Owner’s Manual,
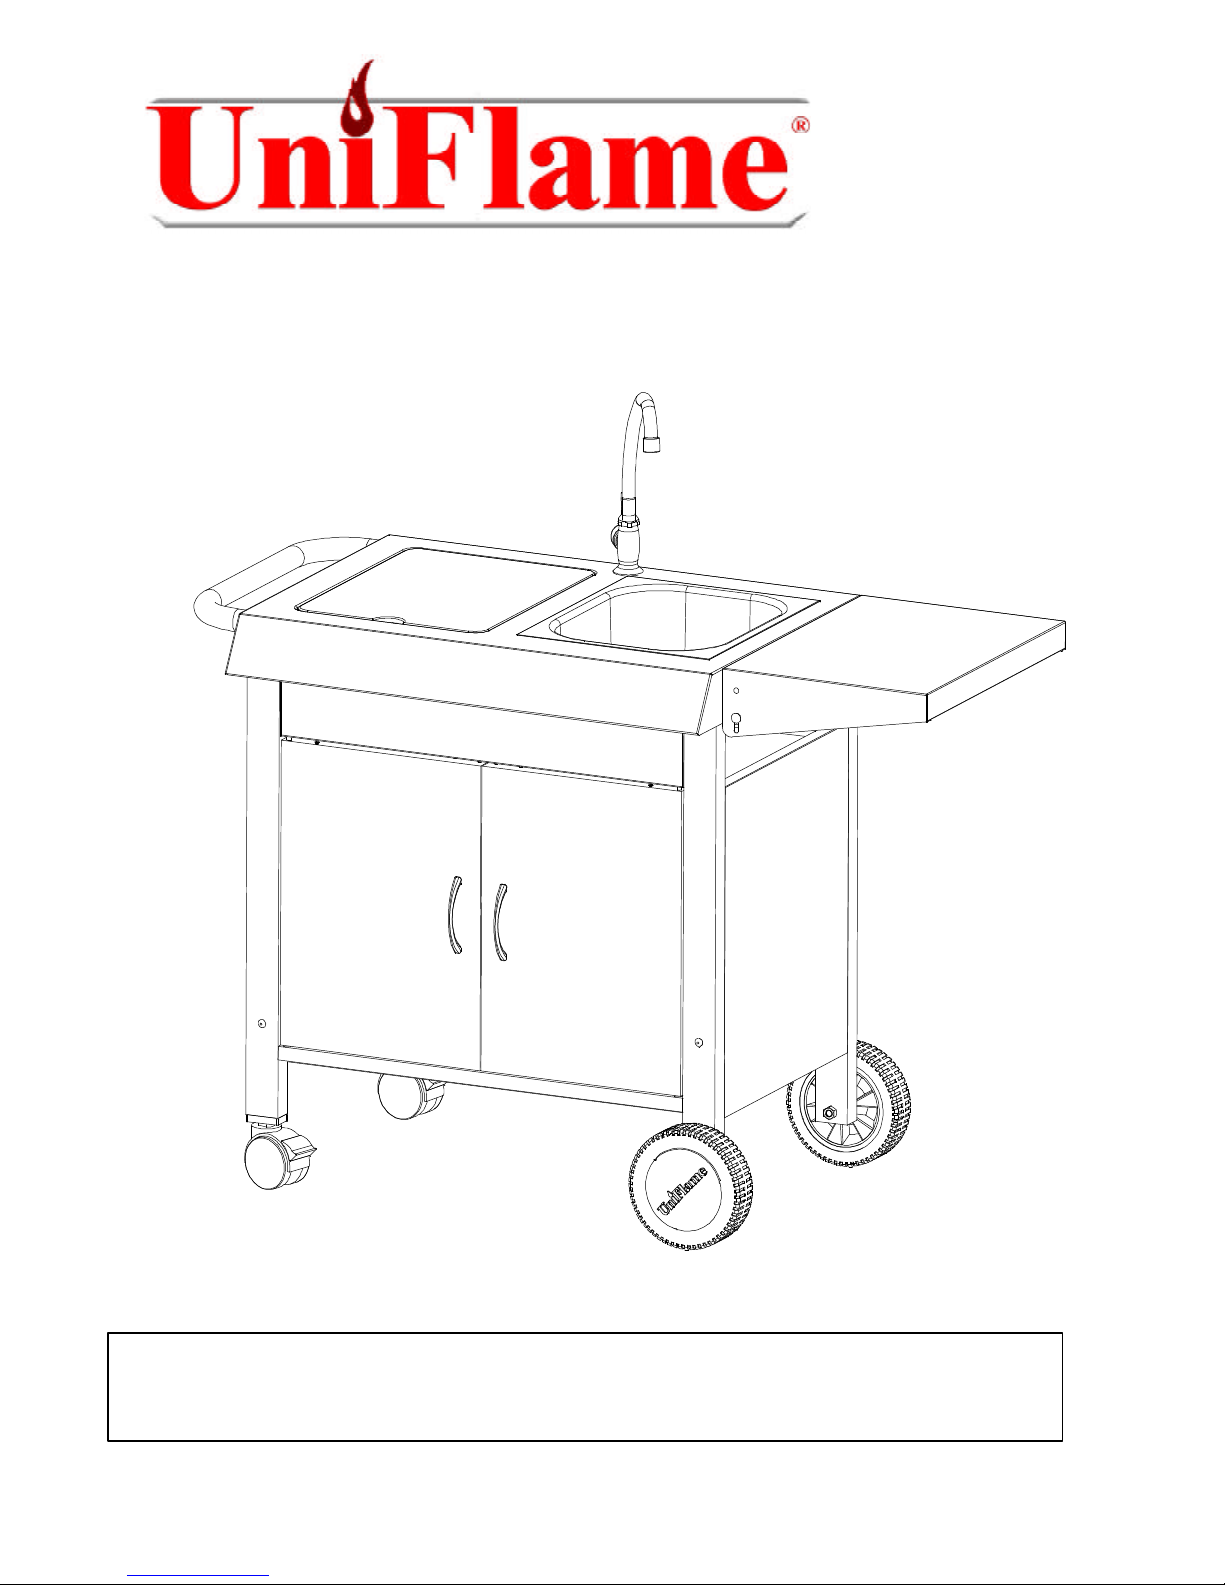
SC2001-1S serving cart
SC2001 owner’s manual 1
Dear Valued Customer,
Congratulations on your new serving cart: You’ve made the right choice! In this
manual, you will find assembly instructions, suggestions , and helpful hints, as
well as guidelines for the safe operation, proper care of, and use of your serving
cart. Our expert staff strives to provide you with an easy to assemble product.
However, in the unlikely event that a part is missing or defective, please call our
customer satisfaction department seven days a week at (800) 762-1142 from 8
a.m. to 5 p.m. central standard time. You also can fax your request to (847) 731-
6032. When faxing, please include your name, address, model number, part
needed, and the name of the store where you purchased your grill. We then will
ship your request as soon as possible. We appreciate and encourage customer
feedback. Please contact us if you have any suggestions or comments regarding
this product.
Best Regards,
UniFlame Corporation
Customer Satisfaction Department