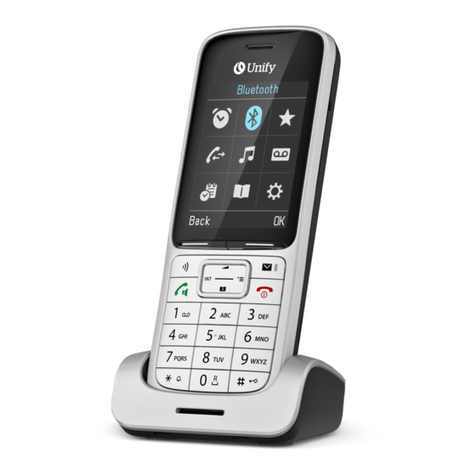
Unify Gigaset M2 plus professional User manual

PNG Configuration for
Gigaset M2 plus professional,
Gigaset M2 Ex professional
Service Manual
A31003-G2100-S100-2-7620

Our Quality and Environmental Management Systems are
implemented according to the requirements of the ISO9001 and
ISO14001 standards and are certified by an external certification
company.
Copyright © Unify GmbH & Co. KG 04/2014
Hofmannstr. 51, 81379 Munich/Germany
All rights reserved.
Reference No.: A31003-G2100-S100-2-7620
The information provided in this document contains merely general descriptions or
characteristics of performance which in case of actual use do not always apply as
described or which may change as a result of further development of the products.
An obligation to provide the respective characteristics shall only exist if expressly agreed in
the terms of contract.
Availability and technical specifications are subject to change without notice.
Unify, OpenScape, OpenStage and HiPath are registered trademarks of Unify GmbH & Co. KG.
All other company, brand, product and service names are trademarks or registered trademarks
of their respective holders.
unify.com

Contents 3
Contents
Introduction . . . . . . . . . . . . . . . . . . . . . . . . . . . . . . . . . . . . . . . . 4
Overview . . . . . . . . . . . . . . . . . . . . . . . . . . . . . . . . . . . . . . . . . . . . . . . . . . . . . . . . . . . . . . . . . . . 4
Data Protection and Data Security . . . . . . . . . . . . . . . . . . . . . . . . . . . . . . . . . . . . . . . . . . . . . . . 5
Typographical Conventions and Symbols Used . . . . . . . . . . . . . . . . . . . . . . . . . . . . . . . . . . . . . 5
Reference Manuals . . . . . . . . . . . . . . . . . . . . . . . . . . . . . . . . . . . . . . . . . . . . . . . . . . . . . . . . . . . 6
PNG Configuration in Compliance with BGR 139 . . . . . . . . . . . 7
PNG-S in a HiPath Alarm Signal System (HNA) . . . . . . . . . . . . 8
PNG-S in HiPath Cordless Office . . . . . . . . . . . . . . . . . . . . . . . 9
PNG-S in Gigaset Base . . . . . . . . . . . . . . . . . . . . . . . . . . . . . . 10
Activating the PNG Functionality on the Handset . . . . . . . . . . 11
PNG Menu . . . . . . . . . . . . . . . . . . . . . . . . . . . . . . . . . . . . . . . . . . . . . . . . . . . . . . . . . . . . . . . . 11
Emergency Key. . . . . . . . . . . . . . . . . . . . . . . . . . . . . . . . . . . . . . . . . . . . . . . . . . . . . . . . . . . . . 11
Preventing PNG Configuration Changes . . . . . . . . . . . . . . . . . . . . . . . . . . . . . . . . . . . . . . . . . . 12
Emergency Alarm Deactivation. . . . . . . . . . . . . . . . . . . . . . . . . . . . . . . . . . . . . . . . . . . . . . . . . 12
PNG Configuration. . . . . . . . . . . . . . . . . . . . . . . . . . . . . . . . . . 13
Overview . . . . . . . . . . . . . . . . . . . . . . . . . . . . . . . . . . . . . . . . . . . . . . . . . . . . . . . . . . . . . . . . . . 13
Alarm Configuration . . . . . . . . . . . . . . . . . . . . . . . . . . . . . . . . . . . . . . . . . . . . . . . . . . . . . . . . . . 14
General Settings . . . . . . . . . . . . . . . . . . . . . . . . . . . . . . . . . . . . . . . . . . . . . . . . . . . . . . . . . . 15
Emergency/Emergency key . . . . . . . . . . . . . . . . . . . . . . . . . . . . . . . . . . . . . . . . . . . . . . . . . . 26
Configuring Automatic Alarms . . . . . . . . . . . . . . . . . . . . . . . . . . . . . . . . . . . . . . . . . . . . . . . . 28
Alarm Signal. . . . . . . . . . . . . . . . . . . . . . . . . . . . . . . . . . . . . . . . . . . . . . . . . . . . . . . . . . . . . . 32
Control Ports . . . . . . . . . . . . . . . . . . . . . . . . . . . . . . . . . . . . . . . . . . . . . . . . . . . . . . . . . . . . . 34
Adjust Sensor . . . . . . . . . . . . . . . . . . . . . . . . . . . . . . . . . . . . . . . . . . . . . . . . . . . . . . . . . . . . . . . 39
PNG Service PIN . . . . . . . . . . . . . . . . . . . . . . . . . . . . . . . . . . . . . . . . . . . . . . . . . . . . . . . . . . . . 40
Factory Defaults . . . . . . . . . . . . . . . . . . . . . . . . . . . . . . . . . . . . . . . . . . . . . . . . . . . . . . . . . . . . . 41
Sample Configurations. . . . . . . . . . . . . . . . . . . . . . . . . . . . . . . 44
Operation in HiPath Cordless Enterprise with PNEZ . . . . . . . . . . . . . . . . . . . . . . . . . . . . . . . . 44
Operation in HiPath Cordless Enterprise without PNEZ . . . . . . . . . . . . . . . . . . . . . . . . . . . . . . . 48
Operation in Gigaset base without PNEZ . . . . . . . . . . . . . . . . . . . . . . . . . . . . . . . . . . . . . . . . . . 52
PNG configuration checklist. . . . . . . . . . . . . . . . . . . . . . . . . . . 55
Abbreviations . . . . . . . . . . . . . . . . . . . . . . . . . . . . . . . . . . . . . . 59
Index . . . . . . . . . . . . . . . . . . . . . . . . . . . . . . . . . . . . . . . . . . . . 60

SHB_PNG01.fm
A31003-G2100-S100-2-7620, 03/2014
PNG Configuration for Gigaset M2 plus and M2 Ex professional, Service Manual 4
Introduction
Overview
1 Introduction
Contents
This chapter contains the following sections:
●Section 1.1, “Overview”
●Section 1.2, “Data Protection and Data Security”
●Section 1.3, “Typographical Conventions and Symbols Used”
●Section 1.4, “Reference Manuals”
1.1 Overview
The Gigaset M2 plus professional and Gigaset M2 Ex professional handsets can be used as
personal alarm signal devices with a voice communication facility (PNG-S).
The handsets offer a range of features to support automatic or deliberate alarm signalling.
The PNG-S monitors the person and signals an alarm when alarm conditions are identified.
The following types of alarms and signals are available:
●Man Down Alarm, Non Movement, Escape Alarm:
The integrated motion sensor technology recognises motionlessness, detects deviation
from an upright position and sudden movement.
●Pull Cord Alarm:
The system recognises when a magnetic contact, which is plugged in on the underside of
the handset and which can be attached to a person via a cord, is detached.
●Time Alarm:
The user’s ability to respond can be checked through regular operation of the handset. The
user is requested to make an entry at regular intervals.
●Deliberate alarm:
Users can trigger an alarm by activating the emergency key.
●Signal in the event of a technical fault:
The handset identifies local technical faults and signals them to the user. Example: the
handset is not receiving any signals or the battery charge is too low. The user can then take
action to rectify the fault.

SHB_PNG01.fm
A31003-G2100-S100-2-7620, 03/2014
PNG Configuration for Gigaset M2 plus and M2 Ex professional, Service Manual 5
Introduction
Data Protection and Data Security
A prealarm informs the monitored individual about an imminent alarm. The alarm can be reset
during the prealarm debounce period in order to prevent false alarms.
The response time, prealarm time, sensitivity level, alarm signal (where applicable) and alarm
destination can be set for each alarm type.
1.2 Data Protection and Data Security
This system processes and uses personal data for purposes, such as, call detail recording, dis-
plays, andcustomer data acquisition.
In Germany, the processing and use of such personal data is subject to various regulations,
includingthose set down by the Federal Data Protection Law (Bundesdatenschutzgesetz,
BDSG). Observe all applicable laws in other countries.
Employees of Unify are bound to safeguard trade secrets and personal data under the terms
of the company’s work rules.
A conscientious and responsible approach helps protect data and ensure privacy:
●Use the password features of the system with no exceptions. Never provide an unautho-
rized person with passwords either orally or in writing, forinstance.
●Prevent unauthorized persons from gaining access to storage media, suchas, backup dis-
kettes or log printouts. Access should also be prevented during service calls as well as
when storing and transporting data.
●Ensure that data media which are no longer required are completely destroyed. Ensure
that documents are not generally available.
1.3 Typographical Conventions and Symbols Used
The following symbols are used throughout this manual:
>Settings that do not comply with BGR 139 (German Accident Prevention Regulation
139) are not approved for BGR-139 applications.
>The “i” indicates useful tips.
7Safety Information
This symbol indicates dangers.

Introduction
A31003-G2100-S100-2-7620, 03/2014
6PNG Configuration for Gigaset M2 plus and M2 Ex professional, Service Manual
SHB_PNG01.fm
Reference Manuals
1.4 Reference Manuals
Documentation Part Numbers
Operating Manual
HiPath 3000, HiPath 4000, Gigaset S310 ISDN professional
Personal alarm device
Gigaset M2 plus professional
Gigaset M2 Ex professional
A31003-G2100-U104-*-**7619
Operating Manual
HiPath 3000, HiPath 500
Gigaset M2 professional
Gigaset M2 plus professional
Gigaset M2 Ex professional
to HiPath Cordless Office
A31003-G2100-U102-*-**7919
Operating Manual
HiPath 4000
Gigaset M2 professional
Gigaset M2 plus professional
Gigaset M2 Ex professional
to HiPath Cordless Enterprise
A31003-G2100-U103-*-**7619
Service Manual
HiPath 3000 V6.0, HiPath 5000 V6.0
A31003-H3560-S100-*-**7620
Service Manual
HiPath 4000 V3.0
A31003-H3130-S104-*-**7620
Table 1-1 Reference Manuals

SHB_PNG02.fm
A31003-G2100-S100-2-7620, 03/2014
PNG Configuration for Gigaset M2 plus and M2 Ex professional, Service Manual 7
PNG Configuration in Compliance with BGR 139
2 PNG Configuration in Compliance with BGR 139
For compliance with BGR 139, handsets may only be configured and operated by trained ser-
vice personnel.
This manual describes how to configure the handset and indicates BGR-139-compliant set-
tings where applicable.
Activating the PNG functionality blocks certain handset settings for normal users (forinstance,
PNG Configuration, Reset Handset, Select Base , Register H/Set, etc.).
You are requested to enter a PNG service PIN when you try to activate a blocked function. The
function will only activate if you enter the correct PIN.
>Settings that do not comply with BGR 139 (German Accident Prevention Regulation
139) are not approved for BGR-139 applications.

SHB_PNG03.fm
A31003-G2100-S100-2-7620, 03/2014
PNG Configuration for Gigaset M2 plus and M2 Ex professional, Service Manual 8
PNG-S in a HiPath Alarm Signal System (HNA)
3 PNG-S in a HiPath Alarm Signal System (HNA)
The HiPath Alarm System is based on the HiPath Cordless Enterprise CMI 3.0 from CV 330.
The control centre for this PNA system (personal alarm signal system) is the emergency call
receiving centre (PNEZ).
The PNEZ controls the PNG-S and responds to its signals and alarms. The CLIP (Calling line
identification presentation) information in the Setup message is required at connection setup
for PNG-S operation.
The PNEZ triggers a function test for the alarm facilities every time monitoring is activated.
Monitoring is activated by the PNEZ if the function test is successful.
Alarm calls from the PNG-S are sent to the configured alarm destination.
In order to ensure that the alarm calls reach the alarm destination they are repeated until an
alarm recall by the PNEZ has been identified or the set number of call repeats has been
reached. However, there is no guarantee that all alarm calls will reach the programmed desti-
nation. Consequently, the PNEZ checks the communication channels to the PNG-S and estab-
lishes contact with the PNG-S on a cyclical basis. If there are no replies, a technical alarm is
generated in the PNEZ and emergency services are deployed.
Localisation can be performed to pinpoint the position of the handset and the party signalling
the alarm.
During alerting, the PNG-S emits an alarm signal, which is used to pinpoint the individual trig-
gering the alarm more precisely.
The PNEZ is responsible for resetting alarms and deactivating monitoring. In doing so, the
PNEZ checks whether or not deactivation is permitted and checks place of deactivation, for in-
stance, as a criterion.
7The HiPath alarm signal system supports BGR-139-compliant operation. Ensure
that the permitted values are used when configuring the PNG-S.

SHB_PNG04.fm
A31003-G2100-S100-2-7620, 03/2014
PNG Configuration for Gigaset M2 plus and M2 Ex professional, Service Manual 9
PNG-S in HiPath Cordless Office
4 PNG-S in HiPath Cordless Office
The handset works without a control centre when operating in HiPath Cordless Office. A PNEZ
is not available to a HiPath Cordless Office.
You can choose how to set the PNG parameters and configure the handset to suit your require-
ments.
Monitoring is activated directly by the handset.
The alarm functions are not tested. However, you can check the alarm function when monitor-
ing is active by triggering the relevant alarm event.
PNG-S alarm calls are routed to the alarm destination set.
In order to ensure that the alarm calls reach the alarm destination they are repeated until the
alarm call count has been reached or until alarm repetition has been interrupted manually on
the handset.
An alarm recall to confirm the alarm call (ending the alarm repeats and possibly the silent mo-
nitoring of the person sending the alarm) is only possible on HiPath 3000 versions which sup-
port CLIP transmission in the setup message. Bear this in mind when configuring the number
of alarm repetitions.
The required control ports must be set in the mobile phone for the alarm callback. See Section
7.2.5, “Control Ports”.
Monitoring is deactivated directly on the handset.
Restriction
Despite alarm repetitions, there is no guarantee that all alarm calls will reach the programmed
destination.
Configuration tip
To ensure that the PNG-S can start up without PNEZ, the "PNEZ Basis" parameter must be
deleted from the PNG configuration. See also Section 7.2.1.2, “PNEZ Basis (Number Config-
ured)” and Section 7.2.1.3, “PNEZ Basis (Number Deleted)”.
7This type of operation does not conform to BGR 139.

SHB_PNG05.fm
A31003-G2100-S100-2-7620, 03/2014
PNG Configuration for Gigaset M2 plus and M2 Ex professional, Service Manual 10
PNG-S in Gigaset Base
5 PNG-S in Gigaset Base
The Gigaset S310 ISDN base is connected to an ISDN port of the HiPath 3000 or HiPath 4000.
The handset is configured as a personal alarm device at this base.
The handset operates without a control centre when working in Gigaset base (unless Gigaset
base does not support the required CLIP protocol).
You can choose how to set the PNG parameters and configure the handset to suit your require-
ments.
Monitoring is activated directly by the handset.
The alarm functions are not tested. However, you can check the alarm function when monitor-
ing is active by triggering the relevant alarm event.
PNG-S alarm calls are routed to the alarm destination set.
In order to ensure that the alarm calls reach the alarm destination they are repeated until the
alarm call count has been reached or until alarm repetition has been interrupted manually on
the handset.
It is not possible to call back the central office to end repetition of the alarms due to failure of
CLIP transmission (in the Setup message). Bear this in mind when configuring the number of
alarm repetitions.
Monitoring is deactivated directly on the handset.
Restrictions
It is not possible to send an alarm signal to an internal station on the base.
Despite alarm repetitions, there is no guarantee that all alarm calls will reach the programmed
destination.
Configuration tip
To ensure that the PNG-S can start up without PNEZ, the "PNEZ Basis" parameter must be
deleted from the PNG configuration. See also Section 7.2.1.2, “PNEZ Basis (Number Config-
ured)” and Section 7.2.1.3, “PNEZ Basis (Number Deleted)”.
7This type of operation does not conform to BGR 139.
7Ensure that no other handsets operating in conjunction with the base are able to
block the line.

SHB_PNG06.fm
A31003-G2100-S100-2-7620, 03/2014
PNG Configuration for Gigaset M2 plus and M2 Ex professional, Service Manual 11
Activating the PNG Functionality on the Handset
PNG Menu
6 Activating the PNG Functionality on the Handset
The PNG functionality only activates on Gigaset M2 plus professional and
Gigaset M2 Ex professional handsets when the PNG memory card is installed.
The plus accessory pack is included in the Gigaset M2 plus professional delivery. The plus ac-
cessory pack must be ordered for Gigaset M2 Ex professional.
The PNG memory card is included in the plus accessory pack. This memory card must be in-
serted into the memory card retainer in the handset’s battery compartment. Replace an existing
memory card with the PNG memory card. For information on how to proceed, see the Operat-
ing Manual*.
*: Operating Manual "HiPath 3000, HiPath 4000, Gigaset S310 ISDN professional – Personal Alarm Device – Gigaset M2 plus
professional, Gigaset M2 Ex professional"
6.1 PNG Menu
Additional PNG menu items appear on the handset under the Add. Features main menu when
the PNG functionality is active:
6.2 Emergency Key
The emergency key operates as a programmable key (like the left softkey or the keys 0, 2 …
9) before the PNG memory card is inserted.
The emergency key is used to trigger a deliberate alarm when the PNG memory card is insert-
ed. This is configured via the Add. Features -> PNG Configuration menu. The emergency
key is used to trigger an alarm when an alarm destination is configured.
Menu item Description
PNG Configuration Contains all submenus for setting the parameters that govern the
handset’s PNG behaviour.
PNG Activation Activates or deactivates monitoring.
Table 6-1 Additional PNG menu items

Activating the PNG Functionality on the Handset
A31003-G2100-S100-2-7620, 03/2014
12 PNG Configuration for Gigaset M2 plus and M2 Ex professional, Service Manual
SHB_PNG06.fm
Preventing PNG Configuration Changes
6.3 Preventing PNG Configuration Changes
Activating the PNG functionality blocks certain handset settings for users (forinstance, PNG
Configuration, Reset Handset, Select Base , Register H/Set, etc.).
You are requested to enter a PNG service PIN when you try to activate a blocked function. The
function will only activate if you enter the correct PIN.
6.4 Emergency Alarm Deactivation
The handset cannot be switched off in monitoring mode (monitoring LED flashing) or alarm
mode (monitoring LED permanently lit).
Users can perform "emergency alarm deactivation" at the handset if they are unable to deacti-
vate an alarm during handset alerting because the handset was not properly configured,
forinstance.
Emergency alarm deactivation is reserved for PNG Service. In other words, emergency alarm
deactivation is, like other configuration changes, protected by the "PNG Service PIN".
Procedure
1. Press and hold down the On-hook key during an alarm interval. The PNG requests the
"PNG Service PIN".
2. Enter the "PNG Service PIN". The alarm status is deactivated at the handset once the PIN
has been entered.
7Caution
Emergency alarm deactivation does not conform to BGR 139. During regular oper-
ation, deactivation must be performed by the PNEZ.
7Caution!
If the PNG is being operated without PNEZ (Configuration: "PNEZ Basis" = "blank"),
this is deactivated without requesting the PNG Service PIN.

SHB_PNG07.fm
A31003-G2100-S100-2-7620, 03/2014
PNG Configuration for Gigaset M2 plus and M2 Ex professional, Service Manual 13
PNG Configuration
Overview
7 PNG Configuration
Contents
This chapter contains the following sections:
●Section 7.1, “Overview”
●Section 7.2, “Alarm Configuration”
●Section 7.3, “Adjust Sensor”
●Section 7.4, “PNG Service PIN”
●Section 7.5, “Factory Defaults”
7.1 Overview
PNG Configuration is displayed under the Add. Features icon in the main menu once the
PNG function has been activated. This allows PNG-specific parameters to be configured. This
configuration may only be carried out by trained PNA system service staff (referred to through-
out as PNA Service).
PNG configuration menus are protected from unauthorized/unintentional changes by the PNG
user by means of a five-digit PIN code.
You are requested to enter the PNG service PIN when you try to activate a PNG menu. The
menu can only be accessed once the password has been entered correctly. The "PNG Service
PIN" is initially set to "00000". PNA Service must set this PIN to a "confidential" value before
handing the handset over to the PNG user. For more information, see Section 7.4, “PNG Ser-
vice PIN”.
The PNG Configuration menu features the following submenus:
●Alarm Configuration
●Control Ports
●Adjust Sensor
●PNG Service PIN
●Reset to default
The following sections contain descriptions of the menus listed here and their configuration op-
tions.
7PNA Service is responsible for allocating the PIN code and for keeping it confiden-
tial.

PNG Configuration
A31003-G2100-S100-2-7620, 03/2014
14 PNG Configuration for Gigaset M2 plus and M2 Ex professional, Service Manual
SHB_PNG07.fm
Alarm Configuration
7.2 Alarm Configuration
The "Alarm Configuration" menu item contains the alerting parameters that define PNG-S
alarms.
The "Alarm Configuration" menu features the following submenus:
Menu item Description
General Settings General alerting parameters
Emergency For configuring the deliberate alarm (alarm via the emergency
key)
Non Movement For configuring automatic alarms (referred to in the following as
"Autom. alarms")
Man Down Alarm
Time Alarm
Escape Alarm
Pull Cord Alarm
Technical Warning For detecting and reporting device faults
Alarm Signal Acoustic signals for PNG incidents
Table 7-1 Alarm Configuration submenus

SHB_PNG07.fm
A31003-G2100-S100-2-7620, 03/2014
PNG Configuration for Gigaset M2 plus and M2 Ex professional, Service Manual 15
PNG Configuration
Alarm Configuration
7.2.1 General Settings
The "General Settings" menu item contains the following parameters:
7.2.1.1 Alarm Number Basis
Enter the alarm destination here (maximum 32-digit number). This alarm destination is config-
ured here as a destination number for all alarm types. When an alarm is triggered, the alarm
call is signalled at this configured alarm destination.
If you want certain alarms, suchas, the non movement alarm, to be signalled at another alarm
destination, you can change the alarm destination later in the relevant alarm type’s submenu.
The "PNEZ Basis" parameter is automatically calculated and configured when you define the
"Alarm Number Basis". "PNEZ Basis" is the base number that is used for communication be-
tween PNEZ and PNG-S. See also Section 7.2.1.2, “PNEZ Basis (Number Configured)” and
Section 7.2.1.3, “PNEZ Basis (Number Deleted)”.
Please note: changing and saving "Alarm Number Basis" always affects all dependent config-
urations. Dependent configurations are the following:
●All alarm destinations of various alarm types
●"PNEZ Basis" and the control ports that are dependent on it
Please note: you must first define the "Alarm Number Basis", then make individual changes to
the alarm destinations of the various alarm types. Then, if necessary, you can configure the in-
dividual "PNEZ Basis" and control ports.
Parameter Parameter input
for startup
See section:
Alarm Number Basis required Section 7.2.1.1, “Alarm Number Basis”
PNEZ Basis adjust to PNEZ if neces-
sary
Section 7.2.1.2, “PNEZ Basis (Number Con-
figured)”
Section 7.2.1.3, “PNEZ Basis (Number Delet-
ed)”
Repeat alarm call optional Section 7.2.1.4, “Repeat alarm call”
Repeat Alarm Time optional Section 7.2.1.5, “Repeat Alarm Time [sec]”
Transport Time optional Section 7.2.1.6, “Transport Time [sec]”
Signal Off - manual optional Section 7.2.1.7, “Signal Off - manual”
Signal Off - autom. optional Section 7.2.1.8, “Signal Off - autom.”
Autom. alarms OFF optional Section 7.2.1.9, “Autom. alarms OFF”
Table 7-2 Parameter overview

PNG Configuration
A31003-G2100-S100-2-7620, 03/2014
16 PNG Configuration for Gigaset M2 plus and M2 Ex professional, Service Manual
SHB_PNG07.fm
Alarm Configuration
Factory setting: No number
The factory setting for the "Alarm Number Basis" is "No number", that is, you must configure a
number here.
Recommendation for BGR 139 configuration
Configure the "Alarm Number Basis" in line with the PNEZ configuration.
7.2.1.2 PNEZ Basis (Number Configured)
The "PNEZ Basis" is the base number of the PNEZ with its different control ports (see Section
7.2.5, “Control Ports”) that are used for signalling and operating the PNG handset.
Changing this parameter is optional because after you enter the "Alarm Number Basis", the
"PNEZ Basis" and all control ports that are dependent on it are automatically calculated using
the following formula: "PNEZ Basis" = "Alarm Number Basis" + 10.
Example: enter the following as the "Alarm Number Basis": "52200". The "PNEZ Basis" is cal-
culated as 52210 and pre-configured.
If you want to change the "PNEZ Basis", enter a new number (maximum 32 digits).
The numbers of the PNEZ control port are derived from this "PNEZ Basis" as automatically pre-
configured numbers.
Please note: changing and saving "PNEZ Basis" always affects all dependent configurations.
Dependent configurations are the following:
●All control ports
Please note: you must first define the "PNEZ Basis", then make individual changes to the
phone numbers of the control ports.
Factory setting: No number
The factory default for the "PNEZ Basis" is "No number", but the "PNEZ Basis" and the control
ports are automatically configured when the "Alarm Number Basis" is entered.
Recommendation for BGR 139 configuration
Configure the "PNEZ Basis" in line with the PNEZ configuration. Use the handset’s automatic
configuration function whenever possible.

SHB_PNG07.fm
A31003-G2100-S100-2-7620, 03/2014
PNG Configuration for Gigaset M2 plus and M2 Ex professional, Service Manual 17
PNG Configuration
Alarm Configuration
Example 1
The following PNG numbering plan is generated by entering "Alarm Number Basis" = 52200:
The numbers of all alarms dependent on this are automatically preset:
The numbers for the "PNEZ Basis" are also automatically preset:
The numbers for all control ports dependent on this are automatically preset:
Recommendation for BGR 139 configuration
Alarm destinations and control ports must be synchronised between PNEZ and the handset.
Use the handset’s automatic configuration function whenever possible to reduce the time and
effort required for configuration.
"Alarm Number Basis": 52200 (input)
Emergency: 52200
Non Movement: 52200
Man Down Alarm: 52200
Time Alarm: 52200
Escape Alarm: 52200
Pull Cord Alarm: 52200
PNEZ Basis: 52210
Start function test: 52211
Start monitoring: 52212
Function test NOK: 52213
Reset Request: 52214
Autom. alarms OFF: 52215
Autom. alarms ON: 52216
Alarm recall-sp on: 52217
Alarm recall-sp off: 52218
Alarm recall: 52219

PNG Configuration
A31003-G2100-S100-2-7620, 03/2014
18 PNG Configuration for Gigaset M2 plus and M2 Ex professional, Service Manual
SHB_PNG07.fm
Alarm Configuration
Example 2
This is based on the configuration in Example 1. The alarm numbers remain unchanged if you
change the "PNEZ Basis" now to the value 47100:
The numbers of all alarms dependent on this are now as follows:
The "PNEZ Basis":
The control ports dependent on this are then automatically preset to:
Recommendation for BGR 139 configuration
Alarm destinations and control ports must be synchronised between PNEZ and the handset.
Use the handset’s automatic configuration function whenever possible to reduce the time and
effort required for configuration.
Alarm Number Basis: 52000
Emergency: 52200
Non Movement: 52200
Man Down Alarm: 52200
Time Alarm: 52200
Escape Alarm: 52200
Pull Cord Alarm: 52200
PNEZ Basis: 52210 is changed to 47100
Start function test: 47101
Start monitoring: 47102
Function test NOK: 47103
Reset Request: 47104
Autom. alarms OFF: 47105
Autom. alarms ON: 47106
Alarm recall-sp on: 47107
Alarm recall-sp off: 47108
Alarm recall: 47109

SHB_PNG07.fm
A31003-G2100-S100-2-7620, 03/2014
PNG Configuration for Gigaset M2 plus and M2 Ex professional, Service Manual 19
PNG Configuration
Alarm Configuration
7.2.1.3 PNEZ Basis (Number Deleted)
PNG-S monitoring can be activated and deactivated without the PNEZ if "PNEZ Basis" is de-
leted.
PNG-S monitoring starts immediately after activation without a function test
(Add. Features -> PNG Activation menu):
●The automatic alarms configured are immediately activated.
●The PNG LED indicates that monitoring mode is active (LED flashing).
●Prealarms and alarms are generated in accordance with the configuration.
●Alarm calls are routed to the configured alarm destinations.
●Alarm calls are repeated in accordance with the configuration. The alarming signal can be
manually deactivated following the minimum call count (five alarm calls). "PNG OFF" is dis-
played on the right display key.
Monitoring is deactivated after resetting PNG activation in the Add. Features -> PNG Activa-
tion menu.
The control ports are also deleted when you delete the "PNEZ Basis".
Control calls for controlling the PNG-S are only recognised if the CLIP information for the rele-
vant control port is transmitted in the Setup message.
●The feature is supported in HiPath Cordless Enterprise with CMI 3.0 CV 320 and later.
●This feature is supported on HiPath Cordless Office from HiPath 3000 V6.0/SMR-7 and
from HiPath 3000 V5.0/SMR-12.
●Gigaset base stations cannot guarantee that CLIP information will be transmitted in the
Setup message.
Please note: if the Cordless Multicell Integration (CMI) system used transmits the CLIP infor-
mation in the requested format, control calls can also be used even though "PNEZ Basis" has
been deleted. In this case the required control port numbers must be configured individually
and manually.
7This type of operation does not conform to BGR 139.

PNG Configuration
A31003-G2100-S100-2-7620, 03/2014
20 PNG Configuration for Gigaset M2 plus and M2 Ex professional, Service Manual
SHB_PNG07.fm
Alarm Configuration
7.2.1.4 Repeat alarm call
The PNG-S automatically signals the alarm call at the alarm destination. Alarm calls are auto-
matically repeated to ensure reliable signalling.
This parameter is used to set the max. number of alarm calls which the PNG-S should make.
Alarm repetition is stopped if the PNG-S recognises the alarm recall. If an alarm recall is not
recognised, the PNG-S repeats the alarm call a minimum of five times. Then "PNG OFF" is dis-
played on the right display key.
You can initiate alarming signal deactivation by pressing "PNG OFF".
●With "PNEZ Basis" = Number
Requests for alarming signal deactivation in the PNEZ must be performed by the PNEZ.
●With "PNEZ Basis" = "blank"
The alarming signal is deactivated immediately. Alarm repetitions are stopped. Monitoring
is switched off. The PNG LED is switched off.
Parameter Setting range Factory setting BGR 139
Repeat alarm call 05 ... 99 15 15
(increase if neces-
sary to improve se-
curity)
Table 7-3 Parameter setting for Repeat alarm call
This manual suits for next models
1
Table of contents
Other Unify Cordless Telephone manuals

Unify
Unify OpenScape DECT Phone S5 Base User manual

Unify
Unify OpenScape SL6 User manual

Unify
Unify OpenStage SL4 professional HiPath Cordless... User manual

Unify
Unify Gigaset S4 professional User manual

Unify
Unify OpenScape SL6 User manual

Unify
Unify Gigaset M2 User manual

Unify
Unify Gigaset S400 professional User manual