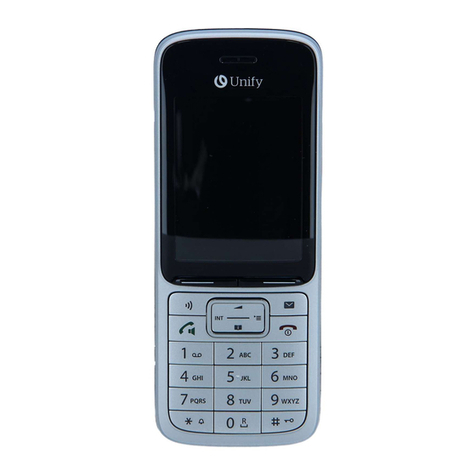
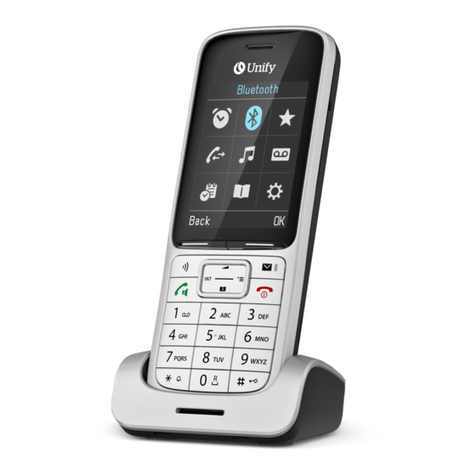
Unify Gigaset S4 professional User manual

Gigaset S4 professional
OpenScape Cordless Enterprise
User Guide
A31003-G2100-U114-2-7619

Our Quality and Environmental Management Systems are
implemented according to the requirements of the ISO9001 and
ISO14001 standards and are certified by an external certification
company.
Copyright © Unify GmbH & Co. KG 04/2014
Hofmannstr. 51, 81379 Munich/Germany
All rights reserved.
Reference No.: A31003-G2100-U114-2-7619
The information provided in this document contains merely general descriptions or
characteristics of performance which in case of actual use do not always apply as
described or which may change as a result of further development of the products.
An obligation to provide the respective characteristics shall only exist if expressly agreed in
the terms of contract.
Availability and technical specifications are subject to change without notice.
Unify, OpenScape, OpenStage and HiPath are registered trademarks of Unify GmbH & Co. KG.
All other company, brand, product and service names are trademarks or registered trademarks
of their respective holders.
unify.com

Safety notes 3
Safety notes
Handset
Batteries
WEEE mark
Danger:
• Do not use the handset in potentially explosive atmospheres.
• To avoid mutual interference, do not operate the handset in the vicinity of electronic equip-
ment.
• Do not use the handset in wet rooms! Devices are not splash-proof.
• A transmitter signal is emitted by your handset. Please observe safety procedures for your
area.
Note:
The ringing tone, signal tones and speakerphone talking (speakerphone mode) are played
over the loudspeaker. Do not hold the telephone to your ear when it is ringing or if speaker-
phone mode is switched on. Otherwise you may seriously impair your hearing.
Note:
• Information for hearing aid users: Radio signals can interfere in hearing aids.
• Please provide the operating instructions with the handset if giving it to another user.
Danger:
• Only use permitted batteries.
• Do not use conventional batteries. This can result in serious injury and material damage
(risk of explosion, degradation of battery cladding, functional interference and handset
damage).
• Avoid contact with fire and water.
• Only use the approved C39280-Z4-C373 power supply unit to operate the charging shell.
Note:
• All electrical and electronic products should be disposed of separately from
the municipal waste stream via designated collection facilities appointed by
the government or the local authorities.
• The correct disposal and separate collection of your old appliance will help
prevent potential negative consequences for the environment and human
health. It is a precondition for reuse and recycling of used electrical and electronic equip-
ment.
• For more detailed information about disposal of your old appliance, please contact your city
office, waste disposal service, the shop where you purchased the product or your sales
representative.
• The statements quoted above are only fully valid for equipment which is installed and sold
in the countries of the European Union and is covered by the directive 2002/96/EC. Coun-
tries outside the European Union may have other regulations regarding the disposal of
electrical and electronic equipment.

4 Operating instructions
Operating instructions
These operating instructions describe your handset and its functions on your communications sys-
tem.
All functions that can be performed via your handset are described here. If some of the required
functions are not available on your handset, it may be due to one of the following:
• The function is not configured for you or your handset - please contact your system administra-
tor.
• Your communications platform does not feature this function - please contact your Unify contract
partner to upgrade.

Overview of handset 5
Overview of handset
1 Earpiece inset 10 Microphone
2 Display 11 Mute key
3 Display keys 12 Hash key
4 Control key 13 Number keys
5 Speakerphone key 14 On-hook and on/off key
6 Talk key 15 Message key
7 Headset connection 16 Volume key
8Starkey
9 R key
How to use the keys: Page 9
1
2
3
4
515
614
12
8
11
9
13
10
16
7

6Contents
Contents
Safety notes . . . . . . . . . . . . . . . . . . . . . . . . . . . . . . . . . . . . . . . . 3
Handset. . . . . . . . . . . . . . . . . . . . . . . . . . . . . . . . . . . . . . . . . . . . . . . . . . . . . . . . . . . . . . . . . . . . 3
Batteries . . . . . . . . . . . . . . . . . . . . . . . . . . . . . . . . . . . . . . . . . . . . . . . . . . . . . . . . . . . . . . . . . . . 3
WEEE mark. . . . . . . . . . . . . . . . . . . . . . . . . . . . . . . . . . . . . . . . . . . . . . . . . . . . . . . . . . . . . . . . . 3
Operating instructions . . . . . . . . . . . . . . . . . . . . . . . . . . . . . . . . 4
Overview of handset . . . . . . . . . . . . . . . . . . . . . . . . . . . . . . . . . 5
Description of controls . . . . . . . . . . . . . . . . . . . . . . . . . . . . . . . . 9
Function keys . . . . . . . . . . . . . . . . . . . . . . . . . . . . . . . . . . . . . . . . . . . . . . . . . . . . . . . . . . . . . . . 9
R key . . . . . . . . . . . . . . . . . . . . . . . . . . . . . . . . . . . . . . . . . . . . . . . . . . . . . . . . . . . . . . . . . . . . . . 10
Control key . . . . . . . . . . . . . . . . . . . . . . . . . . . . . . . . . . . . . . . . . . . . . . . . . . . . . . . . . . . . . . . . . 10
Display keys . . . . . . . . . . . . . . . . . . . . . . . . . . . . . . . . . . . . . . . . . . . . . . . . . . . . . . . . . . . . . . . . 11
Side keys. . . . . . . . . . . . . . . . . . . . . . . . . . . . . . . . . . . . . . . . . . . . . . . . . . . . . . . . . . . . . . . . . . 11
Menu icons in the main menu . . . . . . . . . . . . . . . . . . . . . . . . . . . . . . . . . . . . . . . . . . . . . . . . . . .12
Putting the Handset into Operation . . . . . . . . . . . . . . . . . . . . . 14
Removing the protective cover . . . . . . . . . . . . . . . . . . . . . . . . . . . . . . . . . . . . . . . . . . . . . . . . . 14
Inserting the batteries . . . . . . . . . . . . . . . . . . . . . . . . . . . . . . . . . . . . . . . . . . . . . . . . . . . . . . . . 14
Charging and using the batteries . . . . . . . . . . . . . . . . . . . . . . . . . . . . . . . . . . . . . . . . . . . . . . . .16
Operating and charging times of the batteries . . . . . . . . . . . . . . . . . . . . . . . . . . . . . . . . . . . . 16
Permitted batteries. . . . . . . . . . . . . . . . . . . . . . . . . . . . . . . . . . . . . . . . . . . . . . . . . . . . . . . . . 17
Fitting the attachment clip . . . . . . . . . . . . . . . . . . . . . . . . . . . . . . . . . . . . . . . . . . . . . . . . . . . . . . 17
Assembling plastic cover. . . . . . . . . . . . . . . . . . . . . . . . . . . . . . . . . . . . . . . . . . . . . . . . . . . . . . 17
Connecting a headset . . . . . . . . . . . . . . . . . . . . . . . . . . . . . . . . . . . . . . . . . . . . . . . . . . . . . . . . 17
Connecting a USB data cable . . . . . . . . . . . . . . . . . . . . . . . . . . . . . . . . . . . . . . . . . . . . . . . . . . .18
Setting the handset display language . . . . . . . . . . . . . . . . . . . . . . . . . . . . . . . . . . . . . . . . . . . . . 19
Setting up the handset . . . . . . . . . . . . . . . . . . . . . . . . . . . . . . . 20
Setting the volume . . . . . . . . . . . . . . . . . . . . . . . . . . . . . . . . . . . . . . . . . . . . . . . . . . . . . . . . . . . 20
During the call . . . . . . . . . . . . . . . . . . . . . . . . . . . . . . . . . . . . . . . . . . . . . . . . . . . . . . . . . . . . 20
In idle status. . . . . . . . . . . . . . . . . . . . . . . . . . . . . . . . . . . . . . . . . . . . . . . . . . . . . . . . . . . . . . 20
Advisory tones. . . . . . . . . . . . . . . . . . . . . . . . . . . . . . . . . . . . . . . . . . . . . . . . . . . . . . . . . . . . . . 21
Setting the ringer. . . . . . . . . . . . . . . . . . . . . . . . . . . . . . . . . . . . . . . . . . . . . . . . . . . . . . . . . . . . . 21
Setting ringing tones and pictures with resource directory . . . . . . . . . . . . . . . . . . . . . . . . . . . . . 23
Viewing screensaver/CLIP images/playing sounds . . . . . . . . . . . . . . . . . . . . . . . . . . . . . . . . 23
Renaming/deleting image/sound . . . . . . . . . . . . . . . . . . . . . . . . . . . . . . . . . . . . . . . . . . . . . . 24
Checking the available memory . . . . . . . . . . . . . . . . . . . . . . . . . . . . . . . . . . . . . . . . . . . . . . . 24
Activating or deactivating the ringer . . . . . . . . . . . . . . . . . . . . . . . . . . . . . . . . . . . . . . . . . . . . . .25
Activating or deactivating the warning tone. . . . . . . . . . . . . . . . . . . . . . . . . . . . . . . . . . . . . . . . . 25
Activating/deactivating automatic call answering . . . . . . . . . . . . . . . . . . . . . . . . . . . . . . . . . . . 25
Setting the date and time . . . . . . . . . . . . . . . . . . . . . . . . . . . . . . . . . . . . . . . . . . . . . . . . . . . . . . 26
Display settings . . . . . . . . . . . . . . . . . . . . . . . . . . . . . . . . . . . . . . . . . . . . . . . . . . . . . . . . . . . . . 26
Setting the conversion list for vCard transfer . . . . . . . . . . . . . . . . . . . . . . . . . . . . . . . . . . . . . . 28
Setting the menu view. . . . . . . . . . . . . . . . . . . . . . . . . . . . . . . . . . . . . . . . . . . . . . . . . . . . . . . . 28
Resetting the defaults . . . . . . . . . . . . . . . . . . . . . . . . . . . . . . . . . . . . . . . . . . . . . . . . . . . . . . . . . 29

Contents 7
Making calls – the basic functions . . . . . . . . . . . . . . . . . . . . . . 31
Activating/deactivating the handset. . . . . . . . . . . . . . . . . . . . . . . . . . . . . . . . . . . . . . . . . . . . . . .32
First seize the line, then dial . . . . . . . . . . . . . . . . . . . . . . . . . . . . . . . . . . . . . . . . . . . . . . . . . . . . 33
Dial first, then seize the line . . . . . . . . . . . . . . . . . . . . . . . . . . . . . . . . . . . . . . . . . . . . . . . . . . . 33
Manual number redial . . . . . . . . . . . . . . . . . . . . . . . . . . . . . . . . . . . . . . . . . . . . . . . . . . . . . . . . . 34
Callback . . . . . . . . . . . . . . . . . . . . . . . . . . . . . . . . . . . . . . . . . . . . . . . . . . . . . . . . . . . . . . . . . . 34
Enquiry . . . . . . . . . . . . . . . . . . . . . . . . . . . . . . . . . . . . . . . . . . . . . . . . . . . . . . . . . . . . . . . . . . . . 35
Activating and deactivating the microphone . . . . . . . . . . . . . . . . . . . . . . . . . . . . . . . . . . . . . . . 36
Answering or rejecting a call . . . . . . . . . . . . . . . . . . . . . . . . . . . . . . . . . . . . . . . . . . . . . . . . . . . . 36
End a call . . . . . . . . . . . . . . . . . . . . . . . . . . . . . . . . . . . . . . . . . . . . . . . . . . . . . . . . . . . . . . . . . . 37
Activating or deactivating the keypad lock . . . . . . . . . . . . . . . . . . . . . . . . . . . . . . . . . . . . . . . . . 37
After leaving the radio network . . . . . . . . . . . . . . . . . . . . . . . . . . . . . . . . . . . . . . . . . . . . . . . . . . 37
Making calls – enhanced functions . . . . . . . . . . . . . . . . . . . . . 38
Speakerphone mode. . . . . . . . . . . . . . . . . . . . . . . . . . . . . . . . . . . . . . . . . . . . . . . . . . . . . . . . . 38
Conducting calls with the headset. . . . . . . . . . . . . . . . . . . . . . . . . . . . . . . . . . . . . . . . . . . . . . . .39
Corded headset . . . . . . . . . . . . . . . . . . . . . . . . . . . . . . . . . . . . . . . . . . . . . . . . . . . . . . . . . . . 39
Cordless headset . . . . . . . . . . . . . . . . . . . . . . . . . . . . . . . . . . . . . . . . . . . . . . . . . . . . . . . . . . 39
Number redial . . . . . . . . . . . . . . . . . . . . . . . . . . . . . . . . . . . . . . . . . . . . . . . . . . . . . . . . . . . . . . 40
Automatic redial . . . . . . . . . . . . . . . . . . . . . . . . . . . . . . . . . . . . . . . . . . . . . . . . . . . . . . . . . . . 41
Deleting a redial entry or list . . . . . . . . . . . . . . . . . . . . . . . . . . . . . . . . . . . . . . . . . . . . . . . . .41
Adding a telephone number to the redial list . . . . . . . . . . . . . . . . . . . . . . . . . . . . . . . . . . . . . 42
Handset phonebook . . . . . . . . . . . . . . . . . . . . . . . . . . . . . . . . . . . . . . . . . . . . . . . . . . . . . . . . . 42
Saving an entry . . . . . . . . . . . . . . . . . . . . . . . . . . . . . . . . . . . . . . . . . . . . . . . . . . . . . . . . . . . 43
Finding and dialing an entry. . . . . . . . . . . . . . . . . . . . . . . . . . . . . . . . . . . . . . . . . . . . . . . . . . 44
Dialing an entry with the speed dialing digit . . . . . . . . . . . . . . . . . . . . . . . . . . . . . . . . . . . . . . 44
Viewing an entry . . . . . . . . . . . . . . . . . . . . . . . . . . . . . . . . . . . . . . . . . . . . . . . . . . . . . . . . . . 44
Changing an entry . . . . . . . . . . . . . . . . . . . . . . . . . . . . . . . . . . . . . . . . . . . . . . . . . . . . . . . . . 44
Deleting an entry or phonebook . . . . . . . . . . . . . . . . . . . . . . . . . . . . . . . . . . . . . . . . . . . . . . . 45
Displaying available memory . . . . . . . . . . . . . . . . . . . . . . . . . . . . . . . . . . . . . . . . . . . . . . . . . 45
Send an entry or phonebook to a handset or system . . . . . . . . . . . . . . . . . . . . . . . . . . . . . . 45
Central phonebook (group phonebook) . . . . . . . . . . . . . . . . . . . . . . . . . . . . . . . . . . . . . . . . . . . 47
Making calls using project assignment (cost billing) . . . . . . . . . . . . . . . . . . . . . . . . . . . . . . . . . . 48
Using a different telephone in the same way as your own . . . . . . . . . . . . . . . . . . . . . . . . . . . . . 48
Suppressing call ID display for called party . . . . . . . . . . . . . . . . . . . . . . . . . . . . . . . . . . . . . . . . 49
Activating/deactivating "Do not Disturb" . . . . . . . . . . . . . . . . . . . . . . . . . . . . . . . . . . . . . . . . . . . 50
Call trace . . . . . . . . . . . . . . . . . . . . . . . . . . . . . . . . . . . . . . . . . . . . . . . . . . . . . . . . . . . . . . . . . . . 51
Call forwarding . . . . . . . . . . . . . . . . . . . . . . . . . . . . . . . . . . . . . . . . . . . . . . . . . . . . . . . . . . . . . 51
Using call forwarding . . . . . . . . . . . . . . . . . . . . . . . . . . . . . . . . . . . . . . . . . . . . . . . . . . . . . . . 51
Delayed call forwarding . . . . . . . . . . . . . . . . . . . . . . . . . . . . . . . . . . . . . . . . . . . . . . . . . . . . .57
Forwarding calls for a different terminal. . . . . . . . . . . . . . . . . . . . . . . . . . . . . . . . . . . . . . . . . 58
Entering commands via tone dialing (DTMF suffix dialing) . . . . . . . . . . . . . . . . . . . . . . . . . . . . . 59
Parking/activating calls . . . . . . . . . . . . . . . . . . . . . . . . . . . . . . . . . . . . . . . . . . . . . . . . . . . . . . . . 59
Conducting calls – with multiple users . . . . . . . . . . . . . . . . . . . 61
Call waiting . . . . . . . . . . . . . . . . . . . . . . . . . . . . . . . . . . . . . . . . . . . . . . . . . . . . . . . . . . . . . . . . 61
Override . . . . . . . . . . . . . . . . . . . . . . . . . . . . . . . . . . . . . . . . . . . . . . . . . . . . . . . . . . . . . . . . . . . 62
Transferring a call . . . . . . . . . . . . . . . . . . . . . . . . . . . . . . . . . . . . . . . . . . . . . . . . . . . . . . . . . . . . 62
Toggling (switching between calls) . . . . . . . . . . . . . . . . . . . . . . . . . . . . . . . . . . . . . . . . . . . . . . . 63
Conducting a conference . . . . . . . . . . . . . . . . . . . . . . . . . . . . . . . . . . . . . . . . . . . . . . . . . . . . . 63
Setting up a conference . . . . . . . . . . . . . . . . . . . . . . . . . . . . . . . . . . . . . . . . . . . . . . . . . . . . .64
Expanding a conference . . . . . . . . . . . . . . . . . . . . . . . . . . . . . . . . . . . . . . . . . . . . . . . . . . . . 64
Transferring the conference . . . . . . . . . . . . . . . . . . . . . . . . . . . . . . . . . . . . . . . . . . . . . . . . . . 66
During the conference . . . . . . . . . . . . . . . . . . . . . . . . . . . . . . . . . . . . . . . . . . . . . . . . . . . . . .66
Using the second call function . . . . . . . . . . . . . . . . . . . . . . . . . . . . . . . . . . . . . . . . . . . . . . . . . . 67

8Contents
Message functions . . . . . . . . . . . . . . . . . . . . . . . . . . . . . . . . . . 68
Using the mailbox . . . . . . . . . . . . . . . . . . . . . . . . . . . . . . . . . . . . . . . . . . . . . . . . . . . . . . . . . . . 68
Using the missed call list. . . . . . . . . . . . . . . . . . . . . . . . . . . . . . . . . . . . . . . . . . . . . . . . . . . . . . . 69
Using the HiPath Xpressions mailbox function (optional) . . . . . . . . . . . . . . . . . . . . . . . . . . . . . . 70
Additional functions . . . . . . . . . . . . . . . . . . . . . . . . . . . . . . . . . 71
Handset alarm clock . . . . . . . . . . . . . . . . . . . . . . . . . . . . . . . . . . . . . . . . . . . . . . . . . . . . . . . . . 71
Headset appointment function . . . . . . . . . . . . . . . . . . . . . . . . . . . . . . . . . . . . . . . . . . . . . . . . . .72
System appointment function . . . . . . . . . . . . . . . . . . . . . . . . . . . . . . . . . . . . . . . . . . . . . . . . . . .74
Selecting a base . . . . . . . . . . . . . . . . . . . . . . . . . . . . . . . . . . . . . . . . . . . . . . . . . . . . . . . . . . . . 75
Setting the base . . . . . . . . . . . . . . . . . . . . . . . . . . . . . . . . . . . . . . . . . . . . . . . . . . . . . . . . . . . . 76
Speed dialing . . . . . . . . . . . . . . . . . . . . . . . . . . . . . . . . . . . . . . . . . . . . . . . . . . . . . . . . . . . . . . 76
Speed access to functions . . . . . . . . . . . . . . . . . . . . . . . . . . . . . . . . . . . . . . . . . . . . . . . . . . . . . 77
Data communication with the PC . . . . . . . . . . . . . . . . . . . . . . . . . . . . . . . . . . . . . . . . . . . . . . . 77
Bluetooth interface . . . . . . . . . . . . . . . . . . . . . . . . . . . . . . . . . . . . . . . . . . . . . . . . . . . . . . . . . . . 78
Phonebook transfer . . . . . . . . . . . . . . . . . . . . . . . . . . . . . . . . . . . . . . . . . . . . . . . . . . . . . . . . 78
System-wide speaker calling. . . . . . . . . . . . . . . . . . . . . . . . . . . . . . . . . . . . . . . . . . . . . . . . . . . . 79
Telephone blocking . . . . . . . . . . . . . . . . . . . . . . . . . . . . . . . . . 81
Handset telephone lock. . . . . . . . . . . . . . . . . . . . . . . . . . . . . . . . . . . . . . . . . . . . . . . . . . . . . . . 81
Locking the telephone line to prevent misuse . . . . . . . . . . . . . . . . . . . . . . . . . . . . . . . . . . . . . . . 82
Calling system functions . . . . . . . . . . . . . . . . . . . . . . . . . . . . . 83
Appendix . . . . . . . . . . . . . . . . . . . . . . . . . . . . . . . . . . . . . . . . . 84
Troubleshooting . . . . . . . . . . . . . . . . . . . . . . . . . . . . . . . . . . . . . . . . . . . . . . . . . . . . . . . . . . . . 84
Taking care of the handset . . . . . . . . . . . . . . . . . . . . . . . . . . . . . . . . . . . . . . . . . . . . . . . . . . . . . 85
Documentation . . . . . . . . . . . . . . . . . . . . . . . . . . . . . . . . . . . . . . . . . . . . . . . . . . . . . . . . . . . . . . 86
Technical data. . . . . . . . . . . . . . . . . . . . . . . . . . . . . . . . . . . . . . . . . . . . . . . . . . . . . . . . . . . . . . . 86
Charging shells . . . . . . . . . . . . . . . . . . . . . . . . . . . . . . . . . . . . . . . . . . . . . . . . . . . . . . . . . . . . . . 86
Accessories. . . . . . . . . . . . . . . . . . . . . . . . . . . . . . . . . . . . . . . . . . . . . . . . . . . . . . . . . . . . . . . . . 86
EU Directive . . . . . . . . . . . . . . . . . . . . . . . . . . . . . . . . . . . . . . . . . . . . . . . . . . . . . . . . . . . . . . . . 87
Declaration of conformity . . . . . . . . . . . . . . . . . . . . . . . . . . . . . . . . . . . . . . . . . . . . . . . . . . . . . . 87
Index . . . . . . . . . . . . . . . . . . . . . . . . . . . . . . . . . . . . . . . . . . . . 88

Description of controls 9
Description of controls
Function keys
The following function keys are available:
key Name Use
aOn-hook and on/off
key
• End a call
• Cancel functions
• Go back to the next menu level up
• Turn the handset on or off
cTalk key • Answer a call
• Dial a phone number
• Open the redial list
• Access telephone system functions
dSpeakerphone
key
• Answer a call
• Dial a phone number
• Toggle between handset to speakerphone mode
• Access telephone system functions
fMessage list Access message lists
*Star key Activate/deactivate the ringer
#Hash key Activate/deactivate keypad lock
hMute key Mute microphone
SR key R key function Page 10

10 Description of controls
R key
Briefly pressing the R key enables the following functions in the different operating states:
• When dialing: Insert a pause (for example, between the prefix and the phone number, or when
checking a mailbox)
• During a call: End a call
• In consultation call: End consultation call
• With a consultation call, when initiating a conference or when transferring a call: End call to mail-
box
Control key
The control key is assigned different functions depending on the operating situation:
Situation
t
Press top of key
s
Press bottom of
key
u
Press left side of
key
v
Press right side of
key
In idle status -Open the hand-
set’s phonebook
Open the list of
handsets
Open the handset’s
main menu
During a call Set the voice/
telephone volume
Open the hand-
set’s phonebook -
Select "Loud-
speaker Vol", "GAP
DTMF", "Base Set-
tings"
In the main menu Select a menu
icon
Select a menu
icon
Select a menu
icon Select a menu icon
In lists and menus Next-higher item
in the list
Next-lower item in
the list
Next menu level
up, cancel
Select an entry
(OK)
In the input field Move the cursor
up one line
Move the cursor
down one line
Move the cursor
left
Move the cursor
right
Change values - - Reduce value Increase value

Description of controls 11
Display keys
The handset has two display keys, each with one or two functions. When the key is allocated two
functions, press the right or left side of the key to select the corresponding function. Display key
assignment depends on the operating status.
Some important display keys are:
Side keys
Press the keys on the right of the handset to set the volume for earpiece, ringtone, speakerphone
mode, alarm, appointment signaling and the headset depending on the situation.
Icon Use
Open menu (varies depending on the situation).
Confirm your selection
Move character-by-character/word-by-word from
right to left
Go back one menu level/cancel action
Save input
Open the redial list
Back Save
Current functions of the display keys
Display keys
Options
OK
Û
Back
Save
Þ
key Use
øIncrease volume
÷Lower volume

12 Description of controls
Menu icons in the main menu
vThe main menu of the handset is opened by pressing the right key on the control key.
uvtsThe menu icons are selected by pressing the top, bottom, right or left of the control key.
Alternatively you can press one of the number keys , e. g. 4for "Alarm Clock" or Ofor "Set-
tings".
Menu entries only available in expert mode are marked with an •icon. To change see Page 28.
Icon Name Use
Resource Directory Manage images and tones:
• Screensavers
• Caller Pictures
• Sounds
• Capacity
Bluetooth Configure Bluetooth interface:
• Activation
• Search for Headset
• Search Data Device
• Known Devices
• Own Device
Additional Features see Resource Directory
Alarm Clock Configure alarm call function
Call Lists Open call list if calls are available
Voice Mail If there are voicemail calls: Call voicemail:
• Network Mailbox
Organizer Manage appointments:
• Calendar
• Missed Alarms
Directory Manage phonebook
·
ò
É
ì
Ê
Ì
á
Â

Description of controls 13
Settings Configure handset:
• Date/Time
• Audio Settings
– Handset Volume
–•Advisory Tones
– Ringtones(Handset)
• Display
– Screensaver
– Large Font
– Colour Schemes
–•Backlight
• Language
• Registration
– Register Handset
– De-reg. Handset
–SelectBase
••Telephony
– Auto Answer
– Area Codes
••System
– Handset PIN
– Handset Reset
– Base Reset
• Menu View
Icon Name Use
Ï

14 Putting the Handset into Operation
Putting the Handset into Operation
Removing the protective cover
Inserting the batteries
The handset is supplied with the approved batteries. The batteries are not charged. They are
charged in the handset.
1. If attached: remove the attachment clip
Insert a screwdriver between the attachment clip and the battery cover (1) and force the attach-
ment clip outward (2) until it dislodges.
Also dislodge and remove the clip on the opposite side.
Remove the protective cover from the display before putting the handset
into service.
Note:
• Please observe the safety notes on the back cover!
• Only use approved batteriesPage 17!
• Always replace both batteries at the same time and only use two batteries of the same
type/ from the same manufacturer!
• Open the battery compartment in a dust-free environment only.
• Your telephone directory entries and all settings remain stored even if you remove the bat-
teries. The date and time settings will be reset.
• Only remove the batteries if they are defective. The battery’s life diminishes each time it
is removed.
2
1

Putting the Handset into Operation 15
2. Opening the battery compartment
Press your index finger into the recess and pull the battery cover upward.
3. Inserting the batteries
Insert the batteries making sure the poles are facing the correct direction (see schematic diagram).
The poles are indicated in or on the battery compartment.
4. Closing the battery compartment
Insert the battery cover first with the lateral recesses on the tip of the inside of the housing. Then
press the cover until it snaps into place.
3

16 Putting the Handset into Operation
Charging and using the batteries
To charge the batteries, insert the handset into the charging shell with the keypad facing forwards.
The charging status is indicated by the charge status display. This flashes during charging:
Operating and charging times of the batteries
The operating times are only achieved after several charging and discharging cycles and are de-
pendent on
• the battery capacity,
• the age of the batteries,
• the settings made,
• the user behavior,
• the DECT cordless system used
Attention:
Only use the relevant approved power supply units for operating the charging shell (for or-
der numbers see Page 86).
=Battery flat
eBattery 33% charged
VBattery 66% charged
UBattery 100% charged
Note:
• Initial charging: Charge the batteries for at least 10 hours without a break, regardless of
the charging status icon. Without replacing it in the charging shell, use the handset until
the "battery low" beep is heard. This action aligns the charge status display with the op-
erating times of the batteries.
• To attain full operating and charging times Page 16: Without replacing it in the charging
shell, use the handset until the "battery low" beep is heard.
• For future charging: you can place your handset in the charging shell each time it is used.
Charging is electronically controlled which ensures that the batteries are charged optimal-
ly.
Capacity (mAh) approx.
550 700 800 1000
Stand-by mode (hours) a
a with/without display lighting
140 / 50 165 / 58 185 / 67 230 / 83
Talk time (hours) 11 12 14 17
Operating time with 1.5 hours calls a day
(hours) b
b without display lighting (set display lighting Page 27)
85 95 110 135
Charging time in charging shell (hours) 6.5 7.5 8.5 10.5

Putting the Handset into Operation 17
Permitted batteries
The following batteries are approved for use with the handset.
Fitting the attachment clip
Press the attachment clip onto the back of the handset so that the tabs on the sides engage in the
recesses on the phone.
Assembling plastic cover
Use the supplied plastic cover for the headset port to achieve optimum sound
in speakerphone mode.
Connecting a headset
Once the plastic cover has been removed, you can connect a headset to the
left side of the handset using a 2.5 mm jack.
The headset volume is the same as the volume set for the earpiece
Page 20.
Replace the plastic cover after using the headset to achieve optimum sound
in speakerphone mode.
Nickel Metal Hydride (NiMH) battery
GPI International LTD 700 mAh AAA
UNION SUPPO Batt. 650 mAh AAA
SHENZHEN High Power Tech. Co. Ltd 650 mAh AAA

18 Putting the Handset into Operation
Connecting a USB data cable
You can connect a standard USB data cable with a mini B jack to the
back of your handset to connect the handset to a PC Page 77.
• Remove belt clip (if attached) Page 14.
• Remove battery cover Page 15.
• Connect the USB data cable to the USB port (1).
1

Putting the Handset into Operation 19
Setting the handset display language
If your preferred language for the handset’s display texts is not set by default,
then you can set it yourself. The language of the communication system’s dis-
play texts can only be set by the administrator.
Opening the main menu
vOpen the handset’s main menu.
Opening the first submenu
uv[Select and confirm a menu.
Open a second sub menu
st[Select the menu item and confirm.
Selecting a language
st[Select and confirm the language you require.
aPress the on-hook key several times to end the operation.
Settings
Ï
Language
Deutsch
English
Francais
Italiano
Espanol
Portugues
Nederlands
Dansk
Norsk
Svenska
Suomi
Cesky
Polski
Turkce
Ellinika
Magyar
Russkij
Hrvatski
Slovenscina
Romana
Srpski
Catalan
Bulgarski
Bosanski
Ukrayinska
Arabic
Note:
• If you inadvertently set a display language that you do not understand,
press "v
O5" and then select the correct language.
• If you want to reset the default display language: Page 29.

20 Setting up the handset
Setting up the handset
You can change the standard settings of the handset if you are not happy with
them.
Setting the volume
During the call
You can set the volume of the earpiece or when in speakerphone mode during
a call by pressing the side volume keys. The corresponding volume can be set
regardless of whether you are making the call using the earpiece or in speaker-
phone mode.
pYou are on a call.
øPress the side volume keys to open the Handset Volume menu.
ø÷Adjust earpiece or speakerphone volume.
or
tPress the control key to view the Handset Volume menu.
rSet earpiece or speakerphone volume.
Save the settings.
or The setting is saved automatically after approx. three seconds.
In idle status
In idle mode you can adjust the call volume via the menu.
vOpen the handset’s main menu.
uv[Select the menu icon and confirm.
st[Select the menu item and confirm.
st[Select the required menu item.
uvDefine settings.
Press the display key.
Save
Settings
Ï
Audio Settings
Handset Volume
Save
Handset Volume
Earpiece:
Back
Speaker:
Earpiece
Speaker
Save
Table of contents
Other Unify Cordless Telephone manuals

Unify
Unify Gigaset S400 professional User manual

Unify
Unify OpenScape SL6 User manual

Unify
Unify OpenScape SL6 User manual

Unify
Unify OpenScape DECT Phone S5 Base User manual

Unify
Unify OpenStage SL4 professional HiPath Cordless... User manual

Unify
Unify Gigaset M2 User manual

Unify
Unify Gigaset M2 plus professional User manual