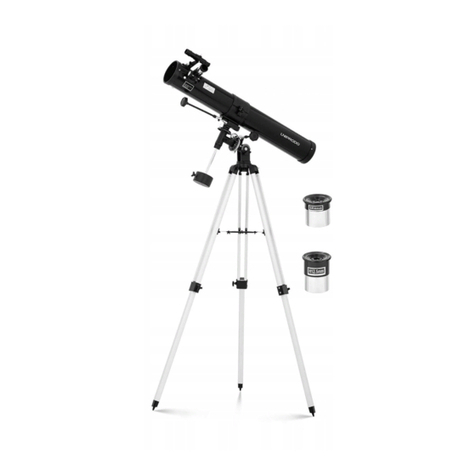
UNIPRODO UNI TELESCOPE 11 User manual

TELESCOPE
UNI_TELESCOPE_11
USER MANUAL
BEDIENUNGSANLEITUNG
INSTRUKCJA OBSŁUGI
NÁVOD K POUŽITÍ
MANUEL D´UTILISATION
ISTRUZIONI PER L‘USO
MANUAL DE INSTRUCCIONES

3
01.10.2019
3
5
7
9
11
13
15
DEUTSCH
ENGLISH
POLSKI
ČESKY
FRANÇAIS
ITALIANO
ESPAÑOL
INHALT | CONTENT | TREŚĆ | OBSAH | CONTENU | CONTENUTO | CONTENIDO
PRODUKTNAME TELESKOP
PRODUCT NAME TELESCOPE
NAZWA PRODUKTU LUNETA
NÁZEV VÝROBKU TELESKOP
NOM DU PRODUIT TÉLESCOPE
NOME DEL PRODOTTO TELESCOPIO
NOMBRE DEL PRODUCTO TELESCOPIO
MODELL
UNI_TELESCOPE_11
PRODUCT MODEL
MODEL PRODUKTU
MODEL VÝROBKU
MODÈLE
MODELLO
MODELO
IMPORTEUR
EXPONDO POLSKA SP. Z O.O. SP. K.
IMPORTER
IMPORTER
DOVOZCE
IMPORTATEUR
IMPORTATORE
IMPORTADOR
ADRESSE VON IMPORTEUR
UL. NOWY KISIELIN-INNOWACYJNA 7, 66-002 ZIELONA GÓRA | POLAND, EU
IMPORTER ADDRESS
ADRES IMPORTERA
ADRESA DOVOZCE
ADRESSE DE L'IMPORTATEUR
INDIRIZZO DELL'IMPORTATORE
DIRECCIÓN DEL IMPORTADOR
TECHNISCHE DATEN
Parameter Werte
Produktname Teleskop
Modell UNI_TELESCOPE_11
Blende [mm] 150
Brennweite 750, 1400
Sucher 6x30
Abmessungen [mm] 1130x1140x1650 (w pionie)
Gewicht [kg] 12
a) Es ist verboten, unmittelbar oder durch die Linse
auf die Lichtquelle zu schauen. Dies kann zu
Augenschäden und epileptischen Anfällen führen.
b) Es ist verboten, die Lupe an Orten mit direktem
Sonnenlicht unbeaufsichtigt zu lassen, da dies
eine Brandgefahr darstellt. Denken Sie nach
Abschluss der Arbeit daran, die Linsenabdeckung
zu schließen.
c) Es ist verboten, den fokussierten Lichtstrahl
auf Menschen oder Tiere zu richten. Dies kann
Verbrennungen verursachen.
d) Verwenden Sie das Produkt nicht an Orten,
an denen Erschütterungen auftreten, um
Augenschäden zu vermeiden.
NUTZUNGSBEDINGUNGEN
Das Produkt ist zur Beobachtung von weit vom
Benutzer entfernten Objekten sowie astronomischen
Beobachtungen bestimmt.
Für alle Schäden bei nicht sachgemäßer Verwendung
haftet allein der Betreiber.
GERÄTEBESCHREIBUNG
1. Öffnung
2. Sekundärspiegel
3. Einbauschrauben für die Sucherstütze
4. Sucher
5. Sucherstütze
6. Sucherokular
7. Haupttubus
8. Fokussierrad
9. Fokussiertubus
10. Okularauszug
11. Deklinationsspannschraube
12. Rektaszensionsspannschraube
13. Uhrwerk
14. Spannschraube für die Horizontalachse
15. Stativspannschraube
16. Gummifüße
17. Spannfutter
18. Flexible Leitung zur Deklinationskontrolle
19. Polarachse
20. Zubehörablage
21. Zubehörablagenstütze
22. Stativ
23. Hauptspiegel
24. Hilfsschraube für die Polarachse
1. Nehmen Sie das Stativ [22] aus der Verpackung,
stellen Sie Länge und Spannweite der Beine
ein und sichern Sie die Einstellungen mit den
Spannschrauben [15].
2. Montieren Sie die Zubehörablage [20] auf
der Stütze [21] und sichern Sie diese mit der
Spannschraube [41].
3. Nehmen Sie das Montagegestell [39] aus der
Verpackung. Die Schrauben am Mechanismus
[11, 12, 24, 25] lösen. Montieren Sie das
Montagegestell auf dem Stativ und sichern Sie es
mit der Spannschraube der Horizontalachse [14].
4. Die Hilfsschraube für die Polarachse [24]
eindrehen.
5. Die Leitungen [18,30] auf der flachen Seite der
schnecke so befestigen, dass sie miteinander
verbunden sind, und dann die Spannschraube
anziehen.
6. Setzen Sie das Gegengewicht auf den
Gegengewichtsschaft, montieren Sie dann das
komplette Montagegestell und sichern Sie es mit
der Spannschraube.
7. Entfernen Sie den Griff vom Tubus [7] und
befestigen Sie das Spannfutter mit der Schraube
und dem Inbusschlüssel [37] am Montagegestell.
8. Den Tubus [7] in das Spannfutter [38] einsetzen
und mit der Spannschraube [17] sichern.
9. Montieren Sie den Okularadapter und den
Fokussiertubus und sichern Sie sie mit der
Spannschraube.
10. Montieren Sie die Sucherstütze [5] auf der
Oberfläche des Haupttubus [7] und sichern Sie sie
mit den Schrauben [3].
FOKUSSIEREN DES TELESKOPS UND EINSTELLEN DES
SUCHERS
1. Lösen Sie die Schrauben am Okularauszug [10].
2. Das Okular mit der geringsten
Vergrößerungsleistung montieren und mit
Schrauben sichern.
3. Richten Sie das Teleskop auf ein entferntes Objekt.
4. Verwenden Sie das Fokussierrad, um das Bild des
zu betrachtenden Objekts zu fokussieren.
5. Schauen Sie durch den Sucher [4]. Wenn das Bild
unscharf ist, drehen Sie das Okular [6], bis das Bild
scharf genug ist.
25. Spannschraube für die Polarachse
26. Einbauschraube des Suchers
27. Drehgriff zum Einstellen der Deklination
28. Deklinationsbefestigung
29. Stundendrehgriff
30. Flexible Leitung zur Rektaszensionskontrolle
31. Rektaszensionsbefestigung
32. Breitengradskala
33. Gegengewichtsschaft
34. Gegengewicht
35. Okular
36. Mondfilter (in der Abbildung nicht sichtbar)
MONTAGEANLEITUNG
ACHTUNG! Die Zeichnung von diesem
Produkt befindet sich auf der letzte Seite der
Bedienungsanleitung S. 17.
ACHTUNG: Die Explosionszeichnungen von diesem
Produkt benden sich auf den letzten Seiten der
Bedienungsanleitung S. 18.
BEDIENUNGSANLEITUNG
DE

4 5
01.10.2019
P= A
B
6. Wenn sich das vom Teleskopokular beobachtete
Objekt nicht in der Mitte des Suchers befindet,
lösen Sie die Einbauschrauben des Suchers [26]
und zielen Sie entsprechend.
7. Wiederholen Sie den Vorgang mit dem Okular mit
höherer Vergrößerung.
8. Nach Abschluss der Vorgänge sind das Teleskop
und der Sucher eingestellt.
EINSTELLEN DER POLARACHSE
Bevor Sie die Polarachse korrekt einstellen können,
müssen Sie den Breitengrad des Beobachtungsortes
genau bestimmen.
1. Stellen Sie das Teleskop nachts auf.
2. Lösen Sie die Spannschraube der
Deklinationsachse [11].
3. Drehen Sie das Teleskop, bis die Skala der
Deklinationsachse 90 ° anzeigt.
4. Ziehen Sie die Spannschraube der
Deklinationsachse [11] an.
5. Lösen Sie die Spannschraube der Horizontalachse
[14].
6. Richten Sie das Teleskop nach Norden (zum
Polarstern).
7. Lösen Sie die Spannschraube der Polarachse [25]
und stellen Sie den Winkel entsprechend dem
Breitengrad ein.
8. Finden Sie den Polarstern im Sucherokular.
Wenn sich der Polarstern nicht in der Mitte
des Suchervisiere befindet, lösen Sie die
Spannschraube der Horizontalachse [14] und
passen Sie die Einstellung an.
UHRENANTRIEB
1. Entfernen Sie die Schraube [A] vom
Schneckengetriebe.
2. Setzen Sie die Schraube in die Feder des
Uhrantriebs [G] und sichern Sie sie wieder.
3. Lösen Sie den Verriegelungsgriff des Antriebs
[E]. Drehen Sie die Klaue [D] in Richtung des
Spannhebels der Polarachse.
4. Bringen Sie den Uhrenantriebsaufsatz [F] am
Uhrenaufsatzhaken [C] an.
5. Klemmen Sie den Verriegelungsgriff des Antriebs
[E] fest. Achten Sie darauf, dass der Uhrenantrieb
[B] und der Motor ineinander greifen.
6. Der Uhrenantrieb ist betriebsbereit. Schließen Sie
den Antrieb an die Spannungsversorgung [I] an.
FUNKTIONEN UND ZUBEHÖR
1. Barlowlinse - dient zur Zusammenarbeit mit dem
Okular des Teleskops [13], erhöht die Brennweite
und somit die Vergrößerung des Bildes des
beobachteten Objekts.
2. Mondfilter - dient zur Zusammenarbeit mit
dem Okular des Teleskops [13], reduziert die
Lichtmenge, die durch das optische System durch
die Polarisationsfilter gelangt.
3. Aufrichtendes Okular - dient zum Erhöhen der
Vergrößerung mit einem gegebenen Okular
während Bodenbeobachtungen und stellt die
korrekte Ausrichtung des Bildes des beobachteten
Objekts wieder her.
4. Fotoadapter
a) Entfernen Sie das Objektiv vom Gerätegehäuse.
b) Setzen Sie das Okular in den Fotoadapter ein.
c) Montieren Sie die T-Ring-Halter zusammen mit
dem Fotoadapter in das Gerätegehäuse.
d) Installieren Sie die vorbereitete Fotoausrüstung
für den Teleskopauszug.
Achtung: Linsen und Filter sind im Okular auf
der dem Auge gegenüberliegenden Seite zu
installieren.
REINIGUNG UND WARTUNG
a) Verwenden Sie zur Reinigung der Oberfläche
ausschließlich Mittel ohne ätzende Inhaltsstoffe.
b) Bewahren Sie das Gerät an einem trockenen,
kühlen, vor Feuchtigkeit und direkter
Sonneneinstrahlung geschütztem Ort auf.
c) Verwenden Sie zur Reinigung ein weiches,
staubfreies und fusselfreies Tuch.
d) Lagern Sie das Produkt an einem Ort, der keinen
hohen oder niedrigen Temperaturen, Staub und
chemischen Mitteln ausgesetzt ist.
P. Teleskopvergrößerung
A. Brennweite des Hauptspiegels
B. Brennweite des Okulars
AD
C
BE
IHGF
7. Wenn Sie den Antrieb manuell steuern möchten,
lösen Sie den Verriegelungsgriff des Antriebs
[E], drehen Sie die Klaue [D] nach unten und
verwenden Sie dann die flexiblen Messleitungen.
OKULAR UND VERGRÖSSERUNG
Das Teleskop ist mit verschiedenen Okulartypen
ausgestattet. Die Leistung jedes Okulars hängt von der
Brennweite des Hauptspiegels ab.
TECHNICAL DATA
Parameter
description
Parameter
value
Product name Telescope
Model UNI_TELESCOPE_11
Aperture [mm] 150
Focal length 750, 1400
Finder 6x30
Dimensions [mm] 1130x1140x1650 (w pionie)
Weight [kg] 12
1. Take the tripod [22] out of the packaging, adjust
the length and span of the legs, then lock the
setup with the clamping screws [15].
2. Install the accessories shelf [20] on the bracket
[21] and secure with the clamping screw [41].
3. Take the fitting [39] out of the packaging. Loosen
the screws at the mechanism [11, 12, 24, 25].
Install the fitting on a tripod and secure with the
horizontal axis clamping screw. [14].
4. Screw in the polar axis auxiliary screw [24].
5. Fasten the cables [18,30] at the flat side of the
worm so that they are connected to each other.
Tighten the clamping screw.
6. Place the counterweight on the counterweight
shaft, then install this assembly on the fixture and
secure with the clamping screw.
7. Remove the clamp from the tube [7] and secure
the clamp bracket on the fixture by means of the
screw and the Allen key [37].
8. Place the tube [7] in the clamp bracket [38] and
secure with the clamping screw [17].
9. Install the eyepiece adapter and focus tube.
Secure with the clamping screw.
10. Install the finder bracket [5] on the surface of the
main tube [7] and secure with the screws [3].
FOCUSING THE TELESCOPE AND ADJUSTING THE
FINDER
1. Loosen the screws at the eyepiece focuser [10].
2. Install the eyepiece with the lowest magnification
and secure with screws.
3. Point the telescope towards a distant object.
4. Use the focus ring to sharpen the image of the
observed object.
5. Look through the finder [4]. If the image is out
of focus, turn the eyepiece [6] until the image is
sharp.
6. If the object observed through the telescope
eyepiece is not in the centre of the finder sight,
loosen the finder mounting screws [26] and aim
accordingly.
7. Repeat the process using a higher-power eyepiece.
8. After completing the operations, the telescope
and finder are adjusted.
POLAR AXIS SETTINGS
Before correctly setting the polar axis, you need
to determine the latitude of the observation site
accurately.
a) Do not look directly or through the lens on the
light source. This can cause eye damage and
epileptic seizures.
b) Do not leave the magnifying lens unattended in
places with direct sunlight as this creates a fire
hazard. After finishing work, remember to close
the lens cover.
c) It is forbidden to direct the focused light beam
towards people or animals. It may cause burns.
d) To avoid eye damage, do not use the product in
places where shocks can occur.
USE GUIDELINES
The product is intended for observing objects located
at a considerable distance from the user and for
astronomical observations.
The user is liable for any damage resulting from
unintended use of the device.
DEVICE DESCRIPTION
1. Hole
2. Secondary mirror
3. Finder bracket mounting bolts
4. Finder
5. Finder bracket
6. Finder eyepiece
7. Main tube
8. Focus ring
9. Focus tube
10. Focuser
11. Declination clamping screw
12. Right ascension clamping screw
13. Clockwork mechanism
14. Horizontal axis clamping screw
15. Tripod clamping screw
16. Rubber feet
17. Clamp bracket
18. Flexible cable for declination control
19. Polar axis
20. Accessories shelf
21. Accessories shelf bracket
22. Tripod
23. Main mirror
24. Polar axis auxiliary screw
25. Polar axis clamping screw
26. Finder mounting screw
27. Declination adjustment knob
ATTENTION! This product‘s view can be found on the
last pages of the operating instructions (pp. 17).
28. Declination mount
29. Hour dial
30. Right ascension control cable
31. Right ascension mount
32. Latitude scale
33. Counterweight shaft
34. Counterweight
35. Eyepiece
36. Moon filter (not visible in the picture)
ASSEMBLY
ATTENTION! This product’s exploded view can be
found on the last pages of the operating instructions
(pp. 18).
DE
USER MANUAL
EN

6 7
01.10.2019
INSTRUKCJA OBSŁUGI
EN PL
DANE TECHNICZNE
Opis parametru Wartość parametru
Nazwa produktu Luneta
Model UNI_TELESCOPE_11
Apertura [mm] 150
Ogniskowa 750, 1400
Szukacz 6x30
Wymiary [mm] 1130x1140x1650 (w pionie)
Ciężar [kg] 12
a) Zabrania się spoglądania bezpośrednio oraz przez
soczewkę na źródło światła. Może to być przyczyną
uszkodzenia wzroku oraz ataku epilepsji.
b) Zabrania się pozostawiać soczewkę powiększającą
bez nadzoru w miejscach o bezpośrednim
nasłonecznieniu, gdyż stwarza to zagrożenie
pożarowe. Po zakończeniu pracy należy pamiętać
o zamknięciu osłony soczewki.
c) Zabrania się kierować skupioną przez soczewkę
wiązkę światła w kierunku osób lub zwierząt. Może
to spowodować oparzenia.
d) Zabrania się korzystania z produktu
w miejscach występowania wstrząsów, aby
uniknąć uszkodzenia oczu.
ZASADY UŻYTKOWANIA
Produkt przeznaczony jest do obserwacji obiektów
znajdujących się w znacznej odległości od użytkownika
oraz obserwacji astronomicznych.
Odpowiedzialność za wszelkie szkody
powstałe w wyniku użytkowania niezgodnego
z przeznaczeniem ponosi użytkownik.
OPIS URZĄDZENIA
1. Otwór
2. Zwierciadło wtórne
3. Śruby montażowe wspornika szukacza
4. Szukacz
5. Wspornik szukacza
6. Okular szukacza
7. Tubus główny
8. Pokrętło ostrości
9. Tubus ostrości
10. Wyciąg okularowy
11. Śruba zaciskowa deklinacji
12. Śruba zaciskowa rektascensji
13. Mechanizm zegarowy
14. Śruba zaciskowa osi poziomej
15. Śruba zaciskowa trójnogu
16. Stopki gumowe
17. Uchwyt zaciskowy
18. Przewód elastyczny kontroli deklinacji
19. Oś biegunowa
20. Półka na akcesoria
21. Wspornik półki na akcesoria
22. Trójnóg
23. Zwierciadło główne
24. Śruba pomocnicza osi biegunowej
UWAGA: Rysunek produktu znajduje się na końcu
instrukcji na stronie: 17.
1. Wyciągnąć z opakowania statyw [22], wyregulować
długość i rozpiętość nóg, a następnie zablokować
ustawienia śrubami zaciskowymi [15].
2. Zainstalować półkę na akcesoria [20] na wsporniku
[21] i zabezpieczyć śrubą zaciskową [41].
3. Wyciągnąć montaż [39] z opakowania. Poluzować
śruby przy mechanizmie [11, 12, 24, 25].
Zainstalować montaż na statywie, a następnie
zabezpieczyć śrubą zaciskową osi poziomej [14].
4. Wkręcić śrubę pomocniczą osi biegunowej [24].
5. Zamocować przewody [18,30] przy płaskiej strony
ślimaka w taki sposób, aby połączyć je ze sobą,
a następnie zacisnąć śrubę zaciskową.
6. Umieścić przeciwwagę na trzonku przeciwwagi,
a następnie zainstalować całość na montażu
i zabezpieczyć śrubą dociskową.
7. Zdjąć uchwyt z tubusu [7], a następnie zamocować
uchwyt zaciskowy na montażu przy pomocy śruby
i klucza imbusowego [37].
8. Umieścić tubus [7] w uchwycie zaciskowym [38]
i zabezpieczyć śrubą zaciskową [17].
9. Zainstalować adapter okularu oraz tubus ostrości,
zabezpieczyć śrubą zaciskową.
10. Zainstalować wspornik szukacza [5] na
powierzchni tubusu głównego [7] i zabezpieczyć
przy pomocy śrub [3].
WYOSTRZENIE TELESKOPU I REGULACJA SZUKACZA
1. Poluzować śruby przy wyciągu okularu [10].
2. Zainstalować okular o najniższej mocy
powiększenia i zabezpieczyć śrubami.
3. Skierować teleskop w kierunku oddalonego
obiektu.
4. Przy pomocy pokrętła ostrości wyostrzyć obraz
obserwowanego obiektu.
5. Zajrzeć przez szukacz [4]. Jeśli obraz jest nieostry,
należy przekręcić okular [6] do czasu uzyskania
odpowiedniej ostrości obrazu.
6. W przypadku, gdy obserwowany przez okular
teleskopu obiekt nie znajduje się w centrum
celownika szukacza, należy poluzować śruby
montażowe szukacza [26], a następnie
odpowiednio wycelować.
7. Powtórzyć proces przy użyciu okularu o większej
mocy powiększania.
8. Po zakończonych czynnościach teleskop oraz
szukacz są wyregulowane.
25. Śruba zaciskowa osi biegunowej
26. Śruba montażowa szukacza
27. Pokrętło regulacji deklinacji
28. Mocowanie deklinacji
29. Pokrętło godzinowe
30. Przewód elastyczny kontrolny rektascensji
31. Mocowanie rektascensji
32. Podziałka szerokości geograficznej
33. Trzonek przeciwwagi
34. Przeciwwaga
35. Okular
36. Filtr księżycowy (niewidoczny na ilustracji)
MONTAŻ
UWAGA: Rysunki złożeniowe produktu znajdują się
na końcu instrukcji na stronach: 18.
P= A
B
1. Set up the telescope at night.
2. Loosen the declination axis clamping screw [11].
3. Turn the telescope until the declination axis scale
shows 90°.
4. Tighten the declination axis clamp screw [11].
5. Loosen the horizontal axis clamping screw [14].
6. Point the telescope to the north (towards the Polar
Star).
7. Loosen the polar axis clamping screw [25] and set
the angle corresponding to the latitude.
8. Find the North Star in the finder eyepiece. If the
North Star is not in the centre of the finder sight,
loosen the horizontal axis clamping screw [14] and
correct the setting.
CLOCKWORK DRIVE
1. Remove the screw [A] from the worm mechanism.
2. Insert the screw into the clockwork spring [G] and
fix again.
3. Loosen the drive locking handle [E]. Turn the claw
[D] towards the polar axis clamping lever.
4. Install the clockwork drive cap [F] on the clockwork
drive catch [C].
5. Tighten the drive locking handle [E]. Make sure the
clockwork drive [B] and the motor engage.
6. The clockwork drive is ready for use. Connect the
drive to the power source [I].
7. If you want to control manually, loosen the drive
locking handle [E], turn the claw [D] down and use
the flexible test leads.
EYEPIECE AND MAGNIFICATION
The telescope is equipped with several types of
eyepieces. The power of each eyepiece depends on the
focal length of the main mirror.
FUNCTIONS AND ACCESSORIES
1. Barlow lens. When used with the telescope
eyepiece [13] it extends the telescope's focal
length and, as a result, further enlarges the image
of the observed object.
2. Moon filter. Used with the telescope eyepiece [13]
it reduces the light passing through the optical
system by means of polarizing filters.
AD
C
BE
IHGF
P. telescope magnification
A. focal length of the main mirror
B. focal length of the eyepiece
3. Correcting eyepiece - serves to increase
magnification together with a given eyepiece
during ground observations and restores the
correct orientation of the image of the observed
object.
4. Photo adapter
a) Remove the lens from the camera body
b) Place the eyepiece in the photo adapter
c) Install the T-ring holder with the photo adapter
into the camera body.
d) Install the prepared photographic equipment on
the focuser.
Note: The lenses and filters should be installed in
the eyepiece on the side opposite the eye.
CLEANING AND MAINTENANCE
a) Use only non-corrosive cleaners to clean the
surface.
b) Store the unit in a dry, cool place, free from
moisture and direct exposure to sunlight.
c) Use a soft, dust-free and lint-free cloth to clean the
telescope.
d) Store the product in a place not exposed to high or
low temperatures, dust and/or chemical agents.

8 9
01.10.2019
PL
NÁVOD K POUŽITÍ
CZ
P= A
B
USTAWIENIA OSI BIEGUNOWEJ
Przed prawidłowym ustawieniem osi biegunowej należy
w miarę dokładnie określić szerokość geograficzną
miejsca obserwacji.
1. Rozstawić teleskop w porze nocnej.
2. Poluzować śrubę zaciskową osi deklinacji [11].
3. Obrócić teleskop do czasu, aż podziałka osi
deklinacji wskaże 90°.
4. Zacisnąć śrubę zaciskową osi deklinacji [11].
5. Poluzować śrubę zaciskową osi poziomej [14].
6. Skierować teleskop w kierunku północnym
(w kierunku Gwiazdy Polarnej).
7. Poluzować śrubę zaciskową osi biegunowej [25],
a następnie ustawić kąt odpowiadający szerokości
geograficznej.
8. Odnaleźć Gwiazdę Polarną w okularze szukacza.
W przypadku, gdy Gwiazda Polarna nie znajduje
się w centrum celownika szukacza, należy
poluzować śrubę zaciskową osi poziomej [14]
i skorygować ustawienie.
NAPĘD ZEGAROWY
1. Usunąć śrubę [A] z mechanizmu ślimakowego.
2. Wsunąć śrubę w sprężynę napędu zegarowego
[G], a następnie zamocować ponownie.
3. Poluzować uchwyt blokujący napędu [E]. Obrócić
pazur [D] w kierunku dźwigni zaciskowej osi
biegunowej.
4. Zainstalować nasadkę napędu zegarowego [F] na
zaczepie napędu zegarowego [C].
5. Zacisnąć uchwyt blokujący napędu [E]. Upewnić
się, że napęd zegarowy [B] oraz silnik zazębiają się.
6. Napęd zegarowy jest gotowy do użycia. Należy
podłączyć napęd do źródła zasilania [I].
7. W przypadku chęci ręcznego sterowania,
należy poluzować uchwyt blokujący napędu [E],
obrócić pazur [D] w dół, a następnie skorzystać
z elastycznych przewodów kontrolnych.
OKULAR I POWIĘKSZENIE
Teleskop wyposażony jest w kilka rodzajów okularów.
Moc każdego okularu jest zależna od ogniskowej
zwierciadła głównego.
FUNKCJE I WYPOSAŻENIE DODATKOWE
1. Soczewka Barlowa – służy do współpracy
z okularem teleskopu, powoduje wydłużenie
ogniskowej teleskopu, a w wyniku tego dodatkowe
powiększenie obrazu obserwowanego obiektu.
2. Filtr księżycowy – służy do współpracy z okularem
teleskopu, powoduje redukcję ilości światła
przechodzącego przez układ optyczny poprzez
filtry polaryzacyjne.
3. Okular prostujący – służy do zwiększenia
powiększenia z danym okularem podczas
obserwacji naziemnych oraz przywraca właściwą
orientację obrazu obserwowanego obiektu.
4. Adapter fotograficzny
a) Usunąć obiektyw z korpusu aparatu
b) Umieścić okular w adapterze fotograficznym
c) Zainstalować uchwyt pierścieniowy T wraz
z adapterem fotograficznym do korpusu aparatu.
d) Zainstalować przygotowany sprzęt fotograficzny
do wyciągu teleskopowego.
Uwaga: Soczewki i filtry należy zainstalować
w okularze po stronie przeciwnej niż przykłada się
oko.
CZYSZCZENIE I KONSERWACJA
a) Do czyszczenia powierzchni należy stosować
wyłącznie środki niezawierające substancji
żrących.
b) Urządzenie należy przechowywać w suchym
i chłodnym miejscu chronionym przed wilgocią
i bezpośrednim promieniowaniem słonecznym.
c) Do czyszczenia należy używać miękkiej, wolnej od
kurzu i niestrzępiącej się ściereczki.
d) Przechowywać produkt w miejscu nie będącym
narażonym na występowanie wysokich lub niskich
temperatur, pyłów oraz czynników chemicznych.
P. Powiększenie teleskopu
A. Ogniskowa zwierciadła głównego
B. Ogniskowa okularu
AD
C
BE
IHGF
TECHNICKÉ ÚDAJE
Popis parametru Hodnota parametru
Název výrobku Teleskop
Model UNI_TELESCOPE_11
Clona [mm] 150
Ohnisková vzdálenost 750, 1400
Hledáček 6x30
Rozměry [mm] 1130x1140x1650 (w pionie)
Hmotnost [kg] 12
1. Vyjměte stativ [22] z obalu, upravte délku a rozpětí
nožiček a poté nastavení zajistěte upínacími
šrouby [15].
2. Namontujte polici na příslušenství [20] na držák
[21] a zajistěte ji upínacím šroubem [41].
3. Vyjměte sestavu [39] z obalu. Povolte šrouby
u mechanismu [11, 12, 24, 25]. Namontujte
sestavu na stativ a poté ji zajistěte upínacím
šroubem vodorovné osy [14].
4. Zašroubujte pomocný šroub s polární osou [24].
5. Vodiče [18,30] upevněte na rovnou stranu šroubu
tak, aby byly vzájemně spojeny, a poté utáhněte
upínací šroub.
6. Umístěte protizávaží na hřídel protizávaží,
potom namontujte na sestavu a zajistěte pomocí
upínacího šroubu.
7. Odstraňte kryt z trubice [7] a poté zajistěte upínací
držadlo na sestavě pomocí šroubu a imbusového
klíče [37].
8. Trubici [7] vložte do svorky [38] a zajistěte ji
upínacím šroubem[17].
9. Nainstalujte adaptér okuláru a zaostřovací trubici,
zajistěte upínacím šroubem.
10. Namontujte držák hledáčku [5] na povrch hlavní
trubice [7] a zajistěte jej šrouby [3].
OSTŘENÍ DALEKOHLEDU A SEŘÍZENÍ HLEDÁČKU
1. Povolte šrouby na výčnělku okuláru [10].
2. Nainstalujte okulár s nejmenším zvětšením
a zajistěte jej šrouby.
3. Nasměrujte dalekohled na vzdálený objekt.
4. Pomocí zaostřovacího knoflíku zaostřete obraz
pozorovaného objektu.
5. Prohlédněte si hledáček [4]. Pokud je obraz
rozostřený, otáčejte okulárem [6], dokud není
obraz ostrý.
6. Není-li předmět pozorovaný okulárem
dalekohledu ve středu hledáčku, povolte
upevňovací šrouby hledáčku [26] a poté zaměřte.
7. Opakujte postup pomocí okuláru s vyšším
výkonem.
8. Po dokončení činností bude dalekohled a hledáček
nastaven.
NASTAVENÍ POLÁRNÍ OSY
Před správným nastavením polární osy je třeba přesně
určit zeměpisnou šířku místa pozorování.
1. V noci postavte dalekohled.
2. Povolte upínací šroub osy sklonu [11].
a) Nedívejte se přímo, ani přes čočku na světelný
zdroj. Může to způsobit poškození zraku nebo
vyvolat epileptický záchvat.
b) Nenechávejte zvětšovací čočku bez dozoru
na místech s přímým slunečním zářením,
hrozí nebezpečí požáru. Po dokončení práce
nezapomeňte zavřít kryt čočky.
c) Nikdy nesměřujte světelný paprsek na lidi nebo
zvítata, může způsobit popáleniny.
d) Nepoužívejte výrobek na místě, kde se vyskytují
otřesy, aby nedošlo k poškození očí.
ZÁSADY POUŽÍVÁNÍ
Výrobek je určen pro pozorování objektů umístěných
ve značné vzdálenosti od uživatele a astronomická
pozorování.
Odpovědnost za veškeré škody vzniklé v důsledku
použití zařízení v rozporu s určením nese uživatel.
POPIS ZAŘÍZENÍ
POZNÁMKA! Nákres tohoto produktu naleznete na
konci návodu na str. 17.
1. Otvor
2. Sekundární zrcadlo
3. Montážní šrouby držáku hledáčku
4. Hledáček
5. Držák hledáčku
6. Okulár hledáčku
7. Hlavní trubice
8. Zaostřovací knoflík
9. Zaostřovací trubice
10. Výčnělek okuláru
11. Upínací šroub sklonu
12. Upínací šroub rektascenze
13. Mechanismus hodin
14. Upínací šroub vodorovné osy
15. Upínací šroub stativu
16. Gumové nožičky
17. Upínací svorka
18. Kabel pro ovládání sklonu
19. Polární osa
20. Police na příslušenství
21. Držák police na příslušenství
22. Stativ
23. Hlavní zrcadlo
24. Šroub pomocného pólu
25. Upínací šroub polární osy
26. Montážní šroub hledáčku
27. Knoflík pro nastavení sklonu
28. Připevnění sklonu
29. Hodinový číselník
30. Kabel pro ovládání rektascenze
31. Instalace rektascenze
32. Měřítko zeměpisné šířky
33. Hřídel protizávaží
34. Protizávaží
35. Okulár
36. Měsíční filtr (na obrázku není vidět)
INSTALACE
POZNÁMKA! Výkresy sestavení produktu jsou na
konci příručky na str. 18.

10 11
01.10.2019
CZ
MANUEL D‘UTILISATION
FR
P= A
B
3. Otáčejte dalekohledem, dokud body stupnice osy
sklonu nebudou ukazovat 90°.
4. Utáhněte upínací šroub osy sklonu [11].
5. Uvolněte upínací šroub vodorovné osy [14].
6. Nasměrujte dalekohled na sever (směrem k
Polární hvězdě).
7. Povolte upínací šroub polární osy [24] a poté
nastavte úhel odpovídající zeměpisné šířce.
8. Najděte Polárku v okuláru hledáčku. Pokud se
Polárka nenachází ve středu hledáčku, povolte
upínací šroub vodorovné osy [14] a upravte
nastavení.
HODINOVÝ STROJEK
1. Vyjměte šroub [A] ze šnekového mechanismu.
2. Vsuňte šroub do hodinového strojku [G] a znovu
jej připojte.
3. Uvolněte zajišťovací rukojeť strojku [E]. Otočte
dráp [D] směrem k upínací páce s polární osou.
4. Namontujte kryt hodinového strojku [F] na
západce hodinového strojku [C].
5. Upněte blokovací rukojeť strojku [E]. Ujistěte se, že
hodinový strojek [B] a motor zapadli do sebe.
6. Hodinový strojek je připraven k použití. Připojte jej
ke zdroji napájení [I].
7. Pokud chcete zařízení ovládat ručně, povolte
aretační rukojeť strojku [E], otočte dráp [D] dolů
a poté použijte flexibilní testovací kabely.
OKULÁR A ZVĚTŠENÍ
Dalekohled je vybaven několika druha okulárů. Síla
každého okuláru závisí na ohniskové délce hlavního
zrcadla.
FUNKCE A PŘÍSLUŠENSTVÍ
1. Barlowowa čočka – používá se s okulárem
dalekohledu [13], prodlužuje ohniskovou
vzdálenost dalekohledu a v důsledku toho dále
zvětšuje obraz pozorovaného objektu.
2. Měsíční filtr – používá se s okulárem dalekohledu
[13], snižuje množství světla procházejícího
optickým systémem polarizačními filtry.
AD
C
BE
IHGF
P. Zvětšení dalekohledu
A. Ohnisková vzdálenost hlavního zrcadla
B. Ohnisková vzdálenost okuláru
3. Vyrovnávací okulár – používá se k většímu
zvětšení daným okulárem při pozorování objektů
na zemi a obnovuje správnou orientaci obrazu
pozorovaného objektu.
4. Fotografický adaptér
a) Sejměte objektiv z těla fotoaparátu
b) Umístěte okulár do fotografického adaptéru
c) Nainstalujte držák T kroužku s fotografickým
adaptérem do těla fotoaparátu.
d) Nainstalujte připravené fotografické vybavení pro
teleskopický zvedák.
Poznámka: Čočky a filtry by měly být instalovány
do okuláru na protější straně. Tedy ne tam, kam
přikládáme oko
ČIŠTĚNÍ A ÚDRŽBA
a) K čištění povrchu zařízení používejte výhradně
prostředky neobsahující žíravé látky.
b) Zařízení skladujte na suchém a chladném místě,
chráněném proti vlhkosti a přímému slunečnímu
svitu.
c) Pro čištění použijte čistý měkký a bezprašný
hadřík, který nepouští vlákna nebo chlupy.
d) Výrobek skladujte na místě, které není vystaveno
vysokým nebo nízkým teplotám, prachu
a chemickým látkám.
Description des
paramètres
Valeur des paramètres
Nom du produit Télescope
Modèle UNI_TELESCOPE_11
Ouverture [mm] 150
Distance focale 750, 1400
Chercheur 6x30
Dimensions [mm] 1130x1140x1650 (w pionie)
Poids [kg] 12
a) Il est interdit de regarder directement et à travers
la lentille sur la source de lumière. Cela peut
provoquer des lésions oculaires et des crises
d'épilepsie.
b) Il est interdit de laisser la loupe sans surveillance
dans des endroits exposés à la lumière directe
du soleil car cela crée un risque d'incendie. Une
fois le travail terminé, n'oubliez pas de fermer la
couverture de la lentille.
c) Il est interdit de diriger le faisceau de lumière
focalisé vers des personnes ou des animaux. Cela
peut causer des brûlures.
d) Il est interdit d'utiliser le produit dans des
lieux soumis à des secousses afin d'éviter tout
dommage aux yeux.
CONDITIONS D’UTILISATION
Le produit est destiné à l'observation d'éléments situés
à une distance considérable de l'utilisateur et aux
observations astronomiques.
L’utilisateur porte l’entière responsabilité pour
l’ensemble des dommages attribuables à un usage
inapproprié.
DESCRIPTION DE L'APPAREIL
1. Orifice
2. Miroir principal
3. Boulon de fixation du support du chercheur
4. Chercheur
5. Support du chercheur
6. Oculaire du chercheur
7. Tube du télescope
8. Molette de mise au point
9. Tube de mise au point
10. Porte oculaire
11. Boulon de serrage de la déclinaison
12. Boulon de serrage de l'ascension droite
13. Mécanisme d'horloge
14. Boulon de serrage de l'axe horizontal
15. Boulon de serrage du trépied
16. Pied en caoutchouc
17. Support de fixation
18. Tige flexible de régulation de la déclinaison
19. Axe polaire
20. Étagère à accessoires
21. Support de l'étagère à accessoires
22. Trépied
23. Miroir principal
1. Retirez le trépied [22] de l'emballage, ajustez
la longueur et l'écartement des jambes, puis
verrouillez les réglages à l'aide des boulons de
serrage [15].
2. Installez l'étagère à accessoires [20] sur le support
[21] et fixez-la à l'aide du boulon de serrage [41].
3. Retirez la monture [39] de l'emballage. Desserrez
les vis du mécanisme [11, 12, 24, 25] Installez la
monture sur le trépied puis fixez-la avec le boulon
de serrage de l'axe horizontal [14].
4. Vissez le boulon auxiliaire de l'axe polaire [24].
5. Fixez les tiges [18,30] sur le côté plat de la vis sans
fin de manière à les relier ensemble, puis serrez le
boulon de serrage.
6. Placez le contrepoids sur la tige du contrepoids,
puis installez l'ensemble sur la monture et fixez-le
avec un boulon de serrage.
7. Retirez le support de fixation [7] du tube du
télescope, puis fixez-le sur le mécanisme à l'aide
d'un boulon et d'une clé Allen [37].
8. Placez le tube du télescope [7] dans le collier de
serrage [38] et fixez-le avec un boulon de serrage
[17].
9. Installez l'adaptateur d'oculaire et le tube de mise
au point, fixez-les avec un boulon de serrage.
10. Installez le support du chercheur [5] sur la surface
du tube du télescope [7] et fixez-le à l'aide de
boulons [3].
MISE AU POINT DU TÉLESCOPE ET RÉGLAGE DU
CHERCHEUR
1. Desserrez les boulons lors du retrait de l'oculaire
[10].
2. Installez l'oculaire avec le grossissement le plus
faible et fixez-le avec des boulons.
3. Pointez le télescope vers un objet éloigné.
4. Utilisez la molette de mise au point pour affiner
l'image de l'objet observé.
5. Regardez dans le chercheur [4]. Si l'image est
floue, tournez l'oculaire [6] jusqu'à ce que l'image
soit nette.
6. Si l'objet observé dans l'oculaire du télescope
n'est pas dans le viseur du chercheur, desserrez
les boulons de fixation du chercheur [26], puis
visez en conséquence.
24. Boulon auxiliaire de l'axe polaire
25. Boulon de serrage de l'axe polaire
26. Boulon de fixation du chercheur
27. Molette de réglage de la déclinaison
28. Fixation de la déclinaison
29. Molette horaire
30. Tige flexible de régulation de l'ascension droite
31. Fixation de l'ascension droite
32. Échelle de latitude
33. Tige du contrepoids
34. Contrepoids
35. Oculaire
36. Filtre lunaire (non visible sur l'illustration)
MONTURE
DÉTAILS TECHNIQUES
ATTENTION! Le plan de ce produit se trouve à la
dernière page du manuel d‘utilisation, p. 17.
ATTENTION! Les vues éclatées de ce produit se
trouvent aux dernières pages du manuel d‘utilisation
p. 18.

12 13
01.10.2019
FR
ISTRUZIONI D`USO
IT
P= A
B
7. Répétez l'opération avec un oculaire de
grossissement plus important.
8. Une fois les opérations terminées, le télescope et
le chercheur sont réglés.
RÉGLAGE DE L'AXE POLAIRE
Avant de définir correctement l’axe polaire, vous
devez déterminer avec précision la latitude du site
d’observation.
1. Installez le télescope de nuit.
2. Desserrez le boulon de serrage de l'axe de
déclinaison [11].
3. Tournez le télescope jusqu'à ce que l'échelle de
l'axe de déclinaison indique 90°.
4. Serrez le boulon de serrage de l'axe de déclinaison
[11].
5. Desserrez le boulon de serrage de l'axe horizontal
[14].
6. Dirigez le télescope vers le nord (en direction de
l'étoile Polaire).
7. Desserrez le boulon de serrage de l'axe polaire
[25] puis réglez l'angle correspondant à la latitude.
8. Trouvez l'étoile Polaire dans l'oculaire du
chercheur. Si l'étoile Polaire n'est pas au centre du
chercheur, desserrez le boulon de serrage de l'axe
horizontal [14] et corrigez le réglage.
ENTRAINEMENT À HORLOGE
1. Retirez le boulon [A] du mécanisme à vis sans fin.
2. Insérez le boulon dans le ressort du mécanisme
d'entrainement à horloge.
3. Desserrez la poignée de verrouillage [E] bloquant
l'entrainement du mécanisme. Tournez la griffe
[D] vers le levier de serrage de l'axe polaire.
4. Montez la douille du mécanisme d'entrainement à
horloge [F] sur l'attelage du mécanisme.
5. Serrez la poignée de verrouillage [E]. Assurez-vous
que le mécanisme d'entrainement à horloge [B] et
le moteur s’engrène.
6. Le mécanisme d'entrainement à horloge est prêt
à l'emploi. Branchez le mécanisme à une source
d'alimentation [I].
7. Si vous souhaitez diriger l'appareil manuellement,
desserrez la poignée de verrouillage [E] du
mécanisme d'entrainement à horloge, abaissez
la griffe [D], puis utilisez les tiges flexibles de
régulation.
FONCTIONS ET ACCESSOIRES
1. Objectif Barlow – utilisé avec l'oculaire du
télescope [13], il étend la distance focale du
télescope et, par conséquent, agrandit l'image de
l'objet observé.
2. Filtre lunaire – utilisé avec l'oculaire du télescope
[13], réduit la quantité de lumière traversant le
système optique à travers les filtres polarisants.
3. Oculaire de redressement – sert à augmenter
le grossissement avec un oculaire donné lors
des observations au sol et rétablis l'orientation
correcte de l'image de l'objet observé.
4. Adaptateur photo
a) Retirez l'objectif du boîtier de l'appareil photo
b) Placez l'oculaire dans l'adaptateur photo
c) Montez la bague de fixation T avec l'adaptateur
photo sur le boîtier de l'appareil photo.
d) Installez l'équipement photographique préparé
sur le porte-oculaire.
Attention: Les lentilles et les filtres doivent être
installés dans l'oculaire du côté opposé au
positionnement de l'œil.
NETTOYAGE ET ENTRETIEN
a) Pour nettoyer les différentes surfaces, n'utilisez
que des produits sans agents corrosifs.
b) Conservez l'appareil dans un endroit propre, frais
et sec, à l'abri de l'humidité et des rayons directs
du soleil.
c) Pour le nettoyage, utilisez un chiffon doux, sans
poussière ni peluche.
d) Stockez le produit dans un endroit non exposé
à des températures élevées ou basses, à la
poussière et aux agents chimiques.
AD
C
BE
IHGF
OCULAIRE ET GROSSISSEMENT
Le télescope est équipé de plusieurs types d'oculaires.
La puissance de chaque oculaire dépend de la distance
focale du miroir principal.
P. Ampliación del telescopio
A. Distancia focal del espejo principal
B. Distancia focal del ocular
Parametri
-Descrizione
Parametri - Valore
Nome del prodotto Telescopio
Modello UNI_TELESCOPE_11
Apertura [mm] 150
Focale 750, 1400
Cercatore 6x30
Dimensioni [mm] 1130x1140x1650 (w pionie)
Peso [kg] 12
a) È vietato guardare direttamente una sorgente
luminosa attraverso la lente. Questo può causare
danni agli occhi e crisi epilettiche.
b) È vietato lasciare la lente d'ingrandimento
incustodita in luoghi esposti alla luce solare
diretta, poiché ciò crea un pericolo d'incendio.
Dopo aver terminato il lavoro, è necessario
ricordarsi di chiudere la copertura della lente.
c) È vietato dirigere il raggio di luce focalizzato verso
persone o animali. Ciò potrebbe causare ustioni.
d) Non utilizzare il prodotto in un ambiente instabile
al fine di evitare eventuali danni agli occhi.
CONDIZIONI D'USO
Il prodotto è progettato per l'osservazione di oggetti
situati ad un' ampia distanza dall'utente e per le
osservazioni astronomiche.
L'operatore è responsabile di tutti i danni derivanti
da un uso improprio.
DESCRIZIONE DEL DISPOSITIVO
1. Apertura
2. Specchio secondario
3. Viti di montaggio del supporto del cercatore
4. Cercatore
5. Supporto del cercatore
6. Oculare del cercatore
7. Tubo principale
8. Manopola di messa a fuoco
9. Tubo di messa a fuoco
10. Estrattore dell’oculare
11. Vite di serraggio della declinazione
12. Vite di serraggio dell’ascensione retta
13. Meccanismo orario
14. Vite di serraggio dell’asse orizzontale
15. Vite di serraggio del treppiede
16. Piedini in gommma
17. Morsa
18. Tubo flessibile di controllo della declinazione
19. Asse polare
20. Ripiano per accessori
21. Supporto del ripiano per accessori
22. Treppiede
23. Specchio primario
24. Vite ausiliaria dell’asse polare
25. Vite di serraggio dell'asse polare
26. Vite di montaggio del cercatore
1. Estrarre il treppiede [22] dall'imballaggio, regolare
la lunghezza e la distanza delle gambe, quindi
bloccare le impostazioni con le viti di serraggio
[15].
2. Montare il ripiano per accessori [20] sul supporto
[21] e fissarlo con la vite di serraggio [41].
3. Estrarre la montatura [39] dall'imballaggio.
Allentare le viti del meccanismo [11, 12, 24, 25].
Installare la montatura sul treppiede e fissarlo con
la vite di serraggio dell'asse orizzontale [14].
4. Avvitare la vite ausiliaria dell'asse polare [24].
5. Fissare i fili [18,30] sul lato piatto della chiocciola
in modo che siano collegati tra loro, quindi serrare
con la vite di serraggio.
6. Posizionare il contrappeso sull'albero del
contrappeso, quindi installare l'unità completa
sulla montatura e fissare con la vite di fissaggio.
7. Rimuovere la staffa dal tubo [7], quindi fissare la
staffa di bloccaggio alla montatura con una vite e
una chiave a brugola [37].
8. Inserire il tubo [7] nella staffa di fissaggio [38] e
fissarlo con la vite di fissaggio [17].
9. Installare l'adattatore dell' oculare e il tubo di
messa a fuoco, fissare con la vite di serraggio.
10. Installare il supporto del cercatore [5] sulla
superficie del tubo principale [7] e fissarlo con le
viti [3].
MESSA A FUOCO DEL TELESCOPIO E REGOLAZIONE DEL
CERCATORE.
1. Allentare le viti sull’estrattore dell'oculare [10].
2. Installare l'oculare con l'ingrandimento più basso
e fissarlo con viti.
3. Orientare il telescopio verso un oggetto lontano.
4. Mettere a fuoco l'immagine dell'oggetto da
osservare utilizzando la manopola di messa
a fuoco.
5. Guardare attraverso il cercatore [4]. Se l'immagine
è sfocata, ruotare l'oculare [6] fino a quando
l'immagine è sufficientemente nitida.
6. Se l'oggetto osservato dall'oculare del telescopio
non si trova al centro del mirino del cercatore,
occorre allentare le viti di montaggio del mirino
[26] e di conseguenza puntare di nuovo.
7. Ripetere la procedura con l'oculare con
ingrandimento maggiore.
8. Al termine della procedura il telescopio e il mirino
sono regolati.
27. Manopola di regolazione della declinazione
28. Fissaggio della declinazione
29. Manopola per la impostazione dell’ angolo orario
30. Tubo flessibile di controllo dell’ascensione retta
31. Fissaggio dell’ascensione retta
32. Scala della latitudine
33. Albero di contrappeso
34. Contrappeso
35. Oculare
36. Filtro lunare (non mostrato nell’illustrazione)
MONTATURA
DATI TECNICI
ATTENZIONE: L´esploso di questo prodotto si trova
nell´ultima pagina del manuale d´uso, p. 17.
ATTENZIONE! Le viste esplose di questo prodotto
sono disponibili nell‘ultima pagina (18) del manuale
d´uso.
14 15
01.10.2019
IT
MANUAL DE INSTRUCCIONES
ES
P= A
B
MPOSTAZIONI DELL'ASSE POLARE
Prima di procedere al corretto allineamento dell'asse
polare, occorre determinare con adeguata precisione la
latitudine del punto di osservazione.
1. Appronare il telescopio di notte.
2. Allentare la vite di serraggio dell'asse di
declinazione [11].
3. Ruotare il telescopio fino a quando la scala
dell'asse di declinazione indica 90°.
4. Serrare la vite di serraggio dell'asse di declinazione
[11].
5. Allentare la vite di fissaggio dell'asse orizzontale
[14].
6. Orientare il telescopio verso nord (verso la Stella
Polare).
7. Allentare la vite di fissaggio dell'asse polare [24] e
regolare l'angolo in base alla latitudine.
8. Trovare la Stella Polare nell'oculare del cercatore.
Qualora la Stella polare non si trovi al centro
del mirino del cercatore, allentare la vite di
serraggio dell'asse orizzontale [14] e regolare
l'impostazione.
AZIONAMENTO ORARIO
1. Rimuovere la vite [A] dall’azionamento a chiocciola.
2. Inserire la vite nella molla dell'azionamento
dell'orologio [G] e quindi fissarla di nuovo.
3. Allentare la maniglia di bloccaggio
dell'azionamento [E]. Ruotare l'artiglio [D] verso la
leva di bloccaggio dell'asse polare.
4. Installare il cappuccio dell'azionamento
dell'orologio [F] sul giunto dell'azionamento
dell'orologio [C].
5. Serrare la maniglia di bloccaggio dell'azionamento
[E]. Accertarsi che l'azionamento dell'orologio [B]
e il motore siano collegati tra loro.
6. L'azionamento dell'orologio è pronto per l'uso.
Collegare l'azionamento all'alimentazione [I].
7. Per il controllo manuale dell'azionamento,
occorre allentare la maniglia di bloccaggio
dell'azionamento [E], ruotare l'artiglio [D] verso
il basso e quindi utilizzare i cavi flessibili di
comando.
OCULARE E INGRANDIMENTO
Il telescopio è dotato di diversi tipi di oculari. La potenza
di ogni oculare dipende dalla lunghezza focale dello
specchio primario.
FUNZIONI E ACCESSORI SUPPLEMENTARI
1. Lente di Barlow - viene utilizzata per cooperare
con l'oculare del telescopio ( [13], fa aumentare la
lunghezza focale del telescopio e, di conseguenza,
fa ingrandire ulteriormente l'immagine
dell'oggetto osservato.
2. Filtro lunare - viene utilizzato insieme all'oculare
del telescopio [13], riduce la quantità di luce
che attraversa il sistema ottico mediante filtri
polarizzatori.
3. Oculare di raddrizzamento - utilizzato per
aumentare l'ingrandimento dell'oculare durante
le osservazioni terrestri e ripristina il corretto
orientamento dell'immagine dell'oggetto
osservato.
4. Adattatore fotografico
a) Rimuovere l'obiettivo dal corpo della macchina
fotografica.
b) Inserire l'oculare nell'adattatore fotografico
c) Installare la staffa ad anello T insieme con
l'adattatore fotografico al corpo della macchina
fotografica.
d) installare l'attrezzatura fotografica predisposta all'
estrattore telescopico
Nota: lenti e filtri devono essere installati
nell'oculare sul lato opposto a quello dove si vuole
posizionare l'occhio.
PULIZIA E MANUTENZIONE
a) Per pulire la superficie utilizzare solo detergenti
senza ingredienti corrosivi.
b) Tenere l'apparecchio in un luogo asciutto, fresco,
protetto dall'umidità e dalla luce diretta del sole.
c) Per la pulizia, utilizzare un panno morbido, privo di
polvere, non sfilacciante.
d) Conservare il prodotto in un luogo non esposto
alle alte o basse temperature, alla polvere e agli
agenti chimici.
AD
C
BE
IHGF
P. Ingrandimento del telescopio
A. Lunghezza focale dello specchio primario
B. Lunghezza focale dell'oculare
Parámetro
-Descripción
Parámetro - Valor
Nombre del producto Telescopio
Modelo UNI_TELESCOPE_11
Apertura [mm] 150
Focal 750, 1400
Buscador 6x30
Dimensiones [mm] 1130x1140x1650 (w pionie)
Peso [kg] 12
a) Se prohíbe mirar directamente y a través de la
lente a una fuente luminosa, ya que puede causar
daños en la vista y ataques de epilepsia.
b) Se prohíbe dejar la lente de aumento sin
supervisión en lugares con radiación solar directa
debido al riesgo de provocar un incendio. Al
finalizar el trabajo, recuerde cubrir la lente con el
protector.
c) Se prohíbe apuntar el haz luminoso concentrado
por la lente a animales o personas, puesto que
puede provocar quemaduras.
d) Se prohíbe utilizar el producto en lugares donde
puedan darse temblores para evitar daños en el ojo.
INSTRUCCIONES DE USO
El producto está indicado para observar objetos que
se encuentren a gran distancia y para observaciones
astronómicas.
El usuario es responsable de los daños derivados de
un uso inadecuado del aparato.
DESCRIPCIÓN DEL APARATO
1. Apertura
2. Specchio secondario
3. Viti di montaggio del supporto del cercatore
4. Cercatore
5. Supporto del cercatore
6. Oculare del cercatore
7. Tubo principale
8. Manopola di messa a fuoco
9. Tubo di messa a fuoco
10. Estrattore dell’oculare
11. Vite di serraggio della declinazione
12. Vite di serraggio dell’ascensione retta
13. Meccanismo orario
14. Vite di serraggio dell’asse orizzontale
15. Vite di serraggio del treppiede
16. Piedini in gommma
17. Morsa
18. Tubo flessibile di controllo della declinazione
19. Asse polare
20. Ripiano per accessori
21. Supporto del ripiano per accessori
22. Treppiede
23. Specchio primario
24. Vite ausiliaria dell’asse polare
25. Vite di serraggio dell'asse polare
1. Saque el trípode [22] del embalaje, ajuste la
longitud y la separación de las patas y bloquee la
posición con los tornillos de sujeción [15].
2. Instale la balda para accesorios [20] en el soporte
[21] y asegúrela con el tornillo de fijación [41].
3. Saque el ensamblaje [39] del paquete. Afloje los
tornillos del mecanismo [11, 12, 24, 25]. Instale
el ensamblaje en el trípode y asegúrelo con el
tornillo de fijación del eje horizontal [14].
4. Apriete el tornillo auxiliar del eje polar [24].
5. Ajuste los cables [18, 30] en el lado liso del tornillo
sin fin para conectarlos entre sí, y a continuación
apriete el tornillo de fijación.
6. Coloque el contrapeso en el mango del
contrapeso, después instale ambos elementos
en el ensamblaje y asegúrelo con el tornillo de
fijación.
7. Retire el mango del tubo [7] y después instale el
mandril de sujeción en el ensamblaje mediante el
tornillo y la llave Allen [37].
8. Coloque el tubo [7] en el mandril de sujeción [38]
y asegúrelo con el tornillo de fijación [17].
9. Instale el adaptador del ocular y el tubo de
enfoque, y asegúrelos con el tornillo de fijación.
10. Instale el soporte del buscador [5] en la superficie
del tubo principal [7] y asegúrelo con los tornillos
[3].
ENFOQUE DEL TELESCOPIO Y AJUSTE DEL BUSCADOR
1. Afloje los tornillos en el enfocador [10].
2. Instale el ocular de mayor potencia de aumento y
asegúrelo con los tornillos.
3. Dirija el telescopio hacia un objeto alejado.
4. Enfoque la imagen del objeto mediante la perilla
de nitidez.
5. Mire a través del buscador [4]. Si el objeto no se ve
nítido, gire el ocular [6] hasta conseguir la nitidez
deseada.
6. Si el objeto observado a través del ocular del
telescopio no se encuentra en el centro del visor
del buscador, afloje los tornillo de instalación del
buscador [26] y apunte adecuadamente.
7. Repita el proceso usando un ocular de mayor
potencia de aumento.
8. Después de finalizar estas acciones, el telescopio y
el buscador estarán regulados.
26. Vite di montaggio del cercatore
27. Manopola di regolazione della declinazione
28. Fissaggio della declinazione
29. Manopola per la impostazione dell’ angolo orario
30. Tubo flessibile di controllo dell’ascensione retta
31. Fissaggio dell’ascensione retta
32. Scala della latitudine
33. Albero di contrappeso
34. Contrappeso
35. Oculare
36. Filtro lunare (non mostrato nell’illustrazione)
INSTALACIÓN
DATOS TÉCNICOS
¡ATENCIÓN! La ilustración de este producto se
encuentra en la última página de las instrucciones p. 17.
¡ATENCIÓN! El despiece de este producto se
encuentra en las últimas páginas de las instrucciones
p. 18.

16 17
01.10.2019
ES
PRODUKTZEICHNUNGEN | PRODUCT’S VIEW | RYSUNKI PRODUKTU | NÁKRESY PRODUKTU SCHÉMAS DU PRODUIT
LE ILLUSTRAZIONI DI PRODOTTO | LAS ILUSTRACIONES DE PRODUCTO
20
31
32 33
34
30
29
28
27
26
23
24
25
17
18
19
20
21
22
16
15
14
13
12
11
10
9
8
1 2 3 4 5 6 7
P= A
B
AJUSTE DEL EJE POLAR
Antes de ajustar adecuadamente el eje polar, defina
de forma más o menos precisa la latitud del lugar de
observación.
1. Disponga el telescopio por la noche.
2. Afloje el tornillo de fijación del eje de declinación
[11].
3. Gire el telescopio hasta que la escala del eje de
declinación muestre 90º.
4. Apriete el tornillo de fijación del eje de declinación
[11].
5. Afloje el tornillo de fijación del eje horizontal [14].
6. Dirija el telescopio hacia el norte (hacia la estrella
polar).
7. Afloje el tornillo de fijación del eje polar [25] y
después ajuste el ángulo que se corresponda con
la latitud.
8. Encuentre la estrella polar en el ocular del
buscador. Si la estrella polar no se encuentra en el
centro del visor del buscador, afloje el tornillo de
fijación del eje horizontal [14] y corrija la posición.
UNIDAD DE RELOJ
1. Retire el tornillo [A] del mecanismo del tornillo sin
fin.
2. Introduzca el tornillo en el resorte de la unidad de
reloj [G] y vuelva a apretarlo.
3. Afloje el mandril de bloqueo de la unidad [E]. Gire
la garra [D] hacia la palanca de sujeción del eje
polar.
4. Instale el capuchón de la unidad de reloj [F] en el
enganche de la unidad de reloj [C].
5. Apriete el mandril de bloqueo de la unidad [E].
Asegúrese de que la unidad de reloj [B] y el motor
hayan encajado.
6. La unidad de reloj está lista para usarse. Conecte
la unidad a la fuente de alimentación [I].
7. Si desea controlar manualmente, afloje el mandril
de bloqueo de la unidad [E], gire la garra [D] hacia
abajo y utilice los cables de control elásticos.
OCULAR Y AMPLIACIÓN
El telescopio está equipado con distintos tipos de
oculares. La potencia de cada uno de ellos depende de
la distancia focal del espejo principal.
FUNCIONES Y EQUIPAMIENTO ADICIONAL
1. Lente Barlow – elemento auxiliar al ocular del
telescopio [13]. Alarga la distancia focal del
telescopio, por lo que amplía adicionalmente la
imagen del objeto observado.
2. Filtro lunar – elemento auxiliar al ocular del
telescopio [13]. Reduce la cantidad de luz que
pasa por el sistema óptico a través de los filtros de
polarización.
3. Ocular enderezador – sirve para incrementar el
aumento de un ocular durante las observaciones
terrestres y para restaurar la orientación
adecuada de la imagen del objeto observado.
4. Adaptador fotográfico
a) Retire el objetivo del cuerpo del aparato.
b) Coloque el ocular en el adaptador fotográfico.
c) Instale el tirador de arandela T junto con el
adaptador fotográfico en el cuerpo del aparato.
d) Instale el material fotográfico preparado en el
enfocador.
Atención: Las lentes y los filtros se deben instalar
en el ocular en el extremo contrario al ojo.
LIMPIEZA Y MANTENIMIENTO
a) Para limpiar la superficie, utilice solo productos
que no contengan sustancias corrosivas.
b) Guarde el aparato en un lugar seco, fresco y
protegido de la humedad y la radiación solar
directa.
c) Para la limpieza, use un paño suave, sin polvo y sin
pelusa.
d) Almacene el producto en un lugar que no esté
expuesto a temperaturas altas o bajas, polvo
o agentes químicos.
AD
C
BE
IHGF
P. Ampliación del telescopio
A. Distancia focal del espejo principal
B. Distancia focal del ocular

18 19
01.10.2019
NOTES/NOTIZEN
3
9
38
39
30
33
34
15 41
21
20
14
22
40
24
18
7
17
35
10
5
37
ZUSAMMENBAUEN DES PRODUKTS | ASSEMBLING THE EQUIPMENT | SKŁADANIE SPRZĘTU | SKLÁDÁNÍ ZAŘÍZENÍ
ASSEMBLAGE DU PRODUIT | MONTAGGIO DEL PRODOTTO | MONTAJE DEL PRODUCTO

expondo.de
Our customers‘ satisfaction is our main goal!
Please contact us with questions AT:
Unser Hauptziel ist die Zuredenheit unserer Kunden!
bei fragen kontaktieren Sie uns bitte unter:
Naszym głównym celem jest satysfakcja klientów
W przypadku pytań prosimy o kontakt z przedstawicielem w danym kraju:
Naším hlavním cílem je spokojenost našich zákazníků!
V případě otázek nás prosím kontaktujte na:
Notre but premier est votre satisfaction!
pour toute question, contactez nous sur:
Nuestro objetivo principal es la satisfacción de nuestros clientes!
si tiene preguntas, por favor pónganse en contacto con nostros en:
I nostro principale obiettivo è la soddisfazione dei nostri clienti!
per eventuali domande per favore, ci contattino sotto:
CONTACT
expondo Polska sp. z o.o. sp. k.
ul. Nowy Kisielin-Innowacyjna 7
66-002 Zielona Góra | Poland, EU
e-mail: [email protected]
Table of contents
Other UNIPRODO Telescope manuals

UNIPRODO
UNIPRODO UNI TELESCOPE 10 User manual

UNIPRODO
UNIPRODO UNI TELESCOPE 08 User manual

UNIPRODO
UNIPRODO UNI TELESCOPE 03 User manual

UNIPRODO
UNIPRODO UNI TELESCOPE 02 User manual

UNIPRODO
UNIPRODO UNI TELESCOPE 01 User manual

UNIPRODO
UNIPRODO UNI TELESCOPE 04 User manual

UNIPRODO
UNIPRODO TELESCOPE UNI TELESCOPE 07 User manual

UNIPRODO
UNIPRODO UNI TELESCOPE 06 User manual
Popular Telescope manuals by other brands

Levenhuk
Levenhuk Strike 115 PLUS manual

ORION TELESCOPES & BINOCULARS
ORION TELESCOPES & BINOCULARS SpaceProbe 130ST EQ 9007 instruction manual

Orion
Orion StarBlast II 4.5 EQ instruction manual

Bresser
Bresser MC-90 Quick start instructions

Celestron
Celestron StarSense AutoAlign manual

Polaris
Polaris Meade 21600X quick start guide