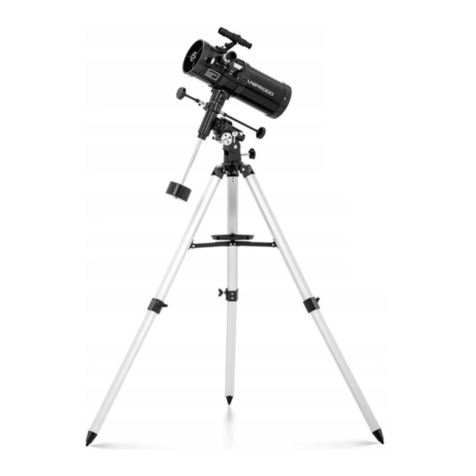
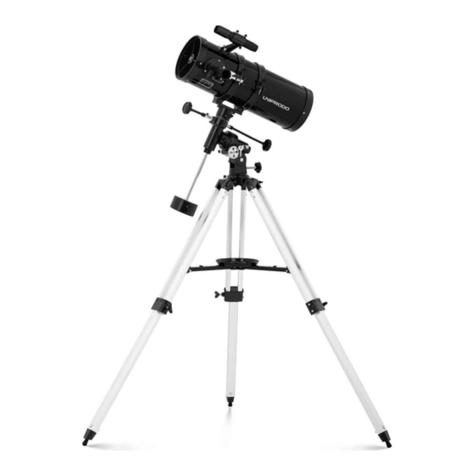
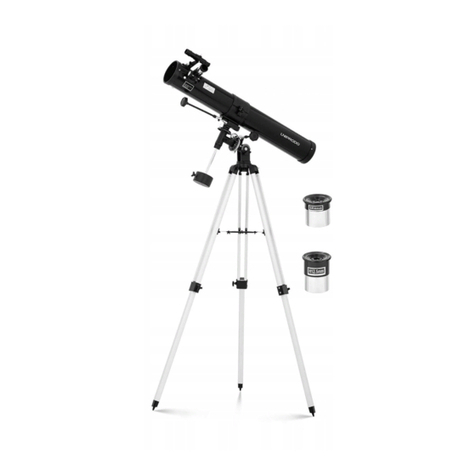
UNIPRODO UNI TELESCOPE 01 User manual

TELESCOPE
UNI_TELESCOPE_01
USER MANUAL
BEDIENUNGSANLEITUNG
INSTRUKCJA OBSŁUGI
NÁVOD K POUŽITÍ
MANUEL D´UTILISATION
ISTRUZIONI PER L‘USO
MANUAL DE INSTRUCCIONES

3
01.10.2019
3
5
7
9
11
13
15
DEUTSCH
ENGLISH
POLSKI
ČESKY
FRANÇAIS
ITALIANO
ESPAÑOL
INHALT | CONTENT | TREŚĆ | OBSAH | CONTENU | CONTENUTO | CONTENIDO
PRODUKTNAME TELESKOP
PRODUCT NAME TELESCOPE
NAZWA PRODUKTU LUNETA
NÁZEV VÝROBKU TELESKOP
NOM DU PRODUIT TÉLESCOPE
NOME DEL PRODOTTO TELESCOPIO
NOMBRE DEL PRODUCTO TELESCOPIO
MODELL
UNI_TELESCOPE_01
PRODUCT MODEL
MODEL PRODUKTU
MODEL VÝROBKU
MODÈLE
MODELLO
MODELO
IMPORTEUR
EXPONDO POLSKA SP. Z O.O. SP. K.
IMPORTER
IMPORTER
DOVOZCE
IMPORTATEUR
IMPORTATORE
IMPORTADOR
ADRESSE VON IMPORTEUR
UL. NOWY KISIELIN-INNOWACYJNA 7, 66-002 ZIELONA GÓRA | POLAND, EU
IMPORTER ADDRESS
ADRES IMPORTERA
ADRESA DOVOZCE
ADRESSE DE L'IMPORTATEUR
INDIRIZZO DELL'IMPORTATORE
DIRECCIÓN DEL IMPORTADOR
BEDIENUNGSANLEITUNG
DE
TECHNISCHE DATEN
Parameter Werte
Produktname Teleskop
Modell UNI_TELESCOPE_01
Blende [mm] 60
Brennweite 900
Sucher 5x24
Abmessungen [mm] 1250x840x1285
Gewicht [kg] 2,40
a) Es ist verboten, unmittelbar oder durch die Linse
auf die Lichtquelle zu schauen. Dies kann zu
Augenschäden und epileptischen Anfällen führen.
b) Es ist verboten, die Lupe an Orten mit direktem
Sonnenlicht unbeaufsichtigt zu lassen, da dies
eine Brandgefahr darstellt. Denken Sie nach
Abschluss der Arbeit daran, die Linsenabdeckung
zu schließen.
c) Es ist verboten, den fokussierten Lichtstrahl
auf Menschen oder Tiere zu richten. Dies kann
Verbrennungen verursachen.
d) Verwenden Sie das Produkt nicht an Orten,
an denen Erschütterungen auftreten, um
Augenschäden zu vermeiden.
NUTZUNGSBEDINGUNGEN
Das Produkt ist zur Beobachtung von weit vom
Benutzer entfernten Objekten sowie astronomischen
Beobachtungen bestimmt.
Für alle Schäden bei nicht sachgemäßer Verwendung
haftet allein der Betreiber.
GERÄTEBESCHREIBUNG
1. Höhenversteller
2. Fokussierrad
3. Fokussiertubus
4. Winkelprisma
5. Okular
6. Sucherstütze
7. Sucher
8. Haupttubus
9. Sonnenblende
10. Linse
11. Feststellschraube der Klemme
12. Einstellspannschraube
13. Klemmstütze
14. Azimutverriegelung
15. Stativkopf
16. Zubehörablage
17. Stativbein
18. Gummifuß
MONTAGEANLEITUNG
ACHTUNG! Die Zeichnung von diesem
Produkt bendet sich auf der letzte Seite der
Bedienungsanleitung S. 17.
1. Stellen Sie die Länge der Stativbeine ein
und sichern Sie die Einstellungen mit den
Spannschrauben (Abb. 1).
2. Verbinden Sie die Stativbeine mit dem Stativkopf
mittels Schraube und Flügelmutter (Abb. 2A).
3. Befestigen Sie die Zubehörablage mit Schrauben
und Muttern (Abb. 3).
4. Bringen Sie den Haupttubus am Stativkopf an
und sichern Sie ihn mit der Feststellschraube der
Klemme (Abb. 2b,c).
5. Die Sucherstütze mit Flügelschrauben auf der
Oberfläche des Haupttubus montieren (Abb. 4).
6. Bringen Sie das Winkelprisma auf dem
Fokussiertubus an und sichern Sie es mit der
Einstellschraube (Abb. 5).
7. Bringen Sie das Okular am Winkelprisma an,
stellen Sie dann seine Position ein und sichern Sie
es mit einer kleinen Einstellschraube (Abb. 6).
8. Wenn Sie optisches Zubehör (z. B. Barlowlinsen)
verwenden, platzieren Sie es zwischen Okular und
Fokussiertubus (Abb. 7).
FOKUSSIEREN DES TELESKOPS UND EINSTELLEN DES
SUCHERS
Hinweis: Es wird empfohlen, die folgenden Aktivitäten
bei Tageslicht durchzuführen.
1. Bringen Sie das Okular mit der geringsten
Vergrößerung am Winkelprisma an.
2. Richten Sie das Teleskop auf ein leicht erkennbares
Objekt. Das Objekt sollte sich in der Mitte des
Sichtfelds des Teleskops befinden.
3. Sichern Sie die gewünschte Position des Teleskops
mit Spannschrauben.
4. Schauen Sie durch den Sucher. Stellen Sie seine
Position mit der Einstellmutter so ein, dass sich
das durch das Teleskop beobachtete Objekt in der
Mitte des Suchervisiers befindet.
5. Sichern Sie nach dem Einstellen des Suchers seine
Position mit Hilfe der Andrückschrauben.
OKULAR UND VERGRÖSSERUNG
Das Teleskop ist mit verschiedenen Okulartypen
ausgestattet. Die Leistung jedes Okulars hängt von der
Brennweite des Hauptspiegels ab.
ACHTUNG: Die Explosionszeichnungen von diesem
Produkt benden sich auf den letzten Seiten der
Bedienungsanleitung S. 17.
P= A
B
P. Teleskopvergrößerung
A. Brennweite des Hauptspiegels
B. Brennweite des Okulars
FUNKTIONEN UND ZUBEHÖR
1. Barlowlinse - dient zur Zusammenarbeit mit dem
Okular des Teleskops, erhöht die Brennweite
und somit die Vergrößerung des Bildes des
beobachteten Objekts.
2. Mondfilter - dient zur Zusammenarbeit mit dem
Okular des Teleskops, reduziert die Lichtmenge,
die durch das optische System durch die
Polarisationsfilter gelangt.

4 5
01.10.2019
DE
USER MANUAL
EN
3. Aufrichtendes Okular - dient zum Erhöhen der
Vergrößerung mit einem gegebenen Okular
während Bodenbeobachtungen und stellt die
korrekte Ausrichtung des Bildes des beobachteten
Objekts wieder her.
Achtung: Linsen und Filter sind im Okular auf
der dem Auge gegenüberliegenden Seite zu
installieren.
REINIGUNG UND WARTUNG
a) Verwenden Sie zur Reinigung der Oberfläche
ausschließlich Mittel ohne ätzende Inhaltsstoffe.
b) Bewahren Sie das Gerät an einem trockenen,
kühlen, vor Feuchtigkeit und direkter
Sonneneinstrahlung geschütztem Ort auf.
c) Verwenden Sie zur Reinigung ein weiches,
staubfreies und fusselfreies Tuch.
d) Lagern Sie das Produkt an einem Ort, der keinen
hohen oder niedrigen Temperaturen, Staub und
chemischen Mitteln ausgesetzt ist.
TECHNICAL DATA
Parameter
description
Parameter
value
Product name Telescope
Model UNI_TELESCOPE_01
Aperture [mm] 60
Focal length 900
Finder 5x24
Dimensions [mm] 1250x840x1285
Weight [kg] 2,40
a) Do not look directly or through the lens on the
light source. This can cause eye damage and
epileptic seizures.
b) Do not leave the magnifying lens unattended in
places with direct sunlight as this creates a fire
hazard. After finishing work, remember to close
the lens cover.
c) It is forbidden to direct the focused light beam
towards people or animals. It may cause burns.
d) To avoid eye damage, do not use the product in
places where shocks can occur.
USE GUIDELINES
The product is intended for observing objects located
at a considerable distance from the user and for
astronomical observations.
The user is liable for any damage resulting from
unintended use of the device.
DEVICE DESCRIPTION
1. Height adjuster
2. Focusing knob
3. Focus tube
4. Angle prism
5. Eyepiece
6. Finder bracket
7. Finder
8. Main tube
9. Sun visor
10. Lens
11. Clamp locking screw
12. Adjuster clamping screw
13. Clamp support
14. Azimuth lock
15. Tripod head
16. Accessories shelf
17. Tripod leg
18. Rubber foot
ASSEMBLY
ATTENTION! This product‘s view can be found on the
last pages of the operating instructions (pp. 17).
1. Adjust the length of the tripod legs, then lock them
with the clamping screws (Fig. 1).
2. Connect the tripod legs with the tripod head using
the screw and the wing nut (Fig. 2a).
3. Fasten the accessories shelf with the screws and
nuts (fig. 3)
4. Install the main tube on the tripod head and
secure with the adjuster clamping screw
(Fig. 2b, c).
5. Install the finder bracket on the surface of the
main tube with the thumbscrews (fig. 4).
6. Install the angle prism on the focus tube and
secure with the adjusting screw (fig. 5).
7. Install the eyepiece at the angle prism, then adjust
its position and secure with the small adjusting
screw (Fig. 6).
8. If you are using optical accessories (e.g. Barlow
lenses), place them between the eyepiece and the
focus tube (Fig. 7).
FOCUSING THE TELESCOPE AND ADJUSTING THE
FINDER
Note: It is recommended to perform the following
activities in daylight.
1. Install the eyepiece with the lowest magnification
at the angle prism.
2. Point the telescope towards an easily recognizable
object. The object should be in the middle of the
telescope’s field of view.
3. Secure the selected telescope position with the
clamping screws.
4. Look through the finder. Adjust its position using
the adjusting nut so that the object observed
through the telescope is in the centre of the finder
sight.
5. After adjusting the finder, secure its position with
the clamping screws.
EYEPIECE AND MAGNIFICATION
The telescope is equipped with several types of
eyepieces. The power of each eyepiece depends on the
focal length of the main mirror.
ATTENTION! This product’s exploded view can be
found on the last pages of the operating instructions
(pp. 17).
P= A
B
P. Telescope magnification
A. Focal length of the main mirror
B. Focal length of the eyepiece
FUNCTIONS AND ACCESSORIES
1. Barlow lens. When used with the telescope
eyepiece it extends the telescope's focal length
and, as a result, further enlarges the image of the
observed object.
2. Moon filter. Used with the telescope eyepiece
it reduces the light passing through the optical
system by means of polarizing filters.
3. Correcting eyepiece - serves to increase
magnification together with a given eyepiece
during ground observations and restores the
correct orientation of the image of the observed
object.
Note: The lenses and filters should be installed in
the eyepiece on the side opposite the eye.

6 7
01.10.2019
INSTRUKCJA OBSŁUGI
PLEN
DANE TECHNICZNE
Opis parametru Wartość parametru
Nazwa produktu Luneta
Model UNI_TELESCOPE_01
Apertura [mm] 60
Ogniskowa 900
Szukacz 5x24
Wymiary [mm] 1250x840x1285
Ciężar [kg] 2,40
a) Zabrania się spoglądania bezpośrednio oraz przez
soczewkę na źródło światła. Może to być przyczyną
uszkodzenia wzroku oraz ataku epilepsji.
b) Zabrania się pozostawiać soczewkę powiększającą
bez nadzoru w miejscach o bezpośrednim
nasłonecznieniu, gdyż stwarza to zagrożenie
pożarowe. Po zakończeniu pracy należy pamiętać
o zamknięciu osłony soczewki.
c) Zabrania się kierować skupioną przez soczewkę
wiązkę światła w kierunku osób lub zwierząt. Może
to spowodować oparzenia.
d) Zabrania się korzystania z produktu w miejscach
występowania wstrząsów, aby uniknąć
uszkodzenia oczu.
ZASADY UŻYTKOWANIA
Produkt przeznaczony jest do obserwacji obiektów
znajdujących się w znacznej odległości od użytkownika
oraz obserwacji astronomicznych.
Odpowiedzialność za wszelkie szkody
powstałe w wyniku użytkowania niezgodnego
z przeznaczeniem ponosi użytkownik.
OPIS URZĄDZENIA
1. Regulator wysokości
2. Pokrętło regulacji ostrości
3. Tubus ostrości
4. Pryzmat kątowy
5. Okular
6. Wspornik szukacza
7. Szukacz
8. Tubus główny
9. Osłona przeciwsłoneczna
10. Soczewka
11. Śruba blokująca zacisk
12. Śruba zaciskowa regulacji
13. Wspornik zacisku
14. Blokada azymutu
15. Głowica trójnogu
16. Półka na akcesoria
17. Noga trójnogu
18. Stopka gumowa
MONTAŻ
UWAGA: Rysunek produktu znajduje się na końcu
instrukcji na stronie: 17.
1. Wyregulować długość nóg trójnogu, a następnie
zablokować ustawienia śrubami zaciskowymi (rys 1).
2. Połączyć nogi trójnogu z głowicą trójnogu przy
pomocy śruby i nakrętki motylkowej (rys. 2a).
3. Zamocować półkę na akcesoria przy pomocy śrub
i nakrętek (rys. 3)
4. Zainstalować tubus główny na głowicy trójnogu i
zabezpieczyć przy pomocy śruby blokującej zacisk
(rys. 2b,c).
5. Zainstalować wspornik szukacza na powierzchni
tubusu głównego przy pomocy śrub
skrzydełkowych (rys. 4).
6. Zainstalować pryzmat kątowy na tubusie ostrości
i zabezpieczyć przy pomocy śruby nastawczej (rys.
5).
7. Zainstalować okular przy pryzmacie kątowym,
a następnie wyregulować jego położenie i
zabezpieczyć przy pomocy małej śruby nastawczej
(rys. 6).
8. W przypadku korzystania z korzystania optycznych
akcesoriów dodatkowych (np. soczewki Barlowa)
należy umieścić je pomiędzy okularem, a tubusem
ostrości (rys. 7).
WYOSTRZENIE TELESKOPU I REGULACJA SZUKACZA
Uwaga: zaleca się przeprowadzanie poniższych
czynności w świetle dziennym.
1. Zainstalować okular o najmniejszym powiększeniu
przy pryzmacie kątowym.
2. Skierować teleskop w kierunku łatwo
rozpoznawalnego obiektu. Obiekt powinien
znajdować się w środku pola widzenia teleskopu.
3. Zabezpieczyć wybrane ustawienie teleskopu przy
pomocy śrub zaciskowych.
4. Spojrzeć przez szukacz. Wyregulować jego
położenie przy pomocy nakrętki regulacyjnej w
taki sposób, aby obserwowany przez teleskop
obiekt znajdował się w centrum celownika
szukacza.
5. Po regulacji szukacza należy zabezpieczyć jego
ustawienie przy pomocy śrub dociskowych.
OKULAR I POWIĘKSZENIE
Teleskop wyposażony jest w kilka rodzajów okularów.
Moc każdego okularu jest zależna od ogniskowej
zwierciadła głównego.
UWAGA: Rysunki złożeniowe produktu znajdują się
na końcu instrukcji na stronach: 17.
P= A
B
P. Powiększenie teleskopu
A. Ogniskowa zwierciadła głównego
B. Ogniskowa okularu
FUNKCJE I WYPOSAŻENIE DODATKOWE
1. Soczewka Barlowa – służy do współpracy z
okularem teleskopu, powoduje wydłużenie
ogniskowej teleskopu, a w wyniku tego dodatkowe
powiększenie obrazu obserwowanego obiektu.
2. Filtr księżycowy – służy do współpracy z okularem
teleskopu, powoduje redukcję ilości światła
przechodzącego przez układ optyczny poprzez
filtry polaryzacyjne.
CLEANING AND MAINTENANCE
a) Use only non-corrosive cleaners to clean the
surface.
b) Store the unit in a dry, cool place, free from
moisture and direct exposure to sunlight.
c) Use a soft, dust-free and lint-free cloth to clean the
telescope.
d) Store the product in a place not exposed to high or
low temperatures, dust and/or chemical agents.

8 9
01.10.2019
PL
NÁVOD K POUŽITÍ
CZ
3. Okular prostujący – służy do zwiększenia
powiększenia podczas obserwacji naziemnych oraz
przywraca właściwą orientację obserwowanego
obrazu.
Uwaga: Soczewki i filtry należy zainstalować w
okularze po stronie przeciwnej niż przykłada się
oko.
CZYSZCZENIE I KONSERWACJA
a) Do czyszczenia powierzchni należy stosować
wyłącznie środki niezawierające substancji
żrących.
b) Urządzenie należy przechowywać w suchym i
chłodnym miejscu chronionym przed wilgocią i
bezpośrednim promieniowaniem słonecznym.
c) Do czyszczenia należy używać miękkiej, wolnej od
kurzu i niestrzępiącej się ściereczki.
d) Przechowywać produkt w miejscu nie będącym
narażonym na występowanie wysokich lub niskich
temperatur, pyłów oraz czynników chemicznych.
TECHNICKÉ ÚDAJE
Popis parametru Hodnota parametru
Název výrobku Teleskop
Model UNI_TELESCOPE_01
Clona [mm] 60
Ohnisková vzdálenost 900
Hledáček 5x24
Rozměry [mm] 1250x840x1285
Hmotnost [kg] 2,40
a) Nedívejte se přímo, ani přes čočku na světelný
zdroj. Může to způsobit poškození zraku nebo
vyvolat epileptický záchvat.
b) Nenechávejte zvětšovací čočku bez dozoru
na místech s přímým slunečním zářením,
hrozí nebezpečí požáru. Po dokončení práce
nezapomeňte zavřít kryt čočky.
c) Nikdy nesměřujte světelný paprsek na lidi nebo
zvítata, může způsobit popáleniny.
d) Nepoužívejte výrobek na místě, kde se vyskytují
otřesy, aby nedošlo k poškození očí.
ZÁSADY POUŽÍVÁNÍ
Výrobek je určen pro pozorování objektů umístěných
ve značné vzdálenosti od uživatele a astronomická
pozorování.
Odpovědnost za veškeré škody vzniklé v důsledku
použití zařízení v rozporu s určením nese uživatel.
POPIS ZAŘÍZENÍ
1. Regulátor výšky
2. Zaostřovací knoflík
3. Zaostřovací trubice
4. Úhlový hranol
5. Okulár
6. Držák hledáčku
7. Hledáček
8. Hlavní trubice
9. Sluneční clona
10. Čočka
11. Upínací šroub
12. Seřizovací šroub
13. Upínací svorka
14. Zajištění azimutu
15. Hlavice stativu
16. Odkládací police
17. Noha stativu
18. Gumová nožička
INSTALACE
POZNÁMKA! Nákres tohoto produktu naleznete na
konci návodu na str. 17.
1. Upravte délku nohou stativu a poté nastavení
zajistěte upínacími šrouby (obr. 1).
2. Připojte nohy stativu k hlavě stativu pomocí
šroubu a křídlové matice (obr. 2a).
3. Připevněte odkládací polici pomocí šroubů a matic
(obr. 3)
4. Namontujte hlavní trubici na hlavici stativu a
zajistěte ji zajišťovacím šroubem (obr. 2b,c).
5. Namontujte držák hledáčku na povrch hlavní
trubice pomocí šroubů (obr. 4).
6. Namontujte úhlový hranol na zaostřovací trubici a
zajistěte seřizovacím šroubem (obr. 5).
7. Nainstalujte okulár proti úhlovému hranolu, poté
upravte jeho polohu a zajistěte malým seřizovacím
šroubem (obr. 6).
8. Pokud používáte optické příslušenství (např. čočky
Barlow), umístěte je mezi okulár a zaostřovací
trubici (obr. 7).
OSTŘENÍ DALEKOHLEDU A SEŘÍZENÍ HLEDÁČKU
Poznámka: doporučuje se provádět následující činnosti
za denního světla.
1. Nainstalujte okulár s nejnižším zvětšením na
úhlový hranol.
2. Nasměrujte dalekohled na snadno rozpoznatelný
objekt. Objekt by měl být uprostřed zorného pole
dalekohledu.
3. Zajistěte vybrané nastavení dalekohledu pomocí
upínacích šroubů.
4. Prohlédněte si hledáček. Upravte jeho polohu
pomocí seřizovací matice tak, aby předmět
pozorovaný dalekohledem byl ve středu hledáčku.
5. Po seřízení hledáčku zajistěte jeho polohu
přítlačnými šrouby.
OKULÁR A ZVĚTŠENÍ
Dalekohled je vybaven několika druha okulárů. Síla
každého okuláru závisí na ohniskové délce hlavního
zrcadla.
POZNÁMKA! Výkresy sestavení produktu jsou na
konci příručky na str. 17.
P= A
B
P. Zvětšení dalekohledu
A. Ohnisková vzdálenost hlavního zrcadla
B. Ohnisková vzdálenost okuláru
FUNKCE A PŘÍSLUŠENSTVÍ
1. Barlowowa čočka – používá se s okulárem
dalekohledu, prodlužuje ohniskovou vzdálenost
dalekohledu a v důsledku toho dále zvětšuje obraz
pozorovaného objektu.
2. Měsíční filtr – používá se s okulárem dalekohledu,
snižuje množství světla procházejícího optickým
systémem polarizačními filtry.
3. Vyrovnávací okulár – používá se k většímu
zvětšení daným okulárem při pozorování objektů
na zemi a obnovuje správnou orientaci obrazu
pozorovaného objektu.
Poznámka: Čočky a filtry by měly být instalovány
do okuláru na protější straně. Tedy ne tam, kam
přikládáme oko

10 11
01.10.2019
CZ
MANUEL D´UTILISATION
FR
ČIŠTĚNÍ A ÚDRŽBA
a) K čištění povrchu zařízení používejte výhradně
prostředky neobsahující žíravé látky.
b) Zařízení skladujte na suchém a chladném místě,
chráněném proti vlhkosti a přímému slunečnímu
svitu.
c) Pro čištění použijte čistý měkký a bezprašný
hadřík, který nepouští vlákna nebo chlupy.
d) Výrobek skladujte na místě, které není vystaveno
vysokým nebo nízkým teplotám, prachu a
chemickým látkám.
DÉTAILS TECHNIQUES
Description des
paramètres
Valeur des paramètres
Nom du produit Télescope
Modèle UNI_TELESCOPE_01
Ouverture [mm] 60
Distance focale 900
Chercheur 5x24
Dimensions [mm] 1250x840x1285
Poids [kg] 2,40
a) Il est interdit de regarder directement et à travers
la lentille sur la source de lumière. Cela peut
provoquer des lésions oculaires et des crises
d'épilepsie.
b) Il est interdit de laisser la loupe sans surveillance
dans des endroits exposés à la lumière directe
du soleil car cela crée un risque d'incendie. Une
fois le travail terminé, n'oubliez pas de fermer la
couverture de la lentille.
c) Il est interdit de diriger le faisceau de lumière
focalisé vers des personnes ou des animaux. Cela
peut causer des brûlures.
d) Il est interdit d'utiliser le produit dans des
lieux soumis à des secousses afin d'éviter tout
dommage aux yeux.
CONDITIONS D’UTILISATION
Le produit est destiné à l'observation d'éléments situés
à une distance considérable de l'utilisateur et aux
observations astronomiques.
L’utilisateur porte l’entière responsabilité pour
l’ensemble des dommages attribuables à un usage
inapproprié.
DESCRIPTION DE L'APPAREIL
1. Régulateur de hauteur
2. Molette de mise au point
3. Tube de mise au point
4. Renvoi coudé
5. Oculaire
6. Support du chercheur
7. Chercheur
8. Tube du télescope
9. Pare-Soleil
10. Lentille
11. Boulon de verrouillage de l'étrier
12. Boulon de verrouillage de la régulation
13. Fourche
14. Verrouillage de l’azimut
15. Tête du trépied
16. Étagère à accessoires
17. Jambe du trépied
18. Pied en caoutchouc
MONTURE
ATTENTION! Le plan de ce produit se trouve à la
dernière page du manuel d‘utilisation, p. 17.
1. Réglez la longueur des jambes du trépied, puis
verrouillez les réglages à l’aide des boulons de
serrage (Fig. 1).
2. Assemblez les jambes du trépied à la tête du
trépied à l'aide d'un boulon et d'un écrou à ailettes
(Fig. 2a).
3. Fixez l'étagère à accessoires à l'aide de boulons et
d'écrous (fig. 3).
4. Installez le tube du télescope sur la tête du trépied
et fixez-le avec le boulon de verrouillage de l'étrier
(Fig. 2b, c).
5. Installez le support du chercheur sur la surface
du tube du télescope à l'aide de boulons à oreilles
(fig. 4).
6. Installez le renvoi coudé sur le tube de mise au
point et fixez-le avec la vis de réglage (fig. 5).
7. Installez l'oculaire sur le renvoi coudé, puis ajustez
sa position et fixez-le avec une petite vis de
réglage (Fig. 6).
8. Lorsque vous utilisez des accessoires optiques
supplémentaires (par exemple, une lentille de
Barlow), placez-les entre l'oculaire et le tube de
mise au point (Fig. 7).
MISE AU POINT DU TÉLESCOPE ET RÉGLAGE DU
CHERCHEUR
Attention: il est recommandé d'effectuer les opérations
suivantes à la lumière du jour.
1. Installez l'oculaire avec le plus faible grossissement
sur le renvoi coudé.
2. Pointez le télescope vers un objet facilement
reconnaissable. L'objet doit être au centre du
champ de vision du télescope.
3. Verrouillez le réglage sélectionné du télescope
avec les boulons de serrage.
4. Regardez dans le chercheur. Ajustez sa position
à l'aide de l'écrou de réglage de sorte que l'objet
observé à travers le télescope se trouve au centre
du viseur du chercheur.
5. Après avoir réglé le chercheur, fixez sa position à
l'aide des boulons de serrage.
OCULAIRE ET GROSSISSEMENT
Le télescope est équipé de plusieurs types d'oculaires.
La puissance de chaque oculaire dépend de la distance
focale du miroir principal.
ATTENTION! Les vues éclatées de ce produit se
trouvent aux dernières pages du manuel d‘utilisation
p. 17.
P= A
B
P. Grossissement du télescope
A. Distance focale du miroir principal
B. Distance focale de l'oculaire
FONCTIONS ET ACCESSOIRES
1. Objectif Barlow – utilisé avec l'oculaire du
télescope, il étend la distance focale du télescope
et, par conséquent, agrandit l'image de l'objet
observé.
2. Filtre lunaire – utilisé avec l'oculaire du télescope,
réduit la quantité de lumière traversant le système
optique à travers les filtres polarisants.

12 13
01.10.2019
FR
ISTRUZIONI PER L’USO
IT
3. Oculaire de redressement – sert à augmenter
le grossissement avec un oculaire donné lors
des observations au sol et rétablis l'orientation
correcte de l'image de l'objet observé.
Attention: Les lentilles et les filtres doivent être
installés dans l'oculaire du côté opposé au
positionnement de l'œil.
NETTOYAGE ET ENTRETIEN
a) Pour nettoyer les différentes surfaces, n'utilisez
que des produits sans agents corrosifs.
b) Conservez l'appareil dans un endroit propre, frais
et sec, à l'abri de l'humidité et des rayons directs
du soleil.
c) Pour le nettoyage, utilisez un chiffon doux, sans
poussière ni peluche.
d) Stockez le produit dans un endroit non exposé
à des températures élevées ou basses, à la
poussière et aux agents chimiques.
DATI TECNICI
Parametri
-Descrizione
Parametri - Valore
Nome del prodotto Telescopio
Modello UNI_TELESCOPE_01
Apertura [mm] 60
Focale 900
Cercatore 5x24
Dimensioni [mm] 1250x840x1285
Peso [kg] 2,40
a) È vietato guardare direttamente una sorgente
luminosa attraverso la lente. Questo può causare
danni agli occhi e crisi epilettiche.
b) È vietato lasciare la lente d'ingrandimento
incustodita in luoghi esposti alla luce solare
diretta, poiché ciò crea un pericolo d'incendio.
Dopo aver terminato il lavoro, è necessario
ricordarsi di chiudere la copertura della lente.
c) È vietato dirigere il raggio di luce focalizzato verso
persone o animali. Ciò potrebbe causare ustioni.
d) Non utilizzare il prodotto in un ambiente instabile
al fine di evitare eventuali danni agli occhi.
CONDIZIONI D'USO
Il prodotto è progettato per l'osservazione di oggetti
situati ad un' ampia distanza dall'utente e per le
osservazioni astronomiche.
L'operatore è responsabile di tutti i danni derivanti
da un uso improprio.
CONDIZIONI D'USO
1. Regolatore dell’altezza
2. Manopola di messa a fuoco
3. Tubo di messa a fuoco
4. Prisma angolare
5. Oculare
6. Supporto del cercatore
7. Cercatore
8. Tubo principale
9. Filtro solare
10. Lente
11. Vite di bloccaggio per morsetto
12. Vite di serraggio della regolazione
13. Staffa del morsetto
14. Blocco dell’azimut
15. Testa del treppiede
16. Ripiano per accesori
17. Piede del treppiede
18. Piedino in gomma
MONTATURA
ATTENZIONE: L´esploso di questo prodotto si trova
nell´ultima pagina del manuale d´uso, p. 17.
1. Regolare la lunghezza dei piedi del treppiede,
quindi bloccare le regolazioni con le viti di
serraggio (fig. 1).
2. Unire le piedi del treppiede con la testa del
treppiede utilizzando un bullone e un dado ad
alette (fig. 2a).
3. Fissare il ripiano per accessori con bulloni e dadi
(fig. 3).
4. Montare il tubo principale sulla testa del treppiede
e fissarlo con la vite di bloccaggio del morsetto
(Fig. 2b,c).
5. Montare il supporto del cercatore sulla superficie
del tubo principale utilizzando le viti ad alette (fig.
4).
6. Montare il prisma angolare sul tubo di messa a
fuoco e fissarlo con la vite di regolazione (fig. 5).
7. Montare l'oculare sul prisma angolare, quindi
regolarne la posizione e fissarlo con una piccola
vite di regolazione (fig. 6).
8. In caso di utilizzo di accessori ottici supplementari
(ad es. lenti di Barlow), occorre collocarli tra
l'oculare e il tubo di messa a fuoco (fig. 7).
MESSA A FUOCO DEL TELESCOPIO E REGOLAZIONE DEL
CERCATORE.
Nota: si raccomanda di eseguire le seguenti attività alla
luce del giorno.
1. Installare l'oculare d'ingrandimento minimo ad un
prisma ad angolo.
2. Orientare il telescopio verso un oggetto facilmente
riconoscibile. L'oggetto dovrebbe trovarsi al
centro del campo visivo del telescopio.
3. Fissare la posizione desiderata del telescopio con
le viti di serraggio.
4. Guardare attraverso il cercatore. Regolare la sua
posizione utilizzando il dado di regolazione in
modo che l'oggetto da osservare si trovi al centro
del mirino del cercatore.
5. Dopo aver regolato il cercatore, fissare la sua
posizione con le viti di fissaggio.
OCULARE E INGRANDIMENTO
Il telescopio è dotato di diversi tipi di oculari. La potenza
di ogni oculare dipende dalla lunghezza focale dello
specchio primario.
ATTENZIONE! Le viste esplose di questo prodotto
sono disponibili nell‘ultima pagina (17) del manuale
d´uso.
P= A
B
P. Ingrandimento del telescopio
A. Lunghezza focale dello specchio primario
B. Lunghezza focale dell'oculare
FUNZIONI E ACCESSORI SUPPLEMENTARI
1. Lente di Barlow - viene utilizzata per cooperare con
l'oculare del telescopio, fa aumentare la lunghezza
focale del telescopio e, di conseguenza, fa
ingrandire ulteriormente l'immagine dell'oggetto
osservato.
2. Filtro lunare - viene utilizzato insieme all'oculare
del telescopio, riduce la quantità di luce che
attraversa il sistema ottico mediante filtri
polarizzatori.

14 15
01.10.2019
IT
MANUAL DE INSTRUCCIONES
ES
3. Oculare di raddrizzamento - utilizzato per
aumentare l'ingrandimento dell'oculare durante
le osservazioni terrestri e ripristina il corretto
orientamento dell'immagine dell'oggetto
osservato.
Nota: lenti e filtri devono essere installati
nell'oculare sul lato opposto a quello dove si vuole
posizionare l'occhio.
PULIZIA E MANUTENZIONE
a) Per pulire la superficie utilizzare solo detergenti
senza ingredienti corrosivi.
b) Tenere l'apparecchio in un luogo asciutto, fresco,
protetto dall'umidità e dalla luce diretta del sole.
c) Per la pulizia, utilizzare un panno morbido, privo
di polvere, non sfilacciante.
d) Conservare il prodotto in un luogo non esposto
alle alte o basse temperature, alla polvere e agli
agenti chimici.
DATOS TÉCNICOS
Parámetro -
Descripción
Parámetro - Valor
Nombre del producto Telescopio
Modelo UNI_TELESCOPE_01
Apertura [mm] 60
Focal 900
Buscador 5x24
Dimensiones [mm] 1250x840x1285
Peso [kg] 2,40
a) Se prohíbe mirar directamente y a través de la
lente a una fuente luminosa, ya que puede causar
daños en la vista y ataques de epilepsia.
b) Se prohíbe dejar la lente de aumento sin
supervisión en lugares con radiación solar directa
debido al riesgo de provocar un incendio. Al
finalizar el trabajo, recuerde cubrir la lente con el
protector.
c) Se prohíbe apuntar el haz luminoso concentrado
por la lente a animales o personas, puesto que
puede provocar quemaduras.
d) Se prohíbe utilizar el producto en lugares donde
puedan darse temblores para evitar daños en el
ojo.
INSTRUCCIONES DE USO
El producto está indicado para observar objetos que
se encuentren a gran distancia y para observaciones
astronómicas.
El usuario es responsable de los daños derivados de
un uso inadecuado del aparato.
CONDIZIONI D'USO
1. Regulador de altura
2. Perilla de regulación de la nitidez
3. Tubo de enfoque
4. Prisma angular
5. Ocular
6. Soporte del buscador
7. Buscador
8. Tubo principal
9. Filtro solar
10. Lente
11. Tornillo de bloqueo de la abrazadera
12. Tornillo de sujeción de la regulación
13. Soporte de la abrazadera
14. Bloqueo del acimut
15. Cabezal del trípode
16. Balda para accesorios
17. Pata del trípode
18. Tope de goma
INSTALACIÓN
¡ATENCIÓN! La ilustración de este producto se
encuentra en la última página de las instrucciones p.
17.
1. Regule la longitud de las patas del trípode y
después bloquee la posición con los tornillos de
sujeción (imagen 1).
2. Conecte las patas del trípode al cabezal del trípode
mediante el tornillo y la tuerca mariposa (imagen
2a).
3. Ajuste la balda para accesorios con los tornillos y
las tuercas (imagen 3).
4. Instale el tubo principal en el cabezal del trípode
y apriételo con el tornillo de bloqueo de la
abrazadera (imágenes 2b, c).
5. Instale el soporte del buscador en la superficie
del tubo principal mediante los tornillos alados
(imagen 4).
6. Instale el prisma angular en el tubo de enfoque y
asegúrelo con el tornillo de ajuste (imagen 5).
7. Instale el ocular en el prisma angular y a
continuación regule su posición y asegúrelo con el
pequeño tornillo de ajuste (imagen 6).
8. En caso de usar accesorios ópticos adicionales
(como lentes Barlow), se deben instalar entre el
ocular y el tubo de enfoque (imagen 7).
ENFOQUE DEL TELESCOPIO Y AJUSTE DEL BUSCADOR
Atención: se recomienda llevar a cabo las siguientes
actividades a la luz del día.
1. Instale el ocular de menor aumento en el prisma
angular.
2. Dirija el telescopio hacia un objeto fácilmente
reconocible. El objeto debe encontrarse en el
centro del campo de visión del telescopio.
3. Asegure la posición del telescopio con los tornillos
de ajuste.
4. Mire a través del buscador. Regule su posición
mediante la tuerca de regulación demnaera que
el objeto observado a través del telescopio se
encuentre en el centro del visor del buscador.
5. Después de regular el buscador, asegure su
posición mediante los tornillos de cierre.
OCULAR Y AMPLIACIÓN
El telescopio está equipado con distintos tipos de
oculares. La potencia de cada uno de ellos depende de
la distancia focal del espejo principal.
¡ATENCIÓN! El despiece de este producto se
encuentra en las últimas páginas de las instrucciones
p. 17.
P= A
B
P. Ampliación del telescopio
A. Distancia focal del espejo principal
B. Distancia focal del ocular
FUNCIONES Y EQUIPAMIENTO ADICIONAL
1. Lente Barlow – elemento auxiliar al ocular del
telescopio. Alarga la distancia focal del telescopio,
por lo que amplía adicionalmente la imagen del
objeto observado.
2. Filtro lunar – elemento auxiliar al ocular del
telescopio. Reduce la cantidad de luz que pasa
por el sistema óptico a través de los filtros de
polarización.
16 17
01.10.2019
ES
PRODUKTZEICHNUNGEN | PRODUCT’S VIEW | RYSUNKI PRODUKTU | NÁKRESY PRODUKTU | SCHÉMAS DU PRODUIT
LE ILLUSTRAZIONI DI PRODOTTO | LAS ILUSTRACIONES DE PRODUCTO
ZUSAMMENBAUEN DES PRODUKTS | ASSEMBLING THE EQUIPMENT | SKŁADANIE SPRZĘTU | SKLÁDÁNÍ ZAŘÍZENÍ
ASSEMBLAGE DU PRODUIT | MONTAGGIO DEL PRODOTTO | MONTAJE DEL PRODUCTO
5
6
7
8
9
10
11
12
13
14
15
4
3
2
1
16
17
18
18
18
I II
III IV V
VI VII
1
b
a
2
c
3. Ocular enderezador – sirve para incrementar el
aumento de un ocular durante las observaciones
terrestres y para restaurar la orientación
adecuada de la imagen del objeto observado.
Atención: Las lentes y los filtros se deben instalar
en el ocular en el extremo contrario al ojo.
LIMPIEZA Y MANTENIMIENTO
a) Para limpiar la superficie, utilice solo productos
que no contengan sustancias corrosivas.
b) Guarde el aparato en un lugar seco, fresco y
protegido de la humedad y la radiación solar
directa.
c) Para la limpieza, use un paño suave, sin polvo y sin
pelusa.
d) Almacene el producto en un lugar que no esté
expuesto a temperaturas altas o bajas, polvo o
agentes químicos.

18 19
01.10.2019
NOTES/NOTIZENNOTES/NOTIZEN

expondo.de
Our customers‘ satisfaction is our main goal!
Please contact us with questions AT:
Unser Hauptziel ist die Zuredenheit unserer Kunden!
bei fragen kontaktieren Sie uns bitte unter:
Naszym głównym celem jest satysfakcja klientów
W przypadku pytań prosimy o kontakt z przedstawicielem w danym kraju:
Naším hlavním cílem je spokojenost našich zákazníků!
V případě otázek nás prosím kontaktujte na:
Notre but premier est votre satisfaction!
pour toute question, contactez nous sur:
Nuestro objetivo principal es la satisfacción de nuestros clientes!
si tiene preguntas, por favor pónganse en contacto con nostros en:
I nostro principale obiettivo è la soddisfazione dei nostri clienti!
per eventuali domande per favore, ci contattino sotto:
CONTACT
expondo Polska sp. z o.o. sp. k.
ul. Nowy Kisielin-Innowacyjna 7
66-002 Zielona Góra | Poland, EU
e-mail: [email protected]
Table of contents
Languages:
Other UNIPRODO Telescope manuals

UNIPRODO
UNIPRODO UNI TELESCOPE 04 User manual

UNIPRODO
UNIPRODO UNI TELESCOPE 10 User manual

UNIPRODO
UNIPRODO UNI TELESCOPE 06 User manual

UNIPRODO
UNIPRODO UNI TELESCOPE 08 User manual

UNIPRODO
UNIPRODO UNI TELESCOPE 02 User manual

UNIPRODO
UNIPRODO UNI TELESCOPE 03 User manual

UNIPRODO
UNIPRODO UNI TELESCOPE 11 User manual

UNIPRODO
UNIPRODO TELESCOPE UNI TELESCOPE 07 User manual