UNIS Adda 2 GN User manual

USER’S MANUAL ADDA COLD 2 GN
Content:
1. Introduction, Intended use, Information, Safety
2. Technical specifications
3. Packing, transportation, positioning and installation
4. Operation und use
5. Cleaning and maintenance
6. Service, troubleshooting
1 INTRODUCTION, SAFETY
Introduction
The user’s manual is intended for the use of refrigerated counter called ADDA 2 GN self-
service. Read the following instructions carefully and keep it in safe place for future
consultations
Intended use
The refrigerated counter ADDA Cold 2 GN self-service is designed for presentation and sale of
cold food, it is not aimed as 24 hours cooler. Use the counter in technically perfect conditions
in conformance with its intended use described above with observing this user’s manual.
Information
The use of the cooling counter is very simple. There are controls at back side of the counter.
The counter is ready to plug in equipped with adjustable electronic controller, interior light
by each shelf, automatic defrosting and evaporation (drip tray).
Safety
There are following warning symbols used in the Manual.

This symbol means possible damage or danger or bodily harm if the instructions in this
manual are not carefully observed.
This symbol means electrical voltage.
Modifications
In case of any unauthorised modifications and changes to the counter the manufacturer
accepts no liability.
2. Technical specifications
Adda 2 GN self
Net Dimensions (L x W x H )
746 x 717x 845 mm
Packing dim. (L x W x H) :
87 x 83 x101 cm
Netto Weight (approx.):
98,0 kg
Brutto Weight (approx.):
121,0 kg
Voltage
230 V
Power:
340
Interior light:
3 x 13 W
Coolant type/filling weight
R134 A / 290 g
Temperature range:
+2 / + 6 °C
The counter is designed for ambient temperature of +25°C and max 60% relative humidity.
3. Packing, transportation and installation
Packaging, transportation
The counter is placed on a wooden pallet and protected using wooden battens. The counter
can be transported in its packaging using a fork lift or hand lift trolley. Don’t use hooks for
lifting and tipping. Fragile contents, handle with care. All the packing materials used can be
reused.

During transportation, positioning, cleaning and similar handling care should be
taken to avoid breaking the perplex front doors. Don’t tip the front perplex glass.
Positioning
After positioning to final place remove protected films and taps. Position the cabinet in a safe
and well arranged place. Take in mind free passage for shopping trolleys, prams and playing
children. Level the counter using adjustable feet.
Before installation read the user’s manual carefully. Remove the counter from its packing,
mount the separately supplied racks.
Never clean the cabinet using a water hose and similar. This may cause short-
circuiting.
Before first use
Before using the cabinet for the first time clean all glass parts and the interior space. For
cleaning the glass use glass cleaner. Clean the other parts using warm water and convenient
stuff depending on material. Don’t use abrasive materials or aerosols for cleaning the
stainless steel.
Let the cabinet stand upright for at least half and hour before placing the first products
inside.
4. Operation
The Adda counter is easy to operate. There are 3 controls see picture:
electronic control unit (1)
white lightening switch (2)
green MAIN On-off switch (3)
1
2
3

For more information about electronic control unit see manual instruction of the controller
supplied with counter.
Switch ON
Switch on the white light switch. Switch on the green main on-off switch. The electronic
controller is already programmed to store food within temperature range +2/+6°C. The
automatic defrost of evaporator starts 6 hours after the cabinet has been switched on and is
repeated every 6 hours (it takes 40 minutes). During the defrosting cycle the LED defrost lit.
Description of the control unit:
1. Display
2. LED compressor
If it is lit, the compressor will be on, if it is flashing a modification of working process will be
running or compressor protection will be running.
3. LED defrost - if it is lit, the defrost process will be running.
4. LED evaporator fan - if it is lid the evaporator fan will be running.
5. Setting button
6. LED alarm - if it is lit, an alarm or error will be running.
7. Button to decrease temperature
8. Button to increase temperature and/or to start the defrosting manually.
9. LED Celsius degree –if it is lit, the unit of measure of the temperature will be Celsius
degree.
10. LED Fahrenheit degree –if it is lit, the unit of measure of the temperature will be
Fahrenheit degree.

In standby mode the control unit displays the current temperature of the cooling area.
During defrosting, the measured temperature get blocked (remains the same). After the
completion, the measuring of the temperature goes back to normal mode.
Locking/unlocking the controller
To lock the control unit
Make sure no process is running, press and simultaneously for 1 seconds, the
display will show “Lo”1 second.
If the controller is locked you will not be allowed to:
turn on/off the controller through button ,
show the evaporator temperature
activate the defrost by hand
modify the working setpoint
To unlock the control unit
Press and simultaneously for 1 seconds, the display will show “Un” 1 second.
How to change the setpoint of temperature
Make sure the controller is not locked and there is no process running.
Press (LED compressor will flash) than press or in 15 s, than press .
Evaporator defrosting
The evaporator defrosting is made automatically in times interval pre-set in controller.
To activate manual defrost process
Make sure the unit is not locked and no process is running.
Press the button for 4 seconds. If after this time the pilot-light of defrosting lights up,
defrost is activated. Defrost will not start if there is not sufficient minimum temperature on
the evaporator.

Alarms
AL –Lower temperature alarm –check the cabinet temperature, control parameter A1
(manual of controller is needed)
AH –Upper temperature alarm - check the cabinet temperature, control parameter A4
(manual of controller is needed)
Errors
Symbol
Type of failure
Correction
P 1
Cabinet probe error
check the probe, check the
integrity of the probe, check
the connection instrument-
probe
P 2
Evaporator probe error
Turn off and turn on
the device. If the
alarm remains on, call
a service company.
Switch off
Switch off the main on/off button. Switch off the lightening switch.
Use
Before placing food inside prechill the counter (let the counter to reach the required cooling
temperature).
Don’t place warm (not chilled) food inside the counter.
Goods mustn’t exceed the edge of shelves.
It is necessary to leave min distance of 3 cm between each shelf.
Front air grids and back air exhaust must be always kept unobstructed, avoid placing goods
or any subjects in front of it. Improper placing of the goods will slow the air circulation and
increase the temperature of the goods in the counter. The counter is not intended for cooling
down the goods, but to maintain them at the temperature at which they are placed in the
case for its presentation.

5. Cleaning and maintenance
Remove the plug from the socket before any cleaning, maintenance process!
Use warm water and glass cleaner for cleaning the glass surfaces (only the side and top panel
are from glass).
For cleaning the lift self-service doors use warm water and very fine cloth to avoid scratching.
The display chase is made of stainless steel specially designed for contact with food products;
therefore it does not require extra maintenance. Do not use abrasive and corrosive cleaning
agents.
Never clean the cabinet using a water hose and similar. This may cause short-
circuiting.
Use a brush and vacuum cleaner for the cleaning process –the best method is to blow the
condenser with compressed air. Do not use hard or sharp objects which might damage or
destroy the condenser or the display case during cleaning. Apply the cleaning in regular
intervals (minimally once per month). The manufacturer/seller will not be responsible for any
damage resulting from unqualified handling. The manufacturer/seller is also not responsible
for any damage resulting from using the equipment for other purposes than it is
manufactured and intended for.
6. Service and troubleshooting
Replacing the light –dismount the lamp by pulling lengthwise from the holder. Mount the
new one lamp in reverse order.
If the counter doesn’t work properly please check:
-Is the counter connected to the main power?
-Is the power supply on? (please check fuses)
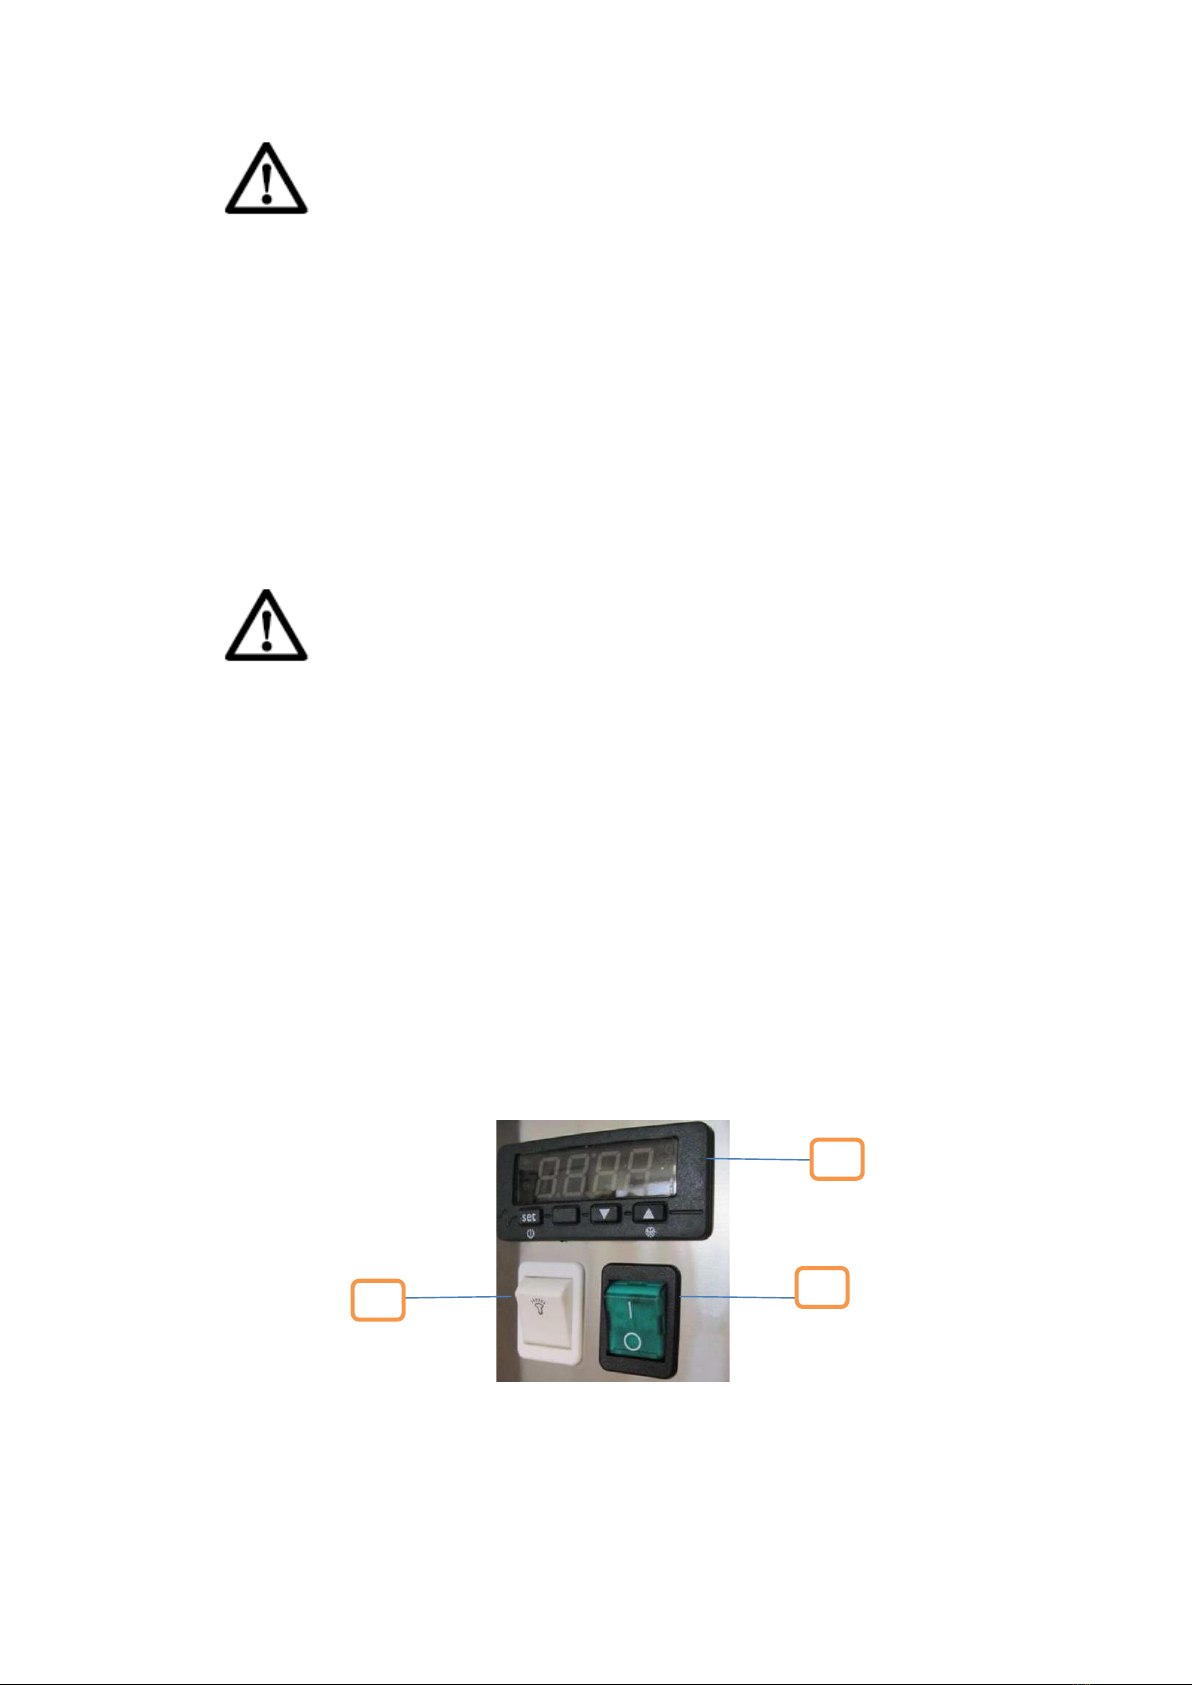
-Is the main on/off switch in correct position?
-Is the evaporator free of ice?
-Did you correctly load the counter with food?
In case of other malfunctions please contact your supplier and provide him the serial number
of the counter.

The manufacturer does not accept any liability for damage or injury cause by the failure to
adhere to these regulations or by not observing the usual caution or care in actions,
operation, maintenance or repair activities, even if not explicity described in this manual.
The manufacturer reserves the right of future improvements/changes and therefore it may
happen that your counter deviates in detail from what is described in this manual. For this
reason the given instructions are only a guideline for the installation, use, maintenance and
repair of the unit referred to in this manual.
This manual has been composed with the utmost care. The manufacturer shall, however, not
be held responsible for any mistakes in this manual or for any consequences thereof.
Table of contents
Other UNIS Commercial Food Equipment manuals
Popular Commercial Food Equipment manuals by other brands

Hendi
Hendi 265000 user manual

Oliver
Oliver 1708-N User's operating and instruction manual

ROBAND
ROBAND AUSTHEAT AHT860 instruction manual

Atosa
Atosa ATMG-24 operating instructions

Roller Grill
Roller Grill SBM 40 F INSTRUCTIONS FOUR USE AND INSTALLATION

Belshaw Brothers
Belshaw Brothers T Operator's manual