R E A D Y . S E T . O T E !
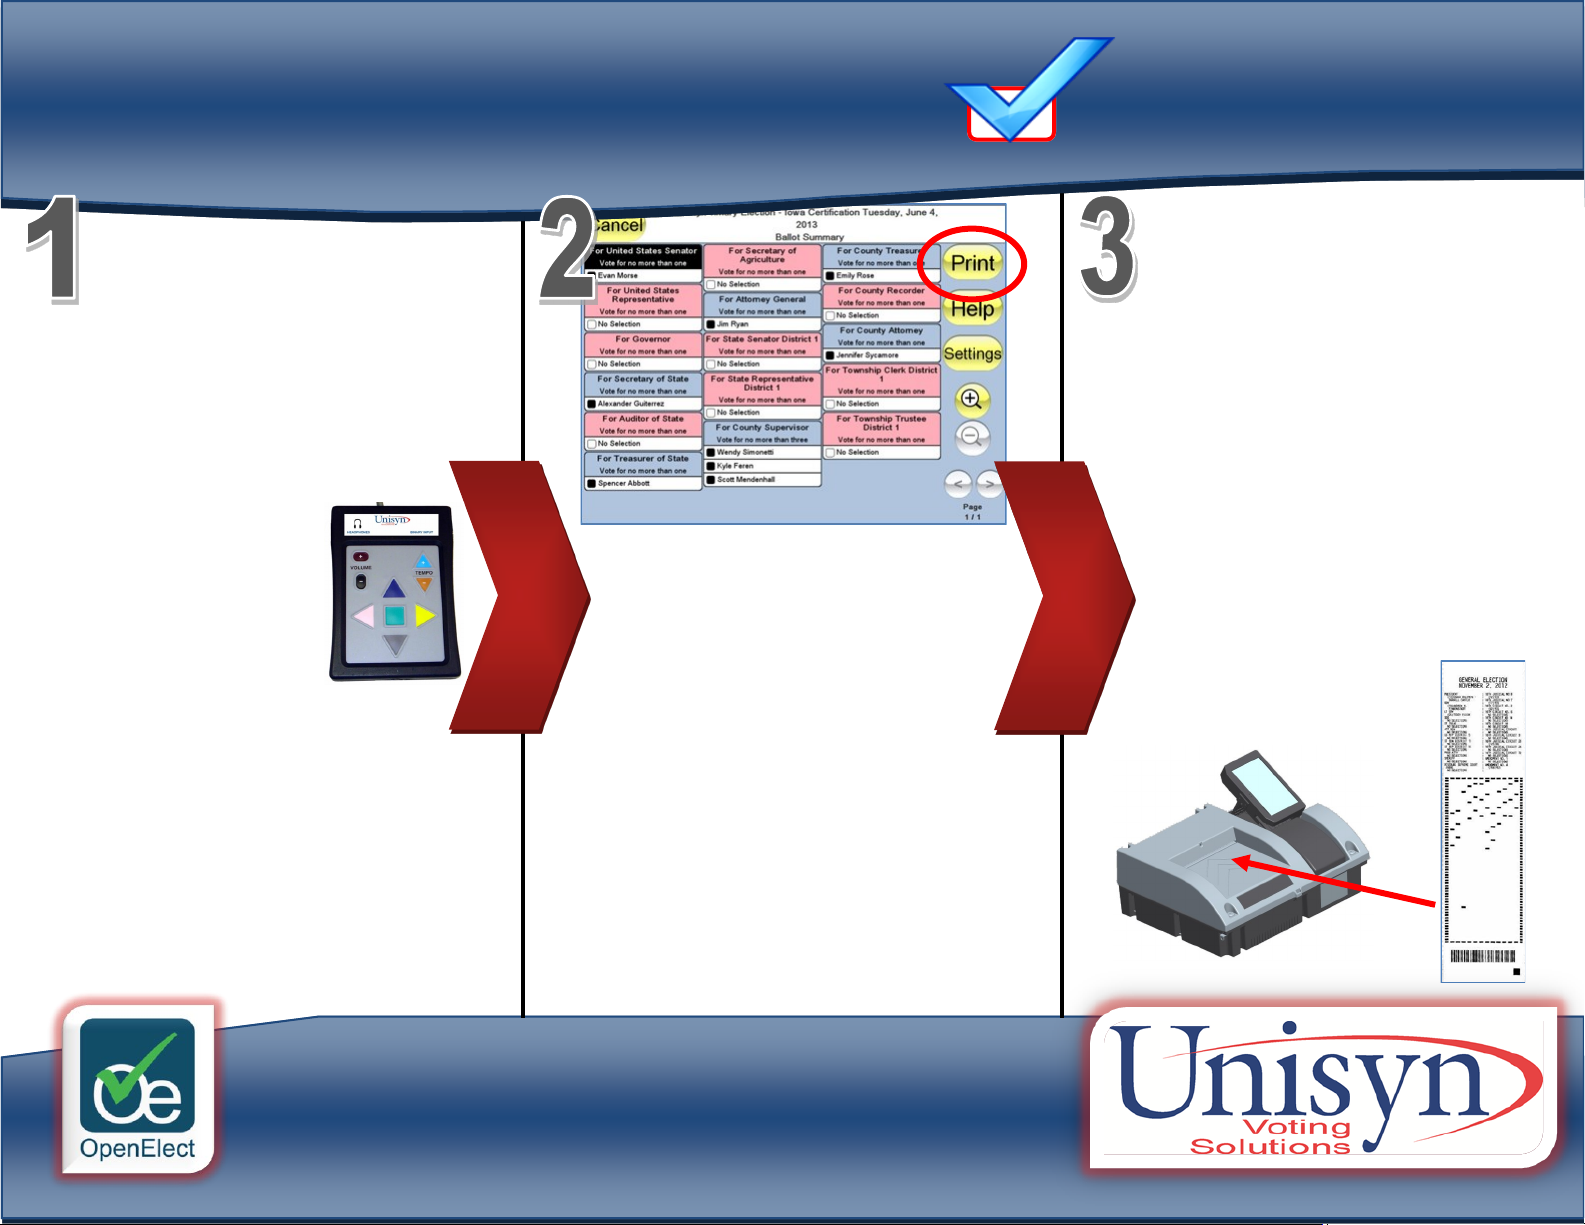
Review your printed ballot (Printed
during Step 2). If you noce an error
on your printed ballot, simply nofy a
polling ocial to have your ballot
spoiled and to vote a new ballot.
Once your ballot is correctly marked,
place it into the ballot box or OVO
Precinct Scanner.
NOTE: The scanner will take your bal-
lot in any orientaon.
You are about to vote on the OpenElect
Vong Interface or OVI using the ADA
keypad and headphones. If a polling o-
cial has not yet acvated the terminal for
you, please visit the registraon desk.
The OVI keypad allows the voter to
navigate the ballot by using the four
direconal keys which sur-
round a square “Select” or
“Enter” buon. The voter
can also adjust the volume
as well as the tempo.
Listen to all instrucons and
then To begin vong, use the key-
pad to navigate to the start buon
on the screen and then press the
square center buon. Navigaonal
instrucons will be given as you
move through the ballot.
Once you have reached the end of the
ballot, navigate to the “Done” buon.
At that me, a summary of your marked
ballot will be read. If any of your choices
are incorrect, simply change your vote
and return to the summary screen. Once
you have conrmed your selecons,
navigate to the “Print” buon and press
the square center buon to print your
ballot. Firmly pull your ballot towards
you to remove it from the OVI.
OVI ADA Vong Instrucons