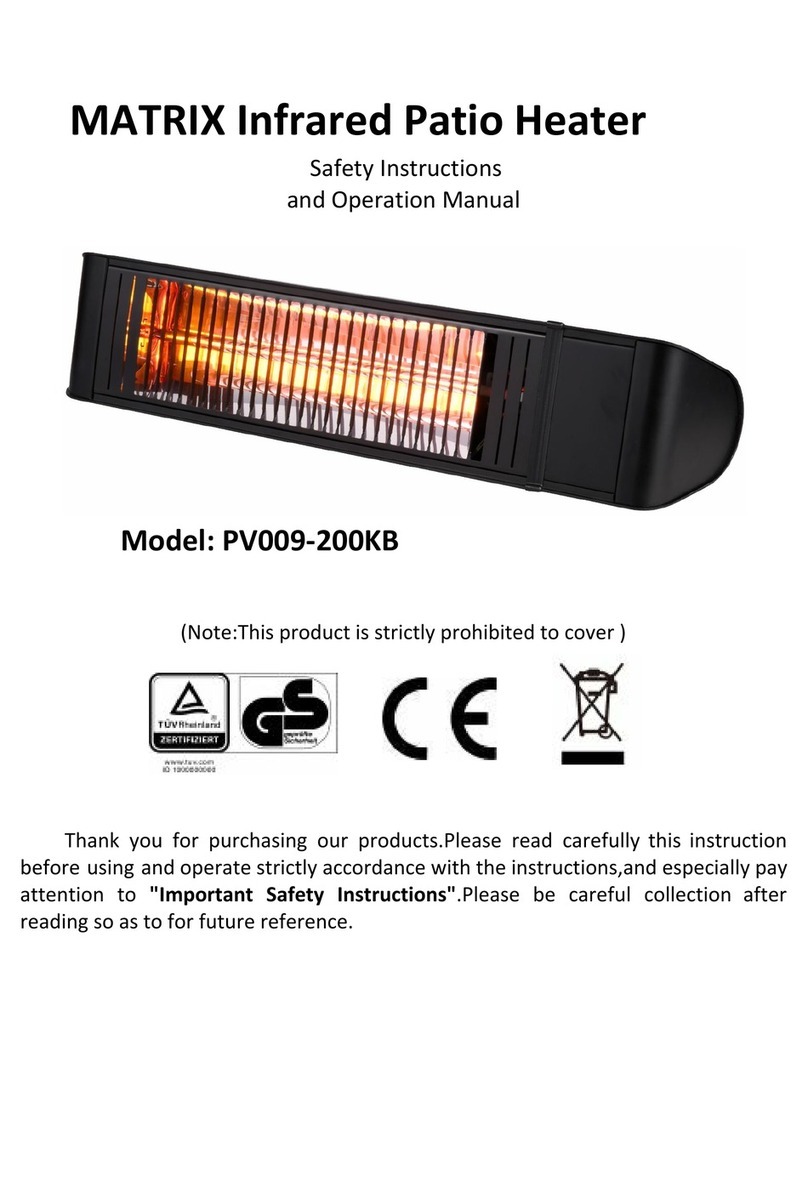
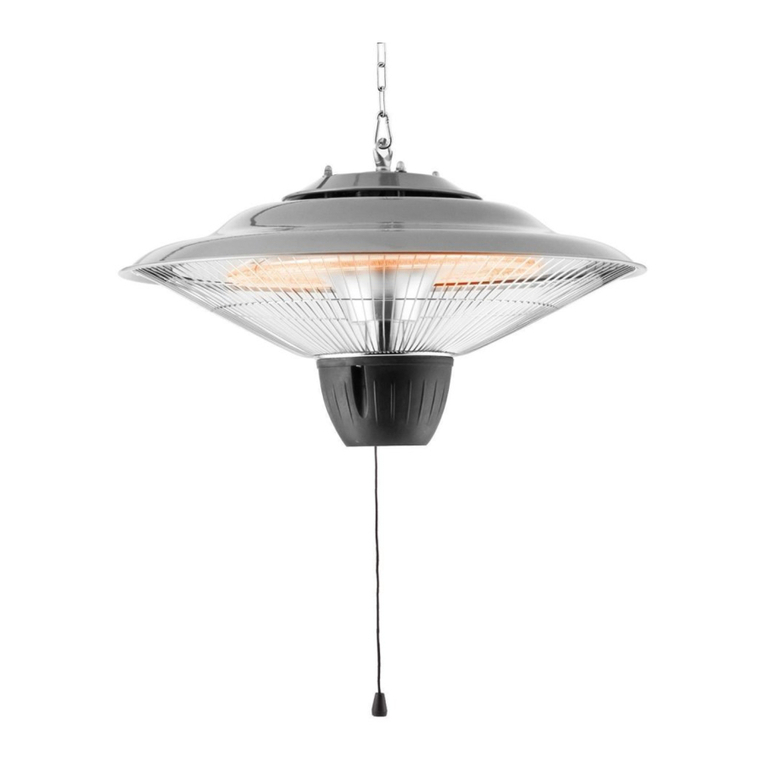
Universal 915HMXDB User manual

Owner's Manual
J
{:iet
-tt='' tr,',",r,,u'
@.
{#_ A Y#H1,,,, I
For outdoor use only
(outside any ertolcsure; :
Solamente Para lJso En Exremor*s [i
. (fuera de cualquier recinto) K
v28077

WARruING
FC}R YQUR SAFETY:
For outdoor use only
{eutside any enclosure)
WARrugruG
FGR YS|JR. SAFET'Y:
Do not store or use Qasoline or other
flammable vapors or liquiels in the
viclnity of this or any ether appliance.
WARruTNffi
FOR. YSTJR SAFETY:
This unit consurnes ea[r. Fr+vide tr inehz
of openlng for fl"esh aln for eacti 1,000
Btu/hr Srrpult {?"22 gmm'?/W of Input}"
Failure to foliow tlie manual's warninEs
and instructiqlms can result in seunere
personal imjnrry death, oa'pnoperty darmage"
WARF{gruG
FSR. YOIJR. SAFETY:
Improper installation, adjustment,
alteration, senvice or maintenance can
cause injury or propenty damage.
Read tire installation, operation and
rnaintenance instructions thoroughly
before installing or servicinE this
equiprcent.
KIARNING
FOR YOUR SAFETY:
If your smell gas:
a Shut off gas to appliance.
o Extinguish any oPen fiame.
c If odor continues, contact your gas
supplier or local fire dePartment'
WARNING
FOR YOUR SAFFTY:
o Gas leaks may cause a fire or explosion
whieh can cause serisus hodily injury
or death, or damage ilo ProPertY.
e You rnustfollsw all lea$<-checking
prneedure as outlined in Step I before
operating the unit'
* Neurer use an open flnm'le'to eheck for leaks.
WARNING
FOR YOUR SAFETY:
o Purchaser assumes all risk in the assembly
and operation of this unit.
Failure to follow this manual's warnings and
instructirrns can result in severe personal
injury, death or ProPefi damage.
e Do not use in an explosive atmosphere'
Keep heater away from areas where flam
rna ble I i qu ids, gasoli ne, va pors, on explosives
are stored or used'
wARrugruffi
FOR Y#I,JR $AFffiTY;
o Fuetsystems rnust be inst*lted by
qualified and licensed Personnel"
r Improper installatlems present hazards,
which ean lead to personai injurg or
propefi damage.
o Ptease contact your local gas supplier
for these serviees.

Table Of Contents
Safety First!
Assem bly Instn-lctions
Components and Hardware
Specifications -------
General Components & Features ________
1
4
5
A
-,'z-_=-\-
I-dfu
" *RffiF,'
\*Hraxrru x* t!
\ -" S)
-..--*. *-S
Additional Requirements _______ 6
Assembly procedures
Step 1 ________ 6
Step 2 -----:------ -------- 6
Step 3 _-_____- -l
Step + ---____- 7
Step 5 _-______ 7
Step 6 ___-____ 7
Step 7 B
Step B _-______ B
Operation : .
Before Turning Gas Supply On
Before Lighting ---------:--
Lighting -;-----:------,---------__ 9
Re-Lighting --------- .-- 11
Troubleshooting ------------
Maintenance ------
Storage
Service
Part List For Replacement---- --- 14
The use and installation of this product must conform to local codes,
fn abs*nce oflocal codes, use the national fuel and gas code,
ANSI 2.223r l/NFPAs4t storage and handting ofliguid petroteum
gases, A|IASI/NFPASB or CSA Bt4g!1, natural gas and propane
installation code,
Save these instructions fior
future reference.
If you arc assembling this unit
for someone else, give this
manual to him or her to save
for future reference.
11
T2
t<
:,@'i''
\l"- "\I

9afety First!
installation and repairs shauld be dcn* by a tualified service person.
P.ead and become familiar u;ith this enL!re manual,especiallv the
folklwing precautions,
if you are unsure cif anything in these lnstructions, STOP and
contact your ciealer fr:r ,rssistance
Caut"ion: Tkis appfia,nse rb fsr outdoar ase only{outside
any enafosare),^df*vaysnrake sure there is fresh air
entilation.
e Always inaintain at least l.8'tlearance {top) and 24"clearance
(side) from cnmbustible rnateriais.
e Always piac*: hr;uter ot-r a herd and level surface.
c Do not use if the wind velocity is greater than 10 miles per hour'
e Unit lvill operate at reejuced efficiency below 40'F (5'C)"
o It is normal fnr the heater to make a hissing sound at staft-up.
This will clecrease as the heater v\iarrs up,
o Keep srrrinklers and other water sources away fro,"n burner
and controls.
r. Always use e:<trenre cautlcn 'when near heater' Alet both children
and adults to tlie hazards of high temperatures, especially to avoid
burns or cioihing eatching fire.
r Young chiicjren anci pets shouid be carefully superuised when they
are in ihe ai'ea of heater.
r Do not hang ciothirrg cr other flammable materials either on or near
heater.
o Ceitain materials or iterns, when stored uncler heater, will be subjected
to radiant heat arrd cr:uld 'ne s*:riously damagecl.
e Do not alter heaier in any manrler.
o Inspect heater before each use. If a danragecl part is detected,do
not operate until an original equipment repiacement part has been
properly installed. Use of unauthorized parts rruiii void warranty and
create an unsafe condition.
r Prior to operating heater, replace any guards or proteetive devices
removed for servicing.
r During operation, do not touch burner assembly.The surface of
heater's emitter is very hot.
1
Before you do anylhing eise,
read and understand all
precautions in Safety firstl
WARNING
FOR YOI.,IR SAFETY:
r Purchaser assumes all risk in
the assembly and oPeration
of this unit.
Failure to follow this manual's
warnings and instructions can
result in severe Personal iniury,
death or property damage.
o Do not use in an expiosive
atmosphere. Keep heater awaY
from areas where flamnlable
liquids, gasoline, vapors/ or
explosives are siored or used'
Ceiling or Overhang

o After shutdclwn, do n*t touch burner assembly until heater has
completely conieeJ down (approximately 45 minutes after use).
o rhe appliance and lts individual shutoff valve must be disconnected
from the Q,:1s srippl! piping system during any pressure testing
of that systern at test pressures in excess of IIZ psig (3.5kpa).
o The appliance nrust be isolated from the gas supply piping system
by closing its incividual manual shutoff valve during any pressure
testing of the gas supply piping system at test pressures equal to
or less than rlZpsig (3.skpa).
o Always perforrn a leak test on gas connections whenever heater is
seruiced. Never use a flame to test for leaks. Do not smoke while
performing a ieak test,
Cautrbn: It is essential to keep the heater's valve
compattment, burners, and circulating air
passages clean,
o Spiders and insects can create a dangerous condition that may
damage heater of make it unsafe. Keep burner area clean of all
spiders, webs, or insects.
o Inspect heater before each use.
o Have heater inspected annually by a qualified service person,
o check heater immediately if any of the following conditions exist:
o The smell of gas in conjunction with extreme yellow tipping of
burner flames.
o Heater does not reach proper temperature.
Note: At temperatures iess than 40 F, heat output will be reduced.
o Heater's glow is excessively uneven.
r Burner makes popping noises during use.
Note: A sllght pop is normal when burner is extinguished.
r Carbon deposits may create a fire hazard. Keep dome and emitter
clean at all times.
' Do n*t clean heater with combustible or corrosive cleaners. Use
warm, soapy water.
o Do not paint radiant screen, control panet or top canopy reflector.
FOR YOUR SAFETY:
Beware of spiders
Spiders or small insects can get
into the burner tube or other
openings of your heater, and
spin webs or build nests, These
obstructions can lead to gas flow
problems. It is important to make
frequent inspections of these
areas and ciean them when
necessary,
Before operating your heater for
the flrst time, be sure to check for
obstructions that may have
occurred during shipment.
2

I{
]U
1D
I
.!
Ir
1_'
eaution: Liqwid propane (LP) gas is flammable and hazardous if
handied improperty, Become aware of the characteristics before
using any LP product'
o LF Characteristics - Fiammable, explosive, heavier than air-settles in low
areas,
o In its natural state, propane has no odor. For youl" safety, an odorant is
added that smells like rotten cabbage'
o Ccntact with liquid LP can cause freeze burns to skin'
o This heater is shipped from the factory for LP gas use only.
e use only Department of Transpoftation (DoT) approved "201b"" LP gas
cylinders (sarne as comrnonly used on gas grills) with Acme Type 1/QCC
safety valves. These valves can be quickly iCentifleC by their external and
internal threads,
Note:
o The cyiinder must oe provided lvith a shutoff valve termina tion in an
I a. ^^^ ^. ,^^1., ^,
Lp-gas suppry ryiinder valve outiet specified, as appiicabie, for connectiott
No, 510 in ihe standard for compressed Gas Cylinder Valve Outiet and
Inlet connections, ANSI/CGA-V- 1'
o The rylinder supply system must be arranged for vapor withdrawal.
e The cylinder usecj must include a coliar to protect the cylinder valve'
o Never use a cilinder witl': a damaged body, valve,collar or foot ring"
c When heater is not in use, turn Control Valve OFF.
o Always peform a leak test on gas connections whenever a cylinder is
connected (see Step 8). Never use a flame to test for leaks. Do not smoke
while performing a leak test'
'.'*l)*o. --'..' "'''
Nqte:
The gas regulator and hose
assembly is CSA approved.
3
Collar
,/
Body
/
I vatve
l
I
I
I
I
I
I
1 8"-1 9"
I
I
I
I
I
a
V
"20 lb." LP Cylinder
tt"t t'
'"*--r ..1.- pg91
NOte: rfre LP-gas supply cylinder (s) to
be used must be constructed and marked in
accordance with the specifications for LP-
gas cylinders of the U.S. Department of
Transpoftation (DOT).

Assembly Instructions
@Air Admittance
Fences
\/ji
,,1.i,"
2-6Psnsctor (O 810mm)
@Emitter
@Burner Base
@Gas Valve Controller
--i-Ofank Housing
i
i
j.
.d
;J
1--=--@support Post
!- @e"tuanized Gas Line
\,.
li'
/,1.-'lOStand
,S' ' i. '
[+-- @l
,,,,I-l-f\,.,
l*=4
l'l
j-i--
l";
\s-*:ajl
rt4 l,>
rfV'lr----
L/,1 ]l---*|- €)
t.,i l+il I :
IL _- J,
:'ilf: "','.
\.l ,,4i-
T
-I
FI
;61
*l
I
t_
II
Hardware
@
o 3 pcs castle nuts
f?
1l
\\,'v
@ll
r 3 pcs pins (90mm (L)) for reffector support
/\
r-\
\\-/l
\,/
o 6 pcs washers (O 8mm) for pins support
@
a
,l^ fr
(( )) l-+m
\-J/ | I
4 pcs bolts (M6x10 mm)forassembly
post and bumer
@O Ffmmm
o 6 pcs bolts (M6x35 mm) & nuts (O 6mm)
for connection of post and post brackets:
il-\ n
@il))ru
',:>=/J I I
r 3 pcs bolts (M8x16 mm) for connection of
post brackets and stand
. 1 pc open end wrench (10 & 13mm)
4

Specifications
Certifications:
CSA international requirement 5,90 US
Canadian national standard CAN 1-2.23-M82.
Rating:
Max. BTU: 37,500 (Btu/hr)
Heat range: Up to 20 foot diameter
Fuel: Use propane or butane gas onlY
Inlet gas supply Pressure:
Maximum - 10.5" W.C.
Minimunt - 7.0" W.C.
ntrte q|pgntng
Minimum permissible ga9 qupply pressure:120 PSI
Consumption : 4509/hr-87 }glhr
Weisht:
Stainless steel model G.W.20.0kgs (44.001bs)
Powder coated model G.W.22.2kgs (48.B4lbs)
Height: 2210 mm including stand
Safety Features: 100o/o Burner shut-off
L The whole gas system, hose, regulator, or burner should be inspected for leak before use,
5
For Canada: 0-2000Ft
(0-6i0m)
2000-4500Ft
(610-1370m)
Input rating 37,500 33,754
Orifice size l.92mm l.Bmm
Gas pressure manifold Main opening
11,0 in. W.C 1.92mm
280/300mm H2O 1.92mm

General components & features
Famiiiarize yourself with all components before proceeding. Refer to page 4 for Hardware and Components,
and page 5 for specifications.
Do NOT attempt assembly unless all components are available, If you believe a component is missing or damaged,
contact your deaier for assistance.
Note: A// hardware is mounted on a cardboard oack.
Additional Requirements ,
The following items are not included, but are necessary for the proper assembly of your heater. Do NOT l
attempt to assemble without proper tools. An open end wrench (10 &13mm) is necessary and is included in the I
parts bag.
Tools needed:
r Adjustable opening wrench (20cm /B" long)
r Slip joint pilers (23cm/9" long)
r Philips screw-driver w/ medium blade
r Teflon plumbing tape for joints
o Spray bottle of soap solution for leakage test
Assembly Procedures:
caution: You must follow all steps to properly assemble heater,
Step I
1.1 Put 3 pcs post brackets on each position on the stand as shown
in the picture.
1.2 Use 3 pcs bolts (MB x 16mm) to join the post brackets and stand.
Step 2
2.1 Put the post onto the top of 3 pcs post brackets.
2.2 Use 6 pcs bolts (M6x35mm) and nuts to connect the post to the
3pcs post brackets.
2.3 Tighten the bolts and nuts.
!2.1&2,2
S*
6

Step 3
3.1 Put the tank housing through the post'
Step 4
4.1 To secure the reflector support bolts on the emitter screen cap
with 3 pcs pins (90mm long) & 3 pcs washers (@Bmm)'
4.2 Connect the pins & washers to the ernitter.
4,3 Tighten the Pins.
Step 5
5.1 Fit the gas line nut into the gas inlet connector of burner,
5.2 Tighten the gas line nut and gas inlet thread'
5.3 Put the burner with gas line into the post'
5.4 Fix the burner base to the post by.4pcs bolts (M6x10mm),
s.1&5.2
'" '-,
+*,', *;$
Step 5
6.1 Check whether the connection of vertical post and burner are assembled as
instruction, and all bolts and nuts are tightened'
6.2 Put flat washer into the top of each burner/reflector support bolts '
6.3 Put reflector on top of the burner and passing through 3 pcs burner/reflec-
tor with supPorl bolts.
6.4 Fit washers into each support bolt and tighten each by castle nut'
$ 6'3
; qt!@s 1.
7

Step 7
7.I Bring up the tank housing and rest it on the post plate,
7.2 Fit the gas regulator rubber hose with the end thread of inlet gas steel pipe and tighten the nut.
7.3 Attach regulator to tank and complete attachment,
7.4 Put LPG gas tank into stand.
7.3.1
8.4
8.5
8.6
8.7
8.8
8,9
Step 8
Check for Leaks
B.1 Make 2-3 oz. of leak check solution by mixing one part liquid dishwashing soap
and three part water.
8.2 Turn gas source ON,
8.3 with the gas supply turned on, spray some soafr soluticn onto Gas Line and
Control Valve connections. .. "
Inspect the solutiorr at the connection is secure
If NO bubbles appear, then the connection is secure.
If bubbles appear, there is a leak
Turn gas source,OFF.
Loosen screw on Clip. :
Release Gas Line fitting from contro[ valve and re-attach makinq sure connection
is secure. '
8.10 Re-lighting Clip.
If you continue to see bubbles after several attempts, contact ycu dealer for
assistance.
Caution:
The Outdoor Heater has been checked at a// factory connectlons for leaks. Recheck a//
connections, as movement in shipping can loosen connections. Check for leaks even if
your unit was assembled for you at the stare.
I

A WARNING
^at psp ygUREFETT'
If at any tirne you are unable to
light flame and smell gas, wait 5
minutes to allow gas to dissipate
before attempting to light heater.
A wARNING
FOR YOUR SAFETY:
Do NOT touch or move heater for
at least 45 rninutes after use.
Aliow all burner elements to cool
before touching.
Operation
Caution: Do not attempt to operate heater antil you have
read and underctand alt preaution in seetion t"safety First'i
Before Turning Gas Supply On
o Your heater was designed and approved for ourdoor use only. Do
NOT use it inside a building, garage/ or any other enclosed area.
r Make sure surroundinq areas are free of combustible materials.
gasoline, and other flammable vapors or liquids,
I Ensure that there is no obstruction to air ventilation.
o Be sure the cylinder cover is clear of debris,
o Be sure any components removed during assennbly or seruicing
are replaced and fastened prior to starting.
Before Lighting
o Heater should be thoroughly inspected before eaeh use, and by a
qualified seryice person at least annually.
o If relighting a hot heater, always wait at least 5 minutes.
LrEnung
fo ttrrnon the heater
A, Turn ON the valve of tfre gas supplv cylinder completely.
B. Push Control Knob trN at the Off position then turn counter-
clockwise to i-ligh/Lig ht position "
C. Push the Control Knob IN and press the ignitor button several
times to light the burner, l-lold it in for 30 seconds" Release the
control knob after the buner lights,
r Flame is visible through Viewing Hole.
r The control knob can be released after the flame llghts. If the
flame does not light or it goes out, REPEAT STEP C'
Note:If a new tank has just been eonnected, piease allow
at lest one minute for the air in the gas pipeline to
purge out at the High/Light position.
D. Turn the Control Knob to switch to desired tenrperature position,
Note: If you experience any ignition problem, consult the
"Troubleshooting" on page 11.
9
--LKEI
'"wnJ
High/Light
:
@
Tnnifer
trt
"-.
@,
v
Igniter

Match Lightilg lu!ruggqry-
A. Turn cylinder v lve cn,
B' Push the Control Knob IN at the off position then turn counter to High/Light position and release,
c' using a long mateh. Light a long fireplace match (minimum 4" long) and insert it into Viewinq Hole.
D. Push the Contrr:i Knob IN and light the burner.
,. .\\
a-,
Viewing Hole
E' Flame will ignite and be visible. And continue to push control knob for 30 to 60 seconds after the flame is on.
Then release the Control Knob after flame rematn.
F. The flame wiil remain on, if not return to Step A.
Note: If flame fails to remain lighteci, all valves should be closed and a waiting period of at least 5 rninutes
should pass before attempting to light.
G. Turn the Control Knob to switch to desired temperafure position,
To Turn Off the heater
1. Turn the Control Knob clockyrise to Low Dosition.
2, Then press lighfly and turn the contror Knob to off position
3' Turn off the valve on the gas supply cylinder to shut down the heater conrpletely.
1' rhe whote gas system, hose, resura,",.,yl':It:,fo- inspected ror reak berore use,
2' Check the hose assembly for sign of extreme abrasion, cuts or wears,suspected areas should be leak
tested' If must be replaced rvith lhe one specified in the Part List Replacement in this owners manual.
3' Make sure the ventilation opening of the cylinder enclosure, controt compartment, burner and circulation
air passageways of the heater are free and clear of debris. If debris, spider or insect nests are found, clean
the holes with heavy duty pipe cleaner or compressed air.
4' Always keep a dry chemical fire e.rtinguisher readily available.For safety, always ailow a S-minute complete
shut off period before r*-iighting a hot heater.
5' Do not move the heater, or cover it with protectlve covei- after it has been turned off until the temperature
has cooled down.
Match
s
igniter"
10

Caution: Avoid inhaling fumes emitted from the heater's
first use. Smoke and odor frum the burning of oils used
in manufacturing will appear.Both smoke and odor will
dissipate after approximately 30 minutes, The heater
shou{d NOT produce thick black smoke'
NOte: It is ncrmai for the heater to make a hissing sound at staft-up. This
wiil decreases as the heater \ /arrns up'
When heater is ON:
Emitter screen will become bright red due to intense heat. The color is
more visible at night.
Burner will display tongues of blue and yeilow flame. These flames should
not be yellow or produce thick black smoke, indicating an obstruction of
airflow through the burners. The flame should be blue with straight yellow
tops.
If excessive yeilow flame is deteCed, turn off heater and consult the
"Troubleshooting" below.
Re-lightin
Turn Control Knob to OFF Position'
Wait at least 5 minutes to let gas dissipate hefore attempting to relight.
Repeat the "liElrting" steps on prior page'
Tfoubleshooting
WABN-I[.I€
FOR YOUR SAFE"TY:
Heater will be hot after use.
Handle with extreme care"
If the problems is: ,And this condition exists: Then do this
Burner wr:n't light
Burner flame is low
Gas pressure is low
Blockage in orifice
Have a professional check gas system
Clear blockaqe
Control knob is not in Hi posltion Turn control knob to Hi position
Gas pressure is low Have a professional check gas system
Supply hose is bent or kinked Straighten hose
Control knob fullY on Check burner and orifices for blockage
Emitter glows uneven
Note: Bottom 1" of emitter
normally does NOT glow
Gas pressure is low Have a professional check gas system
Stand is not on a level surface Place heater on a level surface
Carbon build-up Dirt or film on reflector and emitter Clean reflector and emitter
Remove blockaoe and clean burner
inside and outs:Ce
Thick black smoke Blockage in burner
11

Maintenance
To enjoy years of outstanding performance form your heater, make sure you
pefform the foilowinE maintenance activities on regular basis:
Keep exterlor surfaces clean:
Use warm soapy water for cleaning. Never use flammable or corrosive
cleaning agents.
while cleaning your unit, be sure to keep the area around the burner
assemhly cJry at all times. Do not submerge the control valve assembly,
If the gas control is submerged in water, do NOT use it , it must be
replaceel.
Air flow nrust be unobstructed. Keep controls, bui'nei', and circuratinq
air passageways clean. Signs of possible blockage include:
Gas odor with etreme yellow tipping of flame.
Heater does NOT reach the desired temDerature,
Heater glow is excessiyely uneven.
Heater makes popping noises,
spiders and insects can nest in burner or orlfices. This dangerous
condition can damage heater and render it unsafe for use. clean burner
holes by using a heavy-dqtV pipe cleaner. Compressed air may help
clear away smaller particles..
carbon deposits may creale a fire hazard, clean reflector and emitter
screen with warm soapy water if any carbon deposits develop.
Note: rn a salt-air environment (such as near an ocean), corrosion
occurs mot-e quickly than normal, Freguenily check for corroded
areas and repair tfiem promptty,
TIP:
Use high-quality automobile wax to help maintain the appearance of your
heater. Apply to exterior surfaces frorn the pole down. Do not apply to emitter
screen or dornes.
I wanxrnc,
FOR YOUR SAFETY:
o Do NOT touch or move heater
for at least 45 minutes after
o Reflector is too hot to touch.
Allow reflector to cool down
before touching.
!2

Storage
WARNING:
FOR YOUR SAFETY:
o Storage of an appliance indoors is permissible only if the
cylinder is disconnected and removed from the appliance.
r Cylinders must be stored outdoors in a well-ventilated area
out of the reach of children.Disconnected cylinders must
have threaded valve plugs tightly installed and must not be
stored in a building, garage or arly other enclosed area'
Between uses:
L. Turn Control Knob OFF.
2. Turn the LP tank valve OFF.
3. Disconnect LP tank,
4. Store heater upright in an area sheltered from direct contact with
inclement weather (such as rain, slee! hail, snow, dust and debris).
5. If desired, cover heater to protect exterior sufaces and to help
prevent build up in air Passages.'
Note:Wait until heater is cool before covering.
2.
3.
4.
5.
I urn Control Knob OFF.
Turn the LP tank valve OFF.
Disconnect LP tank and move to a Secure, well-ventilated location outdoors,
Store heater upright in an area sheltered from direct contact with
inclement weather (such as rain, sleet, hail, snow, dust and debris)'
If desired, cover heater to protect exterior sufaces and to help
prevent build up in air Passages,
Never leave LP cannister exposed to direct sunlight or excessive heat'
Note:Wait until heater is cool before covering'
CARBOl{ MOhloxlltf, H,^.zAr?.r
This appiiance c&n producen
carbon nronoxide lv!'r!ch has
nocdor.
Using it in an encloserl -<pace
can Killyou.
Never use this appliance in an
encloseei spa,:e sueh as a
camper, tent, car or home.
fioarucr
During periods of extended i
13

Service:
To learn how Lo service and procure pares for worn out, defective or damaged components contact your deaier for
assistance.
@utrbn: Ure only original quipment rcpfacement parts. ltre of unauthorizd parts or modifration ofp**
will vaid warrantyand create an unsfe condition,
Cauttbn: Always allow heater to coo! before attempting reruire.
Part List For Replacement
Description
Air Admitlance Fences
Tank Housing
Galvanized gatline-
3 pcs castle nut
3 pcs pins (90mm(L)) for reflector supporr
6 pcs washers (Bmm) fcr pins support
4 pcs bolts (M6xi0mm) for assembly post and burner
onof post and post brackes
3 pcs bolts (MBx16) for connection of post brackets and stand
1 pc open end wrench (10&13mm)
L4