URTON M2 User manual

2
MANUAL

The URTON M2 is a Large-Diaphragm-Tube-Microphone with switchable pat-
terns. It is manufactured with utmost care to produce it´s distinctive, warm
and brilliant sound. Handling high sound levels without annoying distortions
is yet another outstanding attribute. The URTON M2 is one high precision
instrument helping to create the special sound. Thus it demands special care
in handling. The URTON M2 uses a twin capsule with platinum diaphragms of
only 4μm gauge. The capsules are mounted on a shock absorber to prevent
subsonic distortions. An additional screen protects against moisture from
spittle occuring regularely during speech and singing performance. The tube
used is a highly selected pentode in a zero feedback circuit design. The output
transformer is specially designed and made for the URTON M2, it provides
even highest levels undistorted to the fully oating output.
Each URTON M2 is completely precision handcrafted in Germany by enthusi-
asts delivering utmost reliability, safety and audio performance, and sure it
meets all CE reg. Requirements -all parts have been specially selected by
URTON to do so. Exchanging any parts will NOT lead to a better performance,
so leave the electronics of your URTON M2 untouched.
Special tools are needed for opening a URTON M2. In case of failure please
contact your national distributor or Analog Audio GmbH.
How to use your M2:
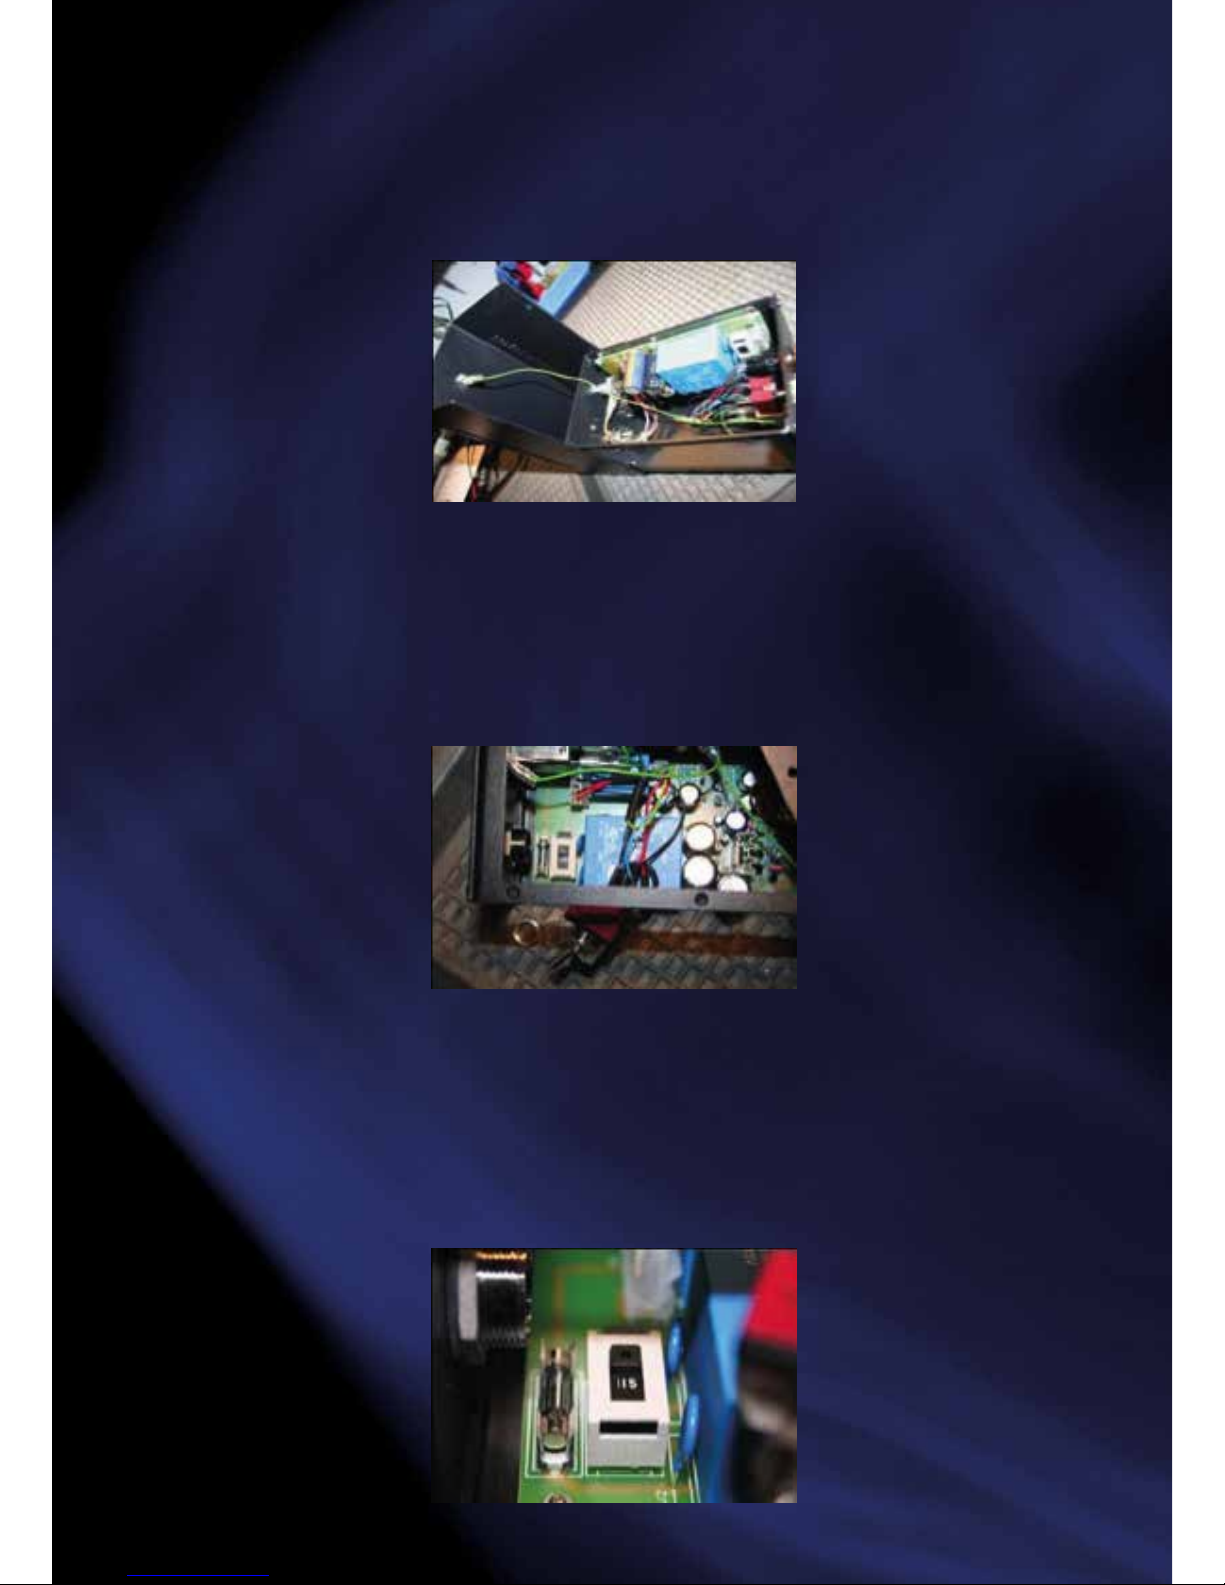
The mains line at power supply is set to 120 Volts for the US market normally,
and to 240 Volts for other countries. This should be shown at the nameplate.
Please verify the setting matching your local mainsvoltage. If changing of
mains voltage is needed (230 or 115 are selectable) please follow instructions
of extra instruction sheet. All condenser microphones are sensitive to humidi-
ty. In case your M2 goes from cold to warm environment, please let it sit open
and unconnected for 24 hrs in the new environment.

If moisture will cover the diaphragm (maybe spittle or condensation) the
output level of your M2 might decrease and the microphone gets noisy – in
extreme cases it quits working. After getting dry it should work again,
although frequent deposition to moisture of the diaphragms can leave a lm
which possibly will produce a dull sound.
• Always:
rst connect the M2 to the power supply (switched to OFF), then plug the
microphone cable from power supply to subsequent devices, then switch on
the power supply !!!
Under NO circumstances pull or insert plug from microphone to working
power supply - the M2 might suer severe damage!
The tube electronic of your M2 needs a minimum warm up time of 30 minutes
for best performance. Please allow your microphone to warm up and switch
on in time.
• Sound shall be provided to the M2 from the side – i.e. from direction of
the URTON logo (maybe also from rear in Figure of 8).
• The M2 has a built-in protection against spittle. Nevertheless we recom
mend to use a good pop screen to keep moisture away.
• The „Blue Mode“ (microphone screen shining blue) offers the patterns
Omni – Cardioid – Figure of 8. To be adjusted at the dedicated knob on
power supply front plate. The „Blue Mode“ can be used for all kinds of
recordings.
• The „Red Mode“ (microphone screen shining red) will activate only the
front capsule, the pattern will be Wide Cardioid. The pattern control at
the power supply is out of use. „Red Mode“ will turn the M2 into a distin
ctive sensitivity to proximity eect. The sound of the M2 will be strongly
related to that of the original vintage Neumann U47. „Red Mode“ may
be used especially for solist recordings (voice, strings etc.). The sound
will be saturated and fat, with powerful bass and rich silky highs. The
signal will provide a good penetration and high prole in mixdown.

• Switch for „Blue Mode“ and „Red Mode“ is located above the URTON
logo and right below thecircular ring of microphone screen. It can be
operated by a ballpen or similar. Do not use sharp toolshere.
• Please be aware output level in „Blue Mode” will be appr. 4 dB less than
in „Red Mode“.
• Please operate your URTON M2 only with the original URTON Power
Supply and URTON interconnecting cable, both provided with the
microphone.
In case your URTON might get weak one day, please contact your national
distributor or Analog Audio GmbH. Please do not try to repair your URTON on
your own. You probably will cause more damage to it.
We wish the very most and best succes with your URTON M2 microphone to
you! Enjoy this ne piece of German precision handcrafting! It will help you
making the best recordings ever…
Analog Audio GmbH
Jeisstraße 18
D - 82140 Olching
www.analogonline.de
www.urton-microphones.com

URTON microphones: Power Supply
The power supplies of all URTON microphones are identical. The URTON
power supply is carefully handcrafted meeting all CE specs and designed for
most possible safety, reliability and audio performance as well.
All components are choosen by URTON for this special purpose, there is no
need for the user to improve any characteristics by exchanging parts. Please
leave the power supply like it is, it will not get better.
Mains:
In standard conguration the power supply will be deliverd in 240 Volt set-
ting. To change to 120 Volt please follow these steps:
After necessary work is accomplished put together the whole power supply in
reverse order by using all of the parts. Fasten plastic nut of power indicator
hand-tíght but rm and power switch by using the inside hex nut. Make sure
no loose cables, parts or screws are left inside the housing, and nothing is left
over.
Do not re-connect power cord and mains before case is fully closed and
screwed and all steps of this manual are double-checked.
Before opening the housing disconnect power cord and mains from power
supply.
Unscrew 6 screws of housing by using a proper tting quality screw driver
(metric no 3 or 4). Use of cheap and improper tools will lead to ugly screw
heads and worn out srew slots.

Lift top of case carefully. Watch out not to damage the yellow-green ground
shielding cable inside while opening the housing. If disconnecting this cable
do not forget to connect again when closing the case.
The switch for changing mains voltage is located on print assy between blue
mains transformer and front of housing. Standard setting is 240 Volt AC. If
necessary switch to 120 Volt AC. Next to this switch the mains fuse is located,
protected by a clear plastic cap.
The switch for changing mains voltage is located on print assy between blue
mains transformer and front of housing. Standard setting is 240 Volt AC. If
necessary switch to 120 Volt AC. Next to this switch the mains fuse is located,
protected by a clear plastic cap.
Table of contents
Other URTON Microphone manuals