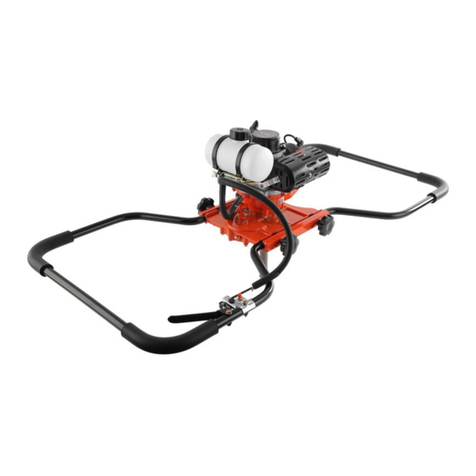
US Sander DRE10 User manual

US Sander LLC
READTHISBOOK
This book has important information for the use and safe operation of this machine. Failure to read this book prior to operating or attempting
any service or maintenance procedure to your US Sander machine could result in injury to you or to other personnel; damage to the machine or
to other property could occur as well. You must have training in the operation of this machine before using it. If you cannot read English, have
this manual explained fully before attempting to operate this machine.
All directions given in this book are as seen from the operator’s position at the rear of the machine.
For new books write to: US Sander, P. O. Box 335, Esperance, NY 12066
Operator’s Manual
!
!
Route20
Esperance,NY 12066
(518)-875-6124
FAX (518)-875-9942
US Sander U. S. WARRANTY
This US Sander Industrial/Commercial Product is warranted to be free from defects in materials and workmanship under normal use and service for
a period of one year from the date of purchase, when operated and maintained in accordance with US Sander Maintenance and Operations
Instructions.
This warranty is extended only to the original purchaser for use of the product. It does not cover normal wear parts such as electrical cable, V-belt, or
backing pad.
If difficulty develops with the product, you should:
(a). Return the complete tool, freight prepaid, to US Sander, Route 20, Esperance, NY, 12066 or an authorized repair center. Only repair center locations
are authorized to make repairs to the product under this warranty.
(b). If inspection shows the trouble is caused by defective workmanship or material, US Sander will repair the product and or replace any defective parts
without charge within a reasonable time after receipt of the product.
This warranty does not apply where:
-repairs have been made or attempted by others
-repairs are required because of normal wear and tear
-the tool has been abused, misused or improperly maintained
-alterations have been made to the tool
US Sander’s liability under this warranty is limited to repair of the product and/or replacement of parts and is given to purchaser in lieu of all other
remedies, including INCIDENTALAND CONSEQUENTIAL DAMAGES.
THERE ARE NO EXPRESS WARRANTIES OTHER THAN THOSE SPECIFIED HEREIN. THERE ARE NO WARRANTIES WHICH EXTEND BE-
YOND THE DESCRIPTION OF THE FACE HEREOF. NO WARRANTIES, INCLUDING BUT NOT LIMITED TO WARRANTY OF MECHANTABILITY,
SHALL BE IMPLIED.
DRE10 & DRE13
Radiator/Toe Kick Edger

OPERATOR SAFETY INSTRUCTIONS
AVERTISSEMENT ADVERTENCIA
WARNING
!
!
!
DANGERmeans: Severe bodily injury or death can occur to you or other personnel if the DANGER statements found on this machine
or in this Owner’s Manual are ignored or are not adhered to. Read andobserve all DANGER statements found in
this Owner’s Manual and on your machine.
WARNING means: Injury can occur to you or to other personnel if the WARNING statements found on your machine or in this Owner’s
Manual are ignored or are not adhered to. Read and observe all WARNING statements found in this Owner’s
Manual and on your machine.
CAUTION means: Damage can occur to the machine or to other property if the CAUTION statements found on your machine or in this
Owner’s Manual are ignored or are not adhered to. Read and observe all CAUTION statements found in this
Owner’s Manual and on your machine.
Failure to read the Owner’s Manual prior to operating or attempting any service or maintenance procedure
to your US Sander machine could result in injury to you or to other personnel; damage to the machine or to
other property could occur as well. You must have training in the operation of this machine before using it.
If you cannot read English, have this manual explained fully before attempting to operate this
machine.
Sanding/finishing wood floors can create an environment that can be explosive. The following safety proce-
dures must be adhered to:
Cigarette lighters, pilot lights and any other source of ignition can create an explosion when active during a
sanding session.All sources of ignition should be extinguished or removed entirely if possible from the
work area.
Work areas that are poorly ventilated can create an explosive environment when certain combustible
materials are in the atmosphere, i.e., solvents, thinners, alcohol, fuels, certain finishes, wood dust and
other combustible materials. Floor sanding machines can cause flammable material and vapors to burn.
Read the manufacturer’s label on all chemicals used to determine combustibility. Keep the work area well
ventilated.
Spontaneous combustion or an explosion can occur when working with sanding dust. The sanding dust
can ignite and cause injury or damage. Sanding dust should be disposed of properly. Always empty the
sanding dust into a metal container that is located outside of any building(s).
Hitting a nail while sanding can cause sparks and create an explosion or fire. Always
use a hammer and punch to countersink all nails before sanding floors.
Operating a machine that is not completely or fully assembled could result in injury or property damage. Do
not operate this machine until it is completely assembled. Keep all fasteners tight. Keep adjustments
according to machine specifications
DANGER:
DANGER:
DANGER:
DANGER:
DANGER:
DANGER:
Do not operate with belt guard removed. Serious injury may occur.
DANGER:
DANGER:
Electrocution could occur if the machine is used on a power circuit that repeatedly trips or is undersized.
Have a licensed electrician check the fuse, circuit breaker or power supply
Electrocution could occur if maintenance and repairs are performed on a unit that is not properly disconnected
from the power source. Disconnect the power supply before attempting any maintenance or service.
This tool has not been waterproofed; so do not use water on work piece surface or operate in water.
Use of this machine with a damaged power cord could result in an electrical shock. Do not use the machine
if the power cord is damaged. Do not use the electrical cord to move the machine. Hold tool by insulated
gripping surfaces when performing an operation where the cutting tool may contact hidden wiring or its own
cord. Contact with a “live” wire will make exposed metal parts of the tool “live” and shock the operator.
Electrocution or injury could occur if the power cord is run over or damaged by the sander. Keep the cord free
from under the machine to avoid contact with the sandpaper. Always lift the power cord over the machine.
Moving parts of this machine can cause serious injury and/or damage. Keep hands, feet, and loose clothing
away from all moving parts of the sander. Disconnect machine from the power source before changing the
abrasive or performing any maintenance. Do not operate unless all covers and guards are in place.
Never leave machine unattended while motor is running or connected to power source.
DANGER:
DANGER:
DANGER:
DANGER:
DANGER:
DANGER:

Failure to read and observe all safety statements found on your machine or in this Owner’s Manual can result in
serious injury or damage. Read and observe all safety statements. Make sure that all labels, decals, warnings,
cautions, and instructions are fastened to the machine. Get new labels from your authorized US Sander distributor.
Sanding dust can be airborne and can be breathed in while operating a sander. Always wear a dust mask while
operatingsanding equipment.Somedust createdbypower sandingandother constructionactivitiescontains chemi-
cals known ( to the state of California) to cause cancer, birth defects, or other reproductive harm. Some examples of
these chemicals are:
Lead from lead based paints, Crystalline silica from bricks and cement and other masonry products, and
Arsenic and chromium from chemically treated lumber.
Your risk from these exposures varies, depending on how often you do this type of work. To reduce your
exposureto thesechemicals;work inawell ventilatedarea,and workwithapproved safety equipment,such as those
dust masks that are specially designed to filter out microscopic particles.
Injury to the eyes and/or body can occur if protective clothing and/or equipment is not worn while sanding. Always
wear safety goggles, protective clothing, and a dust mask while performing any sanding operation.
Bodily injury could occur if power is applied to the machine with the power switch already in the “ON’ position.
Always check to assure that the power switch is in the “OFF” position before applying power to the power cable.
Any alterations or modifications of this machine could result in damage to the machine or injury to the operator or other
bystanders.Alterations or modifications not authorized by the manufacturer voids any and all warranties and liabilities.
Accessories must be rated at least 30% more than the speed recommended on the tool warning label. Wheels and
other accessories running over the rated speed can fly apart and cause injury
Check the backing pad carefully for cracks, damage, or deformity before operation. Replace cracked damaged or
deformed pad immediately. Damaged rotating parts can fly off and cause injury to you or other persons.
Servicing of this unit must always be referred to an authorized US Sander distribu-
tor.
Pay attention that the wheel continues to rotate after the tool is switched off.
WARNING:
WARNING:
WARNING:
WARNING:
WARNING:
WARNING:
WARNING:
WARNING:
WARNING:
Do not leave tool running. Operate the tool only when hand-held
WARNING: Use of this machine to climb on could result in injury or damage. Do not use this machine as a step or furniture.
Serious damage to the floor can occur if the machine is left running in one spot while the sanding disc is in contact
with the floor. To avoid damage to the floor, do not dwell while lowering or raising the sanding disc. Always sand
with a constant motion and pressure.
Do not rest machine on sanding disc. To do so may cause a flat spot and reduce the quality of performance. Tip
machine back or rest on side when not in use.
Do not sand metal surfaces. Watch out for flying sparks. Hold the tool so any sparks or debris will fly away from
you and other persons or flammable materials.
Damage could occur to the machine if not properly kept in a dry building for storage. Store the machine in a dry
building.
Keep hands away from rotating parts. Use the grips provided. Hold the tool firmly.
CAUTION:
CAUTION:
CAUTION:
CAUTION:
CAUTION:
CAUTION:
SANDINGCUTSANDSANDPAPER
Initial Cut
The purpose of the initial cut is to remove old finish and gross imperfections on the floor surface. A coarse
abrasive should be used.
If glazing, loading, or burning takes place immediately into an initial cut, select a
coarser abrasive. If this should occur during an initial cut, the abrasive has dulled and must be replaced.
Final Cuts
The purpose of a finishing cut is to remove the scratches produced during the initial cut. Use a fine (60 -80
grit) grain abrasive.If the surface remains rough after a finishing cut, it may be necessary to use an even
finer grain of abrasive (80 -100 grit). Care should be taken in selecting the grit size of the abrasive. A very
fine grain will close the pores on a wood floor making admission of a stain difficult.
For removing gross imperfections and restore evenness to
old flooring. To remove build-up of paints and varnishes.
For first sanding of new flooring (maple, oak).
For removing minor imperfections and finishes from old flooring
For initial cut on new flooring (oak, walnut). For removing minor
For first sanding of new flooring (cedar, pine, fir) For clean-up of 16 grit.
12 grit
16 grit
20 grit
24 grit
30 grit
36 grit
40 grit
50 grit
For clean-up from initial cut 36 grit.
60 grit
Grit Use
For final sanding of certain hardwoods. For clean-up of initial cuts (50 grit).
80 grit
For final sanding of certain hardwoods and conifers where a
smooth surface is desired.
100 grit
For final sanding of certain conifers
For final sanding of certain conifers where a smooth surface is
desired for surface roughening between coats of finish.
120 grit
150 grit
imperfections and finishes from old flooring.
Grit Use

1. Familiarize yourself with the machine. Read all danger, warning, and caution statements and the Owner’s Manual before operating this
machine. If you or your operator cannot read English, have this manual explained fully before attempting to operate this machine.
2. Remove screw and abrasive retainer. Center abrasive on backing pad and secure with abrasive retainer and screw. Use provided wrench
to tighten paper screw (Figure 2)
MachineSetup
!
OPERATINGINSTRUCTIONS
!
1. Move machine to the location of your work. Set any exposed nails with hammer and punch to avoid encounter with abrasive.
Bodily injury could occur if power is applied to the machine with the power switch already in the “ON” position. Always check to assure
that the power switch is in the “OFF” position before applying power to the power cable.
WARNING
2. Make sure the control switch is in the “Off’ position then connect the supply cable to an appropriately grounded fused circuit.
3. With the machine in the reclined position firmly grasp both handles and pull the control switch to the “ON” position.
4. Gradually lower pad to surface intended for sanding. Make sure the machine is in motion while the pad is engaged with the surface to be
sanded. You may use broad circular motion as you sand along the length of the surface or your may use a combination of forward and sideward
motions. In time you will develop your own technique to optimize coverage. It is advisable to not add effort to the pad as this may lead to “nosing
in” or “tipping” which produces grooves or lines on the surface.
5. When replacing abrasive or sanding operation is completed, return machine to reclined position, release the control switch to “Off” then
disconnect the motor pigtail from the supply cable.
DANGER:
Failure to disconnect the supply cable from machine whenever servicing, or replacing abrasive could result in electrocution or severe injury.
Never leave machine unattended while the supply cable is connected.
!*Donot operatewithbeltguard removed.Seriousinjurymay occur.
DANGER
!Failuretoperformmaintenance at recommended intervals may voidthewarranty.
CAUTION
ROUTINEMAINTENANCE
CarbonBrushes
Havethe carbon brushesreplacedat least every500
hours and more frequently under heavy use.
Power switch
DREM18
VBelt
For 10” # 3L250
For 13” #
7” Flexible Backing Pad
DRE017
Setof brushes
DREM50
Bearing
DREM32 Padaxel
DREM03
5” Pulley and pad
with rubber
DRE015
Brushcap
DREM51
Handle Knob
DRE20
Power cord
DREM17
Motor pulley
DRE11
Formoreparts andinformation
call US Sander at 1866 USSANDR
1(866)-877-2637
Caster
DRE05
Motor
DRE50
Trigger Switch
DREM52
VariableSpeed
Switch
DRE53
Side Handle
DREM54
Vacuum
Flange
DRE41
DriveBelt
For 10” 3L250
For 13” 3L310
Paper
wrench
DRE60
Paper Nut
DRE61
Paper Bolt
For 7 “ DRE63
For 5” DRE64
*Belt Cover
For 10” # DRE40-10
For 13” # DRE40-13
This manual suits for next models
1
Table of contents
Popular Tools manuals by other brands

Hakko Electronics
Hakko Electronics FM-204 quick start guide

Toku
Toku THA-2BRH19X50 manual

Garland
Garland 20Vx2 122 instruction manual

Central Pneumatic
Central Pneumatic 98672 Set up and operating instructions

Hilti
Hilti DX 351 BTG operating instructions
Chicago Pneumatic
Chicago Pneumatic PHB 3-14 operating instructions
