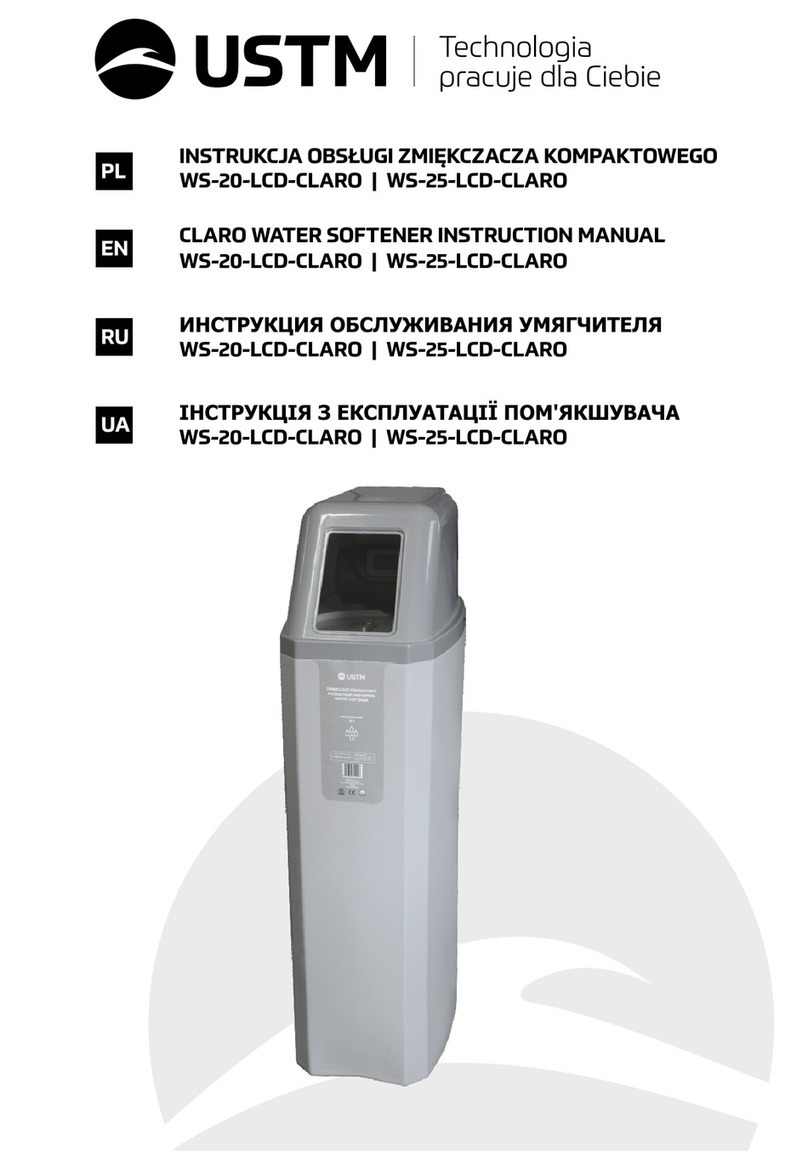
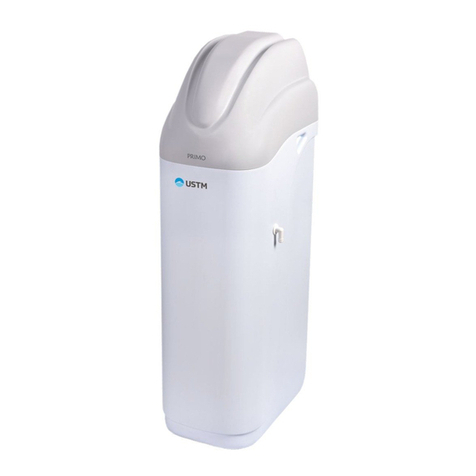
USTM LOTUS User manual

User's manual for water softeners
with 85SE control valve (FUTURA, LOTUS)
EN
Technology
works for you

1. Introduction 1
2. General description 1
3. Technical parameters 1
4. Parts list 2
5. Installation 2
6. Programming 3
7. Start-up procedure 8
8. Adjusting treated water hardness 10
9. Salt level sensor and free chlorine generator (Lotus softener only) 11
10. Holiday mode 14
11. Troubleshooting 15
6.1. Button definition 4
6.2. Programming mode 4
6.2.1. Data input procedure 4
6.2.2. Time setting 5
6.2.3. Setting language and region 5
6.2.4. Setting feedwater hardness and number of people 6
6.2.5. Setting regeneration mode 6
6.2.6. Setting the time of regeneration 7
6.2.7. Setting regeneration frequency (in days) 7
6.2.8. Setting the amount of treated water 7
6.2.9. Setting cycles duration 8
6.2.10. Restoring defaults 8
Table of Contents

1
1. Introduction
2. General description
You have just purchased one of the finest water conditioners on the market.
At UST-M we understand that the quality of water treatment products is an investment in your family
health and well-being. Realizing this fact we do not just sell products, we sell quality you can count on.
That is why in our warranty you will find no fine prints, which are usually the most important for the
Customers.
UST-M warranty is clear, straightforward and comprehensive.
Water softeners with automatic controller are dedicated to improve water quality, especially to lower
its hardness. Water considered „hard” contains large amount of minerals (calcium and magnesium
compounds). They can precipitate creating scale. It can narrow pipes diameter, limiting or in some cases
even blocking the flow. Scale deposits on the heating elements increase the energy consumption for
water heating.
Hard water can also lead to water supply installation and household appliances damages, which
removal can be expensive. Moreover, hard water increases detergent consumption and creates stains
on fixtures.
UST-M’s water softeners soften water so effectively thanks to the usage of high quality ion exchange
resin. They are equipped with by-pass allowing easy installation. Competitive price in combination with
low exploitation costs make this softener an excellent choice.
The softener has been approved for use by the National Institute of Hygiene.
3. Technical parameters
nTest pressure ................................... 350 psi (24.15 bar)
nWorking pressure ........................... 45 ~ 82.5 psi (3 ~ 5.5 bar) zalecane 4 bar
nWorking temperature ................... 4°C ~ 30°C
nDistributor diameter ..................... 1.05” (26.7 mm)
nPower supply ................................... Input: AC 110/240 V; 50/60 Hz
n Output: AC 12V 650 mA
nTank thread ........................................ 2.5” NPSM
nConnections inlet/outlet. .............. 1”, 3/4”, 1/2” (PPR, PPO, mosiądz)
nDimensions ......................................... Futura: 30 x 52 x 111 cm
Lotus: 33 x 52 x 105 cm

2
4. Parts list
5. Installation
Before installation make sure the package contains all parts. The package should contain:
nWater softener
nTransformer
nInstruction manual
nBy-pass
nHex key
n1” coupling
Before installation please read this manual carefully and comply to all safety precautions related to
starting-up and operation. In case of any questions please contact the dealer or the manufacturer.
Before installation remove all parts out of the box. Check if the device has not been damaged during
transport. All comments should be reported to the seller immediately.
The device should be removed from the box carefully. The softener can be heavy, so when carrying,
grab it "from the bottom". It is forbidden to move the device grabbing hoses, by-pass and other delicate
parts. Avoid moving across the floor. It is forbidden to drop the device, putting it on sharp or angular
edges and turning upside-down, because this may lead to permanent damage of the softener. The
device should be transported only in an upright position, otherwise it may damage the controller.
When installing the softener:
- make sure you have the knowledge or hire a professional
- make sure the placement area is clean, flat, stable and it can withstand the load of the softener filled
with water and salt
- make all connections according to the local laws and regulations
- to seal all threaded, gasket-free connections use PTFE tape only. Using tows is prohibited and may
result in connections damage.
Softener must be preceded with at least 50 micron rating sediment pre-filter (eg. UST-M’s PS or PP).
Drain hose and brine overflow hose should be connected to the sewage system separately
using siphon and air gap, in order to prevent the backflow of odors and bacteria inside the
device.

3
input
output
inputoutput
by-pass
flexible
hoses
8bar
pressure limiting valve
pre-filter
alternative exit to the garden
input
floor drain
(to the sewage
system)
brine overflow
drain hose
air gap
output
inputoutput
by-pass
flexible
hoses
pressure gauge
210-230V
water
softener
Drain hose must be installed on drain elbow using a clamp.
Installation scheme.
6. Programming
Head is controlled by a simple software. Large LCD display shows basic informations, such as:
n Time and date
n Water flow
n Regeneration mode
n Date of the previous regeneration
n Volume of water remains until the next regeneration
ATTENTION! THIS SOFTENER WORKS ONLY ON UP FLOW MODE.

4
6.1 Button definition
6.2 Programming mode
6.2.1 Data input procedure:
MENU SET®EN UP+ DOWN-
MENU SET®EN p/+ q/-
The controller is equipped with 4 buttons.
n MENU button
n Is used to enter or exit the main menu
n Pressing and holding for 3 seconds will unlock
the keyboard
n SET/REGEN button
n Is used to select mode or to confirm the
settings
n Pressing and holding for 3 seconds will start
manual regeneration
n UP and DOWN buttons
n Are used to increase/decrease current value
n Are used to move to the next/previous menu
nUnlock the keyboard by pressing and holding the MENU button for 3 seconds
nPress the MENU button to enter the main menu
nPress the UP or DOWN button to select desired parameter
nPress the SET/REGEN button, current value will start to flash
nPress the UP or DOWN button to change the values
nPress the SET/REGEN button to save the settings
nPress the UP or DOWN button to select another parameter
nRepeat these steps until all parameters are set.
nPress the MENU button to exit the main menu
ATTENTION! Only flashing values can be changed
If no buttons are pressed for 1 minute, the controller will exit the programming mode.
If no buttons are pressed for 3 minutes, the keyboard will be locked.
When you first connect the device to the power supply, controller needs
approximatelly 2 minutes to start. During this time a statement:
„System configuration, please wait” is shown on the screen.

5
6.2.2 Time setting
nUnlock the controller by pressing the MENU button for 3 seconds
nPress the MENU button, select TIME using the UP/DOWN buttons
nConfirm by pressing the SET/REGEN button
nPress the SET/REGEN button, to activate selected digit
nSet current hour using the UP/DOWN buttons
nConfirm by pressing the SET/REGEN button
nPress the DOWN button
nPress the SET/REGEN button
nSet minutes using the UP/DOWN buttons
nConfirm by pressing the SET/REGEN button
nPress the DOWN button
nPress the SET/REGEN button
nSet current month using the UP/DOWN buttons
nConfirm by pressing the SET/REGEN button
nPress the DOWN button
nPress the SET/REGEN button
nSet current day of a month using the UP/DOWN buttons
nConfirm by pressing the SET/REGEN button
nPress the DOWN button
nPress the SET/REGEN button
nSet current year using the UP/DOWN buttons
nConfirm by pressing the SET/REGEN button
nPress the MENU button
Time
nSet METRIC or US GALLON using the UP/DOWN buttons
nConfirm by pressing the SET/REGEN button
nSelect LANGUAGE using the UP/DOWN buttons
nConfirm by pressing the SET/REGEN button
nSelect appropriate language using the UP/DOWN buttons
nConfirm by pressing the SET/REGEN button
nPress the MENU button
6.2.3 Setting language and region
nPress the MENU button
nSelect REGION/LANGUAGE using the UP/DOWN buttons
nConfirm by pressing the SET/REGEN button
nSelect REGION using the UP/DOWN buttons
nConfirm by pressing the SET/REGEN button
Region
Language
System configuration
please wait

6
6.2.4 Setting feedwater hardness and number of people
After checking the water hardness using a droplet tester, convert it from
the German degrees of hardness (dH) into ppm using the following
formula:
dH x 17.8 = PPM
Hardness
People Number
nPress the MENU button
nSelect HARDNESS&PEOPLE using the UP/DOWN buttons
nConfirm by pressing the SET/REGEN button
nSelect WATER HARDNESS using the UP/DOWN buttons
nConfirm by pressing the SET/REGEN button
nSet feedwater hardness by setting every following digit using
the UP/DOWN buttons
nConfirm by pressing the SET/REGEN button
nPress the MENU button
nSelect PEOPLE NUMBER using the UP/DOWN buttons
nConfirm by pressing the SET/REGEN button
nPress the SET/REGEN button, to activate selected digit
nSet number of people using the UP/DOWN buttons
nConfirm by pressing the SET/REGEN button
nPress the MENU button twice
Settings
Regeneration
mode
6.2.5 Setting regeneration mode
Futura can operate in the following regeneration modes:
Calendar clock - controller will start regeneration after a specified number
of days
Meter immediate - controller will start regeneration immediately, treating
specified amount of water
Meter delayed – controller will start regeneration after treating specified
amount of water
Meter override (recommended) - controller will start regeneration at a
specified time, after treating specified amount of water.
nPress the MENU button
nSelect ADVANCED SETTINGS using the UP/DOWN buttons
nConfirm by pressing the SET/REGEN button
nSelect MANUAL SETTINGS using the UP/DOWN buttons
nPress and hold the SET/REGEN button
nSelect REGENERATION MODE using the UP/DOWN buttons
nConfirm by pressing the SET/REGEN button

7
6.2.6 Setting the time of regeneration
nPress the MENU button
nSelect REGENERATION TIME using the UP/DOWN buttons
nConfirm by pressing the SET/REGEN button
nPress the SET/REGEN button, to activate selected digit
nSet the hour regeneration starts using the UP/DOWN buttons
nConfirm by pressing the SET/REGEN button
nSelect minutes using the UP/DOWN buttons
nConfirm by pressing the SET/REGEN button
nSet the minutes regeneration starts using the UP/DOWN buttons
nConfirm by pressing the SET/REGEN button
nPress the MENU button
Time
Regen
nSelect „METER OVERRIDE” (recommended) using the UP/DOWN buttons
nConfirm by pressing the SET/REGEN button
nPress the MENU button
6.2.7 Setting regeneration frequency (in days)
nPress the MENU button
nSelect REGENERATION DAYS using the UP/DOWN buttons
nConfirm by pressing the SET/REGEN button
nPress the SET/REGEN button, to activate selected digit
nSet number of days between regenerations using the UP/DOWN
buttons
nConfirm by pressing the SET/REGEN button
nSet minutes using the UP/DOWN buttons
nConfirm by pressing the SET/REGEN button
nPress the MENU button
Regen
Days
Regen
Time
6.2.8 Setting the amount of treated water
The amount of water which can be treated, can be calculated using the following formula:
1263.8 / FEEDWATER HARDNESS (EXPRESSED WITH PPM).
People
Number
nPress the MENU button
nSelect PEOPLE NUMBER by using UP/DOWN buttons
nConfirm by pressing the SET/REGEN button
nSet amount of water to be treated before regeneration, set every
following digit using the UP/DOWN buttons and confirm using
SET/REGEN buttons
nPress the MENU button

8
6.2.9 Setting cycles duration
nPress the MENU button
nSelect REGENERATION CYCLE using the UP/DOWN buttons
nConfirm by pressing the SET/REGEN button
nSet the time of each cycles according to the values listed
below:
Data input method is the same as for setting the amount of water.
Recommended duration of each cycle is:
nbackwash 1 - 06 min
nbrine - 50 min
nbackwash 2 - 06 min
nrefill - 8 min
nPress the MENU button – softener is now in automatic operation mode.
Regen
Cycle
15
6.2.10 Restoring defaults
nPress the MENU button
nSelect RESTORE DEFAULTS using the UP/DOWN buttons
nConfirm by pressing the SET/REGEN button
nPress the MENU button 3 times
ATTENTION! Skip this step if the device works properly.
nInitiating this mode will delete all settings and return to the
factory defaults
Restoring
defaults
7. Start-up procedure
nSet the by-pass valve in:
nINLET OPENED, OUTLET CLOSED.
nVERY SLOWLY open the feedwater valve by ¼ turn and wait
until the tank with the resin will be filled with water.
nAfter filling the tank with water, open the valve to the
maximum.

9
nUnlock the controller by pressing and holding the MENU button for 3
seconds
nPress and hold the SET/REGEN button
nConfirm by pressing the SET/REGEN button
nSelect IMMEDIAT using the UP/DOWN buttons
nConfirm by pressing the SET/REGEN button
nPress the MENU
nSkip „BRINING” by pressing the SET/REGEN button
nPour 12kg (half of bag) of salt to the salt storage tank
nSet the by-pass valve in:
ninlet open, outlet open
nOpen a tap in a possibly highest point of the object and wait for
venting.
nWait until the end of
BACKWASHING 1. Time remaining is
shown on a display.
nWait until the end of RINSING.
Time remaining is shown on a display.
nWait until the end of REFILLING.
Time remaining is shown on a display.
nWait until „preparing to work” message disappear.
Amount of water
Delay
Immediat
Rinsing 1
Rinsing 2
Refilling
Rinsing 1
Time remaining 07:25
Rinsing 2
Time remaining 06:19
Refilling
Time remaining 09:52
Informations shown on a display, are presented below:
Last Regen.
Remaining
capacity
Flow
rate
MODE

10
I t i s r e c o m m e n d e d , t h e
h a rd n e s s o f w a te r a f te r
treatment was between 4 and
5 German degrees of hardness
( approx. 89 ppm).
8. Adjustng treated water hardness
The softener allows to adjust water hardness supplied to the object.
Adjusting can be done by turning the screw, located on the left side of the controller or by using a by-
pass valve.
Turning the screw clockwise the hardness of water supplied to the object is increased. Water hardness
can also be adjusted by turning the blend adjusting knob on a by-pass valve in a way shown on the
picture below.
You can also adjust water hardness supplied to the object (the higher angle of turn ‘A’, the higher water
hardness).
ATTENTION! If yellow water
appear in the installation,
BACKWASHING and RINSING
must be repeated.

11
9. Salt level sensor and free chlorine generator (Lotus softener only)
The principle of operating of the free chlorine generator and the salt level sensor.
The salt level sensor reminds about the need to fill up the salt in the device. When activated in the menu,
it will constantly monitor the level of salt in a solution. If a concentration drops below the set value, an
alarm will be triggered. The alarm is activated by flashing icon and an audible noise. It can be set in a
“silent” mode in any hour range. During this period no sound will be heard. The alarm can be removed by
a short disconnecting of the power supply.
Activation/deactivation of the salt level sensor
The salt level sensor is also the free chlorine generator.
The the free chlorine generator minimizes the risk of bacterial growth inside the softener. It eliminates
the problem of biofilm formation and resulting microbiological corrosion. It produces free chlorine from
brine during a ion exchange resin regeneration process. This function can be activated or deactivated
according to ones needs. When activated, the generator will produce free chlorine during every
regeneration.
nIn order to unlock the device, press and hold the MENU button for
3 seconds
nPress the MENU button again
nPress the UP ▲ button („Salt Check” icon will be highlighted)
nConfirm by pressing the CONFIRM ■ button
nActivate or deactivate the function by pressing the UP ▲
or DOWN ▼ buttons
nConfirm by pressing the CONFIRM ■ button
nAfter confirmation you will automatically exit to Quiet time” (standard
settings from 2 am to 8 am)
nIndicate the value to be changed by pressing the UP ▲
or DOWN ▼ buttons
nPress the CONFIRM ■ button (the value will start to flash)
nPress the UP ▲ or DOWN ▼ buttons (time settings)
nConfirm by pressing the CONFIRM ■ button
nPress the UP ▲ or DOWN ▼ buttons (silent alarm end time settings)
nPress the CONFIRM ■ button (the value will start to flash)
n Press the UP ▲ or DOWN ▼ buttons (time settings)
nConfirm by pressing the CONFIRM ■ button
nPress the MENU button three times in order to return to the „stand-
by” mode

12
nIn order to unlock the device, press and hold the MENU button
for 3 seconds
nPress the MENU button again
nPress the UP ▲ button twice („Chlorine” icon will be
highlighted)
nConfirm by pressing the CONFIRM ■ button
nActivate or deactivate the function by pressing the UP ▲
or DOWN ▼ buttons
nConfirm by pressing the CONFIRM ■ button
nAfter confirmation you will automatically exit to menu
nPress the MENU button in order to return to the „stand-by”
mode
Activation / deactivation of the free chlorine generator
Residual chlorine generator
Signal line
Brine line
Brine tank
Residual chlorine generator

13
Standby display
Save
Save
Press and hold “SETTINGS MENU”
for 3 seconds
SETTINGS
MENU
SETTINGS
MENU
SETTINGS
MENU
SETTINGS
MENU
SETTINGS
MENU
SETTINGS
MENU
SETTINGS
MENU
SETTINGS
MENU
SETTINGS
MENU
SETTINGS
MENU
SETTINGS
MENU
SETTINGS
MENU
SETTINGS
MENU
TIME OF DAY SET PEOPLE
SALT SETTING
CHLORINE
SALT LEVEL
PROGRAMMING
COMPLETE
OFF
OFF
WATER SOURCE
REGEN TIME
PressDOWNorUPto change the setting
ON=OPEN the residual chlorine generating
in the regeneration
ON=OPEN the salt alarm
OFF=CLOSE the residual chlorine generating in
the regeneration
OFF=CLOSE the salt alarm
MUNICIPAL
HIGH EFFICIENCY
TIME OF DAY
YEAR
MONTH
DAY
SET HARDNESS
The instruction of residual chlorine generator and salt alarm
When the salt level is normal,
the screen will show “NORMAL”
When the salt level is lacking,
the screen will show “CHECK”
and flash.Between 8:00-17:00,
the buzzer will alarm.
Open the brine tank,
check the salt level.
Press the ”MANUAL REGEN” button,
the unit will reserve a
regeneration at the day,at the
same time the salt alarm reset.
Refill the salt.
SALT LEVEL
SALT LEVEL
NORMAL
CHECK
MANUAL
REGEN
Reset the salt alarm

14
10. Holiday mode
When planning a longer break in the use of the softener (longer than 30 days) it is recommended to set
it in a HOLIDAY MODE. It is important due to the possibility of bacterial growth on the media, which may
lead to its irreversible damage and the need of replacement. Activation of the HOLIDAY MODE allows
ion exchange resin rinsing and a removal of microorganisms at the same time.
During holiday mode the device does not draw salt. To set the softener in a HOLIDAY MODE do the
following:
nPress the MENU button
nSelect HOLIDAY MODE using the UP/DOWN buttons
nConfirm by pressing the SET/REGEN button
nSelect ACTIVATE using the UP/DOWN buttons
nConfirm by pressing the SET/REGEN button
nSet the end of the holiday mode. Set every following digit using the UP/DOWN
buttons and confirm using the SET/REGEN button
nPress the MENU button 3 times
The device is now in the holiday mode.
This mode turns off automatically after specified time.

15
No power Check electrical connection
PROBLEM CAUSE SOLUTION
Control valve fails to
regenerate Extended power outage Set time and date
By-pass valve is open Close by-pass valve
No salt in the brine tank Add salt to the brine tank
Injector screen plugged Clean injector screen
Insufficient water flowing
into brine tank
Check resin volume setting
and salt setting.
Hard water in hot water tank Empty hot water tank and fill it
with soft water
Leak at distributor tube Make sure distributor tube is not
cracked. Check o-ring and tube
pilot. Replace faulty parts.
Exhausted ion exchange resin
Regenerate the resin
Hard water
Internal valve leak
Replace gaskets, spacers
and/or piston
Salt bridge was formed
Test with a broom handle. Break
the bridge and remove its pieces.
Regeneration mode was not
set.
Set regeneration mode. Carry out
manual regeneration
Float jammed
Disassemble and clean parts
Hard water, salt level
does not change
Injector plugged
Disassemble and clean injector
Increased water consumption Check and re-set regeneration
time
Check and re-set regeneration
time
Re-test the water and re-enter a
new values
Improper regeneration time
Feedwater hardness has
increased
Hard water from time to time
The use of hot water during
regeneration process
Do not use hot water during
regeneration process.
Excessive salt consumption Improper salt setting Check salt usage and salt setting

16
PROBLEM CAUSE SOLUTION
Low water pressure
Sediments in feeding line Clean the installation
Sediments in the softener Clean control or conduct chemical
cleaning
Inlet of control plugged Wyjmij tłok i wyczyść głowicę
Resin flushed to drain Air in water system Assure the well system has proper
air eliminator control, check for dry
Inappropriate restrictor or DLFC Check restrictor
Resin in the installation Cracked resin tank Seal or replace the tank
Broken tank elements Replace broken pieces
Broken or incorrectly assembled
upper “basket”
Check basket assembly, contact
your local dealer
Contact your local dealer
Lack of upper basket
Excess water in brine
tank
Injector plugged Clean or replace injector
Clean flow control
Clean injector
Clean flow control
Clean the tank
Foreign material in brine tank
Plugged drain line flow
control (DLFC)
Softener fails to draw brine
Control cycles continuously
Plugged DLFC
Plugged injector
Low water pressure
Internal control leak
Increase water pressure to 3 bar
(recommended 4 bar)
Replace gaskets, spacers and/or piston
Broken gear Replace broken parts
Drain flows continuously Inappropriate settings Check and correct the settings
Foreign material in control Clean control
Internal control leak
Soft water, but white
stains on the appliances
appear
Silica in water Install sillica removal filter

www.ustm.pl
UST-M Sp. z o.o.
ul. Piaskowa 124A
97-200 Tomaszów Maz. Poland
e-mail: [email protected]
Technology
works for you
This manual suits for next models
1
Table of contents
Other USTM Water Dispenser manuals