Uvify OOri User manual

www.uvify.com Get help at Support.uvify.com Talk to us: +1 (628) 888-6336
Page | 1
OOri quick start guide v1.3a
OORI
Congratulations on your purchase of OORI! The following quick start guide will show you how
to get OORI in the air for the first time, and how to enjoy the fantastic experience of flight!
OORI BOX CONTENTS
1 x OOri drone (Inc. props)
1 x OOri transmitter with FPV screen
1 x 660mAH LiPo battery
2 x FPV transmitter antenna
1 x Prop guard set
1 x spare prop bag (4 props)
1 x Propeller Tool
1 x Tool for drone body
8x M2xL4 screws (motor)
4x M2xL7 screws (propeller)

www.uvify.com Get help at Support.uvify.com Talk to us: +1 (628) 888-6336
Page | 2
TABLE OF CONTENTS
OUT OF THE BOX..................................................................................................................................................................... 3
Antenna installation........................................................................................................................................................ 3
CAMERA ANGLE ...................................................................................................................................................................... 4
Making adjustments........................................................................................................................................................ 4
CHARGING............................................................................................................................................................................... 5
Changing the OORI battery ............................................................................................................................................. 5
USB cable charging.......................................................................................................................................................... 6
POWERING.............................................................................................................................................................................. 7
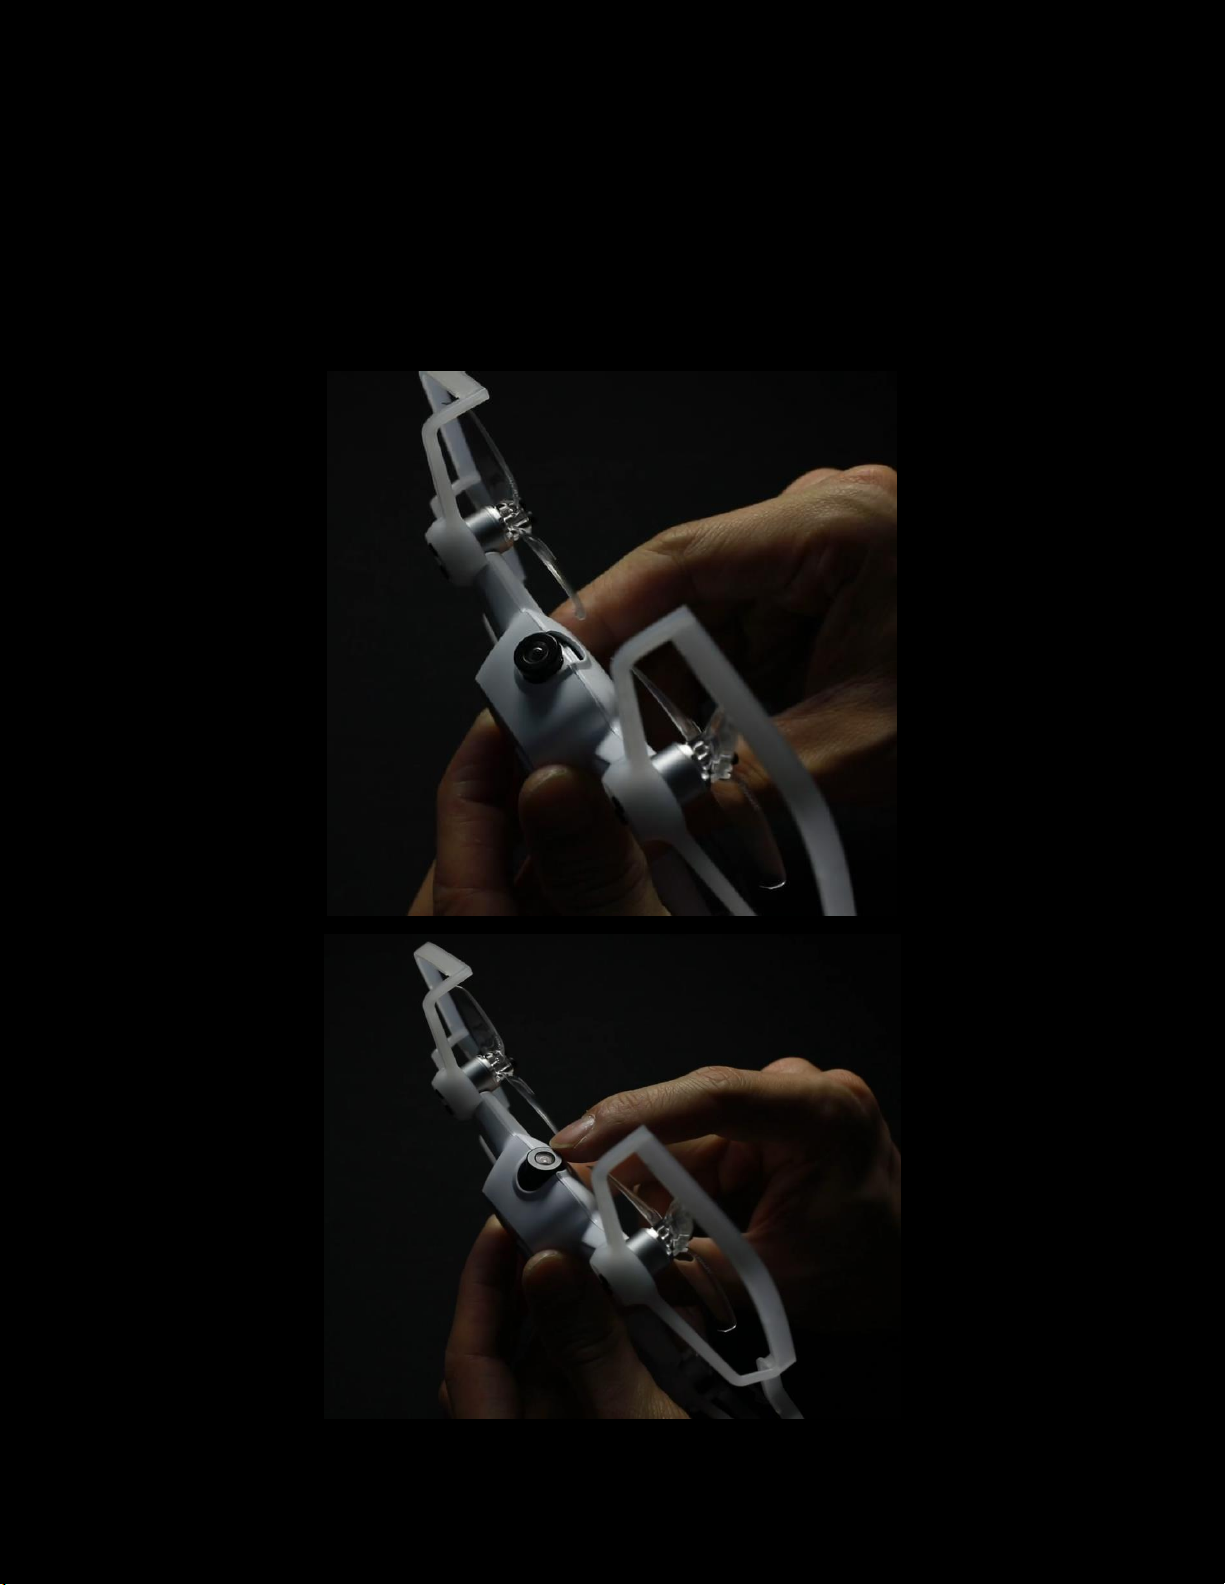
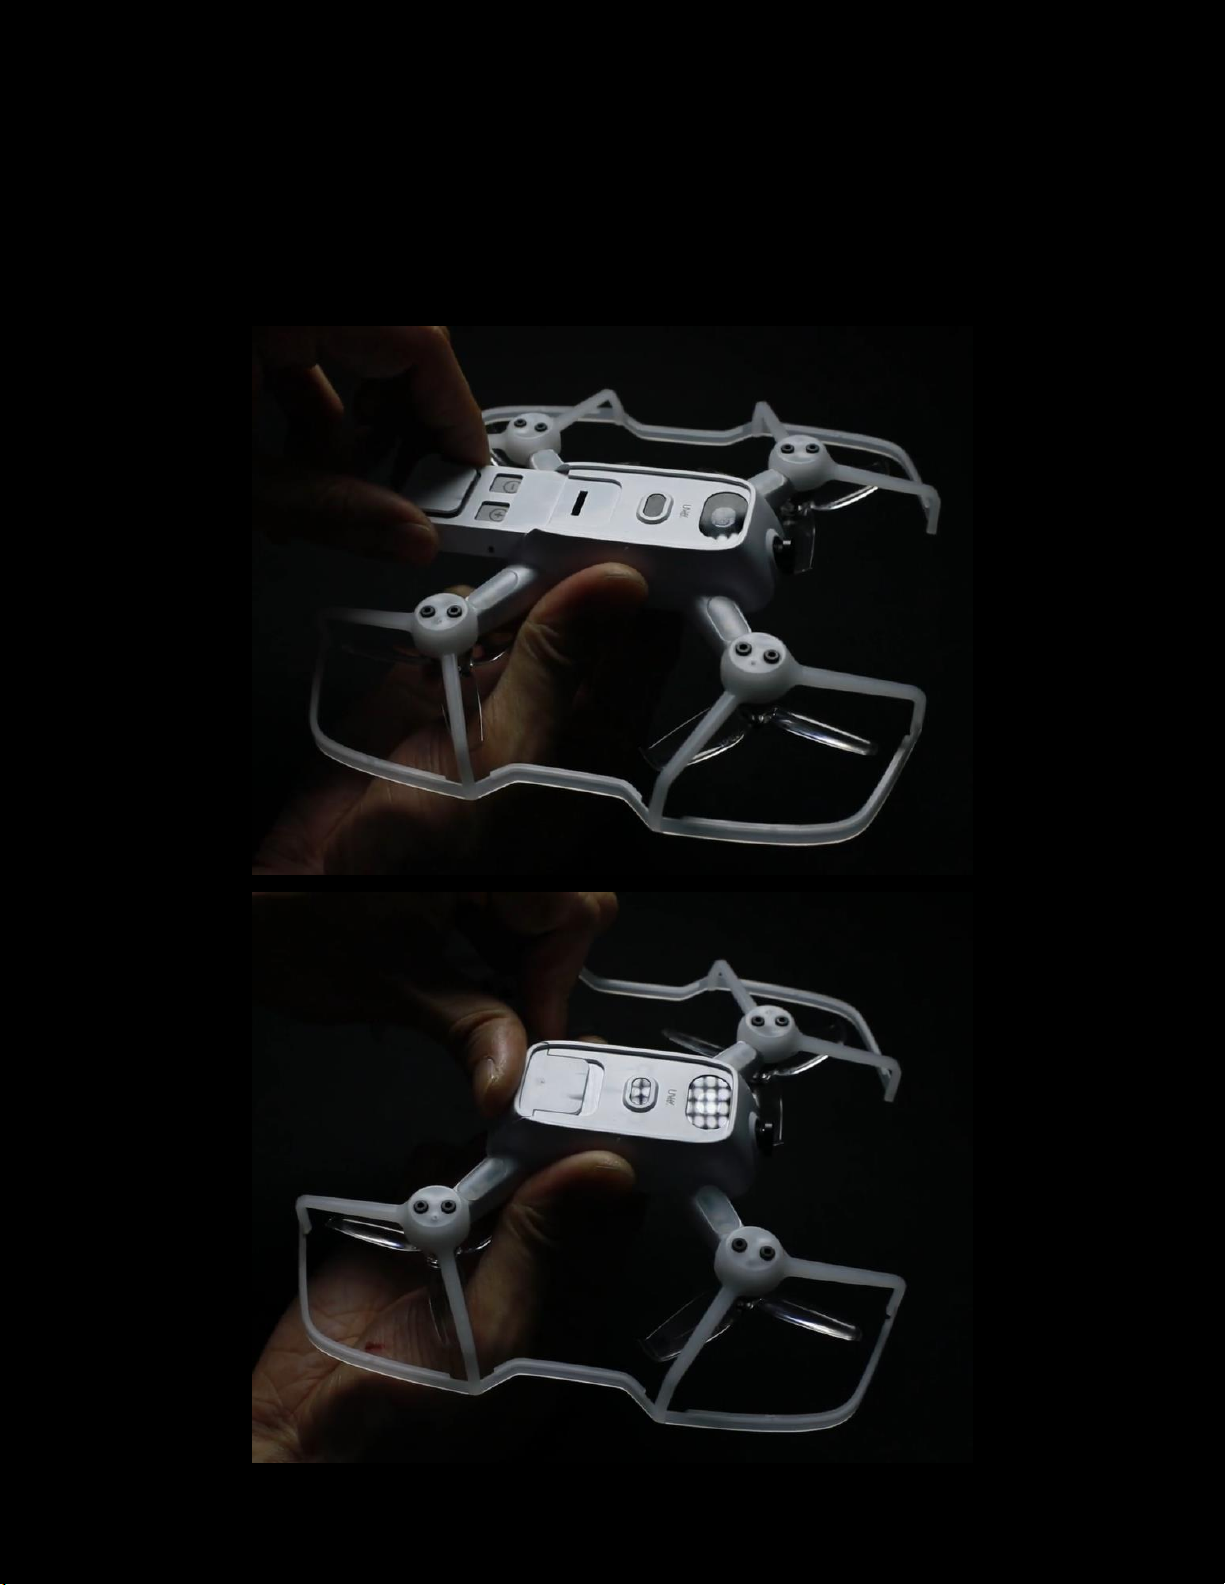
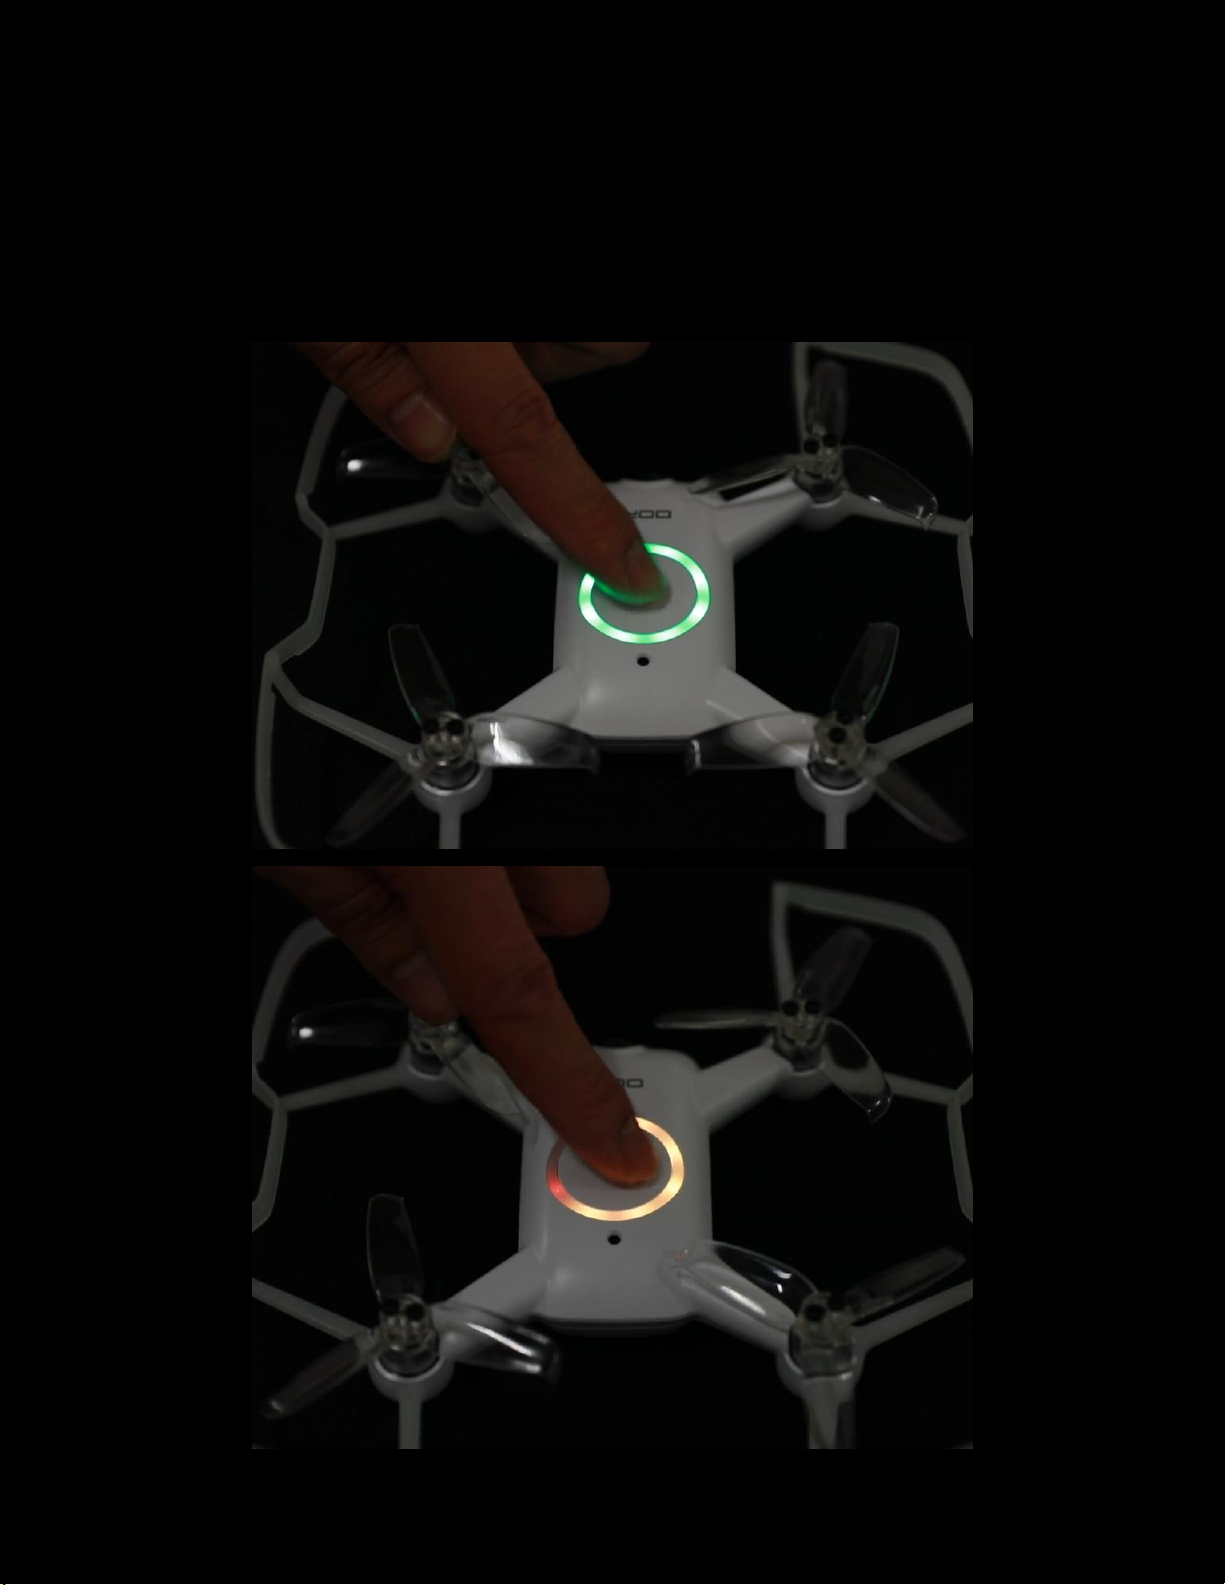
Checking the Battery level .............................................................................................................................................. 7
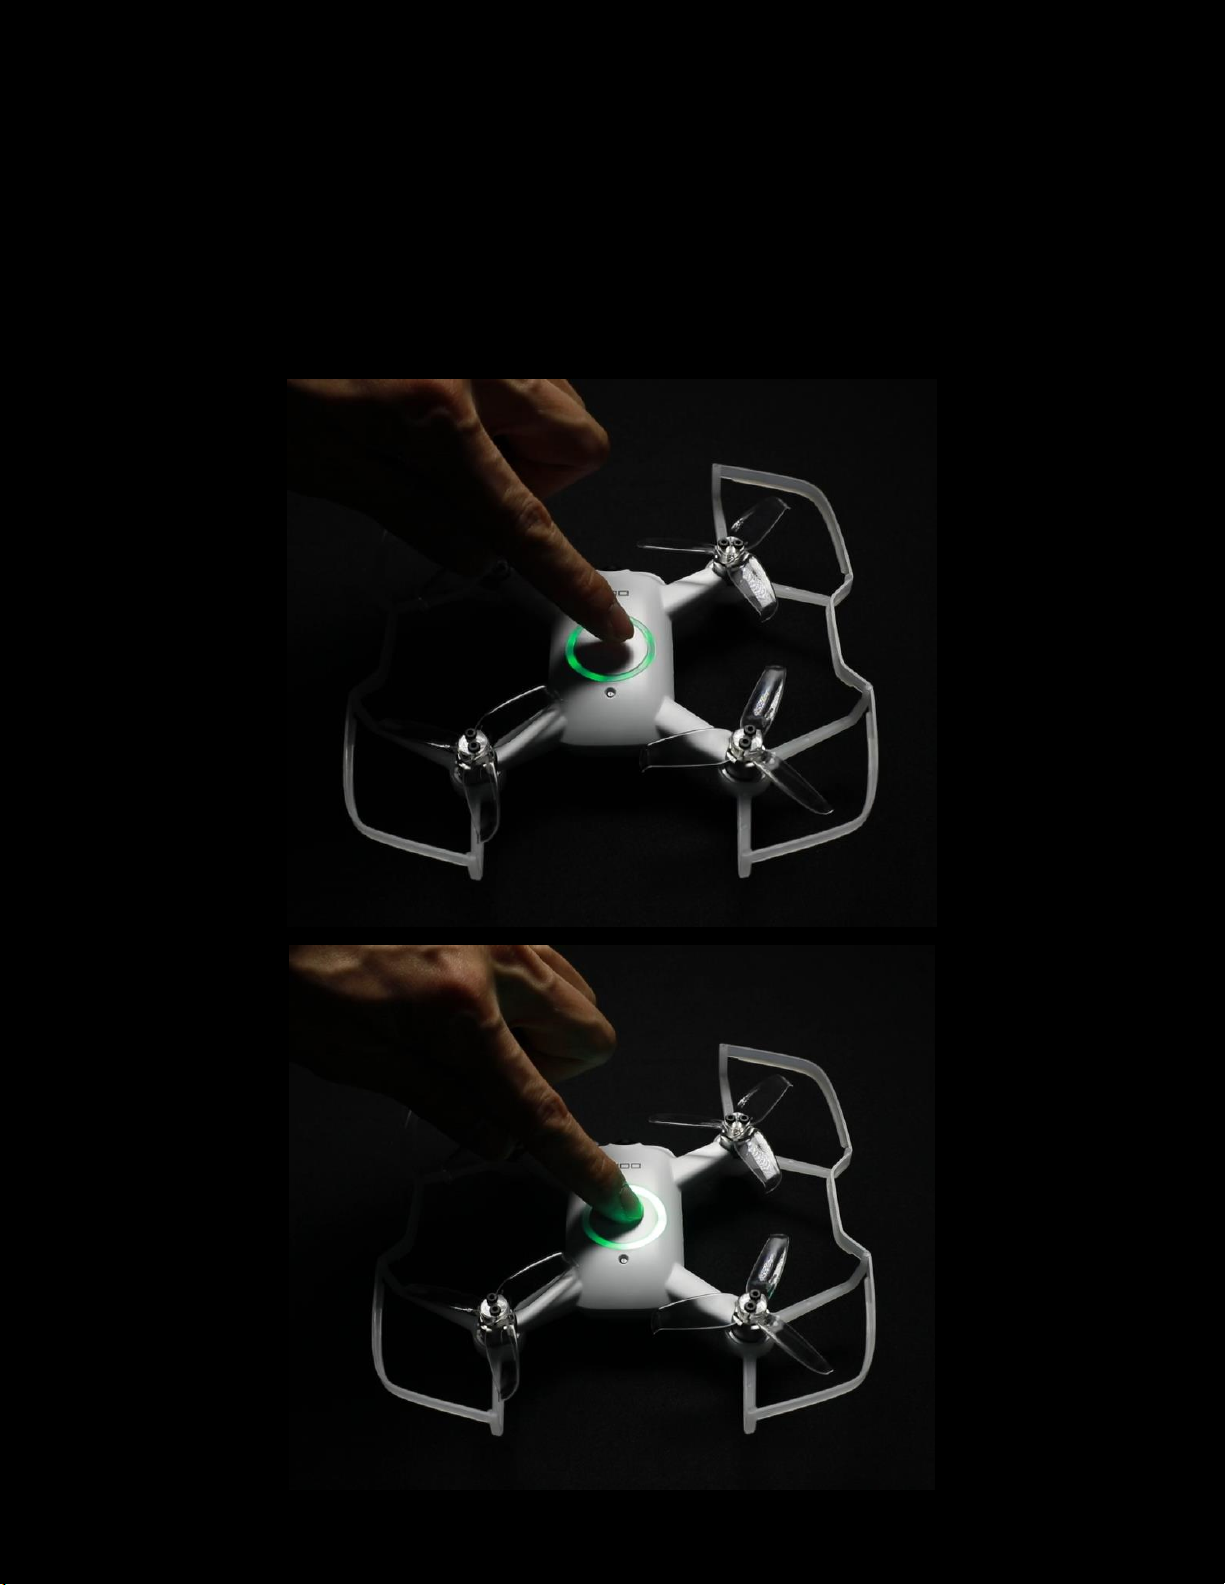
Powering OORI.............................................................................................................................................................. 10
LED SETUP .............................................................................................................................................................................12
Changing the LED colors................................................................................................................................................12
BINDING ................................................................................................................................................................................13
Prepare OOri for binding...............................................................................................................................................13
Prepare FPV Transmitter for binding ............................................................................................................................ 14
VIDEO STREAM...................................................................................................................................................................... 15
Switching video channel ................................................................................................................................................... 15
ARMING.................................................................................................................................................................................16
Throttle position ...........................................................................................................................................................16
Arm switch ....................................................................................................................................................................16
FLYING...................................................................................................................................................................................17
Stick Layout ...................................................................................................................................................................17
Optical position hold.....................................................................................................................................................18
Altitude hold ................................................................................................................................................................. 19
LANDING ...............................................................................................................................................................................19
Low battery ...................................................................................................................................................................19
Disarming ......................................................................................................................................................................20
POWER OFF........................................................................................................................................................................... 21
Powering off OORI ........................................................................................................................................................ 21
Powering off FPV transmitter ....................................................................................................................................... 21
PROP REPLACEMENT............................................................................................................................................................. 22
Prop direction and install.............................................................................................................................................. 22
PROP GUARD......................................................................................................................................................................... 25
Prop guard removal ......................................................................................................................................................25

www.uvify.com Get help at Support.uvify.com Talk to us: +1 (628) 888-6336
Page | 3
OUT OF THE BOX
Antenna installation
The radio requires the 2 antennas to be installed before operation. They are included in the
box and can be screwed onto the top of the radio. Order is not important, screw both down
until tight.

www.uvify.com Get help at Support.uvify.com Talk to us: +1 (628) 888-6336
Page | 4
CAMERA ANGLE
Making adjustments
OORI has two camera angle settings. For initial flights, it should be looking straight out of the
front (zero degree angle). If your camera angle isn't straight, set it to zero degrees by clicking it
into place. Once you have gained confidence and flying faster, you can increase the camera
angle.

www.uvify.com Get help at Support.uvify.com Talk to us: +1 (628) 888-6336
Page | 5
CHARGING
Changing the OORI battery
The OORI battery slides in and out from the bottom of the drone. Simply slide the battery in
like the pictures below, until the battery tab clicks into place. For removal, lift the tab partially
and pull backwards.

www.uvify.com Get help at Support.uvify.com Talk to us: +1 (628) 888-6336
Page | 6
CHARGING
USB cable charging
Charging OORI is simple. With a battery onboard, plug in a micro USB. OORI can charge from a
laptop USB port, but will charge fastest from a wall wart style plug. The ring on top of OORI
will show the charge on the battery, complete once the entire ring is green.

www.uvify.com Get help at Support.uvify.com Talk to us: +1 (628) 888-6336
Page | 7
POWERING
Checking the Battery level
A single click of the main OORI button will show the current battery level. For example, a fully
charged battery is a full green ring. A partially charged battery is an orange partially lit ring.
This is also true for the radio. A single click of the power button will show the charge status.

www.uvify.com Get help at Support.uvify.com Talk to us: +1 (628) 888-6336
Page | 8

www.uvify.com Get help at Support.uvify.com Talk to us: +1 (628) 888-6336
Page | 9
POWERING
Powering FPV transmitter
In normal operation, the radio should be powered first. This is done by a short click of the
power button followed by holding the button until the LED is fully lit. A small delay between
clicking and holding may be necessary, as this helps prevent accidental powering of the radio.

www.uvify.com Get help at Support.uvify.com Talk to us: +1 (628) 888-6336
Page | 10
POWERING
Powering OORI
Click the main OORI button so the LED ring lights up, then hold the button until the green ring
is complete. Upon release, the LED will show rainbow colors. The OORI is now powered.
Note: if the main button is held too long it will go into bind mode, as described below. This is
not required for normal operation, turn off OORI and power up again for normal flying.

www.uvify.com Get help at Support.uvify.com Talk to us: +1 (628) 888-6336
Page | 11

www.uvify.com Get help at Support.uvify.com Talk to us: +1 (628) 888-6336
Page | 12
LED SETUP
Changing the LED colors
The color of OORI and the radio can be changed by holding the right front button on the radio.
When released, the OORI and radio will hold this color. It can be changed at any time.

www.uvify.com Get help at Support.uvify.com Talk to us: +1 (628) 888-6336
Page | 13
BINDING
Prepare OOri for binding
In some instances, it may be required to link OORI with a radio (out of the box this is not
required). Click and then hold the main button on OORI until the yellow ring is completely full,
then release. The yellow ring will spin showing OORI is ready for link.

www.uvify.com Get help at Support.uvify.com Talk to us: +1 (628) 888-6336
Page | 14
BINDING
Prepare FPV Transmitter for binding
Once OORI is in bind mode as above, power on the radio by holding the left front button while
clicking and then holding the power button. The colors will sync on OORI and the transmitter
once link is established. You will be able to see the FPV feed on the screen.

www.uvify.com Get help at Support.uvify.com Talk to us: +1 (628) 888-6336
Page | 15
VIDEO STREAM
Switching video channel
When OORI and the transmitter are powered and bound, it is possible to switch between
video channels by clicking the "BIND/CH" button. This will cycle both the transmitter and OORI
through 8 available channels in the F band. You should switch channels when flying with
others and two or more people are on the same channel. You may see interference in the
video feed if the same channel is being used by multiple OORIs.
A single click of the "BIND/CH" button will bring up your current channel, which you can see by
the amount of LEDs lit around the right gimbal stick. There are 8 LEDs representing the 8
possible channels, and they increase with each click of the "BIND/CH" button. For example, the
picture below shows that OORI is on channel 5.

www.uvify.com Get help at Support.uvify.com Talk to us: +1 (628) 888-6336
Page | 16
ARMING
Throttle position
Lower the throttle stick to the bottom, OORI will not arm without this for safety reasons. Hold
this stick down and then click the arm switch as below.
ARMING
Arm switch
The arm switch starts and stops the props on OORI. To start the props, put the throttle stick at
the bottom and then short click the arm button, which is in the left trigger position.
To stop the props, another short click of the left trigger will disarm the drone. The sticks can be
in any positions for disarm, and if disarmed in flight, OORI will fall.

www.uvify.com Get help at Support.uvify.com Talk to us: +1 (628) 888-6336
Page | 17
FLYING
Stick Layout
The default stick layour for the OORI transmitter is Mode 2. The sticks control OORI as laid out
below.

www.uvify.com Get help at Support.uvify.com Talk to us: +1 (628) 888-6336
Page | 18
FLYING
Optical position hold
In flight, OORI has the capability to hold its position with several sensors. Optimal conditions
for position hold to work are indoors in a well lit area. Areas with bright sunlight or shiny floors
are not optimal for position hold capabilities.
Once you lift off OORI, optimal height is around waist to shoulder level during flight, but can
go higher or lower depending on where you're flying. The OSD shows that position hold is
available by displaying "OPTI" in the top left corner on the video feed, as can be seen below.
If conditions aren't good for position hold, OORI will switch to altitude hold mode, as outlined
below.
Visually, a solid ring on the top of OORI in flight shows it has optical position hold available. If
conditions are sub-optimal, this ring may change from solid to blinking in flight to show it is in
altitude hold mode, and will automatically go back to position hold once conditions are good
again.

www.uvify.com Get help at Support.uvify.com Talk to us: +1 (628) 888-6336
Page | 19
FLYING
Altitude hold
If conditions aren't good for position hold, OORI will switch to altitude hold mode. In altitude
hold, OORI can drift without correcting itself, so the pilot should use the sticks to ensure OORI
doesn't go in unwanted directions.
Altitude hold mode will display as "ATTI" in the top left of the video feed, and will change back
to "OPTI" automatically once conditions are good again.
LANDING
Low battery
During flight, if the OORI battery gets critically low, a warning will appear on screen to tell you
to change the battery. You should land and change the battery when this is shown on screen.
The OORI will slowly land itself the longer this critical battery message is up on the video feed,
and will not allow you to re-arm OORI once you have landed.

www.uvify.com Get help at Support.uvify.com Talk to us: +1 (628) 888-6336
Page | 20
LANDING
Disarming
Clicking the arm switch while the props are spinning will disarm OORI, causing the props to
stop. At the end of our flight, bring OORI to touching the ground and then click the arm / left
trigger switch to stop the props from spinning and disarm OORI.
Table of contents