manuals.online logo
Brands
  1. Home
  2. •
  3. Brands
  4. •
  5. V7
  6. •
  7. Personal Care Product
  8. •
  9. V7 CHGCT30i User manual

V7 CHGCT30i User manual

This manual suits for next models

1

Popular Personal Care Product manuals by other brands

DC-Connex DCX-L201 user manual

DC-Connex

DC-Connex DCX-L201 user manual

MPVTruma MicroDrop CalimeroJet instruction manual

MPVTruma

MPVTruma MicroDrop CalimeroJet instruction manual

Bosch PHA230 instruction manual

Bosch

Bosch PHA230 instruction manual

Beautify 4000001 care guide

Beautify

Beautify 4000001 care guide

MEIYATI Pro Spa quick start guide

MEIYATI

MEIYATI Pro Spa quick start guide

Blossom LED M3 R24 installation guide

Blossom

Blossom LED M3 R24 installation guide

Philips HB875/01 user manual

Philips

Philips HB875/01 user manual

Orliman SITLIVE OSL3120 INSTRUCTIONS FOR USE AND PRESERVATION

Orliman

Orliman SITLIVE OSL3120 INSTRUCTIONS FOR USE AND PRESERVATION

GE T8 Basic service manual

GE

GE T8 Basic service manual

Pretika ST102 Instructions for use & warranty information

Pretika

Pretika ST102 Instructions for use & warranty information

Beurer FC 76 Instructions for use

Beurer

Beurer FC 76 Instructions for use

Pebble Grey 500.40.70-75 manual

Pebble Grey

Pebble Grey 500.40.70-75 manual

PUSH ortho quick start guide

PUSH

PUSH ortho quick start guide

Dermlite DL3N instructions

Dermlite

Dermlite DL3N instructions

DERMAPEN SEMI user manual

DERMAPEN

DERMAPEN SEMI user manual

Carex SunLite user guide

Carex

Carex SunLite user guide

Roper Rhodes Intense Installation & Aftercare Instructions

Roper Rhodes

Roper Rhodes Intense Installation & Aftercare Instructions

Interacoustics Titan IMP440 Setup & installation

Interacoustics

Interacoustics Titan IMP440 Setup & installation

manuals.online logo
manuals.online logoBrands
  • About & Mission
  • Contact us
  • Privacy Policy
  • Terms and Conditions

Copyright 2025 Manuals.Online. All Rights Reserved.

UV-C Cleanse and Sanitizer Kit
for V7 CHGCT30i & CHGCT36i Charge Carts
TABLE OF CONTENTS
1
SAFETY AND WARNINGS
Safety and warnings
5
6
FUNCTIONS
Functions
PACKAGE INCLUDES
Package Includes
INSTALLATION
Installation
SAFETY AND WARNINGS
CAUTION
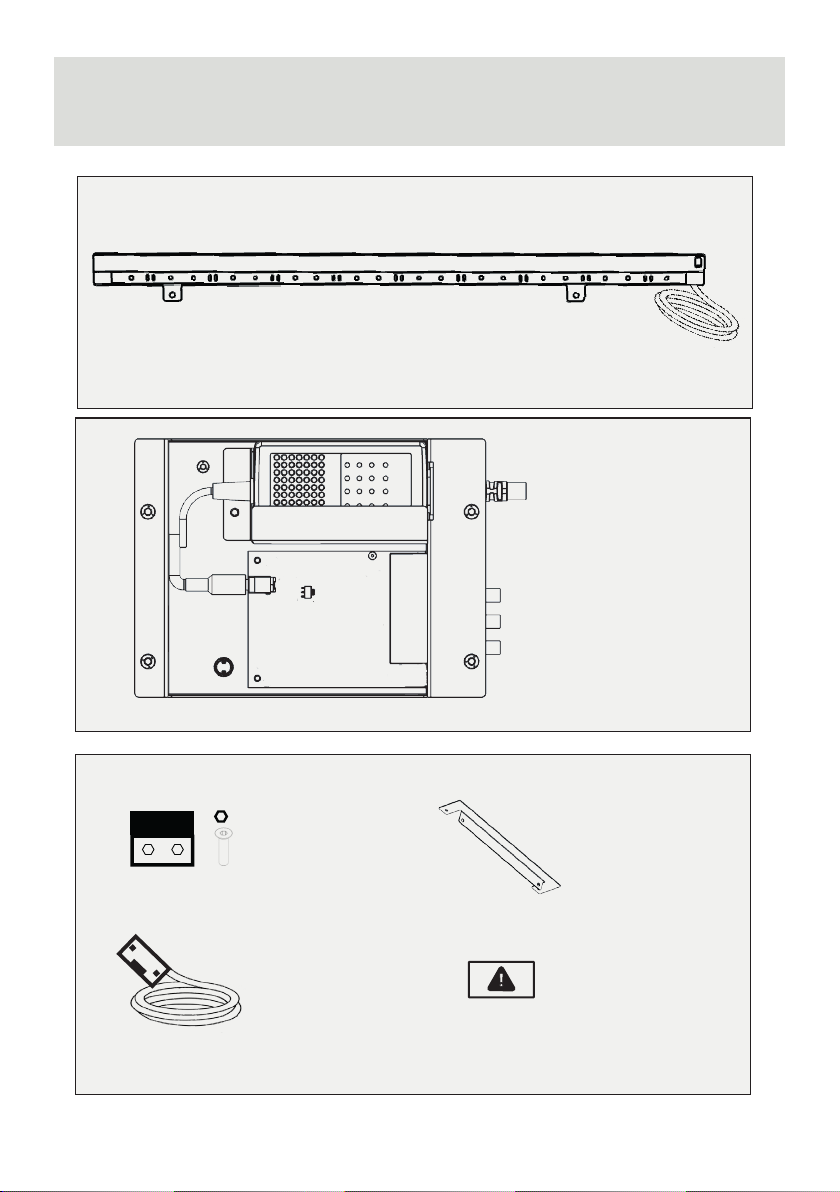
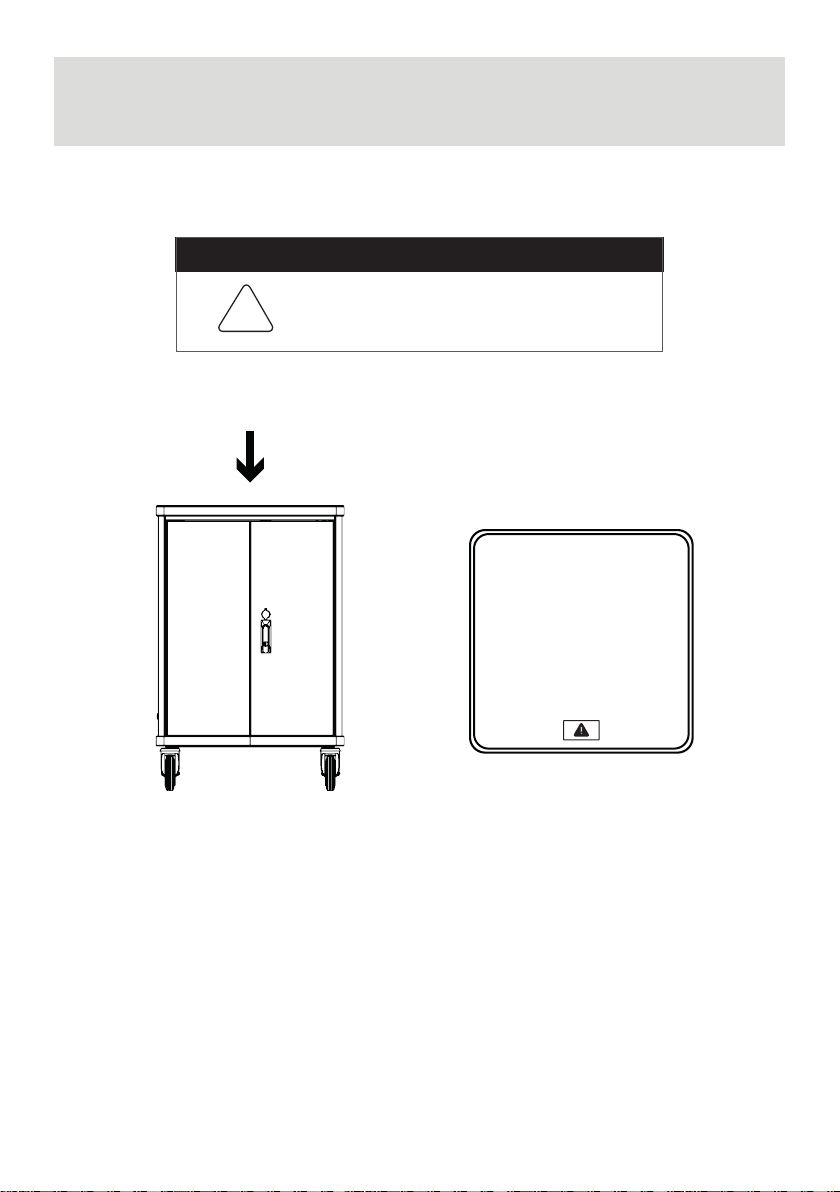
!This symbol on the product indicates important
literature concerning operation and maintenance.
Do not remove or alter labels.
Check www.v7world.com
for additional support and
installation information.
2
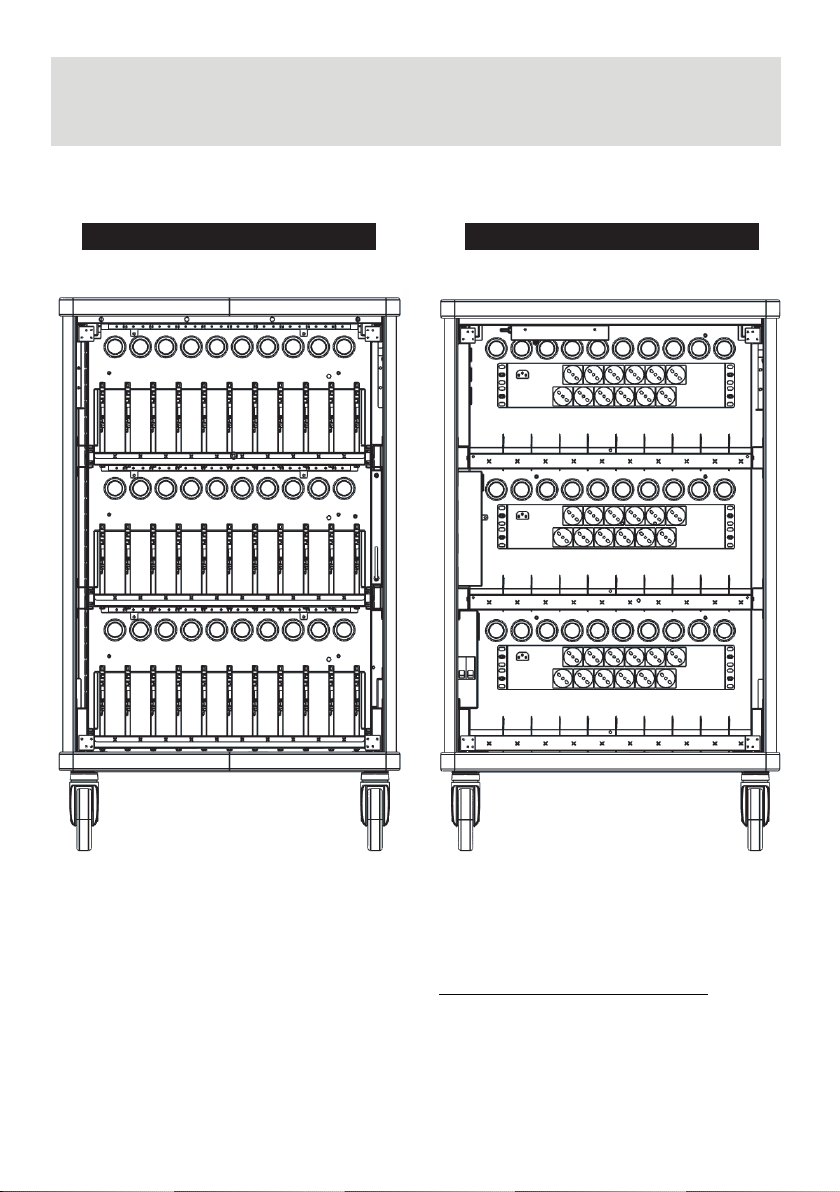
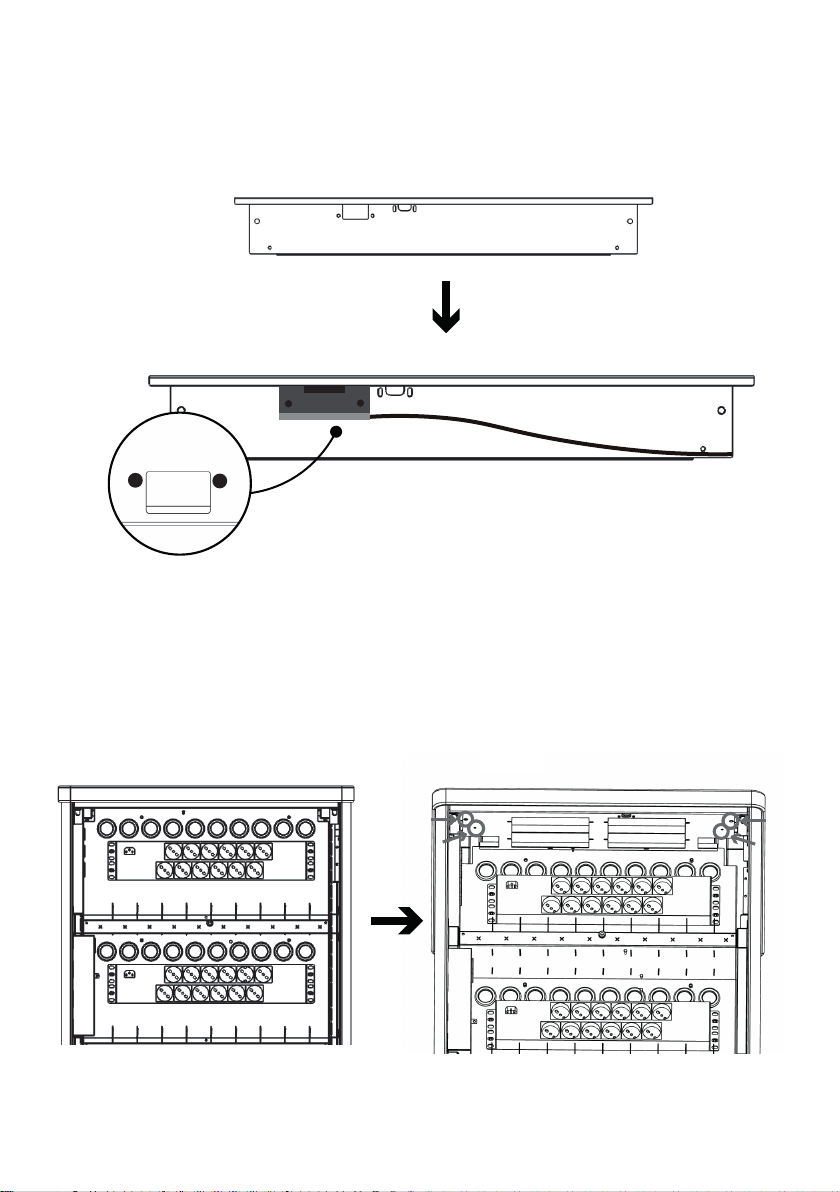
This product uses UV-C light. Warning: eye and skin damage may result from direct exposure
to the light produced by these lamps. Do not activate LEDs with doors open. To safely use the
UV-C LEDs kit, the system requires to always close both doors completely: left door rst and
then right door, closing the handle. By following this instructions, the product prevents
automatically any accidental exposure.
•
•Never look at lamps while they are on, lit or illuminated.
•Disconnect power to all UV-C devices before any maintenance operation
•This product has a security system to automatically prevent accidental exposure. Do not alter
this system. Do not try by any means to fake doors' closing
•This device complies with Part 15 of the FCC Rules. Operation is subject to the following two
conditions: (1) this device may not cause harmful interference, and (2) this device must accept
any interference received, including interference that may cause undesired operation.”
•Caution: no changes or modifications allowed on the equipment not expressly approved by the
party responsible for compliance. It could void the user's authority to operate the equipment.
•Please refer to Charge Cart’s user manual for warnings regarding the Charge Cart itself.
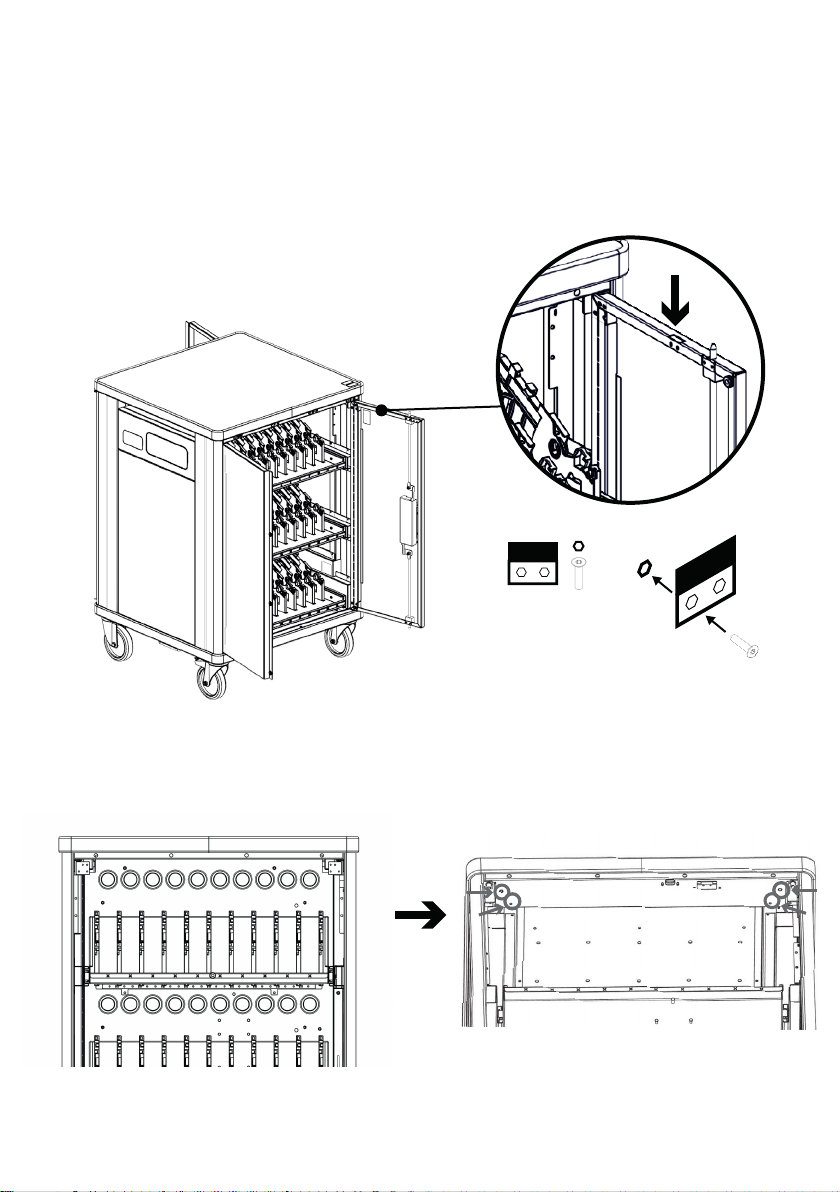
•This product has been designed to work with cart’s doors closed. Follow installation instructions:
do not change any steps of the installation or product.
•WARNING: UV emitted from this product. Avoid eyes and skin exposure to unshielded product.
FUNCTIONS
3
Charge Cart's UV-C Kit is a set of 3 UV-C led bars, a specific control board and accessories.
Charge Cart’s UV-C kit uses UV technology to disinfect the devices stored in the Cart.
It automatically starts the disinfection process after 30 seconds from the closure of the doors. To
safely use the UVC LEDs kit, the system requires to always close both doors completely: left door
first and then right door, closing the handle.UVC LEDs will be lit for 5 minutes in order to complete
the disinfection process.
FRONT REAR
4
User must always close both doors when not operating the Charge Cart.
Whenever the user opens the cart’s doors before the disinfection process is over, UV-C LEDs are
instantly turned off in order to prevent any possible direct exposure.
The process will restart with the 30 seconds countdown when closing doors.
Prevention to accidental exposure
5
PACKAGE INCLUDES
UV-C LED (x3)
UV-C BOARD
BOX
TAMPER
MAGNET
TAMPER
CABLE
UV-C BOARD
BOX SUPPORT
SAFETY
LABEL
Make sure to position the label centered.
Ensure it is readable from the front side, where the user will load devices.
6
INSTALLATION
CAUTION
!It is mandatory to apply the safety label
provided in the box. Position the label as
shown in the image below.
To install UV-C kit, the user needs to remove each drawer. Pull the drawer completely out: this
allows the user to can find levers to remove the drawer from the cart. Find levers at the side of
the slide.
7
INSTALLATION
Once removed, UV-C LEDs can be installed. Spot the position to fix UV-C bars in the fig 1.
g 1
LEVERS
Cable
opening
g 2
The cable connected to the UV-C
LEDs shall pass to the rear side
of the cart via the internal
openings on the side of the cart
(highlighted in fig 2).
Installation of the Tamper in the in the front door:
- Place the nut in its support (behind the magnet)
- Slide the magnet in the opening
- Insert screws through the holes in the lateral part of the door and fix it
Remove the frontplate with power led indicators by unscrewing the four screws (see circles in the
figure 3). Unplug the inner connector and remove the frontplate.
8
g 3
9
XX
Slide the metal part of the “tamper cable” underneath all cablings of the frontplate.
Once in position, turn the frontplate upside-down and fix the tamper with screws.
Move the tamper cable to the rear side of the cart.
To do so, remove the frontplate on the rear part of the cart by unscrewing the four screws (see
circles in figure 4).
INSIDE
OUTSIDE
g 4