◆Do not grind hard food such as bones, nuts, etc.
◆Do not grind ginger and other materials with hard fiber.
◆Continuous running of meat grinder should be not more than 10 minutes with the
following 10minutes interval for motor cooling.
◆Operate the unit from “ON”to “R”or from “R”to “ON”after the previous
working condition stops more than 30 seconds, or it may cause some unnormal
case such as moving up and down and easily destroy the unit.
◆To avoid jamming, do not force to operate the unit with excessive pressure.
◆When the circuit breaker activates, do not switch on.
◆Appliance will cut off power when the current is over 1.5 times rated current,
after around 3 seconds, press Circuit breaker & Reset to reset, then press “ON”,
the appliance can continue to work.
◆Never try to replace the parts and repair the unit by yourself.
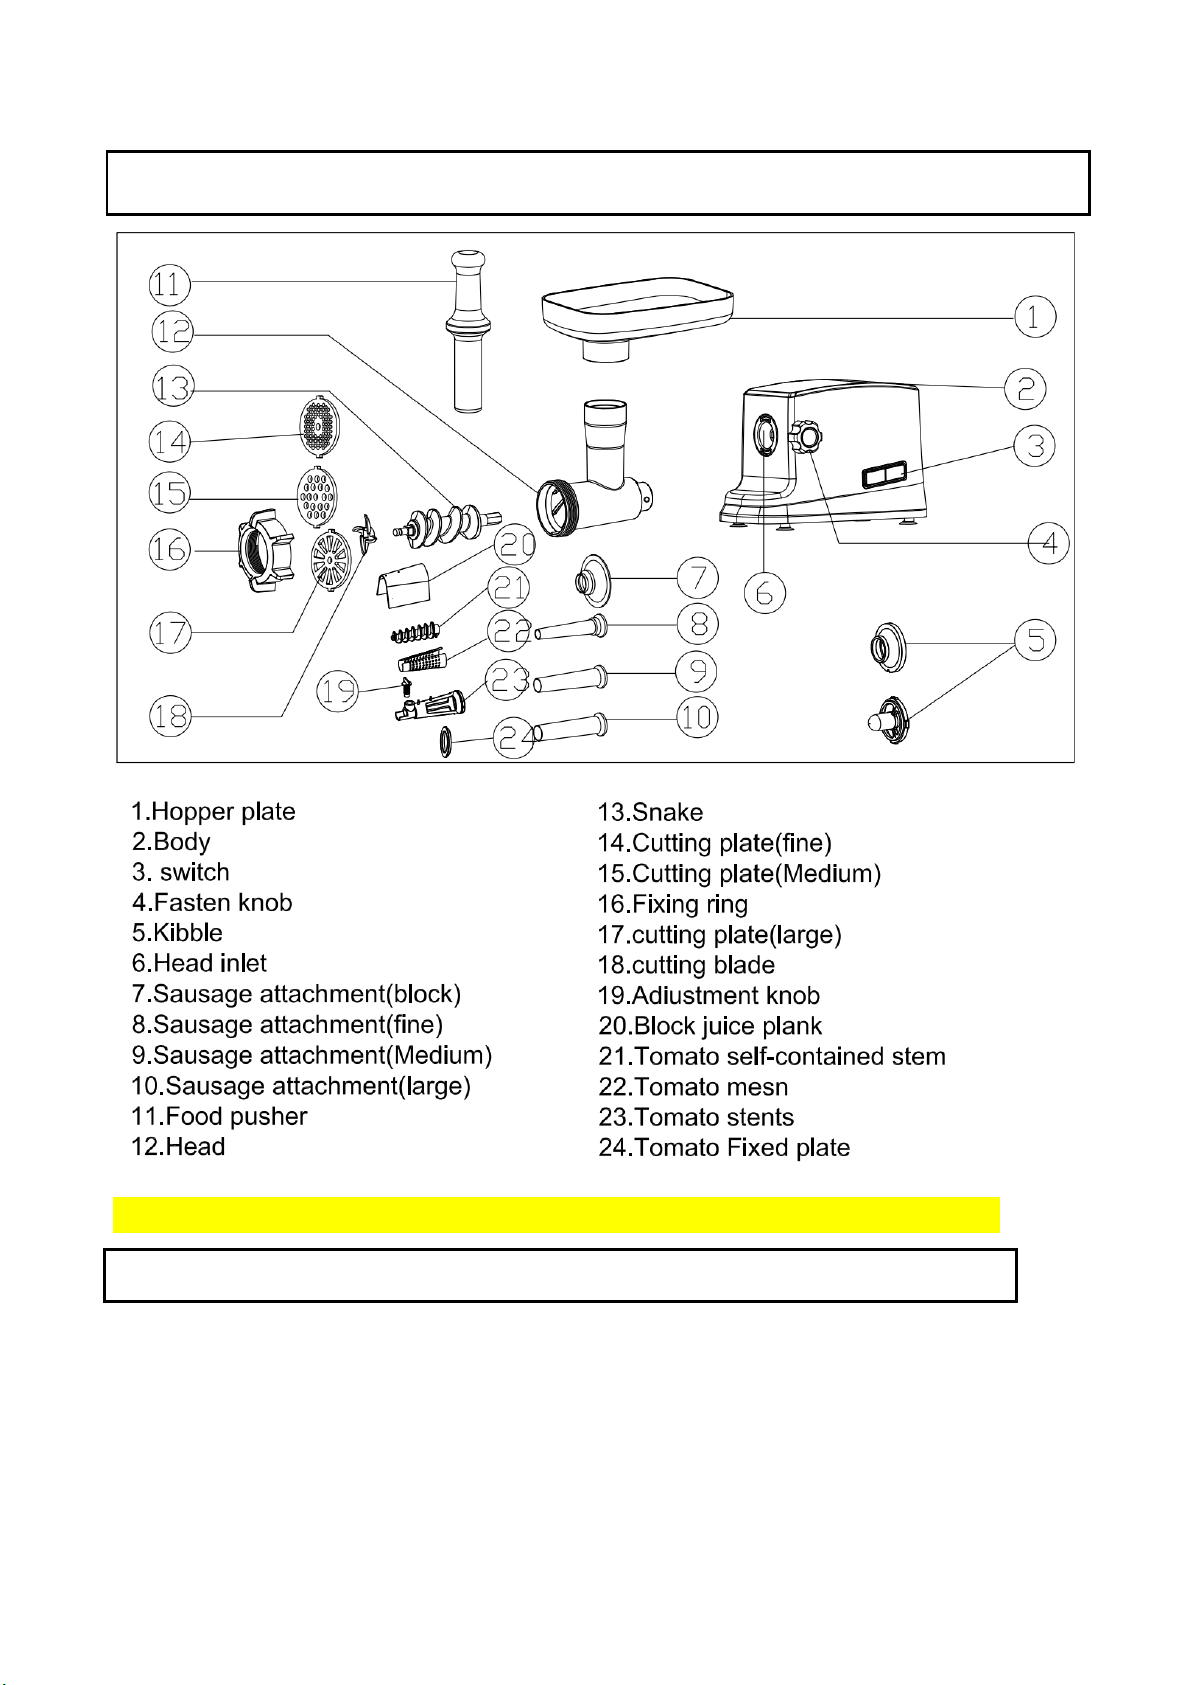
FOR THE FIRST TIME
◆Check that voltage indicated on the rating label corresponds the mains voltage in
your home.
◆Wash all parts (except body) in warm soapy water.
◆Before plug in,Make sure the key switch in the "OFF" position, that is the natural
state of all keys.
INSTRUCTION FOR USE
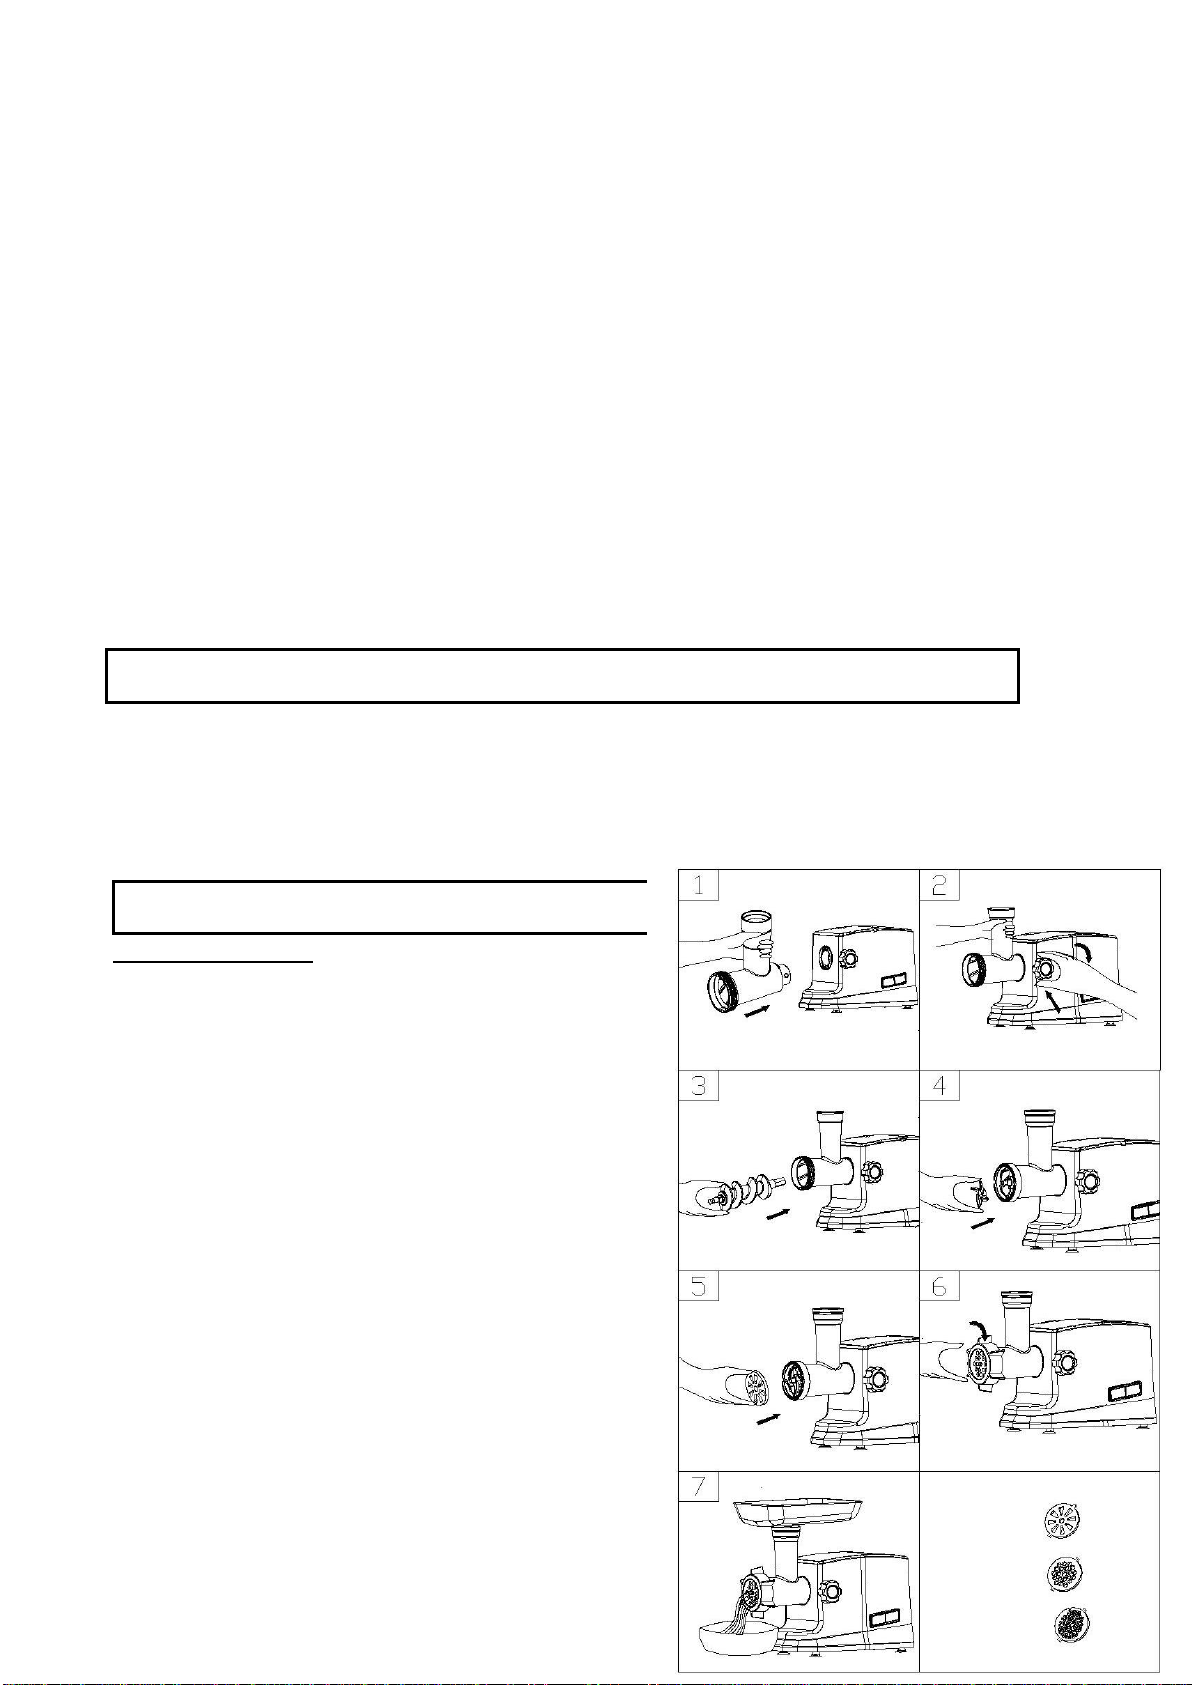
ASSENBLING
◆hold the head and insert it into the
inlet(when inserting pls pay attention
the head must be slanted as per arrow
indicated on the top,see fig.1),then
move the head anticlockwise so that the
head being fastened tightly . (fig.2)
◆Place the snake into the head, long end
first, and turn to feed the screw slightly
until it is set into the motor housing
(fig.3).
◆Place the cutting blade onto the snake
shaft with the blade facing the front as
illustrated (fig.4).If it is not fitted properly,
meat will not be grinded.
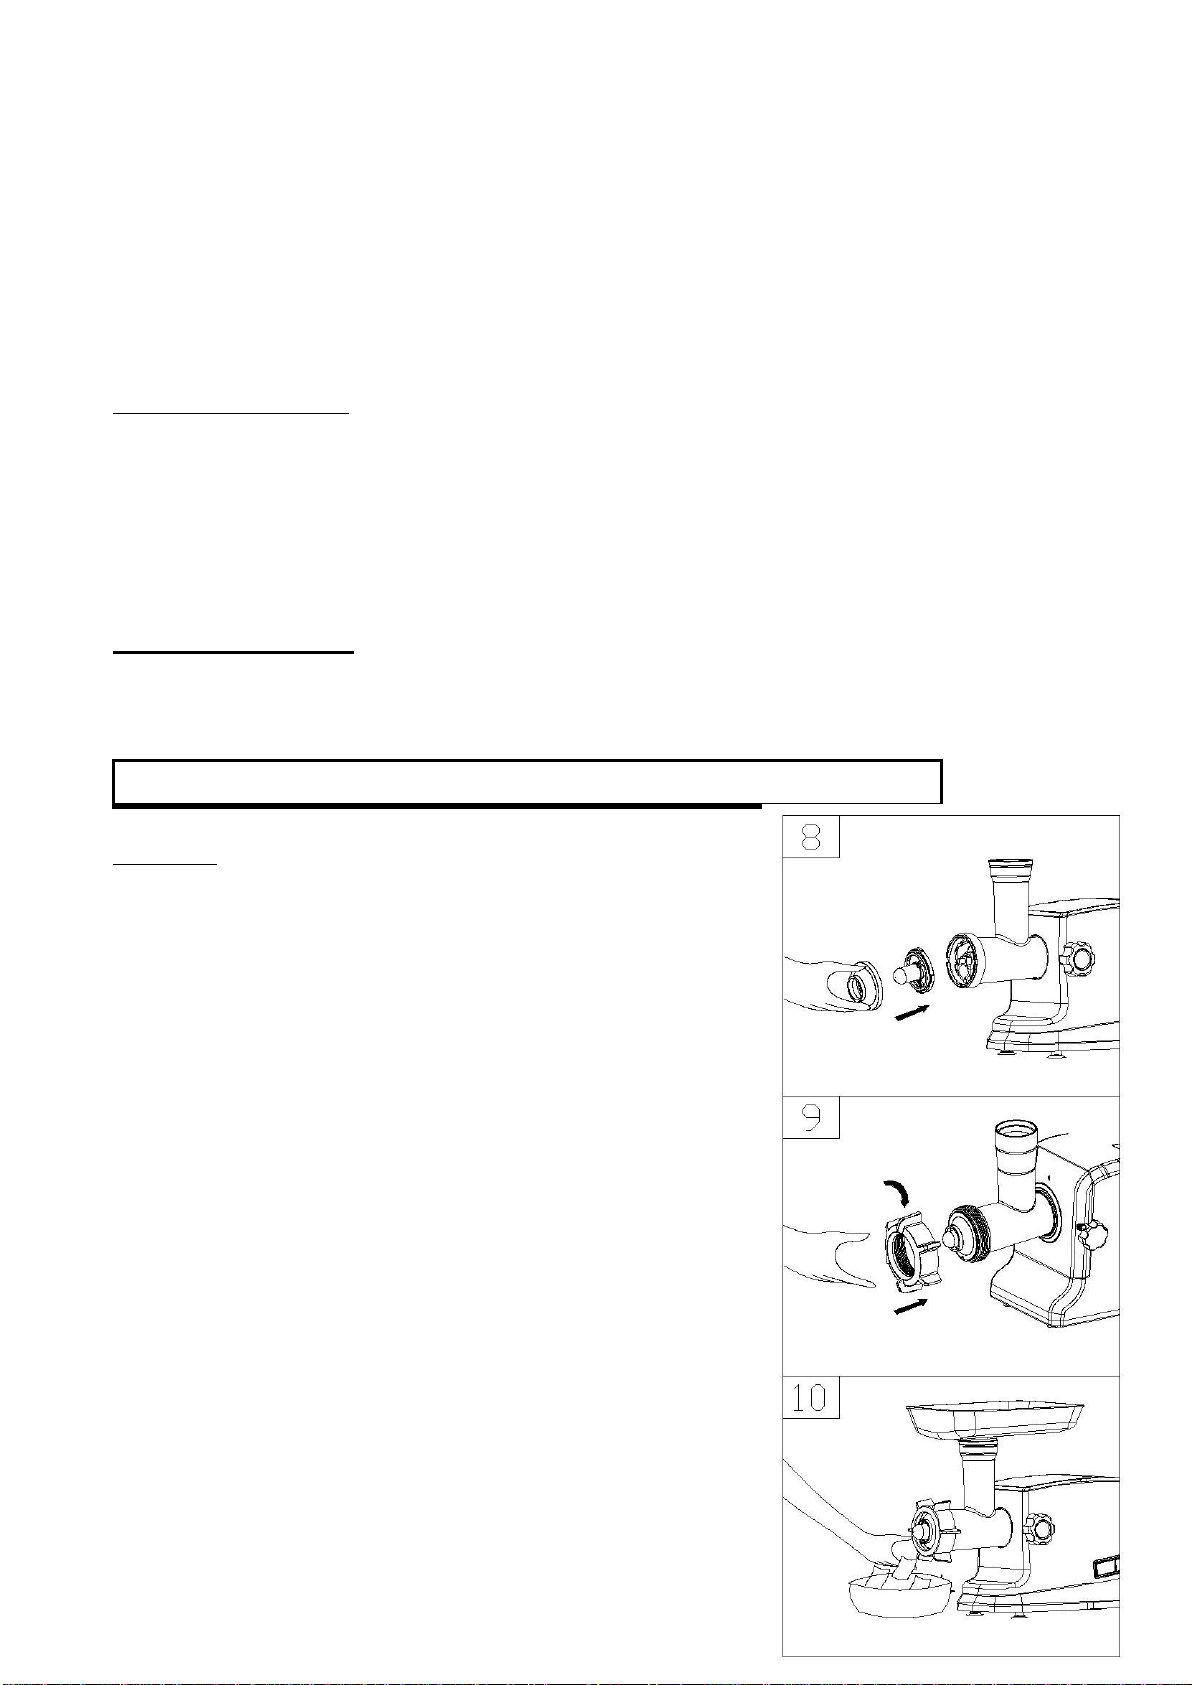
◆Place the desired cutting plate next to the
cutting blade, fitting protrusions in the
slot (fig.5).
◆Support or press the centre of the cutting