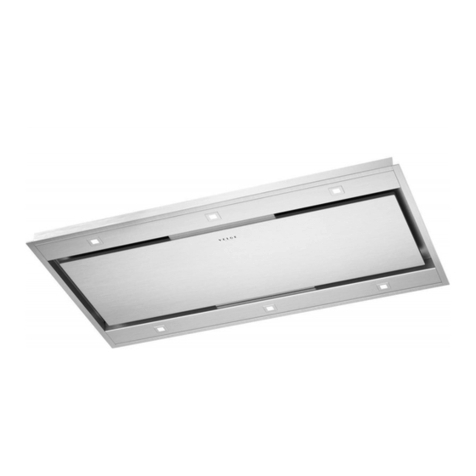
VELGE Kjerag Assembly instructions


www.velgehome.com
PL INSTRUKCJA MONTAŻU, OBSŁUGI I KONSERWACJI DLA OKAPU
MODEL VBCH 5510.1W, 230-240 V prądu zmiennego, 50 Hz
Okapwyciągowy.Niniejszeurządzeniezostałoskonstruowanezgodnieznormamieuropejskimiorazwymogamizawartymiwnastępujących
dyrektywach: EN 60335-1 (Dyrektywa niskonapięciowa), EN55014-2 (Kompatybilność elektromagnetyczna).
MONTAŻ
Zapoznać się z instrukcją obsługi przed montażem i/lub użytkowaniem
okapu.
Urządzenie należy zamontować w odległości co najmniej 60 cm od płyty
grzejnej. Jeśli:
w instrukcji montażu kuchenki gazowej wskazano większą odległość,
wówczas należy zachować taką większą odległość. Nie należy montować
urządzenia
powyżej kuchenki wyposażonej w górną płytę grzejną.
Należy przestrzegać wszystkich przepisów dotyczących odprowadzania
powietrza.
Powietrza nie należy odprowadzać za pomocą rur wykorzystywanych do
odprowadzania oparów wytwarzanych przez urządzenia zasilane gazem
lub urządzenia zasilane paliwem (nie ma to zastosowania do ltrowania
okapów). W trakcie użytkowania okapu razem z innymi urządzeniami
zasilanymi gazem lub paliwem należy odpowiednio wentylować
pomieszczenia.
W celu ułatwienia dostępu, wskazane jest, aby przestawić w miarę
możliwości meble znajdujące się w obszarze montażu.
Montaż okapu na ścianie.
Okap wyposażony jest we wszystkie mocowania niezbędne do jego
montażu, które są odpowiednie dla większości powierzchni.
Upewnić się, że powierzchnia montażu jest wytrzymała.
Prace montażowe mogą wykonywać jedynie wykwalikowani monterzy,
zgodnie z wymogami obowiązującego prawa.
•Wywiercić w szafce wiszącej otwór w sposób pokazany na rys. 1
•Wsunąć okap i zamocować go za pomocą zaczepów mocujących (A)
•Dokręcić śruby (B) upewniając się, że oba uchwyty znajdują się
w kontakcie z krawędzią szai wiszącej
•Nałożyć dwie osłony boczne, wstawiając je na ściany boczne i mocując za
pomocą śrub (C)
•Nałożyć na okap pokrywę maskującą (D) umieszczając ją na szafce
wiszącej i opierając na okapie.
POŁĄCZENIA ELEKTRYCZNE
Niniejsze urządzenie należy podłączyć do instalacji uziemiającej. Można
zastosować dwa rodzaje połączeń elektrycznych:
1)Za pomocą standardowej wtyczki połączonej z kablem zasilającym
oraz wprowadzonej do gniazda, które musi być łatwo dostępne (tak, aby
wtyczka mogła zostać odłączona w trakcie serwisowania). Upewnić się,
że istnieje łatwy dostęp do wtyczki również po dokonaniu kompletnego
montażu urządzenia.
2)Poprzez stałe połączenie sieciowe wyposażone w wyłącznik
dwubiegunowy, który zapewnia odłączenie sieci, przy zachowaniu
odległości pomiędzy otwartymi stykami, która pozwala na całkowite
odłączenie w warunkach przepięcia kategorii III, zgodnie z wymogami
prawa dotyczącymi instalacji. Nie należy przerywać połączenia
z uziemieniem (kabel koloru żółto-zielonego).
Dane znamionowe dotyczące zasilania sieciowego i częstotliwości prądu
dostępne są na tabliczce znamionowej znajdującej się wewnątrz okapu.

www.velgehome.com
ZASTOSOWANIE
Niniejszy okap może być stosowany z wykorzystaniem jego funkcji
odprowadzania oparów lub ltrowania.
Odprowadzanie oparów (ewakuacja zewnętrzna). Opary kuchenne są
odprowadzane na zewnątrz przez przewód kominowy podłączony do
złącza wylotowego.
Przewód ten w żadnym wypadku nie może być podłączony do rur
odprowadzających opary (piekarnika, kotła, palników, itp.).
Filtrowanie (wewnętrzna recyrkulacja). W trakcie gotowania gazy
odlotowe i pary są ltrowane przez ltry z węgla aktywnego, oczyszczane
i recyrkulowane do kuchni przez rurę podłączoną do przewodu okapu
odprowadzającego opary, który dochodzi do otworu znajdującego się
w górnej części szai wiszącej. Otwór ten zawsze powinien być wolny od
przeszkód, aby umożliwić powrót powietrza do kuchni.
DZIAŁANIE
Okap jest wyposażony w silnik wielobiegowy.
W normalnych warunkach okap powinien być uruchamiany przy niskiej
prędkości, natomiast przy wyższych prędkościach należy go uruchamiać
tylko wówczas, gdy nagromadziły się na nim duże ilości oparów lub
zapachów.
Zalecasięwłączanieokapuwchwilirozpoczęciagotowaniaipozostawianie
go włączonego do chwili wyeliminowania wszystkich zapachów.
Do każdego z poleceń przypisany jest odpowiedni przycisk. Naciśnąć
przycisk TL w celu włączenia lampki, nacisnąć przycisk T1 w celu
włączenia okapu przy pierwszej prędkości oraz wyłączenia pochłaniacza,
nacisnąć przyciski T2-T3-T4 w celu wybrania prędkości
Po naciśnięciu polecenia T1 silnik zaczyna pracować na pierwszej
prędkości.PoleceniaT2-T3-T4powodująprzełączeniesilnikaodpowiednio
na prędkości 2, 3 i 4, nacisnąć przycisk T5 w celu uruchomienia funkcji
wymiany powietrza.
Aby wyłączyć silnik należy nacisnąć przycisk T1 jeden raz jeśli jest on
nastawiony na prędkość pierwszą, dwa razy jeśli jest on nastawiony na
prędkość drugą, trzecią i czwartą.
Za pomocą przycisku T4 dokonuje się wyboru na 10 minut maksymalnej
prędkości pochłaniania (klawisz migający), po czym wentylator
samoczynnie przełącza się do prędkości trzeciej.
Wymiana powietrza
Poprzez naciskanie przycisku T5 uruchamia się wymianę powietrza,
która działa przez
24 godziny. Pochłaniacz włącza się na 5 minut przy pierwszej prędkości,
po czym wyłącza się
się samoczynnie. Ten planowany cykl powtarza się co 25 minut.
Podczas pochłaniania światło polecenia miga, w przeciwnym razie jest
ono stałe.
Funkcję tę można wyłączyć w każdej chwili, naciskając na pożądaną
prędkość.
Regulacja i zaplanowane samoczynne wyłączanie się
Aby uaktywnić samoczynne wyłączanie się, należy włączyć okap na
pożądaną prędkość, a następnie nacisnąć i przytrzymać przycisk TL
przez kilka sekund, dopóki wszystkie diody LED nie zaczną migać.
Poprzez naciśnięcie przycisków (T1, T2, T3) można w poniższy sposób
zaprogramować zaplanowane samoczynne wyłączenie się:
T1 odpowiada 5-ciu minutom
T2 odpowiada 10-ciu minutom
T3 odpowiada 15-stu minutom
W trybie pracy automatycznej można zmienić ustawienia prędkości. Jeśli
wybierzemy prędkość maksymalną, po 5 minutach wentylator wyciągu
przełączy się na trzecią prędkość i automatycznie wyłączy się przy tej
prędkości.
Przypomnienie o potrzebie przeprowadzenia konserwacji ltrów
Aluminiowe ltry przeciwtłuszczowe
W chwili gdy okap jest wyłączony po kolejnych 30 godzinach jego
eksploatacji, wszystkie diody przycisków prędkości włączają się świecąc

www.velgehome.com
ltry węglowe.
Okap należy wyczyścić natychmiast po jego zamontowaniu i zdjęciu
folii ochronnej w celu usunięcia resztek kleju lub wszelkich innych
zanieczyszczeń.
Zarówno wewnętrzną, jak i zewnętrzną część okapu należy czyścić często
(co najmniej raz w miesiącu).
Nie należy pozwolić na to, aby zanieczyszczenia gromadziły się na
wewnętrznej i zewnętrznej powierzchni okapu.
Do czyszczenia obudowy okapu nie należy używać kwasu lub produktów
podstawowych ani też gąbek ściernych.
Czyścić okap gąbką zwilżoną ciepłą wodą i małą ilością neutralnego
detergentu (np. detergentu do zmywarek) w celu usunięcia ewentualnych
cząstek tłuszczu.
Opłukać okap wilgotną szmatką, starannie usuwając wszystek detergent
zgodnie z kierunkiem polerowania powierzchni ze stali.
Suszenie okapu jest bardzo ważne, szczególnie w miejscach, gdzie woda
jest szczególnie twarda i pozostawia osad wapienny.
Okap wyposażonyjest w ledoweźródła światła,którenie tylko umożliwiają
dobre podświetlenie i znaczną oszczędność energii, ale również posiadają
trwałość średnio 10 razy wyższą niż oświetlenie tradycyjne. W przypadku
wymiany należy kontaktować się z serwisem.
OSTRZEŻENIA
Niniejsza instrukcja stanowi integralną część samego urządzenia, wobec
powyższego należy ją starannie przechowywać i ZAWSZE powinna
ona towarzyszyć urządzeniu, nawet w przypadku przeniesienia jego
własności na innego właściciela lub posiadania na innego użytkownika lub
w przypadku, gdy okap jest przenoszony do innego zakładu. Jakiejkolwiek
regulacji instalacji elektrycznej, która może być konieczna w celu
zainstalowania okapu, mogą dokonywać wyłącznie osoby kompetentne.
Wszelkie naprawy wykonywane przez osoby niekompetentne mogą
powodować powstawanie uszkodzeń. W celu dokonania jakiejkolwiek
naprawy lub innych czynności technicznych należy skontaktować się
się światłem stałym przez 30 sekund, aby przypomnieć, że aluminiowe
ltry przeciwtłuszczowe wymagają czyszczenia. Aby wyzerować timer
przytrzymać wciśnięty przycisk T1 przy wyłączonym pochłaniaczu,
w przeciwnym razie timer pozostanie ustawiony na 30 godzin eksploatacji
i przypomnienie powtórzy się, w chwili, gdy okap zostanie wyłączany. Filtr
węglowy (do ltrowania okapów)
W chwili gdy okap jest wyłączony po kolejnych 120 godzinach jego
eksploatacji, wszystkie diody migają przez 30 sekund, aby przypomnieć,
że ltr węglowy wymaga czyszczenia.
Aby wyzerować timer przytrzymać wciśnięty przycisk T1 przy
wyłączonym pochłaniaczu, w przeciwnym razie timer pozostanie
ustawiony na 120 godzin eksploatacji i przypomnienie powtórzy się,
w chwili, gdy okap zostanie wyłączany.
KONSERWACJA
Zawsze przed przystąpieniem do czynności konserwacji lub
czyszczenia należy odłączać okap od zasilania.
Szczególną uwagę należy zwrócić na metalowe ltry przeciwtłuszczowe,
które są przeznaczone do wychwytywania cząsteczek tłuszczu zawartych
w oparach. Metalowe ltry przeciwtłuszczowe należy myć co najmniej raz
w miesiącu przy użyciu detergentu i w gorącej wodzie (lub w zmywarce).
UWAGA: tłuszcz, który gromadzi się w ltrach może łatwo zapalić się,
dlatego niezwykle ważne jest, aby metalowe ltry czyścić regularnie
i zgodnie z instrukcją. Filtry węgla aktywnego przeznaczone są do
usuwania nieprzyjemnych zapachów z kuchennych oparów. Oczyszczone
powietrze jest następnie uwalniane do środowiska. Filtrów węglowych nie
należy myć, natomiast należy je wymienić 2 do 3 razy w roku w zależności
od tego, z jaką częstotliwością korzysta się z okapu. Nowe ltry należy
nabyć bezpośrednio u producenta.
Przy wymianie ltrów z węgla aktywnego należy najpierw zdjąć metalowe
ltry przeciwtłuszczowe. W tym momencie można usunąć dwa pręty
wsparcia i ltr węglowy. (rys. 3).
Wykonywać czynności w odwrotnej kolejności, aby zainstalować nowe

www.velgehome.com
z Centrum Obsługi Technicznej, które jest uprawniona do wymiany części
zamiennych.
Zawsze należy upewnić się, że wszystkie części elektryczne (lampy,
urządzenie do odprowadzania oparów) są odłączone, kiedy urządzenie
nie jest używane.
W przypadku wyładowań atmosferycznych umieścić przełącznik systemu
na pozycji „Wyłączony”.
Korzystanie z okapu nie może różnić się od korzystania z pochłaniaczy
oparów kuchennych w kuchenkach produkcji krajowej. Producent nie
ponosi żadnej odpowiedzialności za szkody spowodowane przez ludzi,
zwierzęta lub przedmioty, lub przez błędy, do których doszło w trakcie
montażu i obsługi, lub przez użytkowanie niezgodne z prawem.
Należy upewnić się, że wskaźniki znamionowego napięcia (V)
i częstotliwości (Hz) podane na tabliczce znamionowej znajdującej się
wewnątrz okapu odpowiadają tym dostępnym w miejscu instalacji.
Przypominamy, że stosowanie produktów napędzanych energią
elektryczną wymaga przestrzegania pewnych podstawowych zasad
bezpieczeństwa, w następujący sposób:
•Niniejsze urządzenie nie jest przeznaczone do użytku przez osoby (w tym
dzieci) o ograniczonych zdolnościach psychicznych lub motorycznych,
nieposiadające odpowiedniego doświadczenia lub wiedzy, chyba że są one
nadzorowane lub osoba odpowiedzialna za ich bezpieczeństwo poda im
instrukcje dotyczące korzystania z urządzenia. Dzieci należy nadzorować,
aby mieć pewność, iż nie używają one urządzenia do zabawy.
•Zabrania się przeprowadzania jakichkolwiek czynności czyszczenia,
jeżeli urządzenie nie jest odłączone od zasilania głównego i jeśli
wyłącznik główny instalacji elektrycznej nie jest wyłączony.
W przypadku niewykonywania czynności czyszczenia zgodnie
z niniejszymi instrukcjami, można spowodować wybuch pożaru.
•Nie należy ciągnąć, usuwać lub skręcać kabla, który wychodzi
z urządzenia, nawet jeśli został on odłączony od zasilania głównego.
•Nie pryskać ani nie wylewać wody bezpośrednio na urządzenie.
•Nie dołączać żadnych ostrych narzędzi do otworów odprowadzających
opary oraz do wylotów powietrza.
•Nie wymontowywać ltrów w celu dotarcia do wewnętrznej części
urządzenia w przypadku, gdy wyłącznik główny instalacji elektrycznej
nie jest wyłączony.
•Nie gotować na ogniu, który dociera bezpośrednio pod okap. Zachować
szczególną ostrożność podczas smażenia, aby uniknąć zapalenia się oleju.
•UWAGA: Dostępne części mogą nagrzewać się w przypadku korzystania
z urządzeń do gotowania.

www.velgehome.com
INSTALLATION, OPERATING AND MAINTENANCE INSTRUCTIONS
FOR COOKER HOOD MODEL VBCH 5510.1W, 230-240 Vac - 50 Hz
Exhausting cooker hood. The equipment is constructed in accordance with European Standards and with the requirements included in the
following Directives: EN60335-1 ( Low Voltage Directive), EN55014-2 (Electromagnetic Compatibility).
INSTALLATION
Read the instruction manual before installing and/or using the hood.
The unit must be tted at a distance of at least 60 cm. from the cooking
hob. If the mounting instructions of the gas cooker indicate a wider
distance, respect it. The unit must not be mounted above cookers tted
with top radiant plate.
Respect all the air discharge regulations.
The air must not be discharged in a pipe used to discharge exhaust fumes
produced by gas-fed equipments or fuel-fed equipments (this does not
apply to ltering hoods).
The room must be adequately ventilated when the hoods is used together
with other gas- fed or fuel-fed equipments.
For an easy access, it is advisable to move possible furniture under the
installation area.
Installation of the hood onto the wall.
The hood is equipped with all the necessary fastenings for its installation,
which are suitable for most surfaces.
Verify that the installation surface is strong.
Installation must be carried out by qualied installers according to
present regulations.
•Drill into the wall unit as in Figure 1
•Thread the hood and fasten it through the clamping hooks (A)
•Secure the screws (B) making sure that both brackets are in contact with
the shoulder of the wall unit
•Apply the two side caps, inserting them laterally and xing the screws (C)
•Apply the aesthetic cover (D) to the hood by inserting it on the wall unit
and resting it on the hood.
ELECTRICAL CONNECTIONS
This equipment must be connected to a grounding plant. Two types of
electrical connection can be used:
1)Using a standard plug to be connected to the power cable and inserted
in a mains socket which must be accessible (so that the plug can be
disconnected when servicing is carried out). Make sure that the plug is
accessible also after the complete installation of the equipment.
2)By means of a xed mains connection, tting a bipolar switch, which
ensures the disconnection, with an opening distance of the contacts
allowing a complete disconnection on the conditions of the overvoltage
III category, according to installation regulations. The ground connection
(yellow-green wire) must not be interrupted.
Refer to the plate inside the hood for the mains voltage and frequency
ratings.
EMPLOYMENT
This cooker hood can be employed as exhausting or ltering.
Exhausting (external evacuation). Kitchen smokes are driven outside
through a ue joined to the exhaust pipe ue connector.
GB

www.velgehome.com
turns o automatically. This timed cycle repeats every 25 minutes.
During extraction the light of the command blinks, otherwise it is xed.
This function is easy to deactivate by pressing the desired speed.
Adjustable and delayed self switching o
Choose the desired speed while the hood is working, then keep the speed
button pressed until it starts blinking. This button corresponds to the
desired self switching o minutes. Please keep in mind that:
T1 corresponds to 5 minutes
T2 corresponds to 10 minutes
T3 corresponds to 15 minutes
During the time of the self switching you can go any change the set speed.
If you select the maximum speed, after 5 minutes the extraction fan
switches to the 3rd speed and will automatically turn o at such speed.
Filters maintenance reminder
Aluminium anti-grease lters
Once the hood is switched o, after 30 hour functioning, all the leds of the
speed buttons switch on with a xed light for 30 seconds to remind that
aluminium anti-grease lter need cleaning.To set the timer to zero keep
the button T1 pressed with the aspirator switched o, otherwise the timer
will remain set on 30 hour functioning and the reminder will occur again
when the hood is switched o again.
Charcoal lter (for ltering hoods)
Once the hood is switched o, after 120 hour functioning, all leds blink for
30 seconds to remind that the charcoal lter need cleaning.
To set the timer to zero keep the button T1 pressed with the aspirator
switched o, otherwise the timer will remain set on 120 hour functioning
and the reminder will occur again when the hood is switched o again.
MAINTENANCE
Always disconnect the hood from the mains before carrying out any
maintenance or cleaning operation.
This pipe must not under any circumstances be connected to cooker,
boiler or burner exhaust pipes, etc.
Filtering (inside recycling). Waste gases and vapours when cooking are
ltered through active carbon lters, depurated and re-circulated into the
kitchen through a tube connected to the ducting tting (spigot) on the
cookerhood, which conveys the air to a hole on the upper part of the wall
mounted unit. Always keep this hole free of obstacles to permit the air to
return into the kitchen.
OPERATION
The hood is supplied with a multispeed motor.
The hood should be run at low speed under normal conditions and at
higher speeds only when there is a heavy build-up of fumes or odours.
Ideally, the hood should be switched on as soon as cooking is started and
then kept on until all odours have been eliminated.
The controls consist of these commands. Press TL to turn on the light,
press T1 to swich on the hood at rst speed and to switch o the aspirator,
press T2-T3-T4 to select functioning speeds
By pressing of the command T1 the motor starts running at the 1st speed.
The commands
T2-T3-T4 switch the motor on respectively at the 2nd, 3rd and 4th speed,
press T5 to air exchange function.
In order to switch the motor o press T1 once if set at the 1st speed, twice if
set at the 2nd, 3rd and 4th speed.
T4 is selected with the key top speed of aspiration for 10 minutes (ashing
key), after which the fan will automatically switch to 3rd speed.
Change of air
By pressing the T5 control, you activate the change of air, which keeps on
functioning for
24 hours. The extractor turns on at the rst speed for 5 minutes, then it

www.velgehome.com
Particular attention should be paid to the metallic anti-grease lters that
are designed to trap particles of fat contained in the fumes. The metallic
anti-grease lters must be washed at least once a month with detergent in
hot water (or in the dish-washer).
ATTENTION: the grease collected in the lters can easily catch re and it
is therefore extremely important to clean the metallic lters on a regular
basis as per instructions.
The activated charcoal lters are designed to collect unpleasant odours in
the cooking fumes. The air is then released puried in the environment.
The charcoal lters must not be washed, but replaced 2 or 3 times a year,
depending on how much the hood is used. New lters are to be requested
directly to the manufacturer.
When replacing the activated charcoal lters, you should rst take o
the anti-grease metallic lters. At this moment you can remove the two
support rods and carbon lter. (Fig. 3).
Invert the operation in order to install the new charcoal lters.
In order to remove the remaining glue or any impurity, the cooker hood
must be cleaned immediately after installation and after having removed
the protective lm.
Thecookerhood mustbecleaned frequentlybothinternallyandexternally
(at least once a month).
Do not let dirt gather on the inner and outer surfaces of the hood.
To clean the exterior of the hood do not use either acid or basic products,
or abrasive sponges.
Clean the hood with a sponge dampen in warm water and a little quantity
of neutral detergent (for example dishwasher detergent), in order to
remove possible particles of grease.
Rinse with a damp cloth, removing all the detergent carefully, following
the satin nish direction on the steel surface.
Drying is very important, especially in areas where water is particularly
hard and leaves limestone.
The hood features a LED light that, in addition to oering a
good lighting and a signicant energy savings, are guaranteed
to last on average 10 times more than traditional lights.
For replacement, contact the Assistance Service.
WARNINGS
The present instruction manual is an integral part of the appliance itself,
therefore it must be carefully kept and ALWAYS accompany it, even in
case of its assignment to another owner or user or in case the cooker hood
is moved to another installation plant.
Any eventual adjustment to the electrical system, which may be necessary
to install the cooker hood, must be carried out only by competent people.
Any repair carried out by no competent people may cause damages. For
any repair or needed technical action make reference to a Technical
Assistance Center, which is authorized to carry out the replacement of
the spare parts.
Always make sure that all the electrical parts (lights, exhaustion unit) are
disconnected when the appliance is not in use.
By storms take o the main switch of the house electrical system.
The using of the cooker hood must not be other than the use of exhausting
units for cooking damps on domestic kitchens. The manufacturer does
not accept any liability for damages caused by people, animals or things,
by installation and maintenance mistakes or by any illegitimate use.
Make sure that the voltage (V) and the frequency (Hz) ratings indicated
on the plate inside the cooker hood correspond to the ones available in the
installation place.
We remind that the use of products functioning with electrical energy
implies the observance of some essential security rules, as follows:
•This equipment is not intended for people (children included) with
reduced mental or motorcapacities,withlackof experienceorknowledge,
unless they are supervised or unless a person responsible for their
security, gives them instructions regarding the use of the equipment.
Children must be supervised in order to be sure that they do not play with
the equipment.
•Any cleaning action is forbidden if the appliance hasn’t been

www.velgehome.com
disconnected from the main power supply and if the main switch of the
house electrical system is not o. If cleaning is not carried out according
to these instructions, a re may break out.
•Do not pull, take o or twist the cable coming out from the appliance,
even though this has been disconnected from the main power supply.
•Do not sprinkle or throw any water directly on the appliance.
•Do not stick any sharp tool inside the exhausting holes and into the air
discharge.
•Do not take out the lters in order to reach the internal sides of the
appliance in case the main switch of the house electrical system is not o.
•Do not singe or ambé directly underneath the cooker hood. Take
particular care when frying to ensure that the oil does not catch re.
•CAUTION: Accessible parts may become hot when used with cooking
appliances

www.velgehome.com
ANLEITUNGEN FÜR INSTALLATION, GEBRAUCH UND WARTUNG DER
ABZUGSHAUBE MOD. VBCH 5510.1W, 230-240 Vac - 50 Hz
Abzugshaube für Küchendünste. Das Gerät entspricht den Europäischen Normen und den Anforderungen der Richtlinien: EN60335-1
(elektrische Sicherheit - Niederspannung), EN55014-2 (elektromagnetische Kompatibilität).
D
INSTALLATION
Vor Installation und/oder Gebrauch der Abzugshaube sämtliche
Gebrauchsanleitungen lesen.
Das installierte Gerät muss von der Kochstelle mindestens 60 cm enfernt
sein. Sollte laut Anweisungen des Gasherdherstellers ein größerer
Abstand notwendig sein, muss dieser berücksichtigt werden. Es darf
nicht über Herdplatten die Wärme ausstrahlen installiert werden.
Sämtliche Normativen über Ablufteinrichtungen müssen befolgt werden.
Die Dünste dürfen nicht in Abluftkamine anderer Geräte, die Gase oder
andere Stoe verbrennen, geleitet werden (gilt nicht bei Abzugshauben
mit Umluftbetrieb).
Wenn im Raum die Abzugshaube gleichzeitig mit anderen Geräten,
die Gas oder Holz verbrennen, benutzt wird, muss für eine genügende
Luftzufuhr gesorgt werden.
Eventuell, am Installationsort vorhandene Möbel verschieben, um die
Installationsarbeiten zu erleichtern.
Wandbefestigung der Abzugshaube
Das zur Installation benötigte Befestigungsmaterial liegt bei und ist für
die meisten Oberächen geeignet.
Sich jedenfalls vergewissern, dass die Wand zur Anbringug stark genug
ist.
Die Installation darf nur von erfahrenem, qualiziertem Personal
durchgeführt werden, gemäß den jeweils geltenden Bestimmungen.
•Bohren Sie die Hängeeinheit wie in Abbildung 1 durch.
•Stecken Sie die Haube und hängen Sie es an durch die Befästigungshaken
(A)
•Befestigen Sie die Schrauben (B) und versichern Sie sich, dass beide
Spannbügele in Kontakt mit der Schulter der Hängeeinheit sind
•Bringen Sie die beiden seitlichen Deckele an, bringen sie seitlich an und
befestigen die Schrauben (C)
•Bringen Sie die ästhetische Deckung (D) an die Haube an, stecken Sie sie
in der Hängeeinheit und lehnen Sie sie an die Haube.
ELEKTROANSCHLUSS
Die Elektroanlage muss zum Anschluss dieses Gerätes geerdet sein. Es
sind zwei Netzanschlüsse möglich:
1)entweder mit genormten Stecker, der mit dem Speisekabel verbunden
wird und in eine Steckdose der Elektroanlage gesteckt wird, die in
nächster Nähe sein muss (zum Ausstecken bei Wartungseingrien).
Auch nach kompletter Installation des Gerätes, sollte der Stecker leicht
zugänglich sein;
2)oder durch direkten Netzanschluss, wobei ein bipolarer
Schalter, zur Stromunterbrechung, vorgesehen werden muss. Die
Kontakteönung desselben muss eine komplette Disaktivierung unter
Überlastungsbedingungen der Kategorie III garantieren können, gemäß
der Installationsregelungen. Die Erdungsverbindung (gelb-grünes Kabel)
darf nicht unterbrochen werden.
Die Werte für Spannung und Frequenz sind aus dem Typenschild, innen
am Gerät, zu entnehmen.
GEBRAUCH

www.velgehome.com
Diese Abzugshaube kann entweder mit Umluftbetrieb oder mit
Abluftbetrieb gebraucht werden.
Abluftbetrieb (Absaugung ins Freie). Die Küchendünste werden durch
ein Rohr, das am Abluftanschluss angeschlossen wird, ins Freie geleitet.
Auf keinen Fall darf das Abluftrohr an Abluftkamine anderer
Einrichtungen (Herde, Heizkessel, Brenner usw.,) angeschlossen werden.
Umluftbetrieb (Luftrückführung). Die Küchendünste durchströmen
die Aktivkohlelter, werden somit gereinigt und gelangen dann wieder,
durch ein Rohr, das mit dem Auslassstutzen der Abzugshaube verbunden
ist und zu einer am oberen Teil der Hängestruktur sich bendlicher
Önung führt, in den Raum. Diese Önung muss frei bleiben, damit die
Luft problemlos in die Küche zurückströmen kann.
FUNKTIONSWEISE
Die Abzugshaube ist mit Mehrstufenmotor ausgestattet. Bei
Normalverhältnissen ist es ratsam die unterste Leistungsstufe
einzustellen, nur bei starkem Geruch und vermehrtem Dunst die höheren
Stufen einstellen. Außerdem wird empfohlen bereits bei Kochbeginn
die Abzugshaube einzuschalten und diese erst auszuschalten, wenn alle
Gerüche verschwunden sind. Im Schaltfeld sind Tasten zur Einschaltung
der Lampe (TL) und des Motors mit verschiedenen Geschwindigkeiten
T1-T2-T3-T4, für die Funktion der Luftaustausch drücken T5.
Durch Drücken der Taste T1 wird die erste Geschwindigkeitsstufe
aktiviert.
Zum Ausschalten T1 drücken: einmal bei Geschwindigkeit 1; zweimal bei
zweiter, dritter und vierter Geschwindigkeitsstufe.
T4 ist mit der Taste Höchstgeschwindigkeit von Streben nach 10
Minuten eingestellt haben (blinkende Taste), nach dem der Lüfter wird
automatisch bis zur 3. Geschwindigkeit zu wechseln.
Luftwechsel
Durch Betätigung der Taste T5 wird die Luftwechselfunktion gewählt, die
maximal 24 Stunden lang aktiv bleibt.
Die Absaugvorrichtung schaltet sich 5 Minuten lang in der ersten
Geschwindigkeitsstufe ein, schaltet sich dann automatisch wieder aus
und
wiederholt diesen Vorgang zyklisch alle 25 Minuten.
Während der Absaugphase blinkt die Leuchte der Steuereinheit, die
ansonsten stetig leuchtet.
Es ist jederzeit möglich, die Funktion auszuschalten, indem man die
gewünschte Geschwindigkeit auswählt.
Aktivierung Selbstausschaltung- verspätet regulierbar
Bei funktionierender Abzugshaube, Taste TL so lange drücken bis
alle Lampen aulinken, dann eine der Tasten T1, T2, T3, drücken,
um die Ausschaltzeit zu programmieren, nachstehend die Zeiten der
entsprechenden Tasten:
T1 entspricht 5 Minuten
T2 entspricht 10 Minuten
T3 entspricht 15 Minuten
Im Automatikbetrieb kann die Geschwindigkeitseinstellung geändert
werden. Wählt man die maximale Geschwindigkeit, so wird der
Abzugsventilator nach 5 Minuten in die dritte Geschwindigkeitsstufe
umgeschaltet und automatisch bei dieser Geschwindigkeit ausgeschaltet.
Sättigungsanzeige Filter
Aluminium-Fettlter
Alle 30 Stunden Betrieb, werden nach dem Ausschalten der Abzugshaube
alle Geschwindigkeitstasten für ca. 30 Sekunden x aueuchten, das
soll bedeuten, dass die Alu-Fettlter gereinigt werden sollen. Zur
Wiederherstellung des Timers, bei ausgeschaltetem Absauger, Taste
T1 drücken, andernfalls würde beim nächsten Ausschalten wieder die
Sättigungsanzeige aktiviert.
Alle120StundenBetrieb,werdennachdemAusschaltender Abzugshaube
alle Geschwindigkeitstasten für ca. 30 Sekunden aulinken, um daran zu
erinnern die Aktivkohlelter zu wechseln. Zur Wiederherstellung des
Timers, bei ausgeschaltetem Absauger, Taste T1 drücken, andernfalls

www.velgehome.com
würde beim nächsten Ausschalten wieder die Sättigungsanzeige für die
Aktivkohlelter aktiviert.
WARTUNG
VorReinigungs-undWartungseingrien dieStromzufuhrunterbrechen
Die Metall-Fettlter bedürfen einer besonderen Pege, weil sie ja zur
Aufgabe haben die im Kochdunst enthaltenen Fettpartikeln aufzuhalten.
Die Metall-Fettlter müssen monatlich in warmem Wasser, unter Zusatz
eines milden Reinigungsmittels, ausgewaschen werden.
ACHTUNG: das in den Metall-Filtern sich angesammelte Fett ist
entzündbar. Die Filter sollten deshalb regelmäßig wie oben beschrieben
gereinigt werden.
Die AKTIVKOHLEFILTER haben zur Aufgabe, die Gerüche der
Kochdämpfe aufzunehmen. Die Luft wird gereinigt abgelassen.
Aktivkohlelter dürfen nicht gewaschen werden und müssen je nach
Gebrauch der Haube 2 bis 3 Mal im Jahr ausgetauscht werden.
Die Filter sind beim Kundenservice oder dem Hersteller erhältlich.
Zum Austausch der Aktivkohlelter müssen zuerst die Antifettlter
ausgebaut werden . An dieser Stelle können Sie entfernen Sie die beiden
Stützstangen und Kohlelter. (Abb. 3). Zum Einbau der neuen Filter in
umgekehrter Reihenfolge vorgehen.
Die Abzugshaube muss sofort nach Installation und nach Abziehen
der Schutzschicht gereinigt werden, um Klebstoreste oder andere
Verschmutzungen vollkommen zu beseitigen.
Die Abzugshaube muss regelmäßig außen und innen gereinigt werden
(mindestens 1 Mal im Monat)
Ansammeln von Schmutz, außen oder innen an der Abzugshaube, sollte
vermieden werden.
Zur Pege des äußeren Gehäuses müssen alkaline oder säurehaltige
Produkte oder Scheuerschwämme vermieden werden.
Die Abzugshaube mit warmem Wasser, unter spärlichem Zusatz von
Neutralseife (z.B. Geschirrspülmittel) und mit weichem Schwamm
reinigen, um eventuelle Fettablagerungen zu beseitigen.
Mit einem feuchten Lappen sorgfältig, der Satinierrichtung
der Stahloberäche folgend, nachwischen, um sämtliche
Reinigungsmittelreste zu entfernen.
Gut trocknen, besonders wenn zum Reinigen sehr hartes Wasser benutzt
wird, das Kalkspuren hinterlassen könnte.
Die Rauchabzugshaube ist mit LED-Leuchten ausgestattet, die nicht nur
eine gute Beleuchtung und erhebliche Energieersparnisse ermöglichen,
sondern auch eine durchschnittlich um das Zehnfache größere
Lebensdauer als herkömmliche Beleuchtung aufweisen. Bei notwendigem
Austausch ist unser Servicedienst zu kontaktieren.
SICHERHEITSHINWEISE
Dieses Büchlein ist integrierender Bestandteil der Abzugshaube, es muss
darum sorgfältig auewahrt werden und sie IMMER begleiten, auch
wenn sie den Besitzer oder Benutzer wechselt oder wo anders installiert
wird.
Die auf dem Typenschild, innen am Gerät, eingetragenen Werte für
Spannung (V) und Frequenz (Hz) müssen mit den am Installationsort zur
Verfügung stehenden Werten übereinstimmen. Sollten zur Installation
der Abzugshaube Eingrie an der Elektroanlage notwendig sein, müssen
diese durch kompetentes Personal erledigt werden. Reparaturen durch
nicht kompetentes Personal, könnten Schäden verursachen. Sich an
vertragliche Kundendienststellen wenden, wenn Teile ersetzt werden
müssen.
Wenn das Gerät nicht gebraucht wird, alle elektrischen Komponenten
ausschalten (Lampen, Absaugung)
Bei Gewitter den Hauptschalter auf „spento” (Aus) stellen.
Diese Abzugshaube dient lediglich zum Absaugen von Küchendämpfen
über Gasherden. Für Schäden an Personen, Tieren oder Sachen, durch
Fehler bei Installation oder Wartung oder durch unzweckmäßigen
Gebrauch, kann der Hersteller nicht verantwortlich gemacht werden.

www.velgehome.com
Wir erinnern Sie daran, dass beim Gebrauch von elektrischen Geräten
besondere Vorsicht geboten ist:
•Dieses Gerät darf nicht von Personen (einschließlich Kindern) benutzt
werden, die beschränkt geistig und körperlich fähig sind, weder
Kenntnisse noch Erfahrungen besitzen, es sei denn sie werden durch
Personen, die für Ihre Sicherheit zuständig sind beaufsichtigt und
zweckmäßig angewiesen. Besonders sollten die Kinder beaufsichtigt
werden, um zu vermeiden, dass sie das Gerät zum Spielen benutzen.
•Bevor man mit den Reinigungsarbeiten beginnt, muss das Gerät
ausgeschaltet werden, indem man den Hauptschalter auf „spento” (Aus)
stellt. Es besteht Brandgefahr, sollten die Pegeanweisungen nicht
genauestens befolgt werden.
•Es ist verboten die Kabel am Gerät zu ziehen oder zu verbiegen, auch
wenn diese ausgesteckt sind.
•Es ist verboten das Gerät mit Wasser zu besprühen oder zu beschütten.
•Es dürfen keine spitzen Giegenstände in die Absauggitter oder
Luftauslässe eingeführt werden.
•Bevor die Filter entfernt werden, um die Innenwände des Gerätes zu
erreichen, muss der Hauptschalter auf „spento”(Aus) gestellt werden.
•Es ist verboten unter der Abzugshaube oene Flammen zu benutzen.
Beim Backen in heißem Öl ständig dabei sein, weil Öl sich entzünden
könnte.
•ACHTUNG: Zugängliche Teile können heiß werden, wenn sie mit
Kochgeräte verwendet

www.velgehome.com
FINSTRUCTIONS POUR L’INSTALLATION, L’USAGE ET L’ENTRETIEN DE
LA HOTTE MOD.VBCH 5510.1W, 230-240 Vac - 50 Hz
INSTALLATION
Lire tout le livret d’instructions avant d’installer et/ou d’utiliser la hotte.
L’équipement mis en place devra se trouver à au moins 60 cm du plan
de cuisson. Si les instructions d’installation du dispositif de cuisson
au gaz spécient une distance majeure, il faudra en tenir compte. Cet
équipement ne peut pas être installé au-dessus de poêles avec plaque
supérieure radiante.
Il faut respecter toutes les normes concernant l’évacuation de l’air.
L’air ne doit pas être évacuée à travers une conduite utilisée pour évacuer
les fumées produites par des appareils à combustion de gaz ou d’autres
combustibles (ceci n’est pas valable pour les hottes utilisées en modalité
ltrante).
Le local doit disposer d’une ventilation susante, quand on utilise la hotte
simultanément avec d’autres appareils qui utilisent du gaz ou d’autres
combustibles.
On conseille de déplacer les meubles qui éventuellement se trouvent en
dessous de la zone d’installation pour faciliter l’accès.
Installation de la hotte au mur.
La hotte est dotée de tous les dispositifs de xation nécessaires pour son
installation et appropriés à la plupart des surfaces.
Vérier si la surface d’installation est assez solide.
L’installation doit être eectuée par du personnel compétent et qualié
conformément aux normes en vigueur.
•Percer le mur comme dans la gure 1
•Poussez le crochet par la hotte et des crochets (A)
•Serrer les vis (B) faire en sorte que les deux supports sont en contact avec
l’épaule de la toiture
•Appliquer les deux caches latéraux, l’insertion latéralement et vis de
xation (C)
•Appliquer le couvercle esthétique (D) à insérer dans le capot et le toit
reposant sur le capot.
BRANCHEMENT ELECTRIQUE
Cet appareil doit être branché à une installation dotée de mise à la terre.
Deux types de branchement au réseau sont possibles:
1)A travers l’usage d’une che normalisée à laquelle on branche le câble
d’alimentation et qu’on insère dans une prise de l’installation qui doit être
accessible (pour pouvoir la débrancher en cas d’entretien). Vérier que la
prise soit encore accessible après l’installation complète de l’appareil.
2)Atraversunbranchement xeau réseau, en interposantuninterrupteur
bipolaire qui garantisse le débranchement du réseau, avec une distance
d’ouverture entre les contacts qui permettent le débranchement complet
dans les conditions de la catégorie de surtension III, conformément aux
normes d’installation. Le branchement de terre (l jaune-vert) ne doit pas
être interrompu.
Pour les tensions de ligne et fréquence, consulter la plaquette matricule
placée à l’intérieur de l’appareil.
USAGE
Cette hotte peut être utilisée en modalité aspirante ou ltrante.
Aspirante (évacuation à l’extérieur). Les fumées de la cuisine sont
Hotte aspirante pour cuisine. L’appareil est construit conformément aux Normes Européennes et aux exigences des Directives: EN60335-1 (Sécurité
électrique - Basse tension), EN55014-2 (Compatibilité électromagnétique).

www.velgehome.com
expulsées à l’extérieur à travers une conduite raccordée à un raccord
d’évacuation.
En aucun cas la conduite ne doit être reliée à des conduites d’évacuation de
combustion (poêles, chaudières, brûleurs, etc.).
FILTRANTE (recyclage intérieur) Les fumes passent à travers les ltres
decharbon actif pour être dépurées etrecyclées dans le milieu de la cuisine
à travers les ssures de la cheminée de la hotte. Ces ssures doivent être
libres et communicantes avec le milieu de la cuisine.
Dans ce cas la tubulure de déchargement ne doit pas être installées.
FONCTIONNEMENT
La hotte est munie d’un moteur à plusieurs vitesses. On conseille d’utiliser
la vitesse la plus lente dans des conditions normales et les autres vitesses
dans les cas de forte concentration d’odeurs et de vapeurs. On conseille en
outre de mettre en fonction la hotte quand on commence à cuisiner et de
la maintenir en fonction jusqu’à la disparition complète des odeurs.
Les commandes sont munies de touches pour l’allumage de la lampe
TL, pour l’allumage du moteur et pour la sélection de la vitesse de
fonctionnement T1-T2-T3-T4, pour la fonction d’échange d’air presse T5.
Quand on appuie sur la touche T1 le moteur s’allume en 1ère vitesse. Les
touches T2-T3- T4 allument le moteur en 2ème, 3ème et 4ème vitesse selon le
cas.
Pour éteindre le moteur appuyer sur T1: une fois, s’il est utilisé en 1ère
vitesse; deux fois pour la 2ème, 3ème et 4ème vitesse.
Pour exploiter la vitesse maximal d’aspiration, sélectionnez T4, après 10
minutes, la vitesse du ventilateur arrière à la 3ème
Fonction Aération
Il sut d’appuyer sur la touche T5 pour sélectionner la fonction Aération,
qui reste activée au maximum 24 heures ;
l’aspirateur s’allume à la première vitesse pendant 5 minutes et s’éteint
ensuite automatiquement, avant de répéter cycliquement la
fonction toutes les 25 minutes.
Durant la phase d’aspiration, la lumière de la commande clignote, sinon
elle reste xe.
Il est possible de désactiver la fonction à n’importe quel moment, en
sélectionnant la vitesse désirée.
Mise en route, Arrêt automatique diéré réglable
Quand la hotte est en fonction, maintenir enfoncée la touche “TL” pendant
quelques secondes jusqu’à ce que toutes les led commencent à clignoter. En
appuyant sur une des touches (T1, T2, T3) on peut programmer le temps
qui doit s’écouler avant l’arrêt automatique, comme indiqué ci-dessous:
T1 équivaut à 5 minutes
T2 équivaut à 10 minutes
T3 équivaut à 15 minutes
En mode automatique, vous pouvez modier la vitesse. Si vous choisissez
la vitesse maximale, après 5 minutes, le ventilateur de la hotte changera
en troisième vitesse et s’éteindra automatiquement à cette vitesse.
Avertissement pour l’entretien des ltres
Filtre antigraisse en aluminium
Toutes les 30 heures de fonctionnement de la hotte, quand celle-ci s’éteint,
toutes les led des touches vitesse s’allument avec lumière xe pendant 30
sec. pour avertir qu’il faut nettoyer les ltres antigraisse en aluminium.
Pour remettre le timer ltres sur zéro, il sut de tenir enfoncée la touche
T1 avec aspirateur éteint, autrement le dispositif donnera à nouveau
l’alarme au prochain allumage de la hotte.
Filtre au charbon actif
Toutes les 120 heures de fonctionnement, à l’arrêt de la hotte, toutes les
led s’allument en clignotant pendant 30 sec. pour rappeler que les ltres
en aluminium doivent être nettoyés et si la hotte est ltrante et qu’il
faut substituer les ltres au charbon actif. Pour mettre à zéro le timer, il
sut de tenir enfoncée la touche T1 avec aspirateur éteint, autrement le
dispositif déclenchera à nouveau une alarme au prochain arrêt de la hotte.

www.velgehome.com
Le séchage des zones où l’eau à un degré de dureté élevé et laisse des dépôts
de calcaire est particulièrement important.
La hotte est équipé d’une source de lumière LED, ce qui assure non
seulement un bon éclairage et des économies d’énergie importantes,
mais son espérance de vie est 10 fois plus grande par rapport à l’éclairage
classique. Dans le cas de remplacement, s’il vous plaît contactez votre
fournisseur de services.
AVERTISSEMENTS
Ce livret est partie intégrante de la hotte et par conséquent il doit être
conservé avec soin, il doit TOUJOURS la suivre, même en cas de transfert
à un autre propriétaire ou à un autre usager ou en cas de transfert sur une
autre installation.
Vérier que la tension (V) et la fréquence (Hz) indiquées sur la plaquette
d’identication qui se trouve à l’intérieur de l’appareil correspondent à
celles disponibles sur le lieu d’installation.
Toute éventuelle modication de l’installation électrique qui serait
nécessaire pour installer la hotte devra être eectuée uniquement par
du personnel compétent. Les réparations eectuées par des personnes
non compétentes pourraient provoquer des dommages. Pour toute
intervention, s’adresser à un Centre d’Assistance Technique autorisé pour
eectuer la substitution des pièces de rechange.
Contrôler toujours que toutes les parties électriques (lumières, aspirateur)
soient éteintes quand on n’utilise pas l’appareil.
En cas d’orage, placer l’interrupteur général de l’installation sur la position
“éteint”.
L’usage de la hotte peut être uniquement celui d’un aspirateur de vapeurs
de cuisson au-dessus d’une cuisinière à usage ménager. En cas de doute,
contacter le producteur. Le Constructeur décline toute responsabilité
pour les dommages causés aux personnes, aux animaux ou aux biens dus
à des erreurs d’installation, d’entretien ou causés par un usage impropre.
Nousvousrappelonsquel’utilisationdeproduitsalimentésélectriquement
entraîne le respect de quelques règles fondamentales de sécurité comme:
•Cet appareil ne peut pas être utilisé par des personnes (y compris les
ENTRETIEN
Avant chaque opération d’entretien ou de nettoyage, débrancher
l’alimentation électrique de la hotte.
Les ltres métalliques antigraisse nécessitent de soins particuliers, ils
servent en eet à capturer la graisse contenue dans les vapeurs. Les ltres
métalliques antigraisse doivent être lavés au moins une fois par mois à
l’eau chaude et avec un détergent.
ATTENTION:Lagraissecapturéeparles ltres métalliquesantigraisseest
facilement inammable. Il est donc nécessaire de nettoyer régulièrement
les ltres comme indiqué dans les instructions.
Les ltres au charbon actif ont la fonction de capturer les odeurs présentes
dans les fumées de cuisson. L’air est réintroduite dans l’environnement
après dépuration. Les ltres au charbon actif ne doivent jamais être lavés
et il faut les remplacer2 ou 3 fois par an conformémentàl’usagede la hotte.
Demander les ltres au Service Après-vente ou à la Maison constructrice.
Pour remplacer les ltres de charbon actif il faut avant tout enlever les
ltre métalliques antigras , A ce point-ci, on peut les deux barres de
soutien et de ltre à charbon. (Fig. 3). Pour remonter les nouveaux ltres
de charbon actif, il faut renverser les opérations
La hotte doit être nettoyée immédiatement après l’installation et après
avoir enlevé la protection an d’éliminer tout résidu de colle ou toute
autre impurité.
La hotte doit être nettoyée fréquemment à l’intérieur ainsi qu’à l’extérieur
(au moins une fois par mois).
Ne pas laisser s’accumuler la saleté sur les surfaces extérieures et
intérieures de la hotte.
Pour le nettoyage de l’extérieur de la hotte n’utiliser ni des produits acides
ou basiques, ni des éponges abrasives.
Nettoyer la hotte avec une éponge humide, de l’eau chaude et une petite
quantité de savon neutre (ex. savon pour vaisselle) an d’éliminer les
particules de graisse qui pourraient s’être déposées sur la hotte.
Rincer avec une chion humide en ayant soin d’enlever tous les résidus de
savon et en suivant la direction du satinage des surfaces en acier.

www.velgehome.com
enfants) avec des capacités psychiques ou physiques réduites, avec
un manque d’expérience ou de connaissance, excepté en présence
d’une personne responsable qui puisse les surveiller et leur fournir les
instructions nécessaires sur l’usage de l’appareil. Les enfants doivent être
surveillés pour éviter qu’ils ne jouent avec l’appareil.
•Il est interdit d’eectuer toute opération de nettoyage ou d’entretien si
on n’a pas au préalable débranché l’appareil du réseau d’alimentation
électrique en plaçant l’interrupteur général de l’installation sur la
position “éteint”. Si les opérations de nettoyage ne sont pas eectuées
comme indiqué dans les instructions, on court le risque de déclencher un
incendie.
•Il est interdit de tirer, tordre ou abîmer les câbles électriques qui sortent
de l’appareil même si celui-ci est débranché du réseau d’alimentation
électrique.
•Il est interdit de pulvériser ou de jeter de l’eau directement sur l’appareil.
•Il est interdit d’introduire des objets pointus à travers les grilles
d’aspiration et les prises d’air.
•Il est interdit d’enlever les ltres pour accéder aux parois internes
de l’appareil, sans avoir d’abord positionné l’interrupteur général de
l’installation sur “éteint”.
•Il est interdit de faire amber des aliments sous la hotte. Quand on fait
frire des aliments, tenir constamment l’opération sous surveillance , car
l’huile pourrait s’incendier
•ATTENTION: Les parties accessibles peuvent devenir chaudes lorsqu’il
est utilisé avec les appareils de caisson.

www.velgehome.com
IT ISTRUZIONI PER L’INSTALLAZIONE, USO E MANUTENZIONE DELLA
CAPPA MOD. VBCH 5510.1W, 230-240 Vac - 50 Hz
Cappa aspirante per cucina. L’apparecchio è costruito in conformità alle Norme Europee ed alle richieste delle Direttive: EN60335-1
(Sicurezza elettrica - Bassa tensione), EN55014-2 (Compatibilità elettromagnetica).
INSTALLAZIONE
Leggere tutto il libretto istruzioni prima di installare e/o utilizzare la
cappa. L’apparecchiatura messa in opera dovrà distare dal piano di cottura
non meno di 60 cm. Se le istruzioni di installazione del dispositivo di
cottura a gas specicano una distanza maggiore, bisogna tenerne conto.
Non deve essere sovrapposta a stufe con piastra radiante superiore.
Bisogna rispettare tutte le normative relative allo scarico dell’aria.
L’aria non deve essere scaricata in un condotto utilizzato per scaricare
i fumi di scarico prodotti da apparecchi a combustione di gas o di altri
combustibili (non si applica alle cappe utilizzate in modalità ltrante).
Il locale deve disporre di suciente ventilazione in particolare quando
la cappa viene utilizzata contemporaneamente ad altri apparecchi che
impiegano gas o altri combustibili. Si consiglia di spostare eventuali
mobili sottostanti l’area. di installazione per una migliore accessibilità
Installazione della cappa a parete.
La cappa è dotata di tutti i ssaggi necessari alla sua installazione e idonei
per la maggior parte delle superci.
Vericare che la supercie di installazione sia adeguatamente robusta.
L’installazione deve essere eseguita da installatori competenti e qualicati
e secondo le norme in vigore.
•Forare il pensile come in gura 1
•Inlare la cappa e agganciarla tramite i ganci di ssaggio (A)
•Fissare le viti (B) assicurandosi che le due stae siano a contatto con la
spalla del pensile
•Applicare i due coperchi laterali, inlandoli lateralmente e ssando le viti
(C)
•Applicare la copertura estetica (D) alla cappa inlandola nel pensile e
appoggiandola alla cappa.
COLLEGAMENTO ELETTRICO
Questo apparecchio deve essere collegato ad un impianto dotato di messa
a terra. Sono possibili due tipi di collegamento alla rete:
1)Mediante l’uso di una spina normalizzata alla quale va collegato il cavo
di alimentazione ed inserita in una presa dell’impianto che deve risultare
accessibile (per scollegare in caso di manutenzione). Assicurarsi che la
spina sia accessibile anche dopo l’installazione completa dell’apparecchio.
2)Mediante allacciamento sso alla rete, interponendo un interruttore
bipolare che assicuri la disconnessione della rete, con una distanza di
apertura dei contatti che consenta la disconnessione completa nelle
condizioni della categoria di sovratensione III, conformemente alle regole
di installazione. Il collegamento di terra (cavetto giallo-verde) non va
interrotto.
Per tensioni di linea e frequenza consultare la targa matricola posta
all’interno dell’apparecchio.
UTILIZZO
Questa cappa può essere utilizzata in modalità aspirante o ltrante.
Aspirante (evacuazione esterna). I fumi della cucina vengono espulsi
all’esterno attraverso la tubazione collegata al raccordo di scarico.
In nessun caso la tubazione deve essere collegata a condotti di scarico di
combustione (stufe, caldaie, bruciatori, ecc.).

www.velgehome.com
Filtrante (riciclo interno). I fumi passano attraverso i ltri a carbone
attivo per essere depurati e riciclati nell’ambiente cucina attraverso una
tubazione collegata al raccordo di scarico della cappa che porta ad un foro
praticato nella parte superiore del pensile. Questo foro deve essere libero e
comunicante con l’ambiente cucina.
FUNZIONAMENTO
La cappa è provvista di un motore a più velocità. Si consiglia di usare
la bassa velocità nelle condizioni ordinarie e le altre velocità nei casi di
forte concentrazione di odori e vapori. Si consiglia inoltre di mettere in
funzione la cappa quando si inizia a cucinare e di mantenerla in funzione
no alla scomparsa degli odori.
I comandi sono dotati di tasti per l’accensione della lampada TL, per
l’accensione in prima velocità e lo spegnimento dell’aspiratore premere
T1 per la selezione delle velocità di funzionamento premere T2-T3-T4.,
per la funzione di ricambio d’aria premere T5.
Per spegnere il motore premere T1: una volta, se utilizzato in 1^ velocità;
due volte se utilizzato alle altre velocità.
ConiltastoT4siselezionalavelocitàmassimadell’aspiratoreper10minuti
(tasto lampeggiante), dopo i quali l’aspiratore passerà automaticamente
alla 3^ velocità.
Ricambio d’aria
Premendo il tasto T5 si seleziona il ricambio d’aria, che rimane attivo
per un massimo di 24 ore; l’aspiratore si accende alla prima velocità
per 5 minuti, per poi spegnersi automaticamente e ripetere la funzione
ciclicamente ogni 25 minuti.
Durante la fase di aspirazione la luce del comando lampeggia, altrimenti
rimane ssa.
In qualsiasi momento è possibile disattivare la funzione, selezionando la
velocità desiderata.
Attivazione Autospegnimento Ritardato Regolabile
Per attivare l’autospegnimento, si deve accendere la cappa alla velocità
desiderata e, successivamente, tenere premuto il tasto TL per alcuni
secondi no a quando tutti i led cominciano a lampeggiare. Premendo
uno dei tasti (T1,T2,T3) si può programmare il tempo di autospegnimento,
secondo quanto segue:
T1 uguale a 5 minuti
T2 uguale a 10 minuti
T3 uguale a 15 minuti
Durante il tempo dell’auto spegnimento è possibile modicare la
velocità impostata. Nel caso si scelga la velocità massima, dopo 5 min il
ventilatore dell’estrattore d’aria passa automaticamente alla 3ˆ velocità e
l’autospegnimento averrà a tale velocità.
Avviso manutenzione ltri
Filtro antigrasso in alluminio
Ogni 30 ore di funzionamento della cappa, allo spegnimento della
medesima, tutte i led dei tasti velocità si accendono con luce ssa per 30
sec. ad avvisare la necessaria pulizia dei ltri antigrasso in alluminio. Per
azzerare il timer è suciente tenere premuto il tasto T1 con aspiratore
spento, altrimenti il dispositivo darà nuovamente l’allarme al successivo
spegnimento della cappa.
Filtro carbone attivo
Ogni 120 ore di funzionamento, allo spegnimento della cappa, tutti i led
dei tasti velocità si accendono a luce lampeggiante per 30 sec. a ricordare
la sostituzione dei ltri carbone attivo. Per azzerare il timer è suciente
tenere premuto il tasto T1 con aspiratore spento, altrimenti il dispositivo
darà nuovamente l’allarme al successivo spegnimento della cappa.
MANUTENZIONE
Prima di ogni operazione di manutenzione o pulizia, staccare
l’alimentazione elettrica dalla cappa.
Una cura particolare va rivolta ai ltri antigrasso metallici, i quali hanno
la funzione di trattenere le particelle grasse contenute nei vapori. I ltri

www.velgehome.com
antigrasso metallici devono essere lavati almeno ogni mese in acqua calda
e detersivo.
ATTENZIONE: il grasso trattenuto dai ltri metallici è facilmente
inammabile. E’ pertanto necessario provvedere regolarmente alla
pulizia dei ltri come da istruzioni.
I ltri di carbone attivo hanno la funzione di trattenere gli odori presenti
nei fumi di cottura. L’aria viene immessa in ambiente depurata. I ltri
di carbone attivo non devono essere lavati e vanno sostituiti 2 o 3 volte
all’anno in conformità all’uso della cappa. Richiedere i ltri alla Ditta
costruttrice.
Per sostituire i ltri a carbone attivo si devono prima togliere i ltri
metallici antigrasso . A questo punto si possono rimuovere le due astine
di supporto e il ltro a carbone. (Fig. 3). Per reinstallare i nuovi ltri a
carbone attivo invertire le operazioni.
La cappa deve essere pulita immediatamente dopo l’installazione e
l’asportazione del protettivo al ne di eliminare qualsiasi residuo di
collante o altre impurità di qualsiasi genere.
La cappa deve essere pulita frequentemente sia internamente che
esternamente (almeno una volta al mese).
Non lasciare accumulare sporcizia nelle superci esterne ed interne della
cappa.
Per la pulizia della scocca esterna della cappa non usare assolutamente
prodotti acidi o basici o spugne abrasive.
Pulire la cappa con una spugna inumidita con acqua calda ed una modesta
quantità di sapone neutro (es. sapone per stoviglie) al ne di eliminare le
particelle di grasso eventualmente depositate sulla stessa.
Risciacquare con un panno umido asportando con cura tutto il sapone,
seguendo la direzione di satinatura della supercie dell’acciaio.
Particolarmente importante risulta l’asciugatura soprattutto nelle zone
dove l’acqua ha un’elevata durezza e lascia depositi di calcare.
La cappa è dotata di illuminazione a Led che oltre ad orire una buona
illuminazione e un notevole risparmio energetico, garantisce una durata
media 10 volte superiore rispetto alle lampade tradizionali. Nel caso di
sostituzione rivolgersi al servizi assistenza.
AVVERTENZE
Questo libretto è parte integrante della cappa e di conseguenza deve
essere conservato con cura e deve SEMPRE accompagnarlo,anche in caso
di sua cessione ad altro proprietario o utente,oppure di trasferimento su
un’altra installazione.
Assicurarsi che la tensione (V) e la frequenza (Hz) indicate sulla targa
matricola all’interno dell’apparecchio corrispondano a quelle disponibili
nel luogo di installazione. Ogni eventuale modica che si rendesse
necessaria all’impianto elettrico per installare la cappa dovrà essere
eseguita solo da persone competenti. Le riparazioni eettuate da persone
non competenti possono provocare danni. Per eventuali interventi
rivolgersi ad un Centro Assistenza Tecnica autorizzato ad eseguire la
sostituzione delle parti di ricambio.
Controllare sempre che tutte le parti elettriche (luci, aspiratore), siano
spente quando l’apparecchio non viene usato.
Durante i temporali posizionare l’interruttore generale dell’impianto su
“spento”.
L’utilizzo della cappa non può essere diverso da quello di aspiratori di
fumi di cottura su cucine domestiche. E’ esclusa qualsiasi responsabilità
del costruttore per danni causati a persone,animali o cose, da errori di
installazione , di manutenzione o da usi impropri.
Ricordiamo che l’utilizzo di prodotti che impiegano energia elettrica
comporta l’osservanza di alcune regole fondamentali di sicurezza:
•Questo apparecchio non è destinato all’uso da parte di persone (inclusi
i bambini) con ridotte capacità psichiche o motorie, con mancanza di
esperienza e conoscenza, a meno che ci sia una supervisione o istruzione
sull’uso dell’apparecchio da parte di una persona responsabile per la loro
sicurezza. I bambini devono essere sorvegliati per assicurarsi che non
giochino con l’apparecchio.
•E’ vietata qualsiasi operazione di pulizia, prima di aver scollegato
l’apparecchio dalla rete di alimentazione elettrica posizionando
l’interruttore generale dell’impianto su “spento”. Esiste la possibilità di
This manual suits for next models
1
Table of contents
Languages:
Other VELGE Ventilation Hood manuals

VELGE
VELGE Mjosa Assembly instructions

VELGE
VELGE Fannaraki Assembly instructions

VELGE
VELGE Kyrkja Assembly instructions

VELGE
VELGE Rodoy Assembly instructions

VELGE
VELGE Skarstind Assembly instructions

VELGE
VELGE Fluberg Assembly instructions

VELGE
VELGE Dovre Assembly instructions

VELGE
VELGE Floyen Assembly instructions

VELGE
VELGE Kniven Assembly instructions

VELGE
VELGE Floyen Assembly instructions