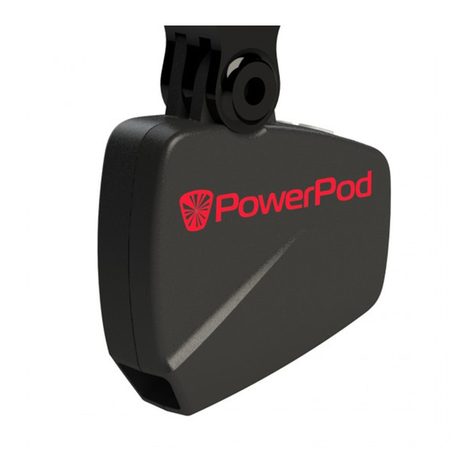
velocomp PowerPod Assembly instructions

Copyright Velocomp LLC 2015-2018 www.velocomp.com
PowerPod with firmware 640+
Tips and Troubleshooting
July 2018
1) PowerPod status light does not turn on when I click its button
a. Battery needs charging. Connect PowerPod to USB charger. Click button; status
light will flash red continuously. When the battery is fully charged the status light
will turn off
b. After charging, if PowerPod status light remains unresponsive to button clicks,
press-hold its button CONTINUOUSLY for about 10 seconds, until you see the
status light flash. This “Hard Reset” reboots PowerPod.
2) Status light is solid RED after sensor pairing (PowerPod pairing instructions, Step 4)
a. Make sure you have an ANT+ speed sensor installed on your bike. Look for an
ANT+ logo on your sensor:
i. Attach magnet-less ANT+ speed sensors to the front wheel hub.
ii. Magnet-based ANT+ speed sensors: make sure the spoke magnet passes
within 1-2 coin widths of the speed sensor.
b. Confirm proper operation of speed sensor by spinning bike wheel; bike
computer display should show speed.
i. If speed is shown, pair PowerPod to speed sensor following step 4 of
PowerPod instructions.
ii. If bike speed is not shown in display, remove speed sensor battery, insert
battery “backwards” momentarily, then reinsert normally (sensor reset).
Pair sensor to bike computer, then spin bike wheel; bike computer
display should show speed. If confirmed, pair PowerPod to sensor (step
4).
c. If you still don’t see bike speed, replace speed sensor battery. Pair speed sensor
to bike computer, then spin bike wheel; bike computer display should show
speed. If confirmed, perform PowerPod Step 4 instructions again.
d. If you still don’t see bike speed, speed sensor is defective.
3) I see zero watts on my bike computer screen even after riding for 90 seconds
a. PowerPod is asleep. Click button. Light must show solid Green.
b. If PowerPod light flashes green, then light turns off, pair speed sensor to
PowerPod (press-hold PowerPod button for 4 seconds, until flashing).
Whenever you do a sensor pairing, you will have to do a new O&B cal ride.

Copyright Velocomp LLC 2015-2018 www.velocomp.com
c. Cadence sensor is not functioning properly. To check proper operation of
cadence sensor, spin bike crank backwards for 5 seconds, and confirm that non-
zero cadence (RPM) is shown on bike computer display.
d. Confirm PowerPod status light is solid green, then pair PowerPod to bike
computer (instructions Step 5), making sure to follow your bike computer’s
pairing instructions.
4) I see zero watts, or low watts, or high watts only for the first 90 seconds of my ride, then
power becomes normal
a. PowerPod is not tightly fastened to its mount. After attaching PowerPod to
mount, but before tightening the mount bolt fully, gently rotate PowerPod
“skyward” from the rear, until its rotation is stopped by the mount. Then,
tighten the mount bolt firmly, so that PowerPod cannot rotate.
b. When reattaching PowerPod, it is fixed to a position different from its prior
attachment. Before tightening the mount bolt fully, gently rotate PowerPod
“skyward” from the rear, until its rotation is stopped by the mount. Then,
tighten the mount bolt firmly, so that the PowerPod cannot rotate.
5) I see zero watts on my bike computer screen after stopping for a rest break
a. PowerPod has gone to sleep. Click button to reawaken; light will show solid
green.
6) After going over a bump, my watts change abruptly to higher or lower values for the
next 90 seconds, then return to normal.
a. PowerPod is not firmly attached to its mount, allowing it to rotate after hitting a
bump. Gently rotate PowerPod from the rear, until its rotation is stopped by the
mount. Then, tighten the mount bolt firmly, so that PowerPod cannot rotate.
7) My watts seem consistently too high or too low.
a. Make sure PowerPod wind port is not blocked or obstructed by bike cables
b. Do a new out-and-back calibration ride. You can initiate a new O&B cal ride by
doing a new sensor pairing
c. Make sure Indoor Trainer mode is OFF (see below)
8) When I put PowerPod on another bike, it shows zero power.
a. You must perform a new sensor pairing, and out-and-back ride, each time you
move PowerPod to a new bike.

Copyright Velocomp LLC 2015-2018 www.velocomp.com
OPTIONAL: USING POWERPOD WITH ISAAC SOFTWARE
• Install free Isaac software for Mac/PC, available here:
https://velocomp.com/isaac-software-installation/
• Mac users: The first time you run Isaac, make sure to hold the “control” button on your
keyboard, then click on the Isaac icon, then select “Open” from the menu that appears.
This procedure temporarily bypasses the security features of OSX.
• Connect PowerPod to your computer using its USB cable. Click PowerPod button to turn
it on. When PowerPod is connected to Isaac, a green box will appear around the USB
icon located at the top of menu bar:
• Use the Isaac command “Device/Set Up Device…,” to fine-tune the settings of your
PowerPod.
1) Connect PowerPod to your computer and launch ISAAC software
2) Using ISAAC Software, “Device/Set Up Device...” wizard:
3) PowerPod Lite: Select Profile 1. POWERPOD LITE DOES NOT WORK WITH
PROFILES 2, 3, OR 4
4) PowerPod ANT or ANT/BLE: Select profile 1, 2, 3 or 4
5) Type in a name you’d like to have for your profile
6) Click the “Next” button and enter your bike and rider information as
instructed by the “Set Up Device” windows.
7) On the final step, select Best Accuracy
8) IMPORTANT: Follow PowerPod instructions steps 4) through 6) to pair your
PowerPod to your bike’s speed and (optional) cadence sensor
9) NOTE: After using the setup wizard, you will need to perform an O&B
calibration ride

Copyright Velocomp LLC 2015-2018 www.velocomp.com
To use PowerPod with your indoor trainer or rollers:
1. Connect PowerPod to your computer, click button to turn it on, then launch Isaac
software
2. Select the Isaac command “Device/Edit Trainer Settings…”
3. Select your indoor trainer OR rollers model from the list underneath the tab. In the
example below, “Kinetic Cyclone” indoor trainer has been selected. Then, in the bottom
of the window click the “Send to iBike” button below the speed/power graph.
PowerPod will “memorize” the selected indoor trainer model in its memory.
4. To turn on indoor trainer mode, use this command from Isaac, then wait for Isaac’s
confirmation that trainer mode has been turned on:
5. IMPORTANT: ONCE ENABLED, INDOOR TRAINER MODE WILL REMAIN “ON” FOR ALL
SUBSEQUENT POWEROD RIDES, UNTIL YOU TURN IT OFF.
IMPORTANT: WHEN TRAINER MODE IS “ON”, POWERPOD WILL NOT PROVIDE
ACCURATE POWER READINGS WHEN USED FOR OUTDOOR RIDES.
6. To turn indoor trainer mode off, select this command from Isaac, then wait for Isaac’s
confirmation that trainer mode has been turned off:
7. IMPORTANT: WHEN INDOOR TRAINER MODE IS “OFF”, POWERPOD WILL NOT
PROVIDE ACCURATE POWER READINGS WHEN USED FOR INDOOR RIDES.
Other manuals for PowerPod
3
This manual suits for next models
1
Table of contents
Other velocomp Measuring Instrument manuals