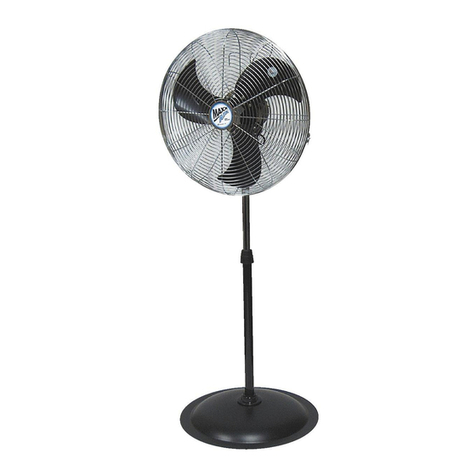
Ventamatic MaxxAir HVFF 20 Quick start guide

VENTAMATIC, LTD. P.O. BOX 728, MINERAL WELLS, TX 76067 • PHONE 800-433-1626 • WWW.BVC.COM
A leader in the ventilation industry for over 60 years, Ventamatic, Ltd. off ers a complete line of
air movement products for commercial, industrial, agricultural, and residential use.
CONGRATULATIONS ON YOUR PURCHASE OF THE MaxxAir™
20” HIGH VELOCITY FLOOR FAN.
With proper care and maintenance the fan will aord you many
years of use. Please read the safety instructions below, and save
for future reference.
THIS FAN IS FOR RESIDENTIAL USE ONLY.
When using electrical appliances, basic precautions should
always be followed to reduce the risk of re, electric shock,
and injury to persons, including the following:
1. Read all instructions before using the Fan.
2. Make certain that the power source conforms to the electri-
cal requirements of the Fan.
3. Use the Fan only as described in these instructions. Any
other use not recommended by the manufacturer may cause re,
electrical shock or injury to persons.
4. To reduce the risk of personal injury and electric shock, the
Fan should not be played with or placed where small children can
reach it.
5. Unplug power cord before installing, servicing or moving the
Fan. Warning: Do not depend upon the on-o switch as the sole
means of disconnecting power when installing or servicing the
fan. Always unplug the power cord.
6. This Fan must NOT be used in potentially dangerous
locations such as ammable, explosive, chemical-laden or wet
atmospheres.
7. DO NOT use Fan in or near a window. Rain may create an
electrical hazard.
8. Completely assemble the Fan according to the assembly
instructions on the reverse of this page before connecting to pow-
er supply. Warning: This appliance has a 3-prong, grounded
plug. If the plug does not t fully into the outlet, contact a
qualied electrician. Do not attempt to defeat this safety fea-
ture. Warning: this plug is a safety device. To reduce the risk
of re, shock, and personal injury, do not remove, replace,
repair or tamper with the originally supplied plug. If the fan
does not function properly, it may be duet° the safety device
incorporated in this plug. Call 800-433-1626, Monday-Friday,
between 8:00 a.m. And 5:00 p.m. CST. If the plug warning
label is missing or damaged, call the toll free number for a
replacement label.
9. Where possible, avoid the use of extension cords. If they
must be used, minimize the risk of overheating by ensuring that
they are UL listed. Never use a single extension cord to operate
more than one Fan. Do not plug the Fan into any other cord-con-
nected device such as a power strip, cord reel, surge protector,
multiple outlet adapters or outlet-type air fresheners. The use of
such devices may create a re hazard.
10. Do not operate any Fan with a damaged cord or plug or
after the Fan malfunctions, has been dropped or damaged in any
manner.
11. Do not insert or allow ngers or foreign objects to enter any
ventilation or exhaust opening, as it may cause an electric shock,
re or damage the Fan. Do not block or tamper with the Fan in
any manner while it is in operation.
12. Always place the Fan on a stable, at, level surface when
operating to avoid the chance of the Fan overturning. Locate the
Power Cord so the Fan or other objects are not resting on it. Do
not run Power Cord under carpeting. Do not cover Power Cord
with throw rugs, runners, or the like. Arrange Power Cord away
from room trac and where it will not be tripped over.
13. This Fan is not intended for use in wet or damp locations.
Never locate a Fan where it may fall into a bathtub or other water
container.
14. Do not use Fan outdoors.
15. This Fan is not suitable for use in agricultural facilities
including areas where livestock, poultry or other animals are
conned. Please refer to National Electric Code ( NEC) Article 547-
7 (2008) or applicable state or local codes or standards relating to
electrical requirements for Agricultural Buildings. THIS FAN DOES
NOT MEET THE REQUIREMENTS OF NEC ARTICLE 547-7 (2008).
16. This Fan is not suitable for use in hazardous locations.
Please refer to National Electric Code (NEC) Article 500 or
applicable state or local codes or standards relating to electrical
requirements for Hazardous locations. THIS FAN DOES NOT MEET
THE REQUIREMENTS OF NEC ARTICLES 500 (2008).
WARNING: TO REDUCE THE RISK OF FIRE OR ELECTRIC SHOCK.
DO NOT USE THIS FAN WITH ANY SOLID STATE SPEED CON-
TROL DEVICES.
20” High Velocity Floor Fan
Operating Instructions MODEL: HVFF 20
web
GENERAL SAFETY INFORMATION
SAVE THESE INSTRUCTIONS

<2>
VENTAMATIC, LTD. P.O. BOX 728, MINERAL WELLS, TX 76067 • PHONE 800-433-1626 • WWW.BVC.COM
A leader in the ventilation industry for over 60 years, Ventamatic, Ltd. off ers a complete line of
air movement products for commercial, industrial, agricultural, and residential use.
1 A 1 B
1 C 1 C
FIGURE 1
MaxxAir™ 20” HIGH VELOCITY FLOOR FAN
ASSEMBLY INSTRUCTIONS
MODEL: HVFF 20
1. Remove two screws from the cradle
arms. Retain screws for use in Step 4 below.
2. Slide one end of U-shaped tube base to
the fan support tube with smaller end
(Fig 1 A in diagram).
3. Slide the other end of the U-shaped
tube base to the second other fan support
tube with smaller end (Fig 1 B in diagram).
4. Align the holes in each side of the tube
base with the holes in each side of the fan
tube. (Fig 1 C in diagram). Secure with
screws removed in Step 1.
1. Use adjustment knobs on either
side of fan to loosen tilt nut by turning
counterclockwise.
2. Adjust fan head to desired tilt.
3. Tighten both knobs by turning
clockwise.
1. Rotate switch to LOW (3), MEDIUM (2) or
HIGH (1) speed for desired air velocity.
PLEASE NOTE:
It is normal for the fan motor to feel warm
to the touch after continuous operation.
This fan features a thermal cuto that will
automatically shut o the motor should it
overheat for any reason. If this happens,
unplug the fan from the outlet immediately.
WARNING: Unplug the fan from electrical
supply before cleaning.
• Use soft, damp cloth to clean fan.
Remove any moisture with clean, dry cloth.
• Do not use any cleaning solution that is
harmful to paint or plastic.
• Do not bend blades when cleaning fan.
TUBE BASE ASSEMBLY INSTRUCTIONS
HOW TO ADJUST TILT
SPEED CONTROL
CLEANING
PLEASE NOTE: The motor bearings in your MaxxAir™ fan are permanently sealed and DO NOT
REQUIRE additional lubrication.
Your MaxxAir™ fan requires minimal assembly. Only a Phillips screwdriver is
required to complete the assembly.
If you should have any questions about the operation of your MaxxAir™ High Velocity Floor Fan, please
contact Ventamatic, Ltd. toll free at 1.800.433.1626

<3>
VENTAMATIC, LTD. P.O. BOX 728, MINERAL WELLS, TX 76067 • PHONE 800-433-1626 • WWW.BVC.COM
A leader in the ventilation industry for over 60 years, Ventamatic, Ltd. off ers a complete line of
air movement products for commercial, industrial, agricultural, and residential use.
CFELICIDADES EN SU COMPRA DEL ABANICO MaxxAir™ DE
ALTA VELOCIDAD DE PISO DE 20” Con el cuidado y man-
ten¬imiento apropiado su abanico le dara muchos años de
uso. POR FAVOR LEA LAS INSTRUCCIONES DE SEGURIDAD
SIGUIENTES Y GUARDELAS PARA UNA REFERENCIA FUTURA.
ESTE ABANICO ES SOLO PARA USO RESIDENCIAL.
Cuando se usen los electrodomésticos precaudones basicas
siempre deven de ser seguidas para reducir el riesgo de fuego
descargas electricas y daño personal, induyendo lo siguiente:
1. Lea las instrucciones antes de usar el abanico.
2. Asegurese que la electricidad esta en conformidad con los
requisitos del abanica
3. Utilize el abanico solo como se describe en estas instruc-
ciones. Cualquier otro uso no recomendado por el fabricante
puede causar fuego, descargas electricas o daños personales.
4. Para reducir el riesgo de daños personales y descargas
electricas no se deve jugar con el abanico o ponerse donde
los niños puedan alcanzarlo.
5. Desconectese antes de instalarlo, moverlo o darle ser-
vicio. Advertenda: no dependa en el apagador como unico
medio de bloqueo de electriddad, siempre desconecte el
cable electrico si se le va a instalar o dar servido.
6. Este abanico no se deve de usar en lugares con potencial
de peligro tal como ammables, explosivos, ambientes moja-
dos o peligos quimicos.
7. No se use el abanico cerca de una ventana, la lluvia puede
crear un peligo electrico.
8. Ensamble el abanico completamente de acuerdo con las
instrucciones al reverso de esta pagina, antes de conectarse
a la corriente. Precaudon: este electrodoméstico tiene un
enchufe polarizado (la clavija ancha del enchufe a la entrada
ancha, completamente insertado) si el enchufe del cable no
cabe completamente dentro del enchufe de la pared dele
vuelta, y si todavia no cabe comuniquese con un electricista
calicado. No trate de vencer esta medida de seguridad.
AVISO: este enchufe es una medida de seguridad para redudr
el riesgo de fuego, electrocudón y daños personales. No se
remueva, remplace, repare o ultraje el enchufe proveido
originalmente. Si el abanico no funciona apropiada¬mente,
puede que sea el mecanismo de seguridad incorporado en
éste enchufe, llame a 800-433-1626 lunes a viernes entre 8:00
a.M. A 5:00 p.M. Ct, si la etiqueta de aviso a sido dañada o per-
dida, llame al telefono gratuito para remplazar la etiqueta.
9. Si es possible evite el uso de extensión electrica, si tiene
que usarlas minimize el riesgo de sobrecalentamiento
asegurandose que son aceptadas por UL. Nunca utilize una
sola extención electrica para prender mas de un abanico;
no enchufe el abanico dentro de una tira electrica multiple,
enrollador de cable, protector de alti-bajas electricas, adapta-
dor con multiples enchufes o enchufe de aire refrescante. El
uso de tales aparatos puede crear peligro de fuego.
10. No se use el abanico con extención o enchufe dañado o
despues que el abanico mal funciono se cayo o se daño en
cualquier forma.
11. No inserte o permita que sus dedos u otros objetos fora-
neos entren al ventilador o abertura de evacuación, porque
hay la posibilidad de ocacionar corto electrico, fuego o daño
al abanico. No obstruya o ultraje el abanico de ninguna
manera mientras este prendido
12. Siempre ponga el abanico en una supercie plana y
estable cuando este prendido, para prevenir la posibilidad de
que el abanico se caiga, localize el cable electrico para que el
abanico u otros objetos no esten sentados en el. No corra el
cable electrico bajo la alfombra, no cubra el cable electrico
con tapetes o cosas similares, arregle el cable electrico lejos
del traco del cuarto para evitar tropiesos.
13. Este abanico no fue hecho con el proposito de usarse en
climas humedos o mojados, nunca utilize el abanico donde se
pueda caer en un recipiente con agua o en la tina del baño.
14. No se use a la intemperie.
15. Este abanico no es apropiado para utilizarse en faci-
lidades agriculturales, incluyendo areas done el Ganado
vacuno, Ganado ovi pero u otros animals, esten connados.
Por favor reerace al Codigo Electrice Nacional (NEC) Articulo
547-7 (2008) o codigos del estado o locales o normas que se
relacionen a los requerimientos electricos para edicios de
agricultura. Este abanico no da los requerimientos de nec
articulo 547-7 (2008)
16. Este abanico no es apropiado para usarse en lugares
peligrosos. Por favor reerace al Codigo Electrice Nacional
(NEC) Articulo 500 o codigos aplicables locales o del estado o
procedimientos con relacion a los requerimientos electricos
de lugares peligrosos. Este abanico no da los requerimientos
de nec articulo 500 (2008)
Advertencia: para redudr el riesgo de fuego o descargas
electricas, no use este abanico con ningun control de velocida
de estado solido.
ABANICO DE ALTA VELOCIDAD DE PISO
DE 20” INSTRUCCIONES DE OPERACIÓN MODELO: HVFF 20
INFORMACIÓN GENERAL PARA SEGURIDAD
GUARDE ESTAS INSTRUCCIONES
INSTRUCCIONES DE OPERACIÓN

VENTAMATIC, LTD. P.O. BOX 728, MINERAL WELLS, TX 76067 • PHONE 800-433-1626 • WWW.BVC.COM
A leader in the ventilation industry for over 60 years, Ventamatic, Ltd. off ers a complete line of
air movement products for commercial, industrial, agricultural, and residential use.
1 A 1 B
1 C 1 C
FIGURE 1
MaxxAir™ ABANICO DE PISO DE ALTA VELOCIDAD DE
20” INSTRUCCIONES DE ENSAMBLE
MODELO: HVFF 20
1. Remueva los dos tornillos de la base en
foma Vide tubo y guardelos para el proceso
4 abajo
2. Resbale la punta de la base en forma
Videntro del tubo de soporte del abanico
que tiene la punta mas chica (gura la en el
diagrama)
3. Resbale la punta del tubo en forma ‘Vide
la base dentro del Segundo soporte del
tubo del abanico con la punta mas chica
4. Alinear los hoyos en cada lado del tubo
de la base, con los hoyos en cada lado del
tubo del abanico (Fig. 1C diagrama)
1. Utilice las perillas de ajuste de O
cualquier lado del abanico, para aojar la
tuerca de maneo dandole vuelta al sentido
opuesto del reloj
2. Ajuste el abanico a la inclinación
deseada
3. Aprete las dos perillas dandole vuelta a
la dirección de las manecillas del reloj.
1. Gire el control de velocidad a BAJA (3), a
MEDIA (2) o ALTA (1) Velocidad
NOTE POR FAVOR:
Es normal que el motor del abanico se sienta
tibio al tocarlo despues de uso continuo. Este
abanico ofrece una protección termal que
automati¬camente apagaria el motor si éste
llega a calentarse por alguna razón, si esto
pasa desconecte el abanico inmediatamente.
CUIDADO: Desconecte el abanico de la
electricidad antes de limpiarlo.
• Utilize un trapo suave y humedo para
limpiar el abanico. Quite cualquier residuo
de humedad con un trapo seco.
• No utilize alguna solución quimica que es
dañina para la pintura o plastico.
• No doble las aspas cúando las limpie.
Instrucciones de ensamble de la base de tubo
COMO AJUSTAR EL RECLINAJE
CONTROL DE VELOCIDAD
LIMPIEZA
NOTE POR FAVOR: Los cojinetes del motor en su MaxxAir™ abanico son de sellado permanente
y no requieren lubricación adicional.
Su abanico MaxxAir™ requiere minimo ensamble, solo necesita un desarmador para
acompletar el ensamble.
Si usted tiene alguna pregunta con respecto a la operación de su ventilador MaxxAir™ de piso de alta
velocidad, comuniquese con Ventamatic, Ltd. Linea gratis 1.800.433.1626
Table of contents
Languages:
Other Ventamatic Fan manuals

Ventamatic
Ventamatic CX242DDWT User manual

Ventamatic
Ventamatic VX1000SOLDOM Series User manual

Ventamatic
Ventamatic CXSOLGB User manual

Ventamatic
Ventamatic VXNRG User manual

Ventamatic
Ventamatic Cool Attic CXSOLGB User manual

Ventamatic
Ventamatic VX25 series User manual

Ventamatic
Ventamatic VX2500 User manual

Ventamatic
Ventamatic BIG AIR HVFF20BA Quick start guide

Ventamatic
Ventamatic HVPF 30 WM User manual

Ventamatic
Ventamatic HVPF 30 User manual