OPERATION
Operation
www.stiebel-eltron.com LWZ304-404 SOL |7
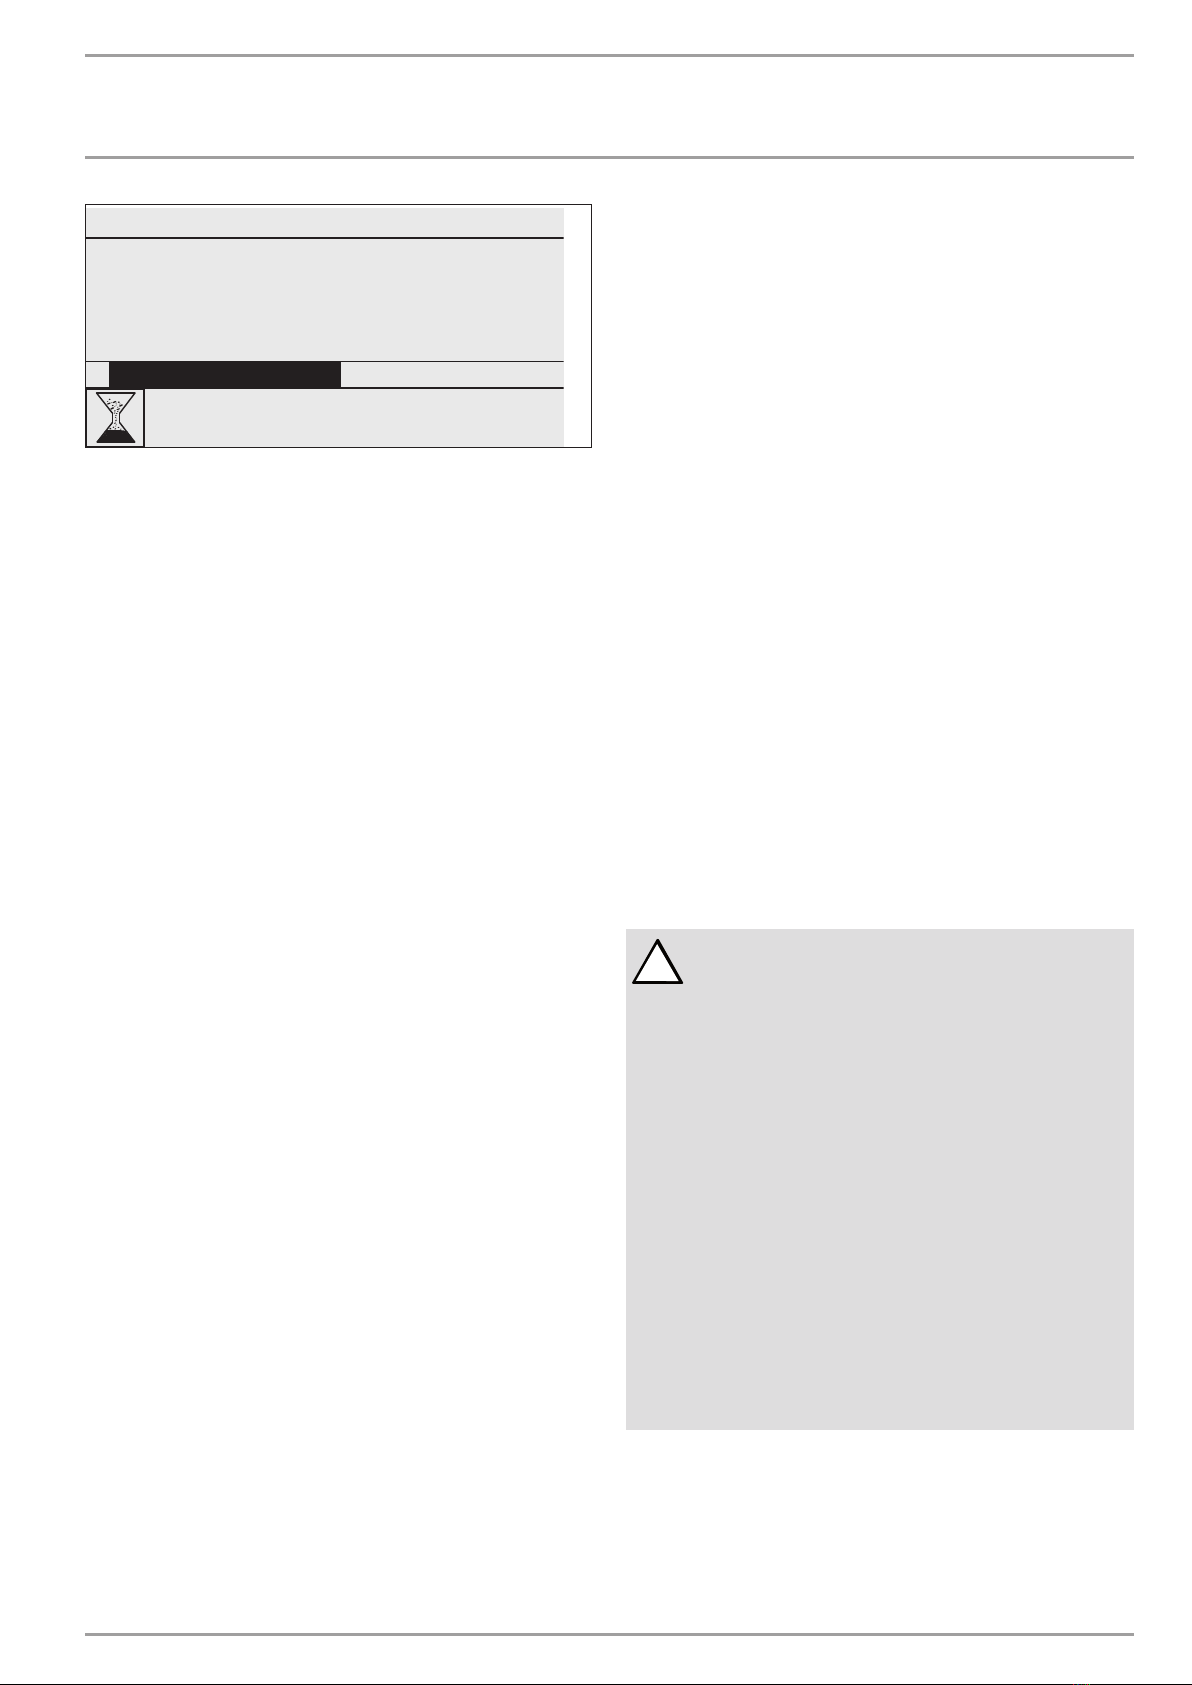
WEDNESDAY 10 SEPT 14 10:23 TIME
OUTSIDE TEMPERATURE
DHW TEMPERATURE
14.0 °C
35.0 °C
18.0 °CROOM TEMPERATURE
DAY MODE
26�04�01�0292
The appliance can operate in the following modes: Standby mode,
automatic mode, day mode, setback mode, DHW mode, manual
mode and emergency mode. In addition, you will find five further
setting options in this selection list: the favourites, the quick access
to ventilation stages, hotter/colder, direct line, and right at the end
of the list, the function block.
Since navigation to a new operating mode is always made from the
currently enabled mode, you may need to scroll in an anti-clock-
wise direction. All operating modes, apart from DHW mode, apply
to central heating, ventilation and DHW.
4.2.1 STANDBY
In standby mode, the appliance delivers the set standby values.
Generally, you will switch the appliance into minimum operation
with standby mode. The appliance runs in standby mode until
another operating mode is enabled.
4.2.2 AUTOMATIC
In automatic mode, the time programs set for central heating,
DHW and ventilation are implemented. Automatic mode is the
standard appliance setting. The heating flow temperature is reg-
ulated according to a weather-compensated heating curve. The
appliance runs in setback mode if no time programs are enabled.
4.2.3 DAY MODE
In day mode (generally while occupants are present in the house,
during the day), the heating system operates with the selected set
day values. Day mode does not influence DHW heating or venti-
lation.
4.2.4 SETBACK MODE
The appliance activity is reduced in setback mode, for example
at night time, or during the day when nobody is at home. In set-
back mode, the heating system is operated with the selected set
night values. Setback mode does not influence DHW heating or
ventilation.
4.2.5 DHW MODE
DHW mode is enabled in accordance with the set time programs.
For the current pair of switching times, the DHW set day value
is delivered. The central heating is switched off except for frost
protection. DHW operation does not influence ventilation.
4.2.6 MANUAL MODE
If manual mode is enabled, the set values selected for manual
mode are delivered. In manual mode, the heating flow tempera-
ture is not influenced by the outside temperature.
4.2.7 EMERGENCY MODE
If emergency mode is enabled, the “Compressor” heating stage is
skipped. Heating is provided by the solar thermal system (if con-
nected) or the electric emergency/booster heater. The dual mode
point is not taken into consideration. Using the electric emergency/
booster heater on its own for long periods means high energy
costs.
If you activate emergency mode, the set room temperatures from
automatic mode are used. The switching programs from automatic
mode are also used.
4.3 Favourites, quick access, function block
As well as the operating modes, on the start screen you can also
select which parameters are always shown in the favourites list.
Additionally, you can influence the fan stage and temperature
via a quick link, jump straight to a parameter and enable the
function block.
4.3.1 Favourites
You reach “FAVOURITES” if you run through the list of operating
modes on the default screen with the scroll wheel. Up to three
parameters are constantly shown on the display when the ap-
pliance is in operation. To select your favourites, navigate to the
required parameter. If the square at the end of the line is not filled
in, this parameter is not yet one of your favourites. Press “OK” to
change this. However, you can only select three favourites. You
may therefore have to disable one of your current favourites. Press
“OK” to disable.
4.3.2 Ventilation stages
!
WARNING Injury
If there is a radio or police announcement ordering win-
dows and doors to be kept closed, simply select fan stage
“0” (= fan off) for several hours.
The programming unit must be activated if the appliance
has been out of operation for a long time:
Hold down “MENU” button for three seconds.
If you have already navigated through the menu
tree, pressing MENU will return you to the default
display. If necessary you may have to press menu
several times.
Slide your finger along the scroll wheel until you
reach the “VENTILATION STAGES” entry.
Press “OK”.
Press “OK” again to adjust the “UNSCHEDULED
VENT.” parameter.
Set the “UNSCHEDULED VENT.” parameter to 0 by
sliding your finger anti-clockwise over the scroll
wheel.
Confirm with “OK”.
Set the “UNSCHED. VENT TIME STAGE 0” parameter
to a suitable value.
With quick access option “VENTILATION STAGES”, you reach the
setting area for the fan stage (see diagram below). Under “UN-
SCHEDULED VENT.” enter the required value (0 to3). This setting
is valid for a limited time, which you set in the neighbouring menu
item, e.g. “UNSCHED. VENT TIMESTAGE 0”. If you do not set a time,
the appliance adopts the saved parameter values.