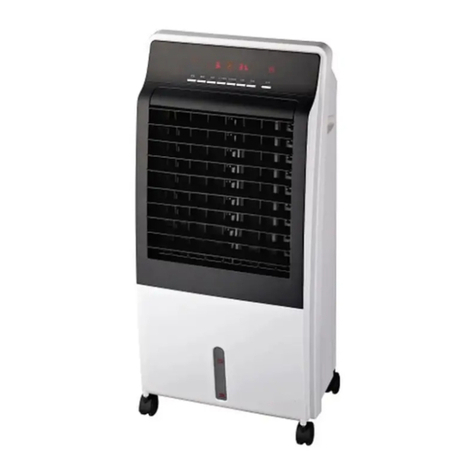
Ventus 705H User manual

EN INSTRUCTION MANUAL
ES MANUAL DE INSTRUCCIONES
FR MODE D’EMPLOI

2
GRACIAS POR ADQUIRIR
Felicitaciones por su compra de este versátil Climatizador Evaporativo con Calefaccióne
3 en 1 VENTUS DUAL TECH.
Lea cuidadosamente todas las instrucciones antes de utilizar el equipo, por favor guarde
este manual de instrucciones para futuras consultas. Este manual le proporcionara
información importante necesaria para la conguración, operación, mantenimiento y
resolución de problemas del VENTUS DUAL TECH. No seguir las instrucciones puede
dañarlo y/o perjudicar su funcionamiento y anular la garantía.
ÍNDICE
SIMBOLOGÍA 3
PRECAUCIONES 3
DESCRIPCIÓN 4
COMPONENTES 5
INSTALACIÓN 6
FUNCIONES DEL PANEL DE CONTROL DIGITAL 6
LIMPIEZA Y MANTENIMIENTO 8
GARANTÍA 9
ESPECIFICACIONES TÉCNICAS 9
DIAGRAMA ELÉCTRICO 10
CONTENIDO 10
ES

3
SIMBOLOGÍA
Este dispositivo no puede ser desechado en la basura doméstica.
Aislamiento doble del equipo de Clase II, no se requiere
conexión a tierra.
PRECAUCIONES
•Durante la operación el equipo debe
ser ubicado distante de los muebles,
cortinas y ventanas.
•Para que la función de
ENFRIADOR /HUMIFIDIFICADOR sea
eciente se deben usar en habitaciones
con las puertas y ventanas abiertas para
renovar el aire y no acumular humedad.
•No coloque objetos encima. De
ninguna manera bloquee la toma de aire
ni las aberturas de escape del equipo.
•Cuando esté en la función de
ENFRIADOR /HUMIFIDIFICADOR no
retire la estructura del ltro de colmena.
El depósito siempre debe tener agua
en los niveles Min y Max que señala.
La puesta en marcha de la unidad con
cantidad inadecuada de agua puede
causar una falla de la bomba.
•No opere el equipo cerca de cualquier
objeto inamable o explosivo.
•Si durante la operación, percibe
ruidos extraños, olores, humo, mal
funcionamiento y otros fallos, apague
inmediatamente el aparto y desenchufe
el cable de alimentación.
•El equipo fue diseñado para el uso
doméstico y se recomienda su utiliz ación
solamente en ese ámbito.
•Para evitar descargas eléctricas nunca
use el aparato con las manos mojadas.
•Apague y desenchufe el cable de
alimentación cuando no está usando el
equipo.
•No ubique el cable de alimentación
debajo de alfombras, ni los cubra con
alfombras ó patines. Ubique el cable lejos
de lugares en los que se pueda pisar.
•Nunca introduzca objetos dentro del
equipo. Al hacerlo generará daño al
equipo y podrá causar incendios.
•Desenchufe el equipo siempre que
vaya a hacer limpieza o mantenimiento
del equipo.
•Nunca transporte ni apague el equipo
tirando del cable.
•No utilice el equipo si se ha caído ó
presenta deterioro visible o si tiene
problemas de funcionamiento.
•No mezcle las pilas nuevas con otras
usadas en el mando a distancia.
•Mire atentamente la tensión del equipo
antes de enchufarlo al tomacorriente.
Marca de conformidad CE: indica cumplimiento con seguridad eléctrica EMC.

4
Este equipo no es de doble voltaje.
•Conecte el equipo en un tomacorriente
exclusivo y en perfecto estado para evitar
sobrecarga de la red eléctrica.
•Incluso cuando el botón ON/ OFF esté
en estado O, existe riesgo de descarga
eléctrica. Por lo tanto, desconecte el
aparato cuando no está siendo utilizado.
•No recomendamos la utilización de
ningún cable de extensión u adaptador.
Si alguno debiera de ser usado siga los
requisitos siguientes:
•La longitud del cable debe ser la
menor posible ya que largo puede
generar sobrecalentamiento y que
alguien tropiece.
•Nunca utilice un adaptador para
más de una aplicación
simultáneamente.
NOTA:
Este equipo no es apropiado para ser utilizado por personas (inclusive niños) con aptitudes
físicas, sensoriales o mentales reducidas o con falta de experiencia y conocimiento, salvo
que estén bajo la supervisión de una persona responsable de su seguridad o que la asesore
sobre el uso de la unidad. Por lo tanto, se recomienda que los niños sean siempre
supervisados para evitar accidentes y uso inapropiado del equipo.
DESCRIPCIÓN
Unidad 3 en 1: Calentador, Enfriador humidicador y puricador de Aire.
Tecnología PTC (Positive Temperature Coecient) proporciona una calefacc-ión
altamente eciente.
Enfría y humidica por medio de su proceso de evaporación, no es un “aire
acondicionado”
Purica y esteriliza el aire al generar iones negativos.
Ecológico, ya que no usa compresor ni gas refrigerante.
Incorpora la opción de añadir bloques refrigerantes al depósito de agua para
mejorar el rendimiento de enfriamiento.
Elevada eciencia y bajo consumo energético.
Cortina de agua que proporciona el grado de humedad necesario.
ES

5
ES
COMPONENTES
1. ESTRUCTURA PRINCIPAL
2. PANEL DE CONTROL DIGITAL
3. LAMAS HORIZONTALES
4. PANEL DELANTERO
5. INDICADOR NIVEL DEL AGUA
6. RUEDAS
7. INTERRUPTOR DE FRÍO/CALOR
8. RUEDAS TRASERAS CON FRENO
9. CUBIERTA DEL BASTIDOR
10. CABLE DE CORRIENTE
11. FILTRO DE AIRE
12. FIJADOR DEL TANQUE
13. TANQUE DE AGUA
14. SOPORTE DE LA COLMENA
15. FILTRO DE COLMENA
16. BLOQUES AZULES REFRIGERANTES

6
Antes de encender el equipo, ubicar al
costado el “interruptor de temperatura”,
y elija manualmente la función que
desea: Cool (Refrigeración) o Heat
(Calefacción).
ON/OFF (Encendido/Apagado)
Enciende y apaga la unidad (pulse una
vez para encender, vuelva a pulsar para
apagar).
Seleccione manualmente la posición
HEAT en el “interruptor de temperatura”
entre HEAT y COOL. Pulse la tecla HEAT
para seleccionar el grado de calefacción,
existen dos velocidades de calefacción
disponibles:
Tener en cuenta:
• Cuando use el modo Calefacción no
introduzca agua en el equipo.
• Cuando se apague la unidad en esta
función, el motor seguirá funcionando
hasta que se enfríe 30-60 segundos
aproximadamente antes de detenerse
por completo.
•Seleccione manualmente la posición
COOL en el “interruptor de temperatura”
entre HEAT y COOL.
•Agregue agua limpia al depósito que
se encuentra en la parte trasera del
equipo, considerando que el volumen
de agua debe estar entre las marcas
MIN y MAX.
•Cuanto más fría este el agua mejor,
introduzca los bloques azules
refrigerantes, previamente congelados
o hielos en el depósito para mejorar el
rendimiento de enfriamiento.
CALEFACCIÓN
MEDIA ALTA
INSTALACIÓN
Por favor no utilizar ningún accesorio que no sea recomendado en este Manual del
Usuario.
A. Retire todo el embalaje que protege al equipo.
NOTA: No encienda el equipo hasta que las ruedas estén instaladas.
B. Coloque el equipo de forma horizontal sobre un local plano y sobre una supercie
suave (toalla, paño), luego atornille las ruedas con la ayuda de la llave, las que tienen
freno deben ser jadas en la parte trasera del equipo.
C. Asegúrese de que no haya otros aparatos compartiendo el circuito eléctrico con el
equipo. Una sobrecarga del circuito eléctrico provocará una baja tensión, quemado de
fusibles y hasta puede causar fuego.
D. El aparato fue diseñado para su uso en ambientes internos. La operación en
ambientes externos podrá no cumplir el efecto esperado.
E. El equipo no puede ser manipulado en ambientes húmedos o mojados.
F. Abrir manualmente las lamas horizontales (veáse nº3 en el apartado “Componentes”)
antes de encender el dispositivo y mantenerlas abiertas durante su uso.
ENFRIADOR/
HUMIDIFICADOR
FUNCIONES DEL PANEL DE CONTROL DIGITAL
ES

7
•Vuelva a colocar el depósito y pulse el
botón COOL (Refrigeración). Se debe
escuchar el agua circulando.
•Seleccione la velocidad deseada
mediante la tecla SPEED entre:
•
•
Tener en cuenta:
•Si el botón COOL no está encendido
sólo se activara la ventilación a la
temperatura que esté el lugar y
se podrá seleccionar la velocidad
deseada mediante la tecla SPEED.
Función oscilatoria automática horizontal;
Las lamas verticales internas oscilan,
direccionando alternadamente el aire
para la derecha y para la izquierda.
Programar el apagado automático de la
unidad en funcionamiento.
Al presionar este botón el generador
de iones comenzará a aportar iones
negativos al ambiente para puricarlo
mientras el indicador luminoso (-Ion)
permanezca encendido.
MANDO A DISTANCIA
•Tiene las mismas funciones que las
descritas en el panel de control (mostrar
como instalar).
•Utilizar baterías CR2025
(incluidas).
BAJA MEDIA ALTA
1. CALEFACCIÓN
2. VELOCIDAD
3. ENFRIADOR/HUMIDIFICADOR
4. ENCENDIDO/APAGADO
5. OSCILACIÓN
6. TEMPORIZADOR
7. IONIZADOR
TEMPORIZADOR
SWING(OSCILACIÓN)
Presione Tiempo de
encendido
Indicación
Panel
1 vez 1 hora
2 veces 2 horas
3 veces 3 horas
4 veces 4 horas
5 veces 5 horas
6 veces 6 horas
7 veces 7 horas
8 veces Apagado Apagado
ANION(IONIZACIÓN)
ES

8
LIMPIEZAYMANTENIMIENTO
LIMPIEZAENGENERAL
•No utilice productos de limpieza como alcohol, queroseno, gasolina,
solventes, detergentes, ácidos, vinagres, y productos químicos o
abrasivos para limpiar el equipo.
•No utilice esponjas metálicas, polvos abrasivos y sustancias
corrosivas, porque estos productos pueden causar daños
permanentes sobre el aparato
LIMPIEZA DE LOS FILTROS
I. Retire la estructura de protección del ltro (a), enseguida retire
el ltro de colmena (b) y lave con agua corriente y un detergente
neutro, utilizando un utilizando un cepillo suave o un paño.
II. Reinstale el ltro y la estructura de protección con cuidado. En
caso de que el equipo no vaya a ser utilizado por algún tiempo,
seque el ltro al sol antes de reinstalarlo.
III. No utilice cepillos con cerdas gruesas para lavar el ltro y la
estructura, estos pueden dañarlos y reducir la eciencia de los
mismos.
NOTA: Después de un largo periodo de uso del equipo, el filtro de colmena y la estructura
de protección del filtro pueden acumular suciedad, lo que puede afectar el flujo de aire y
la eficiencia de la remoción de polvo. Por eso, es recomendada la limpieza cada 15 días.
Si el equipo estuviera siendo utilizado en una habitación con mucho polvo, se debe
realizar la limpieza con mayor frecuencia.
LIMPIEZADELRECIPIENTE DE AGUA
Es importante realizar periódicamente la limpieza del depósito de agua porque es
normal que caiga un poco de agua en el interior del aparato. Debido a la posibilidad de
acumulación de polvo en conjunto con los restos de agua puede haber formación de
suciedad en el interior del climatizador.
•Retire el depósito de agua tirando con cuidado para no derramar el agua en el equipo.
•Antes de que el depósito salga totalmente, levántelo suavemente para liberar la traba
ubicada debajo del recipiente.
•Utilice un paño húmedo con detergente neutro para la limpieza. El mismo tipo de paño
puede ser utilizado para la limpieza del interior del aparato.
•Enjuague con agua corriente, seque y reinstale el recipiente.
IMPORTANTE
Desenchufe el cable de alimentación antes de hacer cualquier tarea de limpieza y
mantenimiento. Vuelva a montar todas las partes antes de encender nuevamente.
ES

9
NOTA : Limpie el exterior del climatizador con un paño húmedo y jabón neutro. Enseguida
séquelo. No utilice alcohol ni ningún producto corrosivo.
ESPECIFICACIONESTÉCNICAS
GARANTÍA
Este producto queda cubierto por una garantía contra defectos de fabricación sujeta a
los plazos de tiempo estipulados por la legislación vigente en cada país. Esta garantía no
cubre los daños resultantes de un uso inadecuado, uso comercial negligente, desgaste
anormal, accidentes o manipulación indebida.
ATENCIÓN - CÓMO DESHACERSE DE MATERIALES
Este producto está cubierto por las leyes de desecho de equipo eléctrico y
electrónico (WEEE, por su sigla en inglés). No se debe desechar con el resto de la
basura, sino que se debe entregar en su centro de reciclaje local. Para mayores
informes, comuníquese con la autoridad local o agencia autorizada para la
eliminación de desechos.
ES
Modelo 705H
Voltaje 220-240V ~
Consumo en
Enfriamiento 65w
Consumo en
Calefacción 2000w
Frecuencia
nominal 50Hz
Flujo de aire 8.0 m/s
Volumen de aire 500 m3/h
Capacidad de
evaporación 300 ml/h
Capacidad del
depósito de agua 3.2L
Ruido ≤65dB
Peso (sin agua) 5,64 kg
Dimensiones (mm) 290 x 250 x 620
Tipo
Climatizador
evaporativo /
calefacción /
humidicador /
ionizador
Características Símbolo Valor Unidad Tipo de control de
potenciatérmica
/temperatura
ambiente:
Control electrónico
de la temperatura
ambiente con
limitación del tiempo
de activación.la durée
d’activation.
Energía térmica
Potencia térmica
nominal Pnom 2,0 kW
Potencia térmica
mínima(indicativo) Pmin 1,5 kW
Potencia térmica
máxima continua Pmax,c 2,0 kW
Consumo de electricidad auxiliar
En modo espera elSB 0,00038 kW
Requisitos de información para calefactores
eléctricos según el Reglamento (UE) 2015/1188
Descripción Símbolo Valor Unidad
Flujo de aire máximo F3,3 m3/min
Potencia consumida P47,74 W
Valor del servicio SV 0,07 (m3/min)/W
Consumo de energía en modo de reposo PSB 0,38 W
Nivel de potencia de sonido LWA 60,3 dB (A)
Velocidad máxima del aire c3,53 m/s
Estándar de medición del valor EN ISO 5801:2017
Requisitos de información para aires acondicionados y
ventiladores según el Reglamento (UE) 206/2012
Datos de contacto WIN DIRECT S.L. C/ CÓRCEGA 299, 5º 3ª, 08008 BARCELONA, ESPAÑA

10
10
DIAGRAMAELÉCTRICO
CONTENIDO
1. EQUIPO PRINCIPAL
2. DOS RUEDAS DELANTERAS
3. DOS RUEDAS TRASERAS CON FRENOS
4. LLAVE INGLESA
5. CUATRO BLOQUES REFRIGERANTES
6. MANDO A DISTANCIA
ES

11
EN
1. EQUIPO PRINCIPAL
2. DOS RUEDAS DELANTERAS
3. DOS RUEDAS TRASERAS CON FRENOS
4. LLAVE INGLESA
5. CUATRO BLOQUES REFRIGERANTES
6. MANDO A DISTANCIA
THANK YOU FOR PURCHASING
Congratulations on purchasing this versatile Evaporative Air Cooler with Heater 3 in 1
from VENTUS DUAL TECH.
Carefully read all the instructions before using the unit, and please keep this instruction
manual for future reference. This manual provides important and necessary information
for the conguration, operation, maintenance and troubleshooting of the VENTUS DUAL
TECH. Failure to follow the instructions may damage and/or impair its operation and void
the warranty.
INDEX
SIMBOLOGY 12
PRECAUTION 12
DESCRIPTION 13
COMPONENTS 14
INSTALLATION 15
FUNCTIONS OF THE DIGITAL CONTROL PANEL 15
CLEANING AND MAINTENANCE 17
WARRANTY 18
TECHNICAL SPECIFICATIONS 18
ELECTRICAL DIAGRAM 19
CONTENTS 19

12
SIMBOLOGY
This device is not allowed to be disposed in domestic waste.
Class II equipment double insulation, no earth connection required.
PRECAUTION
•During operation, the unit must be
located away from furniture, curtains and
windows.
•To ensure the eciency of the
COOLER/HUMIDIFIER function it
should be used in rooms with the doors
and windows open to let in fresh air and
not accumulate moisture.
•Do not place any objects on it. Never
block the air inlet or the exhaust air
outlets of the unit.
•When the COOLER/HUMIDIFIER is
being used do not remove the beehive
lter structure. The tank should always
have water within the Min and Max
levels indicated. Starting the unit with an
inadequate amount of water can cause
pump failure.
•Do not operate the unit near any
ammable or explosive object.
•If during operation you notice any
strange sounds, smells, smoke,
malfunction or other failures, immediately
turn o the device and unplug the power
cord.
•The unit is designed for domestic
use and is only recommended for that
purpose.
•To avoid electric shock, never use the
device with wet hands.
•Turn o and unplug the power cord
when you are not using the unit.
•Do not place the power cord under
carpets, or cover it with carpets or oor
protectors. Keep the cable away from
places where it can be trodden on.
•Never insert objects in the unit. Doing
so will damage it and may cause res.
•To avoid overheating, do not cover the
unit.
•Unplug the unit whenever you are going
to perform any cleaning or maintenance
tasks on it.
•Never transport or turn o the unit by
pulling the cord.
•Never use the unit if it has fallen over
or been dropped, shows any visible
deterioration or has any operating
problems.
•Do not mix new and old batteries in the
remote control.
EN
CE compliance mark: indicates compliance with electrical safety.

13
EN
•Look carefully at the voltage of the unit
before plugging it into the power socket.
This unit is not dual voltage.
•Connect the unit to a single power
socket in perfect condition to avoid a
power surge.
•Even when the ON/OFF button is turned
to O, there is a risk of electric shock.
Therefore, unplug the device when it is
not being used.
•We do not recommend the use of any
extension cord or adapter. If any needs to
be used, follow the requirements below:
•The cable length should be as short
as possible, since a long cable can
cause overheating and someone may
trip over it.
•Never use an adapter for more
than one application simultaneously.
NOTE:
This unit is not suitable for use by people (including children) with reduced physical,
sensory or mental abilities or with lack of experience and knowledge, unless they are
supervised by a person responsible for their safety or who advises them on how to use the
unit. Therefore, it is recommended that children are always supervised to avoid accidents
and improper use of the unit.
DESCRIPTION
3 in 1 unit: Heater / Cooler / Humidier and Air Purier.
PTC technology (Positive Temperature Coecient)
provides highly ecient heating.
Cools and humidies through its evaporation process; it is not an “air conditioner”.
Puries and sterilises the air by generating negative ions.
Ecological, since it does not use a compressor or refrigerant gas.
Includes the option of adding ice packs to the water
tank to improve cooling eciency.
High eciency and low energy consumption.
Water curtain that provides the necessary degree of humidity.

14
COMPONENTS
1. MAIN DEVICE
2. DIGITAL PANEL
3. HORIZONTAL LOUVERS
4. WIND OUTLET
5. WATER LEVEL INDICATOR MIN- MAX
6. WHEELS
7. MANUAL SWITCH COOL/HEATER
8. REAR WHEELS WITH BRAKES
9. FRAME COVER
10. POWER CORD AND PLUG
11. AIR FILTER
12. WATER TANK LOCKING HANDLE
13. WATER TANK
14. GREEN PANEL FRAME
15. GREEN PANEL FILTER
16. BLUE ICE PACKS
EN

15
Before turning on the device, locate on
the side the “temperature switch”, and
choose manually the desired function:
COOL or HEAT.
ON/OFF Turns the unit on and o (press
once to turn on, press again to turn o).
Manually select the position HEAT on the
“temperature switch” between HEAT and
COOL. Press the button HEAT to select
the degree of heat; there are two heat
speeds available:
Remember:
• When using the Heat mode do not
put water in the unit.
• If the unit is turned o in this mode,
the motor will continue to run until it
cools down in approximately 30-60
seconds before stopping completely.
•Manually select the position COOL
on the “temperature switch” between
HEAT and COOL.
•Add clean water to the tank located on
the rear of the unit, considering that the
volume of water should be between the
MIN and MAX marks.
•The colder the water is the better;
insert the pre-frozen blue ice packs or
ice in the tank to improve the cooling
eciency.
HEATER
MEDIUM HIGH
INSTALLATION
Please do not use any accessory that is not recommended in this User Manual.
A. Remove all of the unit’s protective packaging.
NOTE: Do not turn on the unit until the wheels are installed.
B. Place the unit horizontally on a at area and smooth surface (towel, cloth), then
attach the wheels using the spanner; those with a brake should be tted to the rear of
the unit.
C. Make sure there are no other devices sharing the electrical circuit with the unit. An
overload of the electrical circuit will cause a low voltage, burned fuses and possibly
even re.
D. The device has been designed for indoor use. Outdoor use may not have the desired
eect.
E. The unit should not be manipulated in damp or wet conditions.
F. Open horizontal louvers manually (#3 in previous section “Components”) before
turning on the device and keep them open during use.
COOLER/HUMIDIFIER
FUNCTIONS OF THE DIGITAL CONTROL PANEL
EN

16
•Replace the tank and press the COOL
button. The sound of the water owing
should be heard.
•Select the desired speed with the
button SPEED between:
•Remeber:
• If the COOL button is not turned on
the ventilation will only be activated
at room temperature and the desired
speed can only be selected with the
button SPEED.
Horizontal automatic oscillating function;
The internal vertical slats oscillate,
alternately directing the air to the right
and to the left.
Programme the automatic switch-o of
the operating unit.
By pressing this button, the ion generator
will begin to release negative ions into
the environment to purify it while the
indicator light (-Ion) remains on.
REMOTECONTROL
•It has the same functions as those
described in the control panel (show
how to install).
• Use CR2025 batteries.
LOW MEDIUM HIGH
1. HEATER
2. SPEED
3. COOLER/HUMIDIFIER
4. ON/OFF
5. SWING
6. TIMER
7. ANION (IONISATION)
TIMER
Push Timing Button panel
Once 1 hour
Twice 2 hours
3 times 3 hours
4 times 4 horas
5 times 5 hours
6 times 6 hours
7 times 7 hours
8 times OFF OFF
ANION(IONISATION)
EN
SWING

17
CLEANINGANDMAINTENANCE
GENERALCLEANING
•Do not use cleaning products such as alcohol, kerosene, gasoline,
solvents, detergents, acids, vinegars and chemicals or abrasives to
clean the unit.
•Do not use metal sponges, abrasive powders and corrosive
substances, because these products can cause permanent
damage to the device.
CLEANINGFILTERS
I. Remove the lter protection structure (a), then remove the beehive
lter (b) and wash under running water and with a neutral detergent,
using a soft brush or cloth.
II. Reinstall the lter and protection structure carefully. If the unit is
not going to be used for some time, leave the lter to dry in the sun
before reinstalling it.
III. Do not use brushes with thick bristles to wash the lter and the
structure, as they can damage them and make them less eective.
NOTE: After the unit has been used for a long period of time, the beehive filter and the filter
protection structure can accumulate dirt, which can affect the air flow and the effectiveness
of dust removal. For this reason, it is recommended that they are cleaned every 15 days.
If the unit is being used in a room with a lot of dust, cleaning should be performed more
frequently.
CLEANING THE WATER CONTAINER
It is important to clean the water tank periodically because it is normal for a little water
to fall inside the device. As dust may also accumulate with the water droplets, dirt can
form inside the cooler.
•Remove the water tank by pulling it carefully so as not to spill water in the unit.
•Before removing the tank fully, lift it gently to release the lock located below the
container.
•Use a damp cloth with a neutral detergent for cleaning. The same type of cloth can be
used to clean inside the device.
•Rinse with water, dry and reinstall the container.
IMPORTANT
Unplug the power cord before performing any cleaning and maintenance task.
Reassemble all the parts before turning on the air cooler again.
EN

18
NOTE : Clean the exterior of the cooler with a damp cloth and neutral soap. Then dry it.
Do not use alcohol or any corrosive product.
EN
WARRANTY
This product is covered by a warranty against manufacturing defects subject to the time
periods stipulated by the legislation in force in each country. This warranty does not
cover damages resulting from inadequate use, negligent commercial use, abnormal
wear and tear, accidents or improper handling.
WASTE AND CARE FOR THE ENVIRONMENT
This product is covered by the laws of Waste Electrical and Electronic Equipment
(WEEE) It should not be disposed of with the rest of the rubbish, but instead
delivered to your local recycling centre. For more information, contact the local
authority or authorised waste disposal agency.
TECHNICALSPECIFICATIONS
Model 705H
Voltage 220-240V ~
Cooling
Consumption 65w
Heating
Consumption 2000w
Nominal Frequency 50Hz
Air flow 8.0 m/s
Air volume 500 m3/h
Evaporation
capacity 300 ml/h
Water tank
capacity 3.2L
Noise ≤65dB
Weight
(without water) 5,64 kg
Dimensions 290 x 250 x 620
Type
Evaporative air
cooler / heater
/humidier /
ioniser
Characteristics Symbol Value Unit
Control type of
thermal power /
roomtemperature:
Electronic control
of the room
temperature with
limitation of the
activation time.
Thermal power
Rated thermal power Pnom 2,0 kW
Minimum thermal power
(indicative) Pmin 1,5 kW
Continuous maximum
thermal power Pmax,c 2,0 kW
Auxiliary electricity consumption
Sleep mode elSB 0,00038 kW
Description Symbol Value Unit
Maximum airflow F3,3 m3/min
Absorbed power P47,74 W
Service value SV 0,07 (m3/min)/W
Power consumption in sleep mode PSB 0,38 W
Sound power level LWA 60,3 dB (A)
Maximum speed of air c3,53 m/sec
Service Value Measurement Standard EN ISO 5801:2017
Information requirements for air conditioners and
comfort fans according to Regulation (EU) 206/2012
Information requirements for electric space heaters
according to Regulation (EU) 2015/1188
Contact details WIN DIRECT S.L. C/ CÓRCEGA 299, 5º 3ª, 08008 BARCELONA, SPAIN

19
EN
ELECTRICALDIAGRAM
CONTENTS
1. MAIN DEVICE
2. TWO FRONT WHEELS
3. TWO BACK WHEELS WITH BRAKES
4. SPANNER
5. FOUR BLUE ICE PACKS
6. REMOTE CONTROL

20
MERCI D’AVOIR FAIT L’ACQUISITION
Nous tenons à vous féliciter de l’achat de ce climatiseur par évaporation avec fonction
chauage 3 en 1 VENTUS DUAL TECH.
Nous vous prions de lire attentivement toutes les instructions avant d’utiliser l’appareil et
de conserver ce mode d’emploi pour toute référence ultérieure. Ce document contient
des informations importantes relatives à la conguration, à l’utilisation, à l’entretien et à la
résolution des problèmes rencontrés sur l’appareil VENTUS DUAL TECH. Le non-respect
des instructions peut endommager l’équipement et/ou nuire à son fonctionnement et
entraîner l’annulation de la garantie.
SOMMAIRE
SIMBOLIQUE 21
PRECAUTIONS D’EMPLOI 21
DESCRIPTION 22
COMPOSANTS 23
INSTALLATION 24
FUNCTIONS DU PANNEAU DE COMMANDE NUMÉRIQUE 24
NETTOYAGE ET ENTRETIEN 26
GARANTIE 27
SPÉCIFICATIONS TECHNIQUES 27
SCHÉMA ÉLECTRIQUE 28
CONTENU 28
FR
Table of contents
Languages:
Other Ventus Air Conditioner manuals
Popular Air Conditioner manuals by other brands

Mitsubishi
Mitsubishi MR. SLIM MSY-A24NA operating instructions

LG
LG MULTI F A2UW16GFA0 Engineering product data book

Frigidaire
Frigidaire FAS183K2A1 Factory parts catalog

Haier
Haier ESA405R User & care guide

Lennox
Lennox KGA092KGA102KGA120KGA150 installation instructions

Danby
Danby DPAC10030 owner's manual