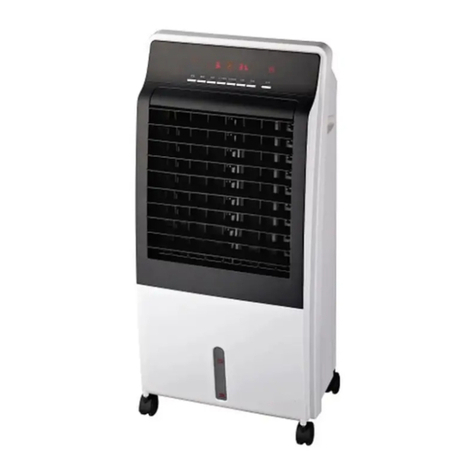
Ventus KT001-18DR User manual

EN INSTRUCTION MANUAL
ES MANUAL DE INSTRUCCIONES
FR MANUEL D’INSTRUCTIONS
DE GEBRAUCHSANWEISUNG


3
EN
IMPORTANT SAFETY INSTRUCTIONS: READ CAREFULLY AND
KEEP FOR FUTURE REFERENCE.
THANK YOU FOR PURCHASING
Congratulations on purchasing Ventus Cooling System.
Carefully read all the instructions before using the unit, and
please keep this instruction manual for future reference. This
manual provides important and necessary information for the
conguration, operation, maintenance and troubleshooting of
the Ventus Cooling System. Failure to follow the instructions may
damage and/or impair its operation and void the warranty.

4
WARNING!!!
TO REDUCE THE RISK OF FIRE,
ELECTRICAL SHOCK, OR INJURY:
•This appliance is not intended
to be used by people (including
children)with reduced physical,
sensory or mental capabilities,
or lack of experience and
knowledge unless they have
been given supervision or
instruction concerning the use
of the appliance by the person
responsible for their safety.
•Do not allow it to be used as a
toy. Close attention is necessary
when used by or near children.
Children should be supervised to
ensure that they do not play with
the machine or remote control.
•Do not operate the Ventus
Cooling System with a damaged
cord or plug or after it has been
damaged in any manner. Please
return the Ventus Cooling System
to an authorized service facility
for examination, electrical or
mechanical adjustment or repair.
•Arrange cord away from trafc
area and where it will not be
tripped over.
•Connect to properly grounded
outlets only.
•To prevent a possible re, do not
use with any opening or exhaust
blocked, and keep free of dust,
lint, hair, and anything that may
reduce airow. Do not put any
object into the inlet grill or the
exhaust opening as this may cause
an electric shock or re, or damage
the appliance.
•Ensure the Ventus Cooling
System is on a stable,secure
surface to eliminate the potential
of tipping it over.
•Be sure that the plug is fully
inserted into an appropriate
receptacle.Please remember
that receptacles may deteriorate
due to aging and continuous
use; check periodically for signs
of overheating or deformations
evidenced by the plug. If you
notice any issues do not use
the receptacle and CALL your
electrician.
•Do not attempt to modify or
repair the product by yourself.
Doing so could void the warranty
and cause damage or personal
injury. Only a repair technician may
disassemble or repair this product.
•Choking hazard-This remote
control unit contains a small
battery.
• If the machine is not working as it
should, has received a sharp blow,
has been dropped, damaged, left
outdoors, or dropped into water,
do not use it and contact Customer
Support.
• Do not open or consume the
liquid within the ice containers.

5
Ventus Cooling System
2 Ice
containers
Spare water
drain lid
Remote control
Manual
MODEL Nº KT001-18DR
RATED VOLTAGE & FREQUENCY 220-240 VAC/50-60 Hz
POWER CONSUMPTION 60 W
WATER TANK CAPACITY 8 L
Air Cooler / Fan / Humidier.
•Includes 3 wind modes and 3 adjustable speeds.
• Strong and quiet airow oscillation from left to right.
•8L capacity water tank.
•7 hour timer function.
•Remote control

6
. Control panel
. Front Louver
. Water Level Display Window
. Rolling Casters
. Upper Sink Cover
. Rear Frame
. Rear Filter Panel
. Water Drain Lid
. Built-in Handle
. Side Filter Panel
. Side Frame

7
1- ASSEMBLE THE MOVING
WHEELS
The product is equipped with 4
casters, which are placed in the
bubble of the outer packaging
box. After opening the product
packaging box, take the air cooler
out.You need to put it upside down
on at ground or table and align
the iron shafts of the 4 casters with
it. The 4 caster holes at the bottom
are inserted rmly into place, and
then the product with assembled
casters can be used normally.
2- ADD WATER TO THE
CONTAINER AT THE TOP
Open the upper sink cover, and
using a cup or a bottle slowly pour
clean water into the middle of the
water tank. Note that the water
surface should not exceed the
square container area in the middle
of the water tank when adding
water to avoid overow. The water
container can hold at most 8 liters
of water. The water volume should
not exceed the maximum water
level to avoid overow of the
bottom water tank. In the process
of using the cool air function, pay
attention to the decrease of the
water tank water volume. When
the water volume is reduced to
the lowest water level, please add
water in time.
Do not shake the product while it’s
full with water to prevent the water
in the tank from overowing.
3-DRAIN THE REMAINING WATER
Once you are done using your
Ventus Cooling System, there is a
water drain at the bottom in order
to prevent water from being stored
in the water tank. When water
needs to be drained, it needs to
be moved to a suitable place, and
then the water drain lid has to be
removed. The remaining water
in the water tank will come out
through the drain hole outow.
4- ADDING THE ICE BOTTLES
To enhance the cool air mode, put
the ice container in the refrigerator
till they freeze. Then place inside
the water tank of your Ventus
Cooling System.
Do not
ll past
the
edge.

8
ON / SPEED
Press this key to switch on/
switch off and select speed. The
sequence is ON, Low Speed, Mid.
Speed, High speed and OFF. The
corresponding indicator lights up.
MODE
Press this key to select mode. The
sequence is normal, natural and
sleep when this key is touched
repeatedly or continuously. The
light indicates the mode state.
ROTATE
Press button once , the cooler will
begin oscillating from left to right
around 75°to get better heat
dispersion Press again to turn the
oscillation off . And you can also
manual-swing vertically louver.
APPT. / TIMER
APPT.: When the air cooler is turn
on, press the key to set 1 to 7
hours timer to turn off. Once set ,
the indicator will show the setting
time.
Timer: When the air cooler is turn
off, press the key to set 1 to 7 hour
timer to turn on. Once set , the
indicator will show the setting
time.
COOL
Press this button with the Ventus
Cooling System turned on to start
the cool air function. The cool
air light will come on. While it is
running, make sure there is enough
water. For more efciency, you
can add the ice containers to the
water tank. Press again to stop this
function.
Before you start your Ventus
Cooling System, open the front
louvers manually by using the
notch on the bottom right corner.
ON
Speed
Mode
Rotate
Appt.
Timer
Cool

9
Remove the Frame Cover by pulling on the handle. Then, remove the
honeycomb panel and wash under running water and with a neutral
detergent, using a soft brush or cloth.
NOTE: Refrain from using any cleaning chemicals such as detergents and
abrasives as this could harm the material of the panel lter and affect its
functionality.
Once you are done, reinstall the lter panel on the Frame, and put the
Frame Cover. If the unit is not going to be used for some time, leave the
parts to dry before reinstalling.
Do not use brushes with thick bristles to wash the lter panel and other
parts, as they can damage them and make them less effective.

MEMORY FUNCTION
Ventus Cooling System will always
remember your last settings
(working mode) once you turn it on
again except for the timer.
REMOTE CONTROLLER
The buttons on the remote control
such as ON/OFF, SPEED, MODE,
COOL, ROTATE and APPT./TIMER
have the same functions as those
of the corresponding keys on the
control panel.
To replace battery, unscrew the
cover and replace it with 1 CR2025
or CR2032 type lithium battery.
Make sure the position is correct.
Reinstall the battery box cover
1. Push the button next to the
battery cover to release the
battery cover.
2. Insert 1 x CR2025 or CR2032
type lithium battery,making
sure”+”side is facing up as shown
in the diagram.
3. Once battery is installed, push
battery cover closed.
• Replace with new batteries of the
same type when replacement is
required.
• When not using the remote
control for a long time, please take
out the battery.
• Do not attempt to dismantle the
battery.
• Do not dispose of the battery in
re, the battery may explode or
leak.
This product contains a lithium
button cell battery. If a used
lithium button cell battery is
swallowed or enters the body, it
can cause severe internal burns
and lead to death in as little as 2
hours. Always secure the battery
compartment completely. If
the battery compartment does
not close tightly, stop using the
product, remove the batteries and
keep it out of the reach of children.
If you think the batteries may have
been swallowed or placed inside
any part of the body, seek medical
attention immediately.
a) Dispose of batteries properly,
and keep them out of the reach of
children.
b) Used batteries can also cause
injury.
PULL
PUSH
BATTERY

11
This product is covered by the laws of Waste Electrical and
Electronic Equipment (WEEE) It should not be disposed of
with the rest of the rubbish, but instead delivered to your
local recycling centre. For more information, contact the
local authority or authorised waste disposal agency.

12
ES
INSTRUCCIONES DE SEGURIDAD IMPORTANTES: LÉALAS
ATENTAMENTE Y CONSÉRVELAS PARA FUTURAS CONSULTAS.
GRACIAS POR SU COMPRA
Enhorabuena por la compra de Ventus Cooling System.
Lea atentamente todas las instrucciones antes de utilizar la unidad
y conserve este manual de instrucciones para futuras consultas.
Este manual proporciona información importante y necesaria
para la conguración, funcionamiento, mantenimiento y solución
de problemas del Ventus Cooling System. El incumplimiento de
las instrucciones puede dañar y/o perjudicar su funcionamiento y
anular la garantía.

13
ADVERTENCIA
PARA REDUCIR EL RIESGO
DE INCENDIO, DESCARGA
ELÉCTRICA O LESIONES:
•Este aparato no está destinado
a ser utilizado por personas
(incluidos niños) con capacidades
físicas, sensoriales o mentales
reducidas, o con falta de
experiencia y conocimientos,
a menos que hayan sido
supervisadas o instruidas acerca
del uso del aparato por la persona
responsable de su seguridad.
•No permita que se utilice como
juguete. Es necesaria mucha
atención cuando es usado por
niños o cerca de ellos. Los niños
deben ser supervisados para
asegurarse de que no jueguen con
la máquina o el control remoto.
•No opere el sistema de
enfriamiento Ventus con un cable o
enchufe dañado o después de que
se haya dañado de alguna manera.
Devuelva el Ventus Cooling System
a un centro de servicio autorizado
para su examen, ajuste eléctrico o
mecánico o reparación.
•Disponga el cable lejos del área
de tráco y donde no pueda
tropezarse con él.
•Conéctelo únicamente a tomas
debidamente conectadas a tierra.
•Para evitar un posible incendio,
no lo use con ninguna abertura o
escape bloqueados y manténgalo
libre de polvo, pelusa, cabello y
cualquier cosa que pueda reducir
el ujo de aire. No coloque ningún
objeto en la rejilla de entrada ni
en la abertura de escape, ya que
podría provocar una descarga
eléctrica o un incendio, o dañar el
aparato.
•Asegúrese de que el Ventus
Cooling System esté sobre una
supercie estable y segura para
eliminar la posibilidad de que se
vuelque.
•Asegúrese de que el enchufe
esté completamente insertado
en un receptáculo apropiado.
Recuerde que los receptáculos
pueden deteriorarse debido al
envejecimiento y al uso continuo;
verique periódicamente si hay
señales de sobrecalentamiento o
deformaciones evidenciadas por el
enchufe. Si nota algún problema,
no use el receptáculo y LLAME a su
electricista.
•No intente modicar o reparar el
producto usted mismo. Si lo hace,
podría anular la garantía y causar
daños o lesiones personales. Solo
un técnico de reparación puede
desarmar o reparar este producto.
•Peligro de asxia: esta unidad
de control remoto contiene una
batería pequeña.
•Si la máquina no funciona como
debería, ha recibido un golpe
fuerte, se ha caído, dañado, se ha
dejado al aire libre o se ha caído
al agua, no la utilice y póngase en
contacto con Atención al cliente.
•No abra ni consuma el líquido
dentro de los contenedores de
hielo.

14
Enfriador de aire/ Ventilador/ Humidicador.
•Incluye 3 modos de viento y 3 velocidades ajustables.
• Oscilación fuerte y silenciosa del ujo de aire de izquierda a derecha.
•Depósito de agua de 8 L de capacidad.
•Función de temporizador de 7 horas.
•Mando a distancia.
Ventus Cooling System
2 Contenedores
de hielo
Tapón de
drenaje de
repueso
Control remoto
Manual
Nº DE MODELO KT001-18DR
TENSIÓN Y FRECUENCIA NOMINALES 220-240 VAC/50-60 Hz
CONSUMO DE ENERGÍA 60 W
CAPACIDAD DEL DEPÓSITO DE AGUA 8 L

15
. Panel de control
. Rejilla frontal
. Ventana de visualización del
nivel de agua
. Ruedas giratorias
. Tapa superior
. Marco trasero
. Panel ltrante trasero
. Tapa de drenaje de agua
. Asa incorporada
. Panel ltrante lateral
. Marco lateral

16
1- MONTE LAS RUEDAS
El producto está equipado con 4
ruedas, que están colocadas en
la burbuja de la caja de embalaje
exterior. Después de abrir la caja
de embalaje del producto, saque
el enfriador de aire, póngalo boca
abajo sobre un suelo plano o una
mesa y alinee los ejes de hierro
de las 4 ruedas con él. Los 4
agujeros de las ruedas en la parte
inferior se insertan rmemente en
su lugar, y luego el producto con
ruedas montadas se puede utilizar
normalmente.
2- AÑADA AGUA AL RECIPIENTE
DE LA PARTE SUPERIOR
Abra la tapa superior, y utilizando
una taza o una botella vierta
lentamente agua limpia en el
centro del depósito de agua.
Tenga en cuenta que la supercie
del agua no debe exceder el
área cuadrada del recipiente en
el centro del depósito de agua
cuando añada agua para evitar
el desbordamiento. El depósito
de agua puede contener como
máximo 8 litros de agua. El
volumen de agua no debe superar
el nivel máximo de agua para evitar
el desbordamiento del depósito de
agua inferior. En el proceso de uso
de la función de aire frío, preste
atención a la disminución del
volumen de agua del depósito de
agua. Cuando el volumen de agua
se reduzca al nivel más bajo, añada
agua a tiempo.
No agite el producto mientras esté
lleno de agua para evitar que el
agua del depósito se desborde.
3-DRENE EL AGUA RESTANTE
Una vez que haya terminado de
utilizar su Ventus Cooling System,
hay un drenaje de agua en la parte
inferior para evitar que se acumule
agua en el depósito de agua.
Cuando sea necesario drenar el
agua, hay que moverla a un lugar
adecuado y, a continuación, retirar
la tapa de drenaje de agua. El agua
restante en el depósito saldrá por
el oricio de salida del desagüe.
4- AÑADA LAS BOTELLAS DE HIELO
Para potenciar el modo de aire
frío, coloque los contenedores
de hielo en el frigoríco hasta
que se congelen. A continuación,
colóquelas dentro del depósito de
agua de su Ventus Cooling System.
No
rellene
más
allá del
borde.

17
ENCENDIDO / VELOCIDAD
Pulse esta tecla para encender/
apagar y seleccionar la velocidad.
La secuencia es Encendido, Baja
velocidad, Media Velocidad, Alta
Velocidad y Apagado. El indicador
correspondiente se enciende.
MODO
Pulse esta tecla para seleccionar
el modo. La secuencia es
normal, natural y dormir cuando
se toca esta tecla repetida o
continuamente. La luz indica el
estado del modo.
GIRAR
Presione el botón una vez, el ujo
de aire comenzará a oscilar de
izquierda a derecha alrededor
de 75 ° para obtener una mejor
dispersión del calor. Presione
nuevamente para apagar la
oscilación. También puede ajustar
la dirección vertical del ujo
ajustando manualmente la rejilla
frontal.
APTO. / TEMPORIZADOR
APPT.: Cuando el enfriador de aire
está encendido, presione la tecla
para congurar el temporizador de
1 a 7 horas para apagar. Una vez
congurado, el indicador mostrará
el tiempo de conguración.
Timer: cuando el enfriador de
aire esté apagado, presione
la tecla para congurar el
temporizador de 1 a 7 horas para
encenderlo. Una vez congurado,
el indicador mostrará el tiempo de
conguración.
FRÍO
Presione este botón con el Ventus
Cooling System encendido para
iniciar la función de aire frío. La luz
de aire frío se encenderá. Mientras
esté en funcionamiento, asegúrese
de que haya suciente agua. Para
mayor eciencia, puede añadir los
contenedores de hielo en el tanque
de agua.Apriete nuevamente para
parar esta función.
Antes de iniciar su Ventus Cooling
System, abra las rejillas frontales
manualmente usando la muesca en
la esquina inferior derecha.
ON
Speed
Mode
Rotate
Appt.
Timer
Cool

18
Retire la cubierta del marco tirando de la muesca en la parte superior de
esta. A continuación, retire el panel ltrante y lávelo con agua corriente y
un detergente neutro, utilizando un cepillo suave o un paño.
NOTA: Absténgase de usar productos químicos de limpieza, como
detergentes y abrasivos, ya que esto podría dañar el material del panel
ltrante y afectar su funcionalidad.
Una vez que haya terminado, vuelva a instalar el panel ltrante en el
marco y coloque la cubierta del marco. Si no va a utilizar la unidad durante
algún tiempo, deje secar las piezas antes de volver a instalarla.
No use cepillos con cerdas gruesas para lavar el panel ltrante y otras
partes, ya que pueden dañarlas y hacerlas menos efectivas.

19
FUNCIÓN DE MEMORIA
Ventus Cooling System siempre
recordará su última conguración
(modo de trabajo) una vez que lo
vuelva a encender, a excepción del
temporizador.
CONTROL REMOTO
Los botones del control remoto
como ON/OFF, SPEED, MODE,
COOL, ROTATE y APPT./TIMER
tienen las mismas funciones que
las teclas correspondientes del
panel de control.
Para reemplazar la batería,
desenrosque la tapa y reemplácela
con 1 batería de litio tipo CR2025
o CR2032. Asegúrese de que la
posición sea la correcta. Vuelva
a instalar la tapa de la caja de la
batería
1. Presione el botón junto a la tapa
de la batería para liberar la tapa de
la batería.
2. Inserte 1 batería de litio tipo
CR2025 o CR2032, asegurándose
de que el lado “+” esté hacia arriba
como se muestra en el diagrama.
3. Una vez instalada la batería,
empuje la tapa de la batería para
cerrarla.
• Reemplácelas con baterías
nuevas del mismo tipo cuando sea
necesario reemplazarlas.
•Cuando no utilice el mando a
distancia durante mucho tiempo,
saque la batería.
•No intente desmontar la batería.
•No deseche la batería en el
fuego, la batería puede explotar o
tener fugas.
Este producto contiene una
batería de botón de litio. Si una
pila de botón de litio usada se
traga o entra en el cuerpo, puede
causar quemaduras internas
graves y provocar la muerte en
tan solo 2 horas. Siempre asegure
completamente el compartimiento
de la batería. Si el compartimento
de las pilas no cierra bien, deje
de utilizar el producto, retire
las pilas y manténgalo fuera del
alcance de los niños. Si cree que
las pilas pueden haberse tragado
o colocado dentro de cualquier
parte del cuerpo, busque atención
médica de inmediato.
a) Deseche las baterías
adecuadamente, y manténgalas
fuera del alcance de los niños.
b) Las baterías usadas también
pueden causar lesiones.
JALAR
EMPUJAR
BATERÍA

Este producto está cubierto por las leyes de Residuos de
Aparatos Eléctricos y Electrónicos (RAEE). No debe desecharse
con el resto de la basura, sino entregarse a su centro de reciclaje
local. Para obtener más información, póngase en contacto
con la autoridad local o la agencia de eliminación de residuos
autorizada.
Table of contents
Languages:
Other Ventus Air Conditioner manuals
Popular Air Conditioner manuals by other brands

McLean
McLean SPECTRACOOL G57 instruction manual

DeLonghi
DeLonghi PAC WE 110 Instructions for use

Hitachi
Hitachi RAM-SJ24H3NK installation manual

F&U
F&U PAH-9016 instruction manual

Mitsubishi Electric
Mitsubishi Electric CITY MULTI PLFY-P-NBMU-E installation manual

Mitsubishi
Mitsubishi Fresh Master GUF-50RD3 Handbook