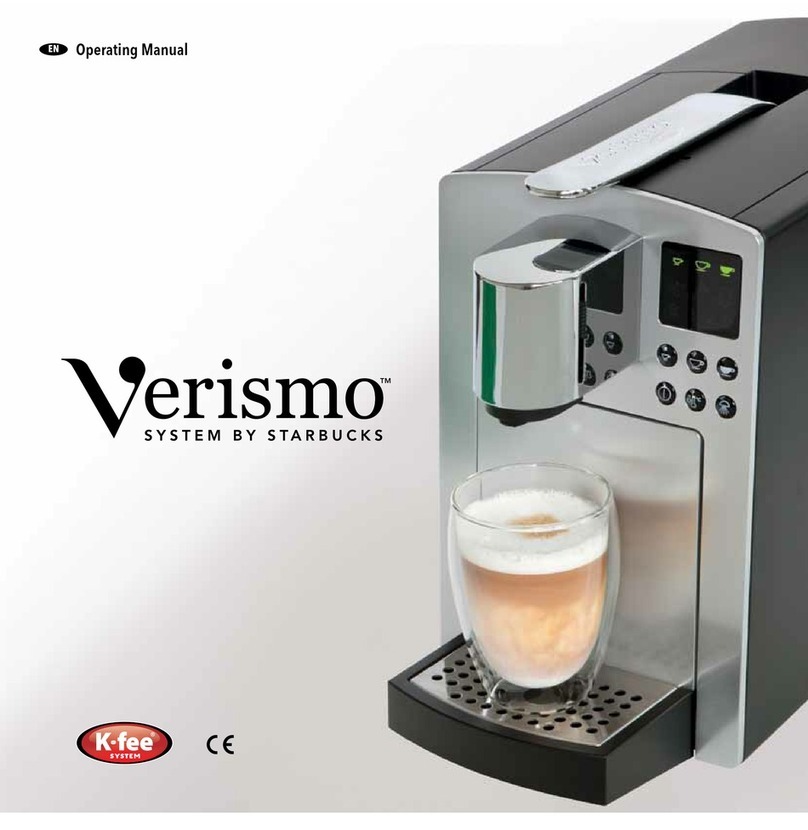
Verismo V?585 User manual

Operating Manual
Manuel d’utilisation
EN
FR

2
EN
3
FR
Contents Table des matières
Introduction ����������������������������������������������������������������������������������������������������������������������������������������������������������������� 2
Important safeguards �������������������������������������������������������������������������������������������������������������������������������������������������� 4
Special safety instructions ������������������������������������������������������������������������������������������������������������������������������������������� 5
Verismo™ System V∙585 overview�������������������������������������������������������������������������������������������������������������������������������� 6
Overview of LED symbols ��������������������������������������������������������������������������������������������������������������������������������������������� 7
Getting started ������������������������������������������������������������������������������������������������������������������������������������������������������������� 8
Preparing beverages ���������������������������������������������������������������������������������������������������������������������������������������������������� 9
Daily cleaning ������������������������������������������������������������������������������������������������������������������������������������������������������������� 10
Cleaning the machine (when prompted) �������������������������������������������������������������������������������������������������������������� 11–12
Descaling the machine (when prompted) ������������������������������������������������������������������������������������������������������������13–14
Changing the filter (when prompted) �������������������������������������������������������������������������������������������������������������������15–16
Manually enabling the cleaning, descaling or filter change functions ��������������������������������������������������������������������� 17
Parameter setting: Water hardness ��������������������������������������������������������������������������������������������������������������������������� 18
Parameter setting: Water filter ���������������������������������������������������������������������������������������������������������������������������������� 18
Parameter setting: Auto-Off �������������������������������������������������������������������������������������������������������������������������������������� 19
Parameter setting: Cleaning interval ������������������������������������������������������������������������������������������������������������������������� 20
Parameter setting: Temperature reduction ���������������������������������������������������������������������������������������������������������������21
Parameter setting: Long (lungo) espresso shot ��������������������������������������������������������������������������������������������������������� 22
Evaporation of residual water ������������������������������������������������������������������������������������������������������������������������������������ 23
Frequently asked questions ��������������������������������������������������������������������������������������������������������������������������������������� 24
Specifications and servicing �������������������������������������������������������������������������������������������������������������������������������������� 25
Disposal instructions�������������������������������������������������������������������������������������������������������������������������������������������������� 26
Notes �������������������������������������������������������������������������������������������������������������������������������������������������������������������������� 27
Introduction ����������������������������������������������������������������������������������������������������������������������������������������������������������������� 3
Consignes de sécurité importantes �������������������������������������������������������������������������������������������������������������������������� 28
Instructions de sécurité particulières ������������������������������������������������������������������������������������������������������������������������ 29
Aperçu du système VerismoMC V∙585 ������������������������������������������������������������������������������������������������������������������������30
Aperçu des symboles DEL ����������������������������������������������������������������������������������������������������������������������������������������� 31
Pour commencer �������������������������������������������������������������������������������������������������������������������������������������������������������32
Préparation des boissons ������������������������������������������������������������������������������������������������������������������������������������������ 33
Nettoyage quotidien �������������������������������������������������������������������������������������������������������������������������������������������������34
Nettoyage de l’appareil (sur invitation) ���������������������������������������������������������������������������������������������������������������35–36
Détartrage de l’appareil (sur invitation) �������������������������������������������������������������������������������������������������������������� 37–38
Changement du filtre (sur invitation) ������������������������������������������������������������������������������������������������������������������39–40
Activation manuelle des fonctions de nettoyage, de détartrage ou de changement du filtre ��������������������������������� 41
Réglage des paramètres : Dureté de l’eau ���������������������������������������������������������������������������������������������������������������� 42
Réglage des paramètres : Filtre à eau ����������������������������������������������������������������������������������������������������������������������� 42
Réglage des paramètres : Arrêt automatique ����������������������������������������������������������������������������������������������������������� 43
Réglage des paramètres : Intervalles de nettoyage ������������������������������������������������������������������������������������������������� 44
Réglage des paramètres : Réduction de la température ������������������������������������������������������������������������������������������ 45
Réglage des paramètres : Espresso long (lungo) �����������������������������������������������������������������������������������������������������46
Évaporation de l’eau résiduelle ��������������������������������������������������������������������������������������������������������������������������������� 47
Foire aux questions ��������������������������������������������������������������������������������������������������������������������������������������������������� 48
Caractéristiques techniques et entretien ������������������������������������������������������������������������������������������������������������������ 49
Instructions pour les mises au rebut particulières ����������������������������������������������������������������������������������������������������50
Remarques ����������������������������������������������������������������������������������������������������������������������������������������������������������������� 51
Verismo™ System V·585 Operating Manual – Introduction
WARNING
Read ALL instructions before use to avoid injury�
Pay attention to warnings in this Operating Manual�
Keep this Operating Manual in a safe place for future reference�
For use by adults only�
Be diligent about emptying, cleaning and descaling as described in this Operating Manual�
Designed for beverage pods that bear the Verismo™ System logo� Also compatible with other K-fee® System pods�
Manuel d’utilisation du système VerismoMC V·585 – Introduction
AVERTISSEMENT
Lisez TOUTES les instructions avant l’utilisation pour éviter les blessures�
Portez attention aux avertissements contenus dans ce manuel d’utilisation�
Conservez ce manuel d’utilisation dans un endroit sûr pour vous y référer ultérieurement�
Pour une utilisation par des adultes seulement�
Ne tardez pas à procéder à la vidange, au nettoyage et au détartrage comme décrit dans ce manuel d’utilisation�
Conçu pour les capsules de boissons qui portent le logo du système Verismo�
MC Également compatible avec les
autres capsules du système K-fee�®

4
EN
5
EN
Special safety
instructions
IMPORTANT
SAFEGUARDS
WARNING
When using electrical appliances, basic
safety precautions must always be
followed, including the following:
1. Read all instructions and use only in
accordance with these instructions.
2. The appliance is designed and
manufactured for household use.
3. Never place your fingers under
the spout while the appliance
is operating — this may result
in scalding. Never insert your
fingers in the pod opening — this
may result in injury.
4. Never open the lever on the
appliance during the brewing,
rinsing, cleaning or descaling
processes. Always keep the lever
in the closed / down position
while machine is operating.
5. Do not touch hot surfaces. Use
handles or knobs when available.
6. Never use a damaged or deformed
pod. Only use beverage pods
suitable for this appliance.
7. Never lift the appliance by its lever.
Never open or close the lever forcibly.
8. Never open the appliance or insert
objects into the appliance openings.
9. Never operate the appliance without
its drip tray or drip grating.
10. Do not overfill the water tank with
water.
11. Use only fresh and cold drinking
water in this appliance! Do not put
any other liquids or foods in the
water tank except as directed in the
cleaning and descaling instructions
in this manual.
12. The use of accessory attachments
not recommended by the appliance
manufacturer may result in fire,
electric shock or injury to persons.
13. Do not place on or near a hot gas or
electric burner, or in a heated oven.
Do not place near water, e.g., kitchen
sink.
14. Do not use outdoors.
15. To protect against fire, electric
shock and injury, do not immerse
appliance, cord or plug in water or
any other liquid.
16. This appliance is equipped with
a power cord having a grounding
wire with a grounding plug. Only
plug the appliance into a grounded
3-pin wall socket. In the event of an
electrical short circuit, grounding
reduces the risk of electrical shock.
Check if mains voltage matches the
specifications on the nameplate.
The warranty becomes null and void
if the appliance is plugged into an
incorrect mains voltage.
17. Do not, under any circumstances,
cut or remove the third (ground)
prong from the power cord or use
an adapter. Consult a qualified
elec tric ian if the grounding
instructions are not completely
understood, or if doubt exists as to
whether the appliance is properly
grounded.
18. Turn off and unplug the appliance
from the outlet when not in use and
before cleaning and maintenance.
Allow to cool before putting on or
taking off parts, and before cleaning
the appliance.
19. Do not operate appliance with a
damaged cord or plug or after the
appliance malfunctions or is damaged
in any manner. Contact Starbucks
customer service (1-800-334-5553)
to report any malfunctions or damage
to the appliance. Repair should be
done by authorized customer service
company only.
20. Do not let cord hang over the edge
of the table or the counter, or touch
hot surfaces.
21. To disconnect, always turn any
control to “off” first, then remove
plug from wall outlet.
22. Close supervision is necessary when
this appliance is used by or near
children. Store the appliance and
all its accessories outside the reach
of children.
23. Refer to the instructions for use of
all cleaning and descaling agents
before use and comply with the
safety regulations. Do not turn
off appliance during rinsing or
descaling process.
24. Apart from normal use, cleaning,
descaling and external cleaning,
all other work such as repairs or
replacing the power cord may only
be carried out by an authorized
customer service company in order
to avoid hazards.
25. In case of long periods of absence,
vacation, etc., the appliance must
be emptied, cleaned and the power
plug must be removed from the
socket.
26. Do not use appliance for other than
intended use.
SAVE THESE
INSTRUCTIONS
WARNING TO USERS
ANDPARENTS
DO NOT permit children to use
the appliance unless there is
adult supervision. Appliance
dispenses very hot water.
Important
safeguards SPECIAL SAFETY
INSTRUCTIONS
Warning symbols and words
The warning triangle appears in these
instructions where failure to comply with
the safety instructions may result in risks
to the user or the appliance.
WARNING: Extremely hot water
Don’ts: Do not reach inside
WARNING:
Electric shock
WARNING
Avoid risk of electric shock
• Keep the appliance away from moisture
and splashing water.
• Do not clean appliance under running
water or with a water jet.
• Never pour any type of liquid on top of
the appliance.
• Never unplug the appliance by pulling the
power cord.
• No user serviceable parts inside.
WARNING
WARNING: Make sure the lever is closed
completely during use. Extremely hot
water runs through the appliance
when operating (brewing, descaling,
cleaning, rinsing). To avoid the risk of
scalding or other injury, always keep
the lever in the closed / down position
while machine is operating. Do not
reach under the spout or remove the
drip tray.
• Take care when emptying the drip tray.
The water can be very hot.
• There is a danger of scalding when
evaporating the residual water (the
steam temperature can be as high as
248°F / 120°C).
WARNING
Hygiene and cleaning
• Only use pods with a best-by date that
has not yet expired.
• Store pods in a suitable location.
• For health reasons it is recommended
to rinse the appliance five times
before first use and once after
each beverage is poured. Read the
instructions under “Daily Cleaning“ on
page10.
• Clean the appliance periodically and in
accordance with the Operating Manual
to prevent hygiene risks.
• Only use cleaning / descaling agents that
are suitable for the appliance.
• Carefully read the user instructions about
the cleaning and descaling agents and
comply with the safety instructions.
Short cord instructions
A short power-supply cord is provided to
reduce risks of entanglement or tripping
over a longer cord.
Information on Eco (Energy–Saving)
mode (Auto-Off)
The appliance returns to Eco (Energy–
Saving) mode if it is unused for more than
30 minutes (factory setting). The appliance
uses considerably less energy in this mode.
For example, it uses less than 0.5 W/h (the
standard operating amount of energy
used).
CAUTION
CAUTION: There are four sharp needles
that puncture the Verismo™ System
pods inside the pod opening. To avoid
risk of injury, do not put your fingers
in the pod opening.
WARNING: TO REDUCE THE RISK OF FIRE
OR ELECTRIC SHOCK, DO NOT REMOVE THE
BOTTOM COVER. NO USER SERVICEABLE
PARTS ARE INSIDE. REPAIR SHOULD BE DONE
BY AUTHORIZED SERVICE PERSONNEL ONLY.
WARNING
RISK OF FIRE OR
ELECTRIC SHOCK
DO NOT OPEN

6
EN
7
EN
Overview of
LEDsymbols
1
2
7
3
9
10
4
8
6
11
12
13
14
5
EN Verismo™ System V∙585
overview
1 Drip tray grate
2 Drip tray wall
3 Height-adjustable spout
4 Pod opening
5 Lever
6 Water tank
7 Water tank cover
8 Water filter (optional)
9 LED display
10 Controls
11 Used pod container
12 Connector
13 Lower drip tray
14 Upper drip tray
CAUTION
CAUTION: There are four sharp needles that
puncture the Verismo™ System pods inside
the pod opening. To avoid risk of injury, do
not put your fingers in the pod opening.
Symbol
Espresso
• The cup symbols flash green while appliance heats up.
• The cup symbols and the Rinse symbol light up green if appliance is ready.
• The respective cup symbol or the Rinse symbol flashes green as the desired
action isperformed.
Brewed
Milk
Rinse
°C
Temperature
Reduction
• Lights up green when temperature reduction is selected.
• Flashes green as beverage preparation is prepared with
temperaturereduction.
• Brewing temperature can be reduced for products to approximately
158°F / 70°C.
Clean
Machine
• Lights up green if appliance needs to be cleaned. Set to every 100 beverage
preparations (factory setting).
• Flashes green as desired action is performed.
Descale
Machine
• Lights up green if appliance needs to be descaled.
• Flashes green as desired action is performed.
Empty
Used Pod
Container
• Symbol for used pods lights up red if used pod container and lower drip tray
need to be emptied.
• Approximately 30 pods fit in the used pod container.
• The upper drip tray has a capacity of approximately 10.14 fl oz / 300ml;
thelower drip tray has a capacity of approximately 16.91 fl oz / 500ml.
Fill
WaterTank
• Lights up red if water tank is empty.
• The water tank has a capacity of approximately 0.92 gallons / 3.5L.
Replace
Water FIlter
• Lights up red when water filter needs to be replaced
(after 13.2 gallons / 50 L water).
• Symbol stays lit until filter has been replaced.
Display of symbols:
°C
Espresso
On / Off
Button symbols:
Brewed
Temperature
Reduction
Milk
Rinse
°C

8
EN
9
EN
NOTE: When inserting pods, please close
handle wi th one smooth motion. Avoid
back and forth movement of the handle or
hesitation when closing the lever, as this can
cause the pod to drop straight into the used
pod container without being punctured.
Do not remove the top foil lid or puncture
the pod.
Preparing
beverages
I f a pp li an ce ha s b ee n e xp ose d t o
temperatures below freezing, allow at least
three hours for the appliance to reach room
temperature before st artup. A frozen or
extremely cold appliance may not operate
properly.
WARNING
WARNING: Make sure the lever is clos ed
completely during use. Extremely hot water
runs through the appliance when operating
(brewing, descaling, cleaning, rinsing). To
avoid the risk of scalding or other injur y,
always keep the lever in the closed / down
position while machine is operating. Do not
reach under the spout and do not remove the
drip tray.
°C
°C
with upper drip tray, or with lower drip tray.Adjust drip tray to desired cup size—
Lift lever and insert pod. Brewing in progress. To stop the
brewingprocess, press anybutton.
Wait until beverage stops pouring.
Beverage is ready. Lift and close lever to eject pod. After preparing a beverage, press the
Rinse button once to dispense water to
thoroughly rinse out the machine.
°C
max
4.3 in / 110 mm max
6.3 in /
160 mm
°C
Adjust height of spout. Close lever
and choose beverage type (espresso,
brewed or milk).
1 A B
234
567
°C
°C
°C
°C
Fill water tank with fresh and cold
drinking water.
Remove water tank. Insert water tank.
Press On / Off button briefly
(1second).
Check operating voltage on rating
plate. Please read important
safeguards on page 4.
Close lever completely. Place a
heat-safe cup under spout.
Press the Rinse button to start rinsing
process. Wait until rinsing process is finished.
Then empty cup. For first use: Repeat
steps 6–8 four more times to rinse the
machine thoroughly.
Appliance is ready for operation.
On
max
118 fl oz / 3.5 L
°C
°C
123
456
789
Please read the safety instructions before
the first use.
If you decide to use a water filter, screw filter
in water tank and rinse appliance with at least
6.76 fl oz / 200 ml water. Enable the setting
“Filter available.” Refer to “Parameter setting:
Water filter” on page 18.
Getting started
The spout can be moved either downward or
upward with the help of the sliding device (on
both sides of the spout).
WARNING
Danger of scalding: Do not open the lever
during the brewing process. Do not reach
under the spout.
See Quick Start Guide for more recipes.
CAUTION
CAUTION: There are four sharp needles that
puncture the Verismo™ System pods inside
the pod opening. To avoid risk of injury, do
not put your fingers in the pod opening.
WARNING
WARNING: Make sure the lever is closed
completely during use. Extremely hot water
runs through the appliance when operating
(brewing, descaling, cleaning, rinsing). To
avoid the risk of scalding or other injur y,
always keep the lever in the closed / down
position while machine is operating. Do not
reach under the spout and do not remove the
drip tray.

10
EN
11
EN
Cleaning
themachine
(whenprompted)
Daily cleaning
Only use liquid detergents that are suitable
for the Verismo™ System. Visit our website for
moreinformation.
Lift and close lever. Remove drip trays with used pod
container.
(Before removing the drip trays, make sure
thatthe spoutis in its uppermost position.)
Remove and empty water tank.
The filter has to be removed
beforecleaning.
Fill water tank with detergent and
water according to cleaning chemical
manufacturer�s directions.
°C
Empty containers and then reinsert
into the appliance.
Insert water tank. Place a container
under spout.
After 100 beverage preparations, the appliance automatically prompts for
cleaning (factory setting). Press the Rinse button for at least
3seconds. Remove the water filter.
min
20.29 floz /
0.6 L
1 2
345
678
Carefully read the instructions for using the detergent
and comply with all safety instructions.
Place a cup under spout. Push Rinse button briefly to rinse
theappliance.
Switch off appliance (or machine
will automatically shut off after
30minutes).
Empty cup.
Lift and close lever.
Press Off
min 3 sec
Take drip trays apart. Empty all containers. Clean and reassemble all parts.
°C
°C
°C
Remove drip trays, used pod container
and water tank.
(Before removing the drip trays, make sure
thatthe spoutis in its uppermost position.)
123
456
789
°C
Risk of damage: Only use a moist cloth and
if necessar y a mild detergent (never use
abrasive detergents). Do not wash parts of the
appliance in the dishwasher. Before inserting
the lower drip tray, dry the connector.
WARNING
WARNING: Make sure the lever is closed
completely during use. Extremely hot water
runs through the appliance when operating
(brewing, descaling, cleaning, rinsing). To
avoid the risk of scalding or other injur y,
always keep the lever in the closed / down
position while machine is operating. Do not
reach under the spout and do not remove the
drip tray. Take care when emptying the drip
trays and pod container. Residual water can
be very hot.
If the cleaning process is interrupted, the
appliance automatically returns to cleaning
mode when switched on again.
For health reasons it is recommended to
maintain the factory setting of the automatic
prompt for cleaning.
WARNING
WARNING: Make sure the lever is closed
completely during use. Extremely hot water
runs through the appliance when operating
(brewing, descaling, cleaning, rinsing). To
avoid the risk of scalding or other injur y,
always keep the lever in the closed / down
position while machine is operating. Do not
reach under the spout and do not remove the
drip tray.
Carefully read the instructions for using
the detergent and comply with all safety
instructions.

12
EN
13
EN
Descaling
themachine
(whenprompted)
Cleaning
themachine
(whenprompted)
continued
The water hardness setting determines when the symbol for descaling lights up
in the display. (See page 18.)
Empty containers and then reinsert
into the appliance.
Fill water tank with descaling agent
and water according to descaling
chemical manufacturer�s directions.
Insert water tank. Place a container
under spout.
Remove and empty water tank. Filter
has to be removed before descaling.
Remove drip trays with used pod
container.
(Before removing the drip trays, make sure
thatthe spoutis in its uppermost position.)
Lift and close lever.
°C
Press the Rinse button for at least
3seconds.
1 2
345
678
Remove water filter.
min
20.29 fl oz/
0.6 L
Press the Rinse button. Rinses in
intervals until empty.
Remove drip trays with used pod
container.
(Before removing the drip trays, make sure
thatthe spoutis in its uppermost position.)
Remove water tank. Fill tank with fresh
drinking water and reinsert it.
Place a container under spout. Press
the Rinse button. Rinses until water
tank is empty.
Wait until rinsing process is finished,
then empty container. Remove and empty drip trays, drying
connector on lower tray with a dry cloth.
Reinsert trays with pod container.
Clean water tank. Refill water tank
(min. 10.14 fl oz / 0.3 L) and reinsert it.
Wait until rinsing process is finished,
then empty container.
Empty and clean drip trays, drying
connector on lower tray with a dry cloth.
Reinsert trays with pod container.
9 10 11
12 13 14
15 16 17
WARNING
WARNING: Make sure the lever is closed
completely during use. Extremely hot water
runs through the appliance when operating
(brewing, descaling, cleaning, rinsing). To
avoid the risk of scalding or other injur y,
always keep the lever in the closed / down
position while machine is operating. Do not
reach under the spout and do not remove the
drip tray.
If the descaling process is interrupted, the
appliance automatically returns to descaling
mode when switched on again.
WARNING
WARNING: Make sure the lever is closed
completely during use. Extremely hot water
runs through the appliance when operating
(brewing, descaling, cleaning, rinsing). To
avoid the risk of scalding or other injur y,
always keep the lever in the closed / down
position while machine is operating. Do not
reach under the spout and do not remove the
drip tray.
Only use descaling agents that are suitable
for the Verismo™ System. Visit our website for
moreinformation.
Carefully read the instructions for using the descaler
and comply with all safety instructions.
Carefully read the instructions for using
the descaler and comply with all safety
instructions.

14
EN
15
EN
Changing the filter
(whenprompted)
Descaling
themachine
(whenprompted)
continued
°C
Unscrew used water filter. Discard used water filter.
If setting “Filter available” has been activated, the appliance automatically
prompts for water filter replacement after 13.2 gallons / 50 L water.
Empty all containers and then reinsert.Remove drip trays with used pod
container.
(Before removing the drip trays, make sure
thatthe spoutis in its uppermost position.)
Lift and close lever.
Remove and empty water tank.
Press the Rinse button for at least
3seconds.
1 2
345
678
Press the Rinse button. Rinses in
intervals until empty.
Remove drip trays with used pod
container.
(Before removing the drip trays, make sure
thatthe spoutis in its uppermost position.)
Remove water tank. Fill tank with fresh
drinking water and reinsert it.
Wait until rinsing process is finished,
then empty container. Remove and empty drip trays, drying
connector on lower tray with a dry cloth.
Reinsert trays with pod container.
Wait until rinsing process is finished,
then empty container. Clean water tank. Refill water tank
(min. 10.14 fl oz / 0.3 L) and reinsert it.
Empty and clean drip trays, drying
connector on lower tray with a dry cloth.
Reinsert trays with pod container.
9 10 11
12 13 14
15 16 17
WARNING
WARNING: Make sure the lever is closed
completely during use. Extremely hot water
runs through the appliance when operating
(brewing, descaling, cleaning, rinsing). To
avoid the risk of scalding or other injur y,
always keep the lever in the closed / down
position while machine is operating. Do not
reach under the spout and do not remove the
drip tray.
The water filter symbol will continue to be
displayed in red until the filter has been
replaced.
If the water filter replacement is interrupted,
the appliance automatically returns to “filter
replacement“ mode when switched on again.
To prevent hygiene risks, it is recommended
to change the water filter every two months.
Place a container under spout. Press
the Rinse button. Rinses until water
tank is empty.
Carefully read the instructions for using the water
filter and comply with all safety instructions.
Only use a water filter that is suitable for
the Verismo™ System. Visit our website
for more information.

16
EN
17
EN
The water filter symbol appears only if the
setting "FIlter available" was previously
activated.
Manually enabling
the cleaning,
descaling or filter
changefunctions
Changing the filter
(when prompted)
continued
°C
°C
°C
Press the Rinse button for at least
3seconds.
Cleaning symbol blinks. For the
cleaning process, please follow the
operating steps on pages 11–12.
Filter symbol blinks. For filter
replacement, please follow the
operating steps on pages 15–16.
To return to descaling function, press
the Rinse button briefly. Descaling symbol blinks again
(program loop). Switch off appliance to exit
programloop.
Descaling symbol blinks. For the
descaling process, please follow the
operating steps on pages 13–14.
°C
For next function, press the Rinse
button briefly.
For next function, press the Rinse
button briefly.
123
456
789
Screw in new water filter. Place a container under spout.Refill water tank completely and
reinsert it.
Press the Rinse button. Remove drip trays with used pod
container.
(Before removing the drip trays, make sure
thatthe spoutis in its uppermost position.)
Appliance is ready for operation. Empty and clean drip trays. Wipe
connector on lower drip tray with
adrycloth.
Reinsert drip trays with pod container.
Appliance heats up.
°C
max
118 fl oz / 3.5 L
min
8.45 fl oz
/ 0.25 L
Wait until rinsing process is finished,
then empty container.
9 10 11
12 13 14
15 16 17
WARNING
WARNING: Make sure the lever is closed
completely during use. Extremely hot water
runs through the appliance when operating
(brewing, descaling, cleaning, rinsing). To
avoid the risk of scalding or other injur y,
always keep the lever in the closed / down
position while machine is operating. Do not
reach under the spout and do not remove the
drip tray.
Af ter inserting the filter, check if setting
“F ilt er ex isting“ is acti vated. Refer to
instructions under “Parameter setting: Water
filter“ (see page 18). An already activated
setting remains active.

18
EN
19
EN
Parameter setting:
Auto‑Off
The water hardness determines descaling
frequency. For an overview to determine the
range of water hardness, refer to page 24.
soft: 39.6 gallons / 150 L
medium-hard: 26.4 gallons / 100 L
hard: 18.5 gallons / 70 L
very hard: 10.6 gallons / 40 L
If the setting “Filter available” was activated,
the w ater hardness is set to sof t water
(39.6 gallons / 150 L) automatically.
Factory setting: No water filter
Parameter setting:
Water hardness
Parameter setting:
Water filter
Press Temperature Reduction button for
at least 3 seconds while the machine is
off but not unplugged (Eco mode).
Press button briefly again: Auto-Off
will be adjusted to 60 minutes. Press button briefly again: Auto-Off
will be adjusted to 180 minutes.
Eco Mode
The appliance returns to Eco mode if it is unused for more than 30 minutes (factory setting).
We recommend this factory setting. The appliance uses considerably less energy in Eco mode
(less than 0.5W/h) than if it is always ready for operation.
Press the Temperature Reduction
button for at least 3seconds to save
the setting.
°C
°C
°C
°C
°C
°C
°C
°C
°C
°C °C
Press button briefly again: Auto-Off
will be adjusted to 15 minutes. Press button briefly again: Auto-Off
will be adjusted to 30 minutes
(factorysetting).
123
456
°C
°C
°C
°C
°C
°C
°C
123
456
123
Press the Rinse button for at least
3seconds while the machine is off but
not unplugged (Eco mode).
Press Espresso button for at least
3seconds while the machine is off
but not unplugged (Eco mode) for
nowaterfilter.
Press Espresso button briefly again.
Water filter is activated. Press Espresso button for at least
3seconds to save the setting.
Press the Rinse button briefly for
softwater. Press button briefly again for
medium-hard water.
Press button briefly again for
hardwater. Press the Rinse button for at least
3seconds to save the setting.
Press button briefly again for very hard
water (factory setting).
EN
The Verismo™ System V·585 includes an Eco
mode setting (factory setting), which means
that the machine will automatically turn off if
it is not used for 30minutes.

20
EN
21
EN
Parameter setting:
Cleaning interval
Press the Brewed button for at least
3 seconds when the machine is off
but not unplugged (Eco mode).
Press Brewed button briefly again:
Cleaning interval will be extended to
300 preparations.
Press Brewed button briefly again:
Cleaning interval will be extended to
400 preparations.
Press Brewed button for at least
3seconds to save the setting.
°C
°C
°C
°C
°C
°C
Cleaning after 100 beverage
preparations (factory setting). Press Brewed button briefly:
Cleaning interval will be extended
to200preparations.
123
456
°C
°C
°C
°C
°C
°C
CAUTION
CAUTION: There are four sharp needles that
puncture the Verismo™ System pods inside
the pod opening. To avoid risk of injury, do
not put your fingers in the pod opening.
Parameter setting:
Temperature
reduction
Open lever and insert Espresso or
Brewed pod. Close lever again.
Press Temperature Reduction button
again to switch off function.
After brewing the appliance is
readyagain. Temperature Reduction is switched off.
Use the Temperature Reduction button to
reduce the brewing temperature for the
Espresso and Brewed beverages. Reduces
temperature to approximately 158°F / 70°C.
Press Temperature Reduction button.
Place a container on drip tray.
Place a suitable cup or glass on drip
tray. Choose Espresso or Brewed
button.
Press Rinse button. Remove container
after rinsing.
1 2
345
678
WARNING
WARNING: Make sure the lever is closed
completely during use. Extremely hot water
runs through the appliance when operating
(brewing, descaling, cleaning, rinsing). To
avoid the risk of scalding or other injur y,
always keep the lever in the closed / down
position while machine is operating. Do not
reach under the spout and do not remove the
drip tray.

22
EN
23
EN
Parameter setting:
Long (lungo)
espresso shot
This function evaporates and thus removes
residual water from inside the appliance. This
prevents residual water from freezing inside
the appliance.
Evaporation of
residual water
Reinsert empty water tank. Dry front of appliance by wiping with
a cloth.
Lift and close lever. Press and hold the Espresso and
Brewed buttons for at least 3 seconds.
Evaporation starts. Wait until evaporation is finished and
appliance is completely cool.
°C
Remove and empty water tank.
°C
°C
Let appliance warm up to room
temperature if necessary.
Depress button until desired amount is
poured. Maximum amount allowable is
2 fl oz / 60 ml. To revert back to factory
setting (1 fl oz / 30 ml), depress button
again. Release after 1 fl oz / 30 ml is poured.
123
4
7
5
8
6
68°F / 20°C
WARNING
WARNING: The steam temperature can reach
up to 248°F / 120°C. To avoid the risk of
scalding or other injury, do not reach under
the spout.
123
30 ml
1 fl oz
60 ml
2 fl oz
0 ml
(lungo)
(factory settings)
The machine can be reset to pour a larger espresso beverage (lungo shot). Insert Espresso pod and then hold
down the Espresso button until the liquid reaches the desired level in the cup. The maximum allowable amount
is 2 fl oz / 60 ml. The new pouring capacity remains saved (even if power isinterrupted).
°C
°C
WARNING
WARNING: Make sure the lever is closed
completely during use. Extremely hot water
runs through the appliance when operating
(brewing, descaling, cleaning, rinsing). To
avoid the risk of scalding or other injur y,
always keep the lever in the closed / down
position while machine is operating. Do not
reach under the spout and do not remove the
drip tray.

24
EN
25
EN
Specifications and
servicing
Frequently asked
questions
Eco Mode
The appliance returns to Eco mode if it is unused for more than 30 minutes (factory setting). We recommend this factory
setting. The appliance uses considerably less energy in Eco mode (less than 0.5W/h) than if it is always ready for operation.
120 V, ~ 60 Hz,
maximum 1450 W
4.75 feet / 1.45 m
Pmaximum 275 psi / 19-bar
~ 0.92 gallon / 3.5 L
~ 9.9 lb / 4.5 kg
A
B
C
°C
A = 7.87 in / 200 mm
B = 15.98 in / 406 mm
C = 12.4 in / 316 mm
°C
maximum 6.3 in / 160 mm
min
max
50°F–113°F / 10°C–45°C
°C
Approximately 194°F / 90°C
Noise emissions do not exceed 70 dB(A)
Designed for beverage pods that bear the
Verismo™ System logo. Also compatible with
other K-fee® System pods.
Overview of water hardness:
Hardness range Water hardness in mmol
1 (soft) < 1.3
2 (medium-hard) 1.3 – 2.5
3 (hard) 2.5 – 3.8
4 (very hard) > 3.8
Ask your local water company for information
about the water hardness. The water hardness
level entered in the appliance determines
the period between descaling for optimal
operation.
Why is there a delay before the drink is dispensed?
The machine is adjusting to the right temperature to make your beverage.
After using the milk pod, why isn’t the drink dispensing immediately after pressing the Espresso or Brewed buttons?
After a milk pod, the machine requires up to 8–10 seconds to heat to the required temperature. Wait until lights stop blinking, then push
Espressobutton.
How do I remove the pod container if it is jammed or overfilled?
Gently move the pod container back and forth while removing the container.
Why isn’t the beverage hot enough?
The machine may need to be descaled (refer to section “Descaling the Machine” on page 13).
Why are all the buttons flashing at a fast rate for a prolonged period of time?
Try switching off the machine and unplugging the cord from the wall socket. If this problem persists, please visit Verismo.com.
Why isn’t the drink dispensing properly?
Ensure the lever is pressed down completely. If necessary, descale the machine (refer to section “Descaling the Machine” on page 13).
Why does the machine switch itself off suddenly when it is used a lot?
The machine switches itself off as protection against overheating. If this occurs, let the machine cool down for about 30 minutes before
using it again.
How do I reset appliance to factory settings?
Switch off and unplug appliance. Keep the Rinse button and the Milk button pressed and plug in appliance. Then release both buttons.
What is the Eco mode?
The appliance returns to Eco mode if it is unused for more than 30 minutes (factory setting). The appliance uses considerably less energy in
Eco mode (less than 0.5 W/h) than if it is ready for operation.

26
EN
27
EN
NotesDisposal
instructions The packaging is recyclable. Follow your local guidelines when recycling.

28
FR
29
FR
Instructions
de sécurité
particulières
CONSIGNES
DE SÉCURITÉ
IMPORTANTES
AVERTISSEMENT
Respectez toujours les mesures de sécurité
de base lors de l’utilisation d’appareils
électriques, notamment les suivantes :
1. Lisez toutes les instructions et utilisez
uniquement l’appareil conformément
à ces instructions.
2. L’appareil est conçu et fabriqué pour
un usage domestique.
3. Ne placez jamais vos doigts sous
le bec verseur lorsque l’appareil
est en marche – vous pourriez
vous brûler. Ne mettez jamais
vos doigts dans le compartiment
à capsules – vous pourriez vous
blesser.
4. Ne relevez jamais le levier de
l’appareil pendant le processus
d’infusio n, de rinç ag e, de
nettoyage ou de détartrage.
Maintenez toujours le levier
abaissé (en position fermée)
lorsque l’appareil fonctionne.
5. Ne touchez pas les surfaces chaudes.
Utilisez les poignées lorsqu’elles sont
disponibles.
6. N’ut ilise z jamais un e capsule
endommagée ou déformée. N’utilisez
que des capsules de boissons qui
conviennent à cet appareil.
7. Ne soulevez jamais l’appareil par son
levier. Ne relevez ni n’abaissez jamais
le levier de force.
8. Ne démontez jamais l’appareil et
n’insérez jamais d’objet dans ses
ouvertures.
9. Ne fai te s jamai s fonc tionne r
l’appareil sans son bac ou sa grille
d’égouttement.
10. Ne remplissez pas trop le réservoir
d’eau.
11. N’utilisez que de l’eau potable
fraîche et froide dans cet appareil!
Ne mettez pas d’autres liquides ou
aliments dans le réservoir d’eau, sauf
comme indiqué dans les instructions
de nettoyage et de détartrage
contenues dans ce manuel.
12. L’utilisation d’un accessoire non
recommandé par le fabricant de
l’appareil peut entraîner un incendie,
une électrocution ou des blessures
corporelles.
13. Ne placez pas l’appareil sur le dessus ou
près d’un brûleur à gaz ou électrique,
ni dans un four chaud. Ne placez pas
l’appareil à proximité d’une source
d’eau comme un évier de cuisine.
14. N’utilisez pas ce produit à l’extérieur.
15. N’immergez pas l’appareil, le cordon
d’alimentation ou la fiche dans l’eau
ou tout autre liquide pour éviter les
incendies, les électrocutions et les
blessures.
16. Cet appareil est équipé d’un cordon
d’alimentation comportant un fil
de mise à la terre avec une fiche
équipée d’une mise à la terre.
Branchez l’appareil dans une prise
murale à trois broches reliée à la terre
seulement. La mise à la terre réduit le
risque d’électrocution dans le cas d’un
court-circuit électrique. Vérifiez si la
tension de l’alimentation du secteur
correspond bien aux caractéristiques
techniques inscrites sur la plaque
signalétique. La garantie devient nulle
et non avenue si l’appareil est branché
sur une prise secteur dont la tension
est incorrecte.
17. Vous ne devez pas, en aucune
circonstance, couper ou enlever la
troisième broche (mise à la terre) du
cordon d’alimentation ni utiliser un
adaptateur. Consultez un électricien
qualifié si les instructions de mise à
la terre ne sont pas complètement
comprises ou si un doute existe quant
à savoir si l’appareil est correctement
mis à la terre.
18. Éteignez et débranchez l’appareil
lorsque vous ne l’utilisez pas et
avant d’en effectuer le nettoyage et
l’entretien. Laissez-le refroidir avant
de mettre ou d’enlever des pièces et
avant de le nettoyer.
19. N’utilisez pas un appareil dont le cordon
ou la fiche est en mauvais état, qui ne
fonctionne pas convenablement ou qui
a été endommagé de quelque façon
que ce soit. Contactez le service à la
clientèle de Starbucks (1 800 334-5553)
pour signaler tous dysfonctionnements
ou dommages à l’appareil. Les
réparations doivent être effectuées par
une entreprise de service à la clientèle
agréée seulement.
20. Ne laissez pas le cordon d’alimentation
pendre du rebord d’une table ou d’un
comptoir ni toucher des surfaces
chaudes.
21. Débranchez toujours l’appareil en le
mettant hors tension (« off ») avant de
retirer la fiche de la prise murale.
22. Une supervision étroite est requise
si cet appareil est utilisé par ou s’il se
trouve à proximité d’un enfant. Rangez
l’appareil et tous ses accessoires hors
de portée des enfants.
23. Reportez-vous aux ins tructions
d’utilisation de tous les agents de
nettoyage et de détartrage avant de
les utiliser et conformez-vous aux
règles de sécurité. N’éteignez pas
l’appareil pendant le processus de
rinçage ou de détartrage.
24. Hormis l’utilisation normale, le
nettoyage, le dét artr age et le
nettoyage externe, tous les autres
travaux tels que les réparations
ou le remplacement du cordon
d’alimentation ne peuvent être
effectués que par une entreprise de
service à la clientèle autorisée afin
d’éviter les dangers.
25. L’appareil doit être vidé, nettoyé, et
la fiche doit être retirée de la prise en
cas de longues périodes d’absence, de
vacances, etc.
26. N’utilisez jamais l’appareil pour un
usage autre que celui prévu.
CONSERVEZ CES INSTRUCTIONS
AVERTISSEMENT POUR LES
UTILISATEURS ET LES PARENTS
NE PERMETTEZ PAS aux enfants
d’utiliser l’appareil à moins qu’ils ne le
fassent sous la surveillance d’un adulte.
L’appareil produit de l’eau très chaude.
Consignes
de sécurité
importantes
INSTRUCTIONS
DE SÉCURITÉ
PARTICULIÈRES
Symboles et mots d’avertissement
Le triangle d’avertissement apparaît dans
ces instructions lorsque le défaut de se
conformer aux consignes de sécurité peut
entraîner des risques pour l’utilisateur ou
l’appareil.
AVERTISSEMENT : Eau
extrêmement chaude
Ce qu’il ne faut pas faire : Ne
pas mettre la main à l’intérieur
AVERTISSEMENT :
Électrocution
AVERTISSEMENT
Évitez les risques d’électrocution
• Gardez l’appareil loin de l’humidité et des
éclaboussures.
• Ne nettoyez pas l’appareil sous l’eau
courante ni avec un jet d’eau.
• Ne versez jamais de liquide sur le dessus
de l’appareil.
• Ne débranchez jamais l’appareil en tirant
sur le cordon d’alimentation.
• Il n’y a aucune pièce réparable par
l’utilisateur à l’intérieur.
AVERTISSEMENT
AVERTISSEMENT : assurez-vous que le
levier est complètement abaissé pendant
l’utilisation. De l’eau extrêmement
chaude traverse l’appareil lorsqu’il
fonctionne (infusion, détartrage,
nettoyage, rinçage). Pour éviter
les risques de brûlures ou d’autres
blessures, gardez toujours le levier
abaissé (en position fermée) lorsque
l’appareil est en marche. Ne mettez pas
la main sous le bec verseur et ne retirez
pas le bac d’égouttement.
• Faites attention lors de la vidange du
bac d’égouttement. L’eau peut être très
chaude.
• Il y a un danger de brûlure lors de
l’évaporation de l’eau résiduelle (la
température de la vapeur peut atteindre
les 120 °C (248 °F).
AVERTISSEMENT
Hygiène et nettoyage
• N’utilisez que des capsules non périmées.
• Rangez les capsules dans un endroit
approprié.
• Pour des raisons de santé, il es t
recommandé de rincer l’appareil cinq
fois avant la première utilisation et
une fois après chaque boisson. Lisez les
instructions sous la rubrique « Nettoyage
quotidien » à la page 34.
• Nettoyez l’appareil régulièrement tout
en respectant les consignes du manuel
d’utilisation pour prévenir les risques liés
à l’hygiène.
• N’utilisez que des agents de
nettoyage ou de détartrage
appropriés pour l’appareil.
• Lise z a ttent iv emen t les
instructions d’utilisation des
agents de nettoyage et de
détartrage et conformez-vous
aux consignes de sécurité.
Instructions concernant le cordon
d’alimentation court
Un cordon d’alimentation court est fourni
pour réduire les risques d’enchevêtrement
ou de trébuchement causés par un cordon
d’alimentation plus long.
Renseignements sur le mode d’économie
d’énergie (Arrêt automatique)
L’appareil passe en mode économie
d’énergie s’il n’est pas utilisé pendant
plus de 30 minutes (réglage d’usine).
L’appareil consomme considérablement
moins d’énergie lorsqu’il est dans ce
mode. Il consomme en fait moins de
0,5 W/h (la quantité d’énergie utilisée pour
un fonctionnement normal).
MISE EN GARDE
MISE EN GARDE : quatre aiguilles
pointues servent à percer les capsules
du système VerismoMC à l’intérieur du
compartiment à capsule. Ne mettez
pas vos doigts dans le compartiment
à capsule pour éviter tout risque de
blessure.
AVERTISSEMENT : POUR RÉDUIRE LES
RISQUES D’INCENDIE OU D’ÉLECTROCUTION,
NE RETIREZ PAS LE COUVERCLE INFÉRIEUR.
IL N’Y A AUCUNE PIÈCE RÉPARABLE PAR
L’UTILISATEUR À L’INTÉRIEUR. LES
RÉPARATIONS DOIVENT ÊTRE EFFECTUÉES PAR
LE PERSONNEL AGRÉÉ SEULEMENT.
AVERTISSEMENT
RISQUE D’INCENDIE OU
D’ÉLECTROCUTION
NE PAS OUVRIR

30
FR
31
FR
Aperçu des
symboles DEL
1
2
7
3
9
10
4
8
6
11
12
13
14
5
Aperçu du système
VerismoMC V∙585
1 Grille du bac d’égouttement
2 Paroi du bac d’égouttement
3 Bec verseur à hauteur réglable
4 Compartiment à capsule
5 Levier
6 Réservoir d’eau
7 Couvercle du réservoir d’eau
8 Filtre à eau (en option)
9 Afficheur à DEL
10 Commandes
11 Réceptacle pour capsules
utilisées
12 Connecteur
13 Bac d’égouttement inférieur
14 Bac d’égouttement supérieur
MISE EN GARDE
MISE EN GARDE : quatre aiguilles pointues ser vent
à percer les capsules du système VerismoMC à
l’intérieur du compartiment à capsule. Ne met tez
pas vos doigts dans le compartiment à capsule pour
éviter tout risque de blessure.
Symbole
Espresso
• Les symboles des tasses clignotent en vert pendant que l’appareil
se réchauffe.
• Les symboles des tasses et le symbole Rincer s’allument en vert lorsque
l’appareil est prêt.
• Le symbole de tasse respectif ou le symbole Rincer clignote en vert pendant
la réalisation de l’action souhaitée.
Infuser
Lait
Rincer
°C
Réduction
de la
température
• S’allume en vert lorsque vous avez sélectionné la réduction
de la température.
• Clignote en vert lorsque la boisson est préparée avec réduction
de la température.
• Il est possible de réduire la température d’infusion pour un espresso
ou un café filtre à environ 70 °C (158 °F).
Nettoyer
l’appareil
• Clignote en vert si l’appareil a besoin d’être nettoyé. Défini pour clignoter
toutes les 100 préparations de boissons (réglage d’usine).
• Clignote en vert lors de la réalisation de l’action souhaitée.
Détartrer
l’appareil
• S’allume en vert si l’appareil a besoin d’être détartré.
• Clignote en vert lors de la réalisation de l’action souhaitée.
Vider le
réceptacle
pour
capsules
utilisées
• Le symbole des capsules utilisées s’allume en rouge si le réservoir pour
capsules utilisées et le bac d’égouttement inférieur ont besoin d’être vidés.
• Le réservoir pour capsules utilisées peut contenir environ 30 capsules.
• Le bac d’égouttement supérieur a une capacité d’environ 300 ml
(10,14 oz liq.); le bac d’égouttement inférieur a une capacité d’environ
500 ml (16,91 oz liq.).
Remplir le
réservoir
d’eau
• S’allume en rouge quand le réservoir d’eau est vide.
• Le réservoir d’eau a une capacité d’environ 3,5 L (0,92 gal).
Remplacer le
filtre à eau
• S’allume en rouge lorsque le filtre à eau a besoin d’être remplacé
(après 50 L / 13,2 gal d’eau).
• Le symbole reste allumé jusqu’à ce que le filtre ait été remplacé.
Affichage des symboles :
°C
Espresso
Marche / Arrêt
Symboles des boutons :
Infuser
Réduction de la
température
Lait
Rincer
°C

32
FR
33
FR
Lors de l’insertion des capsules, veuillez
abaisser le levier d’un seul mouvement
continu. Évitez tout mouvement de va-et-
vient et n’ayez aucune hésitation lorsque
vous abaissez le levier, sans quoi la capsule
ri sque de tomber directemen t dans le
réceptacle pour capsules utilisées sans avoir
été percée.
N’enlevez pas l’opercule et ne percez pas la
capsule.
Préparation
des boissons
Si l’appareil a été exposé à des températures
sous le point de cong éla tion, attendez
au moins trois heures afin de permettre
à l’app areil d’a tteindre la temp érat ure
ambiante avant le démarrage. Un appareil
congelé ou très froid peut ne pas fonctionner
adéquatement.
AVERTISSEMENT
AV ER TISSE MENT : as surez-v ous q ue l e
levier es t complètement abaissé pendant
l’utilisation. De l’eau extrêmement chaude
tra ver se l’a ppar eil lorsqu’il fonc tionne
(infusion, détartrage, net toyage, rinçage).
Pour éviter les risques de brûlures ou d’autres
blessures, gardez toujours le levier abaissé
(en po sition fe rmée) lorsque l’appa rei l
es t en marche. Ne met tez pas les mains
sous le bec verseur et ne retirez pas le bac
d’égouttement.
°C
°C
avec le bac d’égouttement supérieur, ou avec le bac d’égouttement inférieur.Réglez le bac d’égouttement selon la
taille de la tasse souhaitée—
Soulevez le levier et insérez la capsule. Infusion en cours. Pour arrêter le
processus d’infusion, appuyez sur
n’importe quel bouton.
Patientez jusqu’à ce que la boisson cesse
de couler. La boisson est prête. Soulevez et abaissez le levier pour
éjecter la capsule. Après avoir préparé une boisson,
appuyez sur le bouton Rincer une fois
pour faire couler de l’eau afin de bien
rincer l’appareil.
°C
max
110 mm (4,3 po) max
160 mm
(6,3 po)
°C
Réglez la hauteur du bec verseur.
Abaissez le levier et sélectionnez le type
de boisson (espresso, infuser ou lait).
1 A B
234
567
°C
°C
°C
°C
Remplissez le réservoir d’eau avec de
l’eau potable fraîche et froide.
Retirez le réservoir d’eau. Insérez le réservoir d’eau.
Appuyez brièvement sur le bouton
Marche / Arrêt (1 seconde).
Vérifiez la tension de fonctionnement
sur la plaque signalétique. Veuillez lire
les consignes de sécurité importantes à
la page 28.
Abaissez complètement le levier. Placez
une tasse résistante à la chaleur sous le
bec verseur.
Appuyez sur le bouton Rincer pour lancer
le processus de rinçage. Patientez jusqu’à ce que le rinçage soit
terminé. Videz ensuite la tasse. Première
utilisation : répétez les étapes 6 à 8 quatre
fois de plus pour bien rincer l’appareil.
L’appareil est prêt à être utilisé.
On (Mise sous
tension)
max
3,5 L (118 oz liq.)
°C
°C
123
456
789
Veuillez lire les consignes de sécurité avant
la première utilisation.
Si vous décidez d’utiliser un filtre à eau,
vissez-le dans le réservoir d’eau et rincez
l’appareil avec au moins 200 ml (6,76 oz liq.)
d’eau. Activez le paramètre « Filter available »
(filtre disponible). Reportez-vous à « Réglage
des paramètres : filtre à eau » à la page 42.
Pour commencer
Il est possible de faire descendre ou monter
le bec verseur à l’aide du dispositif coulissant
(sur les deux côtés du bec verseur).
AVERTISSEMENT
Risque de brûlures : ne relevez pas le levier
lors de l’infusion. Ne mettez pas les mains
sous le bec verseur.
Consultez le Guide de démarrage rapide pour
obtenir d’autres recettes.
MISE EN GARDE
MISE EN GARDE : quatre aiguilles pointues
servent à percer les capsules du système
VerismoMC à l’intérieur du compartiment à
capsule. Ne met tez pas vos doigts dans le
compartiment à capsule pour éviter tout
risque de blessure.
AVERTISSEMENT
AV ERTISSEMEN T : assurez- vou s q ue le
levier est complètement abaissé pendant
l’utilisation. De l’eau extrêmement chaude
tr averse l’appare il lor squ ’il fon ctionne
(infusion, détartrage, net toyage, rinçage).
Pour éviter les risques de brûlures ou d’autres
blessures, gardez toujours le levier abaissé
(en position fermée) lor sque l’app areil
est en marche. Ne mettez pas les mains
sous le bec verseur et ne retirez pas le bac
d’égouttement.

34
FR
35
FR
Nettoyage de
l’appareil
(sur invitation)
Nettoyage
quotidien
N’utilisez que des détergents liquides qui sont appropriés
pour le système VerismoMC
. Veuillez consulter notre site
Web pour plus de renseignements.
Relevez et abaissez le levier. Retirez les bacs d’égouttement ainsi que le
réceptacle pour capsules utilisées. (Avant de
retirer les bacs d’égouttement, vérifiez que le bec
verseur est dans sa position la plus haute.)
Retirez et videz le réservoir d’eau.
Le filtre doit être retiré avant
nettoyage.
Remplissez le réservoir d’eau avec du
détergent et de l’eau en suivant les
instructions du producteur du produit
détergent.
°C
Videz les réservoirs puis réinsérez-les
dans l’appareil.
Insérez le réservoir d’eau. Placez un
récipient sous le bec verseur.
Après 100 préparations de boissons, l’appareil vous invite automatiquement à le
nettoyer (réglage d’usine). Appuyez sur le bouton Rincer pendant au
moins 3 secondes. Retirez le filtre à eau.
min 0,6 L
(20,29 oz
liq.)
1 2
345
678
Lisez attentivement les instructions sur l’utilisation du détergent et
conformez-vous à toutes les consignes de sécurité.
Placez une tasse sous le bec verseur. Appuyez brièvement sur le bouton
Rincer pour rincer l’appareil..
Éteignez l’appareil (ou l’appareil
s’éteindra automatiquement après
30 minutes).
Videz la tasse.
Relevez et abaissez le levier.
Appuyez sur
Arrêt pendant au
moins 3 secondes
Séparez les bacs d’égouttement. Videz tous les contenants. Nettoyez et remontez toutes les pièces.
°C
°C
°C
Retirez les bacs d’égouttement ainsi que le
réceptacle pour capsules utilisées. (Avant de
retirer les bacs d’égouttement, vérifiez que le bec
verseur est dans sa position la plus haute.)
123
456
789
°C
Risque de dommages : Utilisez uniquement
un chiffon humide et un détergent doux si
nécessaire (n’utilisez jamais de détergents
abrasifs). Ne lavez pas les pièces de l’appareil
dans le lave-vaisselle. Avant d’insérer le
bac d’égouttement inférieur, séchez le
connecteur.
AVERTISSEMENT
AV ERTISSEMEN T : assurez- vou s q ue le
levier est complètement abaissé pendant
l’utilisation. De l’eau extrêmement chaude
tr averse l’appare il lor squ ’il fon ctionn e
(infusion, détartrage, net toyage, rinçage).
Pour éviter l es risque s de brûlur es ou
d’autres bles sur es, gardez toujo urs le
levier abaissé (en position fermée) lorsque
l’appareil est en marche. Ne mettez pas les
mains sous le bec verseur et ne retirez pas
le bac d’égouttement. Faites attention lors
de la vidange des bacs d’égouttement et du
réceptacle pour capsules. L’eau résiduelle
peut être très chaude.
En cas d’interruptio n d u p ro cessus
de net to yage, l’app ar ei l r et ourne
au tomatiquem ent en mode nettoy age
lorsqu’il est rallumé.
Pour des raisons de santé, il est recommandé
de conserver le réglage d’usine de l’invite
automatique au nettoyage.
AVERTISSEMENT
AV ERTISSEMEN T : assurez- vou s q ue le
levier est complètement abaissé pendant
l’utilisation. De l’eau extrêmement chaude
tr averse l’appare il lor squ ’il fon ctionne
(infusion, détartrage, net toyage, rinçage).
Pour éviter les risques de brûlures ou d’autres
blessures, gardez toujours le levier abaissé
(en position fermée) lor sque l’app areil
est en marche. Ne mettez pas les mains
sous le bec verseur et ne retirez pas le bac
d’égouttement.
Lisez attentivement les instructions sur
l’utilisation du détergent et conformez-vous
à toutes les consignes de sécurité.

36
FR
37
FR
Détartrage de
l’appareil
(sur invitation)
Nettoyage de
l’appareil
(sur invitation)
suite
Le paramètre de dureté de l’eau détermine le moment où le symbole de détartrage
s’allume sur l’afficheur. (Reportez-vous à la page 42.)
Videz les réservoirs puis réinsérez-les
dans l’appareil.
Remplissez le réservoir d’eau avec
un agent de détartrage et de l’eau en
suivant les instructions du producteur
du produit détartrant.
Insérez le réservoir d’eau. Placez un
récipient sous le bec verseur.
Retirez et videz le réservoir d’eau. Le
filtre doit être retiré avant le détartrage.
Retirez les bacs d’égouttement ainsi que le
réceptacle pour capsules utilisées. (Avant de
retirer les bacs d’égouttement, vérifiez que le bec
verseur est dans sa position la plus haute.)
Relevez et abaissez le levier.
°C
Appuyez sur le bouton Rincer pendant au
moins 3 secondes.
1 2
345
678
Retirez le filtre à eau.
min 0,6 L
(20,29
oz liq.)
Appuyez sur le bouton Rincer. Rince par
intervalles jusqu’à ce que le réservoir
soit vide.
Retirez les bacs d’égouttement ainsi que le
réceptacle pour capsules utilisées. (Avant de
retirer les bacs d’égouttement, vérifiez que le bec
verseur est dans sa position la plus haute.)
Retirez le réservoir d’eau. Remplissez
le réservoir d’eau potable fraîche et
réinsérez-le.
Placez un récipient sous le bec verseur.
Appuyez sur le bouton Rincer. Rincez
jusqu’à ce que le réservoir d’eau soit
vide.
Patientez jusqu’à ce que le rinçage soit
terminé, puis videz le récipient. Retirez et videz les bacs d’égouttement,
et séchez le connecteur du bac inférieur à
l’aide d’un chiffon sec. Réinsérez les bacs
avec le réservoir pour capsules.
Nettoyez le réservoir d’eau. Remplissez
le réservoir d’eau (min. 0,3 L / 10,14 oz
liq.) et réinsérez-le.
Patientez jusqu’à ce que le rinçage soit
terminé, puis videz le récipient.
Videz et nettoyez les bacs d’égouttement,
et séchez le connecteur du bac inférieur à
l’aide d’un chiffon sec. Réinsérez les bacs
avec le réservoir pour capsules.
9 10 11
12 13 14
15 16 17
AVERTISSEMENT
AV ERTISSEMEN T : assurez- vou s q ue le
levier est complètement abaissé pendant
l’utilisation. De l’eau extrêmement chaude
tr averse l’appare il lor squ ’il fon ctionn e
(infusion, détartrage, net toyage, rinçage).
Pour éviter les risques de brûlures ou d’autres
blessures, gardez toujours le levier abaissé
(en position fermée) lor sque l’app areil
est en marche. Ne mettez pas les mains
sous le bec verseur et ne retirez pas le bac
d’égouttement.
En cas d’interruptio n d u p ro cessus
de d ét art ra ge , l’a ppareil r et ourne
au tomatiqueme nt en mo de détar trage
lorsqu’il est rallumé.
AVERTISSEMENT
AV ERTISSEMEN T : assurez- vou s q ue le
levier est complètement abaissé pendant
l’utilisation. De l’eau extrêmement chaude
tr averse l’appare il lor squ ’il fon ctionne
(infusion, détartrage, net toyage, rinçage).
Pour éviter les risques de brûlures ou d’autres
blessures, gardez toujours le levier abaissé
(en position fermée) lor sque l’app areil
est en marche. Ne mettez pas les mains
sous le bec verseur et ne retirez pas le bac
d’égouttement.
N’utilisez que des agents de détartrage qui sont
appropriés pour le système VerismoMC
. Veuillez
consulter notre site Web pour de plus amples
renseignements.
Lisez attentivement les instructions pour l’utilisation du détartrant
et conformez-vous à toutes les consignes de sécurité.
Lisez attentivement les instructions pour
l’utilisation du détartrant et conformez-vous
à toutes les consignes de sécurité.

38
FR
39
FR
Changement du
filtre
(sur invitation)
Détartrage de
l’appareil
(sur invitation)
suite
°C
Dévissez le filtre à eau utilisé. Jetez le filtre à eau utilisé.
Si le paramètre « Filter available » (filtre disponible) est activé, l’appareil vous invite
automatiquement à changer le filtre à eau après 50 L (13,2 gal) d’eau.
Videz tous les bacs puis réinsérez-les.Retirez les bacs d’égouttement ainsi que le
réceptacle pour capsules utilisées. (Avant de
retirer les bacs d’égouttement, vérifiez que le bec
verseur est dans sa position la plus haute.)
Relevez et abaissez le levier.
Retirez et videz le réservoir d’eau.
Appuyez sur le bouton Rincer pendant au
moins 3 secondes.
1 2
345
678
Appuyez sur le bouton Rincer. Rince par
intervalles jusqu’à ce que le réservoir
soit vide.
Retirez les bacs d’égouttement ainsi que le
réceptacle pour capsules utilisées. (Avant de
retirer les bacs d’égouttement, vérifiez que le bec
verseur est dans sa position la plus haute.)
Retirez le réservoir d’eau. Remplissez
le réservoir d’eau potable fraîche et
réinsérez-le.
Patientez jusqu’à ce que le rinçage soit
terminé, puis videz le récipient. Retirez et videz les bacs d’égouttement,
et séchez le connecteur du bac inférieur à
l’aide d’un chiffon sec. Réinsérez les bacs
avec le réceptacle pour capsules.
Patientez jusqu’à ce que le rinçage soit
terminé, puis videz le récipient. Nettoyez le réservoir d’eau. Remplissez
le réservoir d’eau (min. 0,3 L / 10,14 oz
liq.) et réinsérez-le.
Videz et nettoyez les bacs d’égouttement,
et séchez le connecteur du bac inférieur à
l’aide d’un chiffon sec. Réinsérez les bacs
avec le réceptacle pour capsules.
9 10 11
12 13 14
15 16 17
AVERTISSEMENT
AV ERTISSEMEN T : assurez- vou s q ue le
levier est complètement abaissé pendant
l’utilisation. De l’eau extrêmement chaude
tr averse l’appare il lor squ ’il fon ctionn e
(infusion, détartrage, net toyage, rinçage).
Pour éviter les risques de brûlures ou d’autres
blessures, gardez toujours le levier abaissé
(en position fermée) lor sque l’app areil
est en marche. Ne mettez pas les mains
sous le bec verseur et ne retirez pas le bac
d’égouttement..
AVERTISSEMENT
AV ERTISSEMEN T : assurez- vou s q ue le
levier est complètement abaissé pendant
l’utilisation. De l’eau extrêmement chaude
tr averse l’appare il lor squ ’il fon ctionne
(infusion, détartrage, net toyage, rinçage).
Pour éviter les risques de brûlures ou d’autres
blessures, gardez toujours le levier abaissé
(en position fermée) lor sque l’app areil
est en marche. Ne mettez pas les mains
sous le bec verseur et ne retirez pas le bac
d’égouttement.
Le symbole du filtre à eau continuer a à
s’afficher en rouge jusqu’à ce que vous ayez
remplacé le filtre.
En cas d’interruption lors du changement
du f il tre à eau, l ’appar ei l retour ne
automatique me nt e n mode « f il te r
replacement » (changement de filtre) lorsqu’il
est rallumé.
Pour éviter tout risque lié à l’hygiène, il est
recommandé de changer le filtre à eau tous
les deux mois.
Placez un récipient sous le bec verseur.
Appuyez sur le bouton Rincer. Rincez
jusqu’à ce que le réservoir d’eau soit
vide.
Lisez attentivement les instructions pour l’utilisation du filtre à eau et
conformez-vous à toutes les consignes de sécurité.
Utilisez uniquement un filtre à eau qui
est approprié pour le système VerismoMC
.
Veuillez consulter notre site Web pour plus
de renseignements.
Other manuals for V?585
1
Table of contents
Languages:
Other Verismo Coffee Maker manuals