https://www.verizonwireless.com/support/ 6
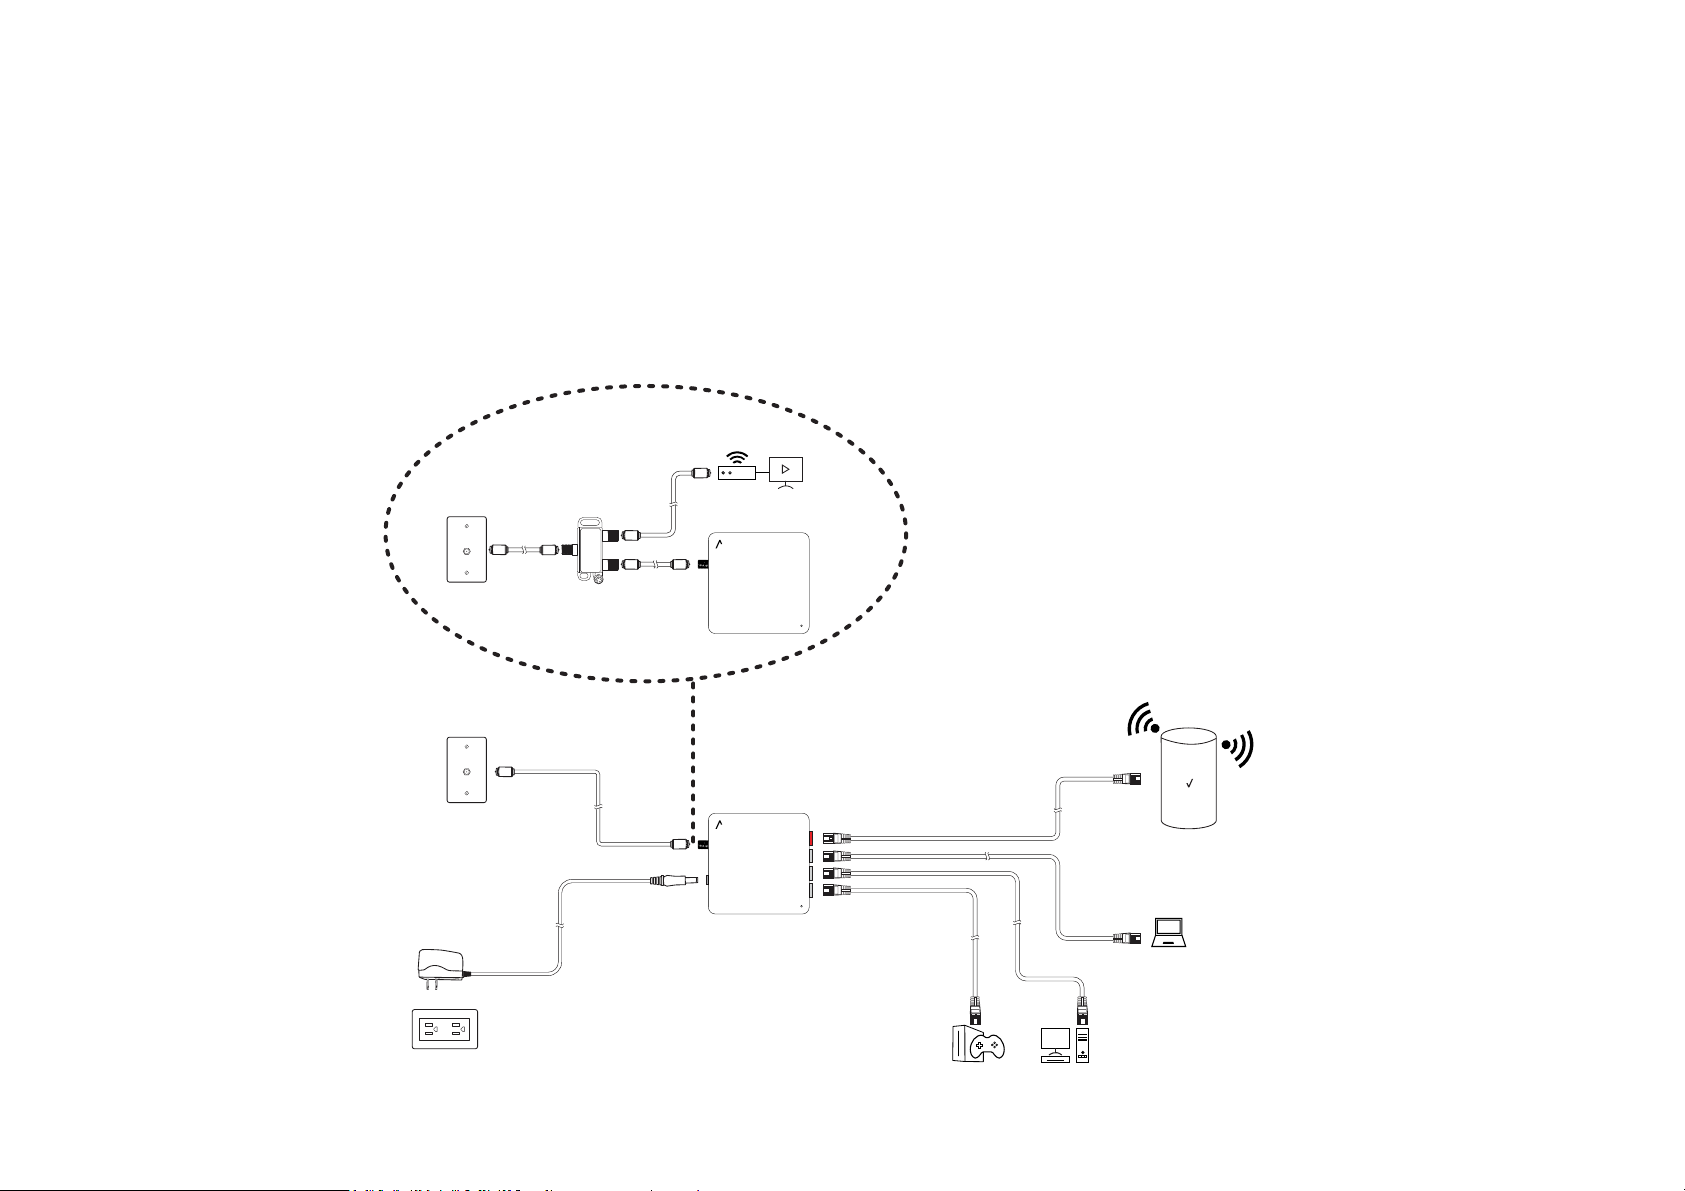
3. Setting Up Your Network Adapter
3.1 Positioning Your Devicer
For the best transmission from the device:
-The equipment shall be mounng at heights less than 2 m.
-Keep the device away from direct sunlight.
3.2 Setup Requirements
To configure your network adapter via computer, you need a computer that meets the following system requirements:
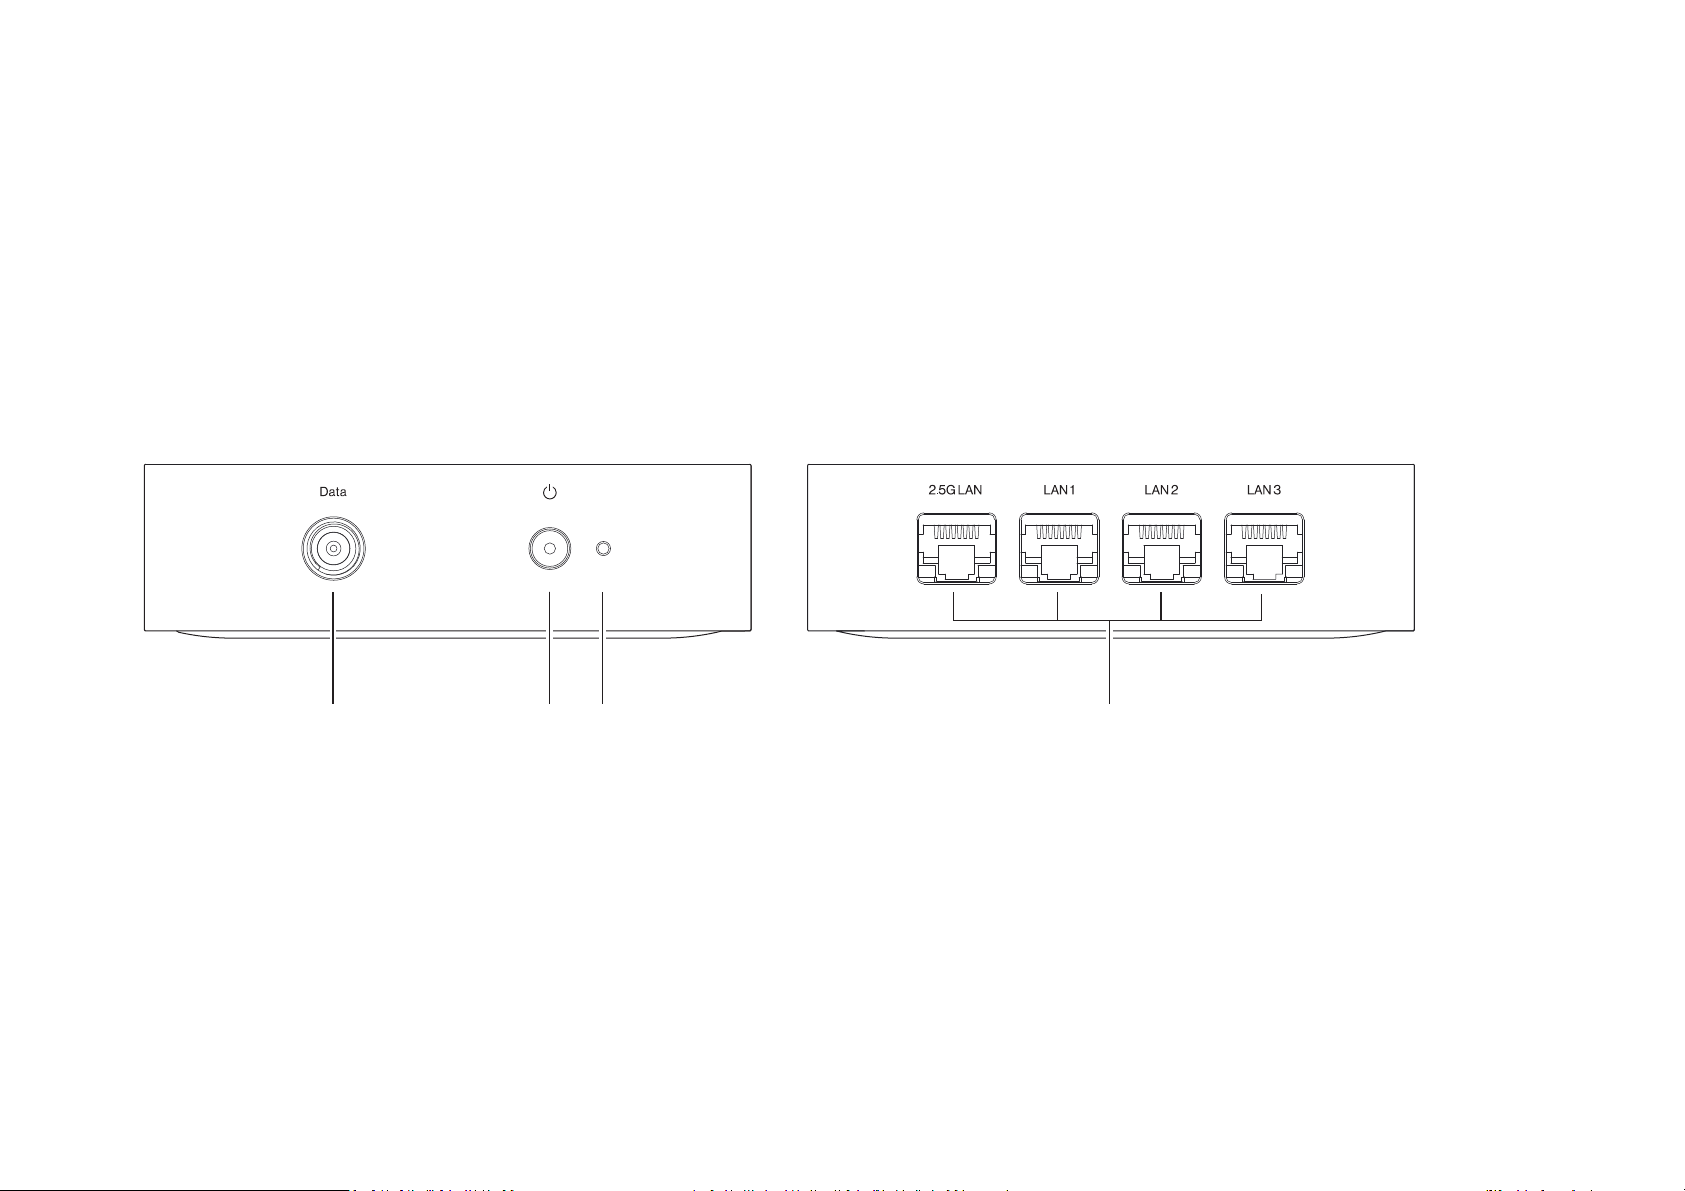
-Ethernet RJ-45 (LAN) port (10Base-T/100Base-TX/1000BaseTX/2.5GBASE-T).
-Router(RJ-45 LAN or MoCA LAN).
-An installed TCP/IP service.
-Web browser such as Internet Explorer, Firefox, Safari, or Google Chrome.