Set Up Device
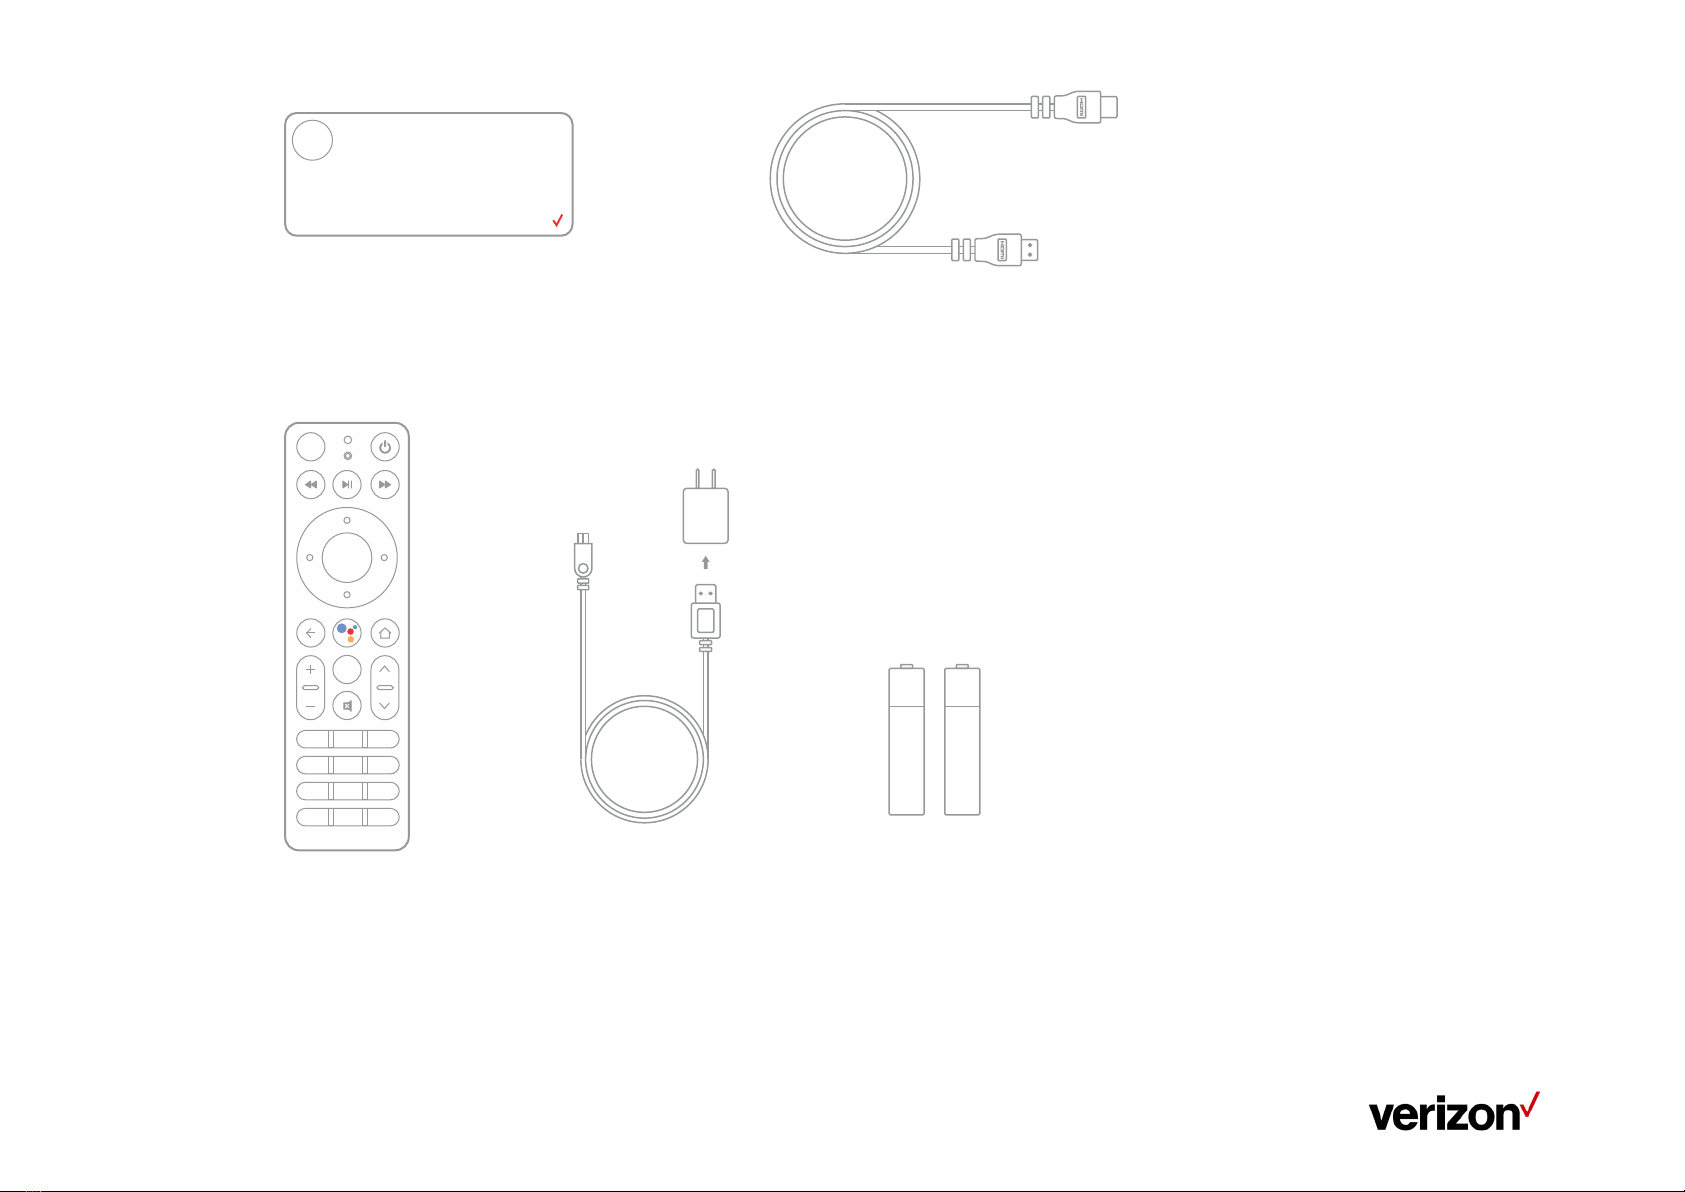
Before you start, confirm you have:
•A Wi-Fi internet connection.
•A Google account.
A Google account is recommended but not required. The user will be able to skip the Google ‘sign in’ step.
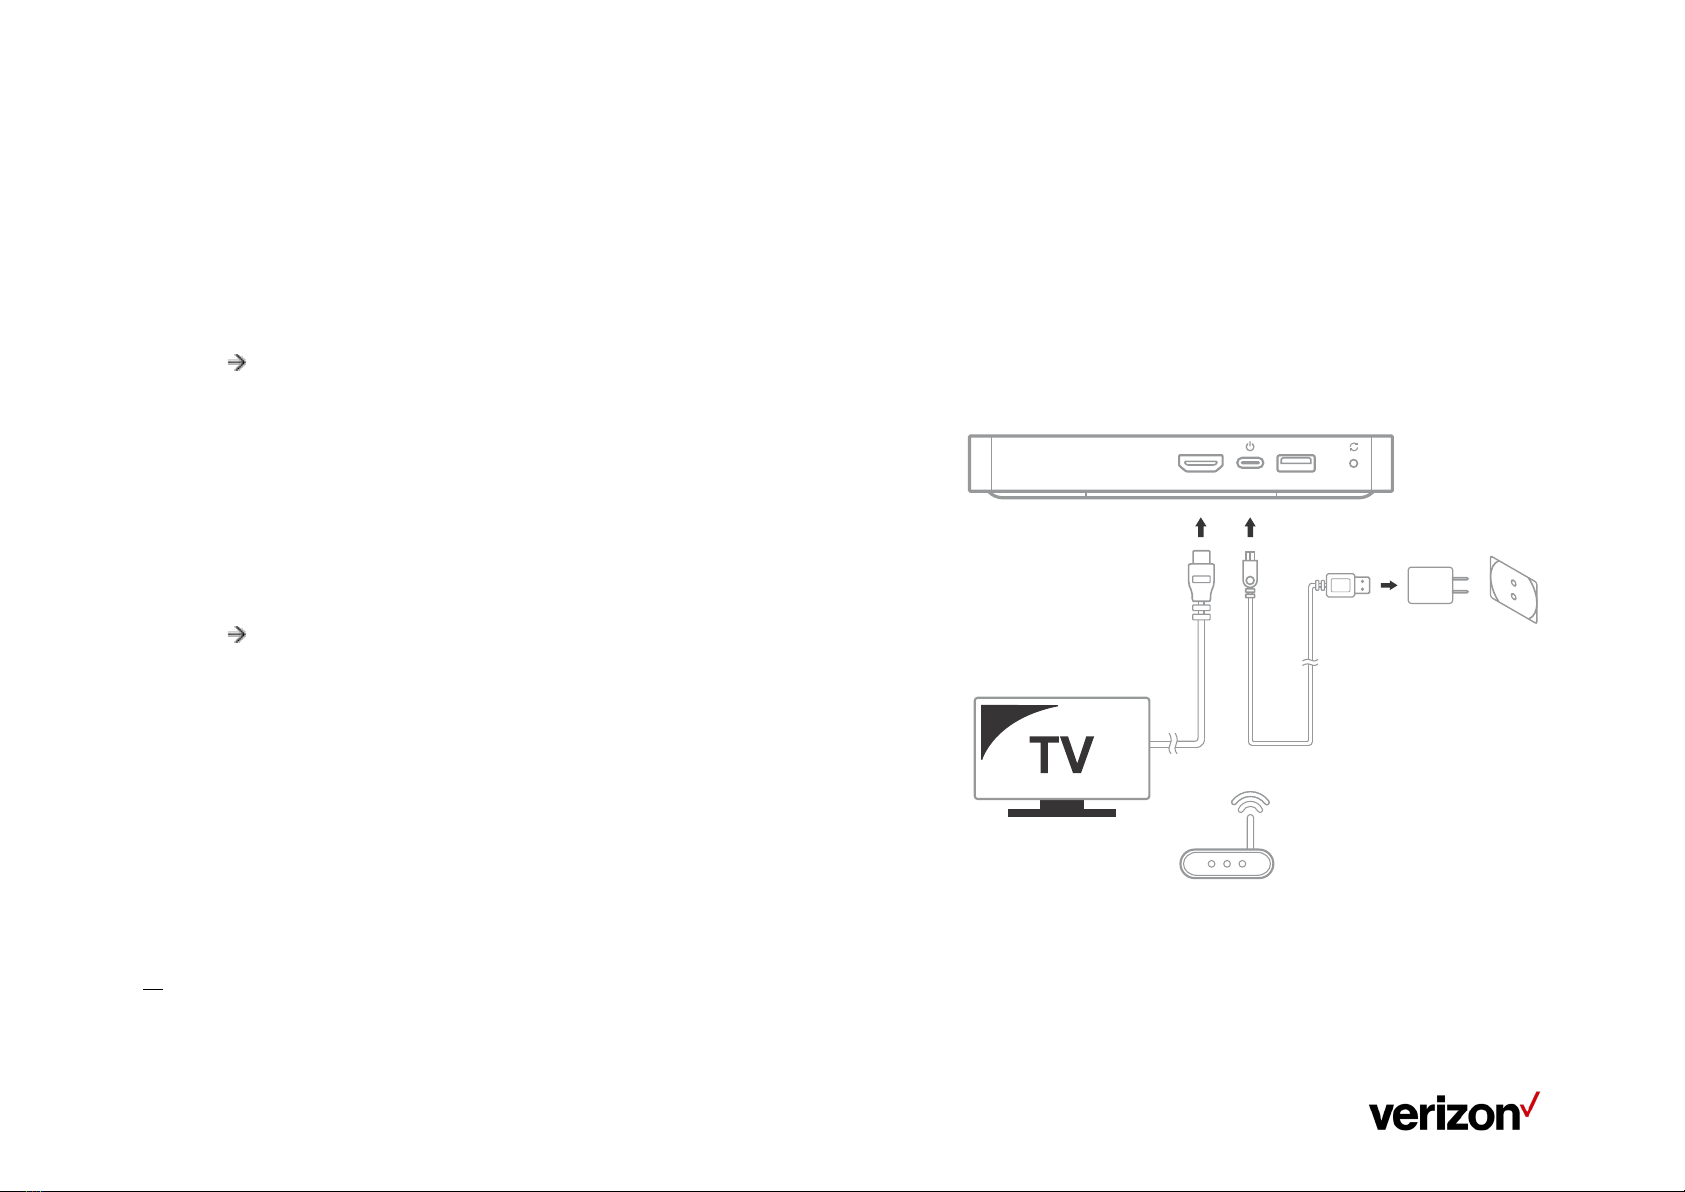
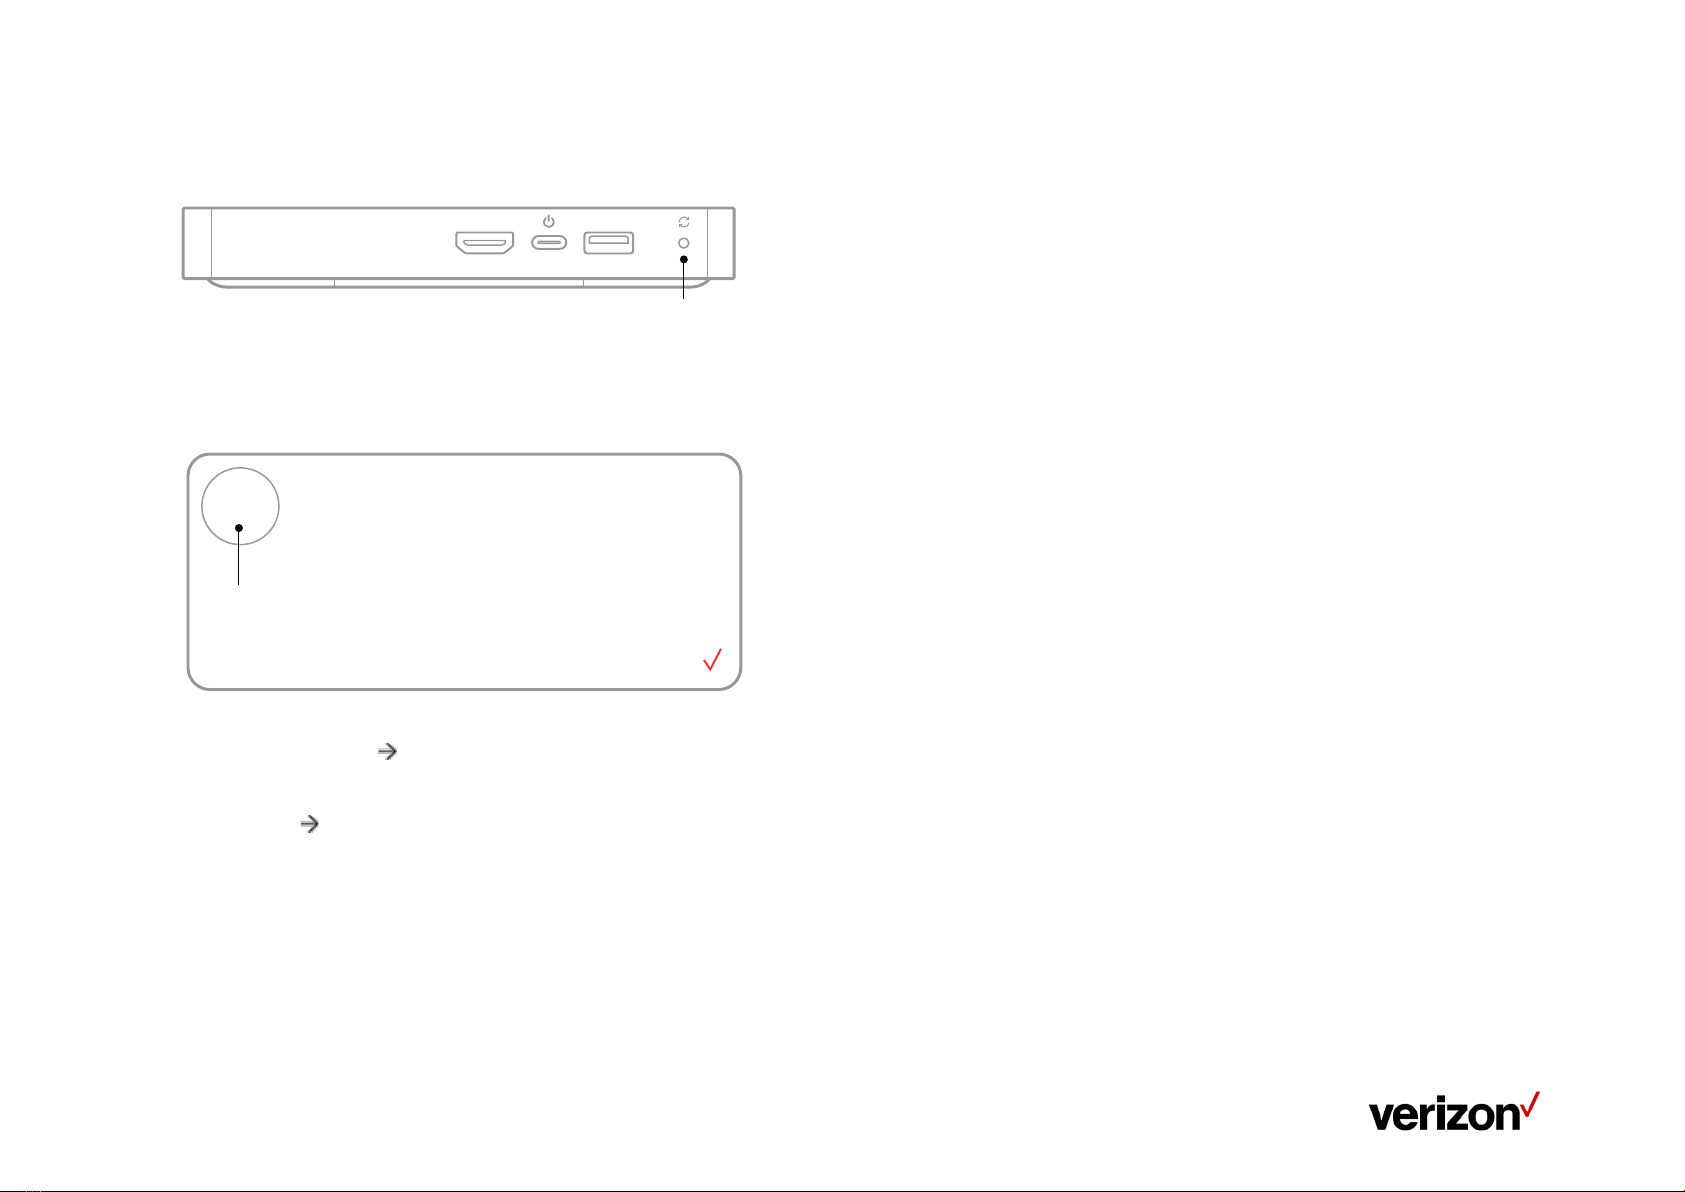
Step1
1. Connect the HDMI cable from your Stream TV to your TV.
2. Connect the power cord from your Stream TV to an electrical outlet.
3. Turn on your TV.
4. Set your TV to the correct HDMI input.
Refer to the TV manufacturer for help verifying HDMI input.
5. Pair your Stream TV Voice Remote as described in pairing screen
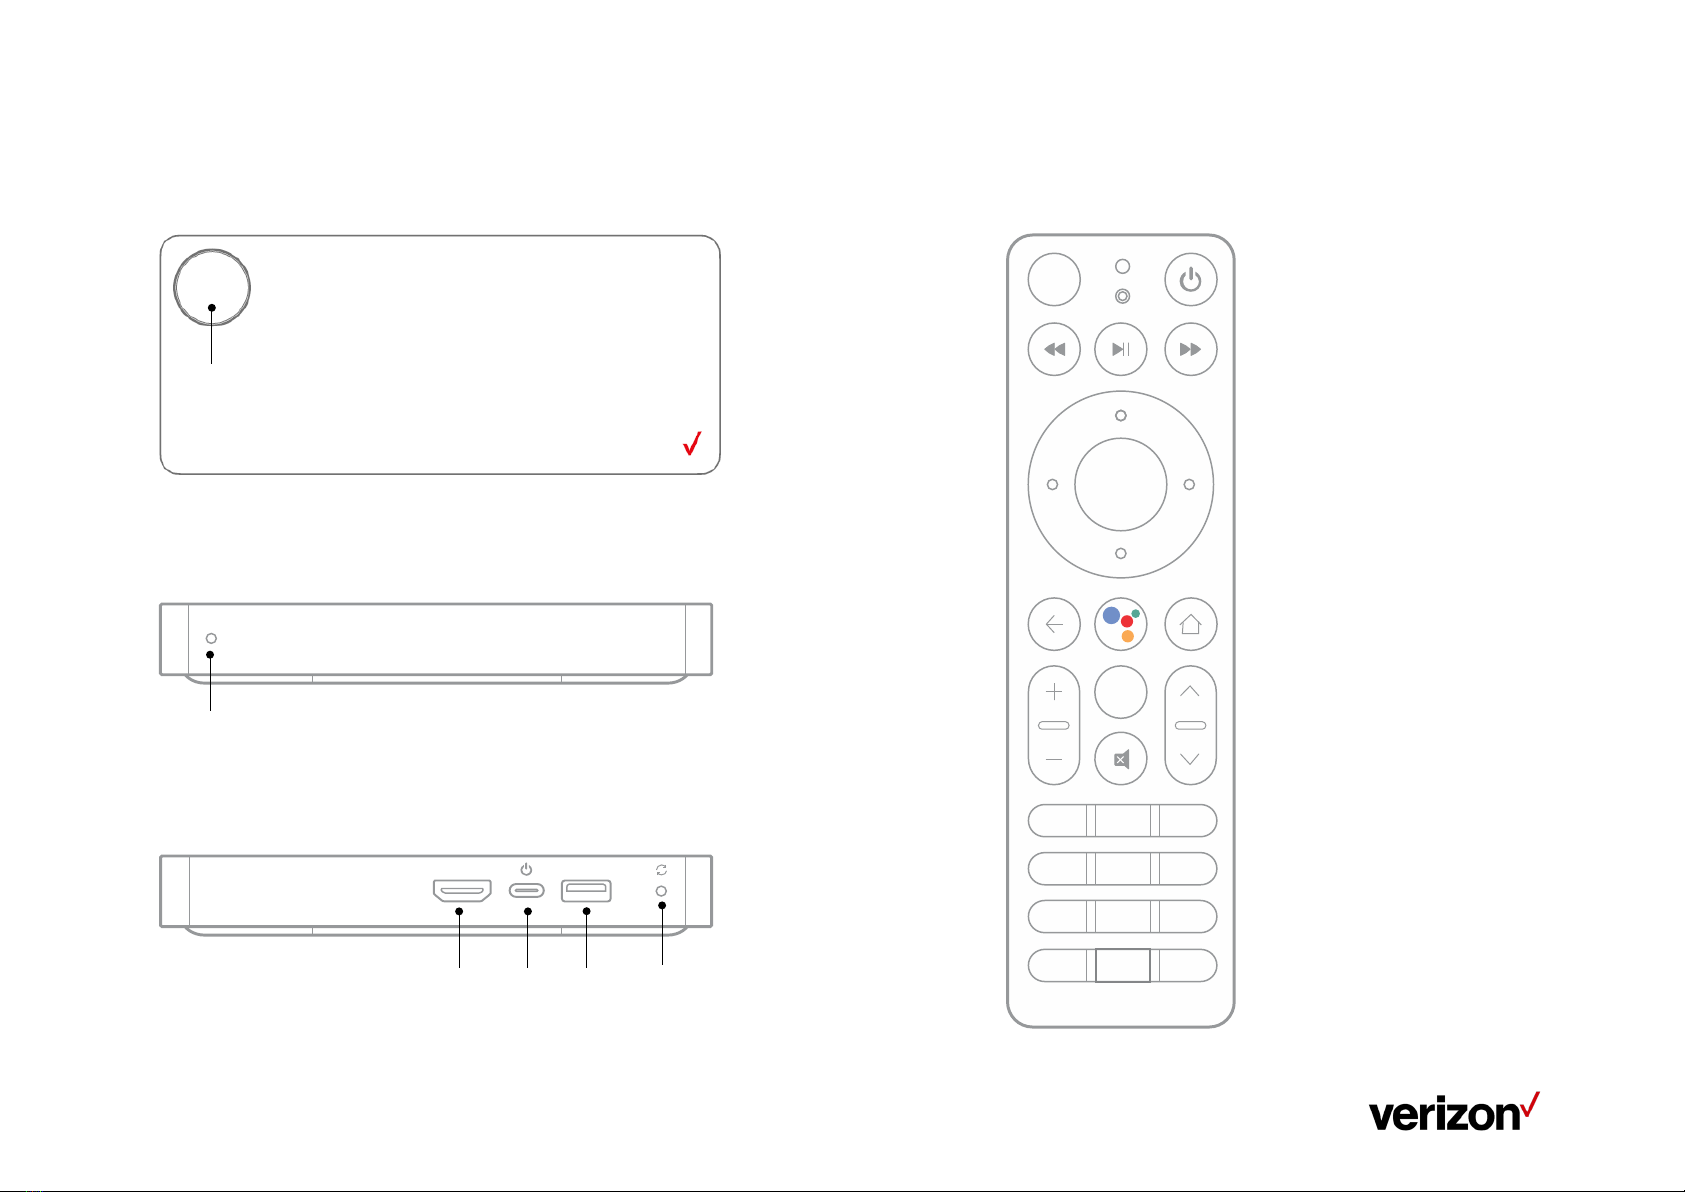
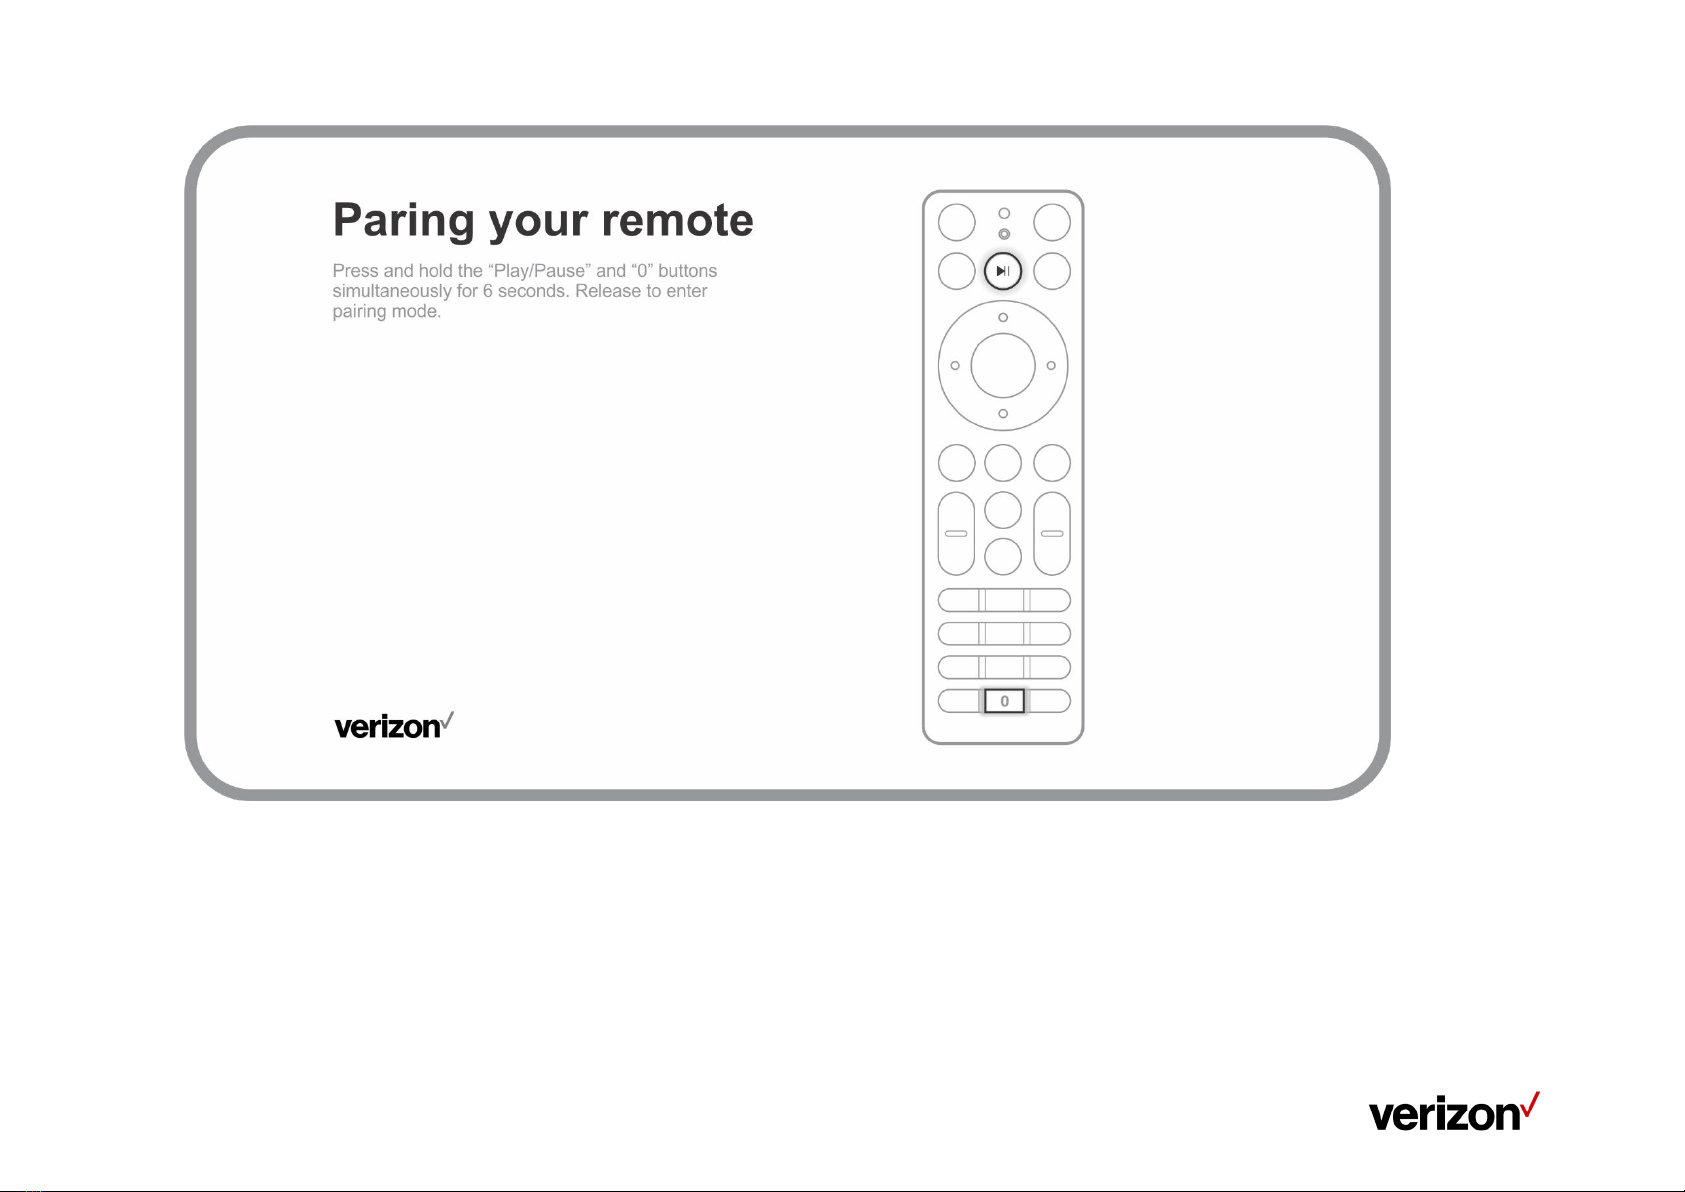
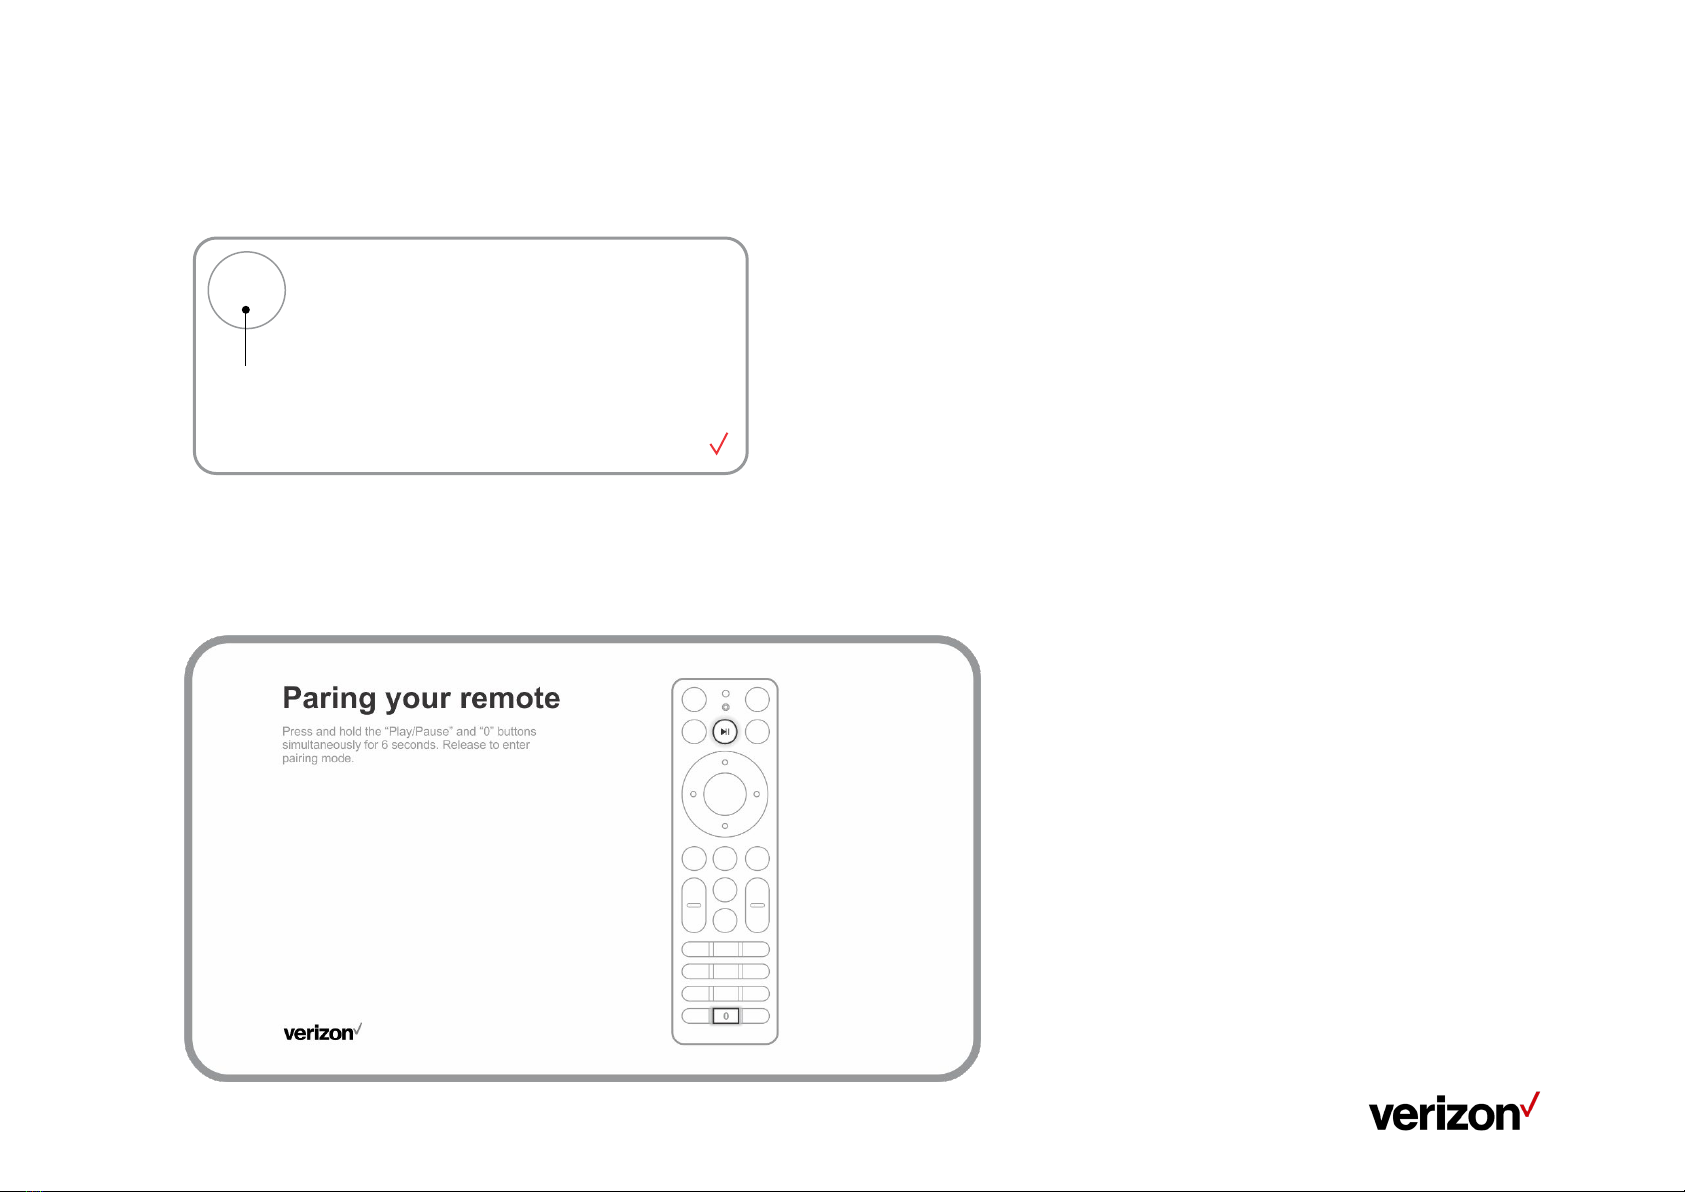
Pairing Your Stream TV Voice
Remote
1. Press and hold the Remote “Play\Pause” and “0” buttons simultaneously
for 6 seconds.
2. Release the buttons to enter pairing mode.
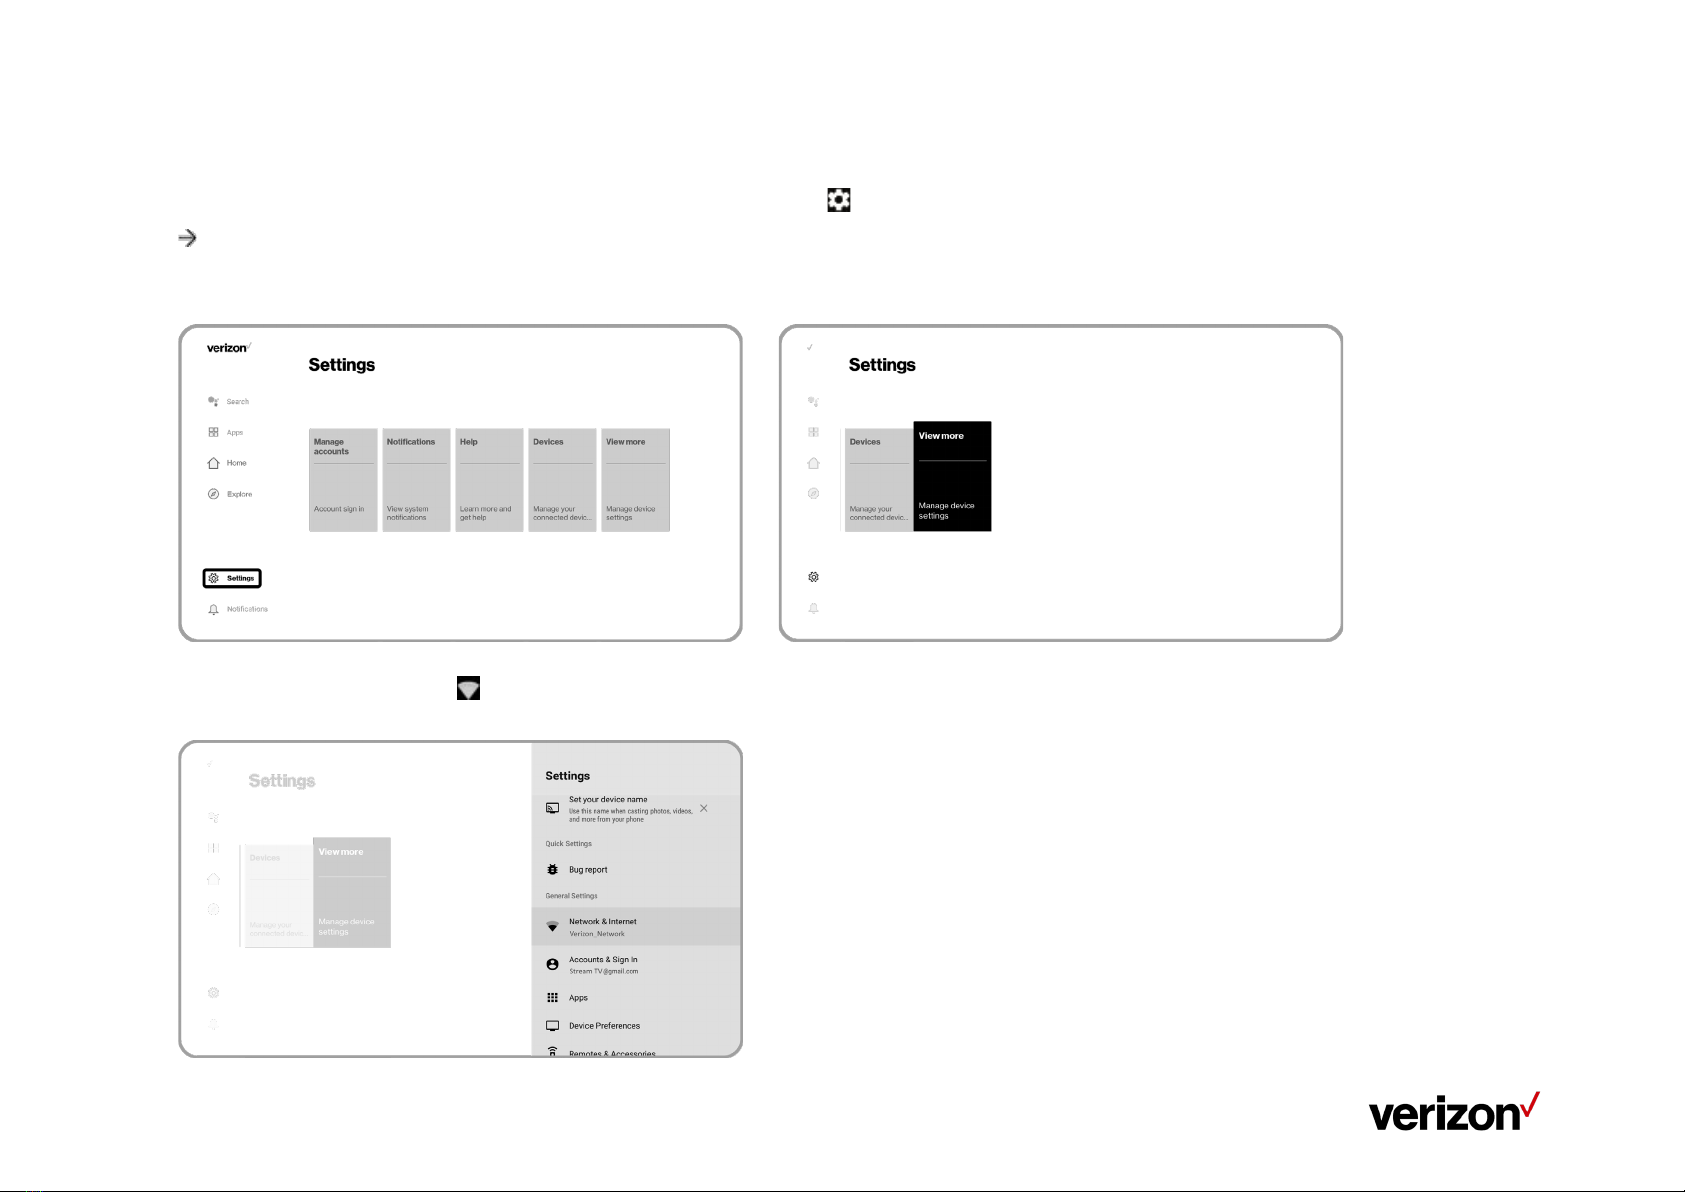
3. If the 'pairing your remote' screen doesn't display, place the Stream TV in Bluetooth® discovery mode with the existing voice
remote