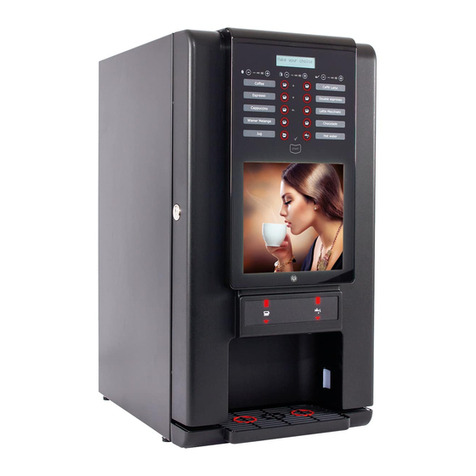
Veromatic MBE01 User manual

SM-MBE01-A v1.1
09/2019
SERVICE MANUAL EN
MBE01
Espresso machine
EN Read the manual before installing, using and serviceing the machine.
This manual is intended for dealers and mechanics who are qualified and instructed to perform service to the machine.

2
EN
Preface
Please read this manual carefully before executing service labour to the dispenser!
This service manual is intended exclusively for technical support to be executed by a qualified or
licensed mechanic. The demands for a qualified mechanic are:
The mechanic is well known in the workings of the dispenser/machine, by training at Veromatic
International BV or an equal training elsewhere (dealer for instance).
The mechanic is well known of all laws and regulations in the area of safety, electrical
connections/symbols, etc.
The mechanic uses the instructions and schemes valid for this machine type/model. These technical
documents are supplied by the dealer.
For service labour is required:
This Service manual
The User manual supplied with all machines
The Spare parts manual
Tooling.
Attention! This manual is NOT intended for the end user or the operator of the dispenser. They refer
to the user manual supplied with the machine.
Nothing in this publication may be copied, included in an automatic information base, and / or
published in any form or way, be it electronic, mechanical, by photocopies, pictures or in any other
way, without previous written permission from Veromatic International B.V.
Although this manual has been produced with the utmost care, no legal claims can be derived here
from. Veromatic International B.V. maintains the right to change the product without prior notice.
Fabrikant:
VEROMATIC INTERNATIONAL BV
Donker Duyvisweg 56
3316 BM Dordrecht
The Netherlands
Nothing in this publication may be copied, included in an automatic information base, and / or
published in any form or way, be it electronic, mechanical, by photocopies, pictures or in any other
way, without previous written permission from Veromatic International B.V.
Although this manual has been produced with the utmost care, no legal claims can be derived here
from. Veromatic International B.V. maintains the right to change the product without prior notice.

3
EN
Contents
Preface................................................................. 2
1Important.........................................................5
1.1 Safety regulations .....................................5
1.2 Users’ qualifications.................................5
1.3 Use environment ......................................5
1.4 Original parts............................................5
1.5 Hygiene .....................................................5
1.6 Ingredients............................................... 6
1.7 Ventilation openings................................ 6
1.8 Water filter ............................................... 6
1.9 Water temperature................................... 6
1.10 Dispense time..........................................6
1.11 Electrical safety ........................................6
1.12 Liability and warranty...............................6
1.13 Personal safety......................................... 7
2Transportation and unpacking ...................... 8
2.1 Transportation ......................................... 8
3Installation...................................................... 9
3.1 Operation schematic ...............................9
3.2 General installation guidelines................9
3.3 Installation location............................... 10
3.4 Water connection.................................... 11
3.5 Electrical connection .............................. 11
3.6 Interface operation (short).....................12
3.7 First installation......................................13
3.7.1 Standard configuration ....................13
3.7.2 Alternative configuration .................13
3.7.3 Taste card installation......................14
3.7.4 Using a customized key layout........ 15
3.8 Start Up................................................... 15
3.9 Customization of bean grind and product
settings ............................................................ 16
3.10 Instructions for the operator................. 16
4Adjustments ..................................................17
4.1 Introduction ............................................17
4.2 Products..................................................17
4.3 Water temperature..................................17
4.4 Grinder adjustment ................................18
4.5 Canister calibration.................................18
5Operation...................................................... 19
5.1 Taking a drink ........................................ 20
5.2 Hot water ................................................22
5.3 Jug/cup-to-go function...........................22
5.4 Energy save mode (VIPS).......................23
5.5 Rinse menu and service menu...............23
6Maintenance ................................................ 24
6.1 The maintenance area........................... 24
6.2 The service area..................................... 24
6.3 Freezing solid ........................................ 24
6.4 Machine overview...................................25
6.5 Rinse/maintenance menu......................25
6.6 Daily maintenance..................................27
6.7 Weekly maintenance...............................28
6.7.1 Cleaning brewer ...............................28
6.7.2 Cleaning instant mixer..................... 31
6.7.3 Filling bean hopper..........................34
6.7.4 Filling instant canisters....................34
6.8 Monthly maintenance ............................36
6.9 Annual maintenance ..............................36
8Service menu................................................. 37
8.1 Extended machine settings....................37
8.2 Extended navigation...............................37
8.3 BASIC - MENU LEVEL.................. 40
8.4 Password protection for higher levels ...41
8.4.1 ADVANCED - & SUPERVISOR -
MENU LEVEL ..................................... 42
9Machine electronics......................................50
9.1 Overview electronics ..............................50
9.1.1 PP-00581 main I/O board................ 51
9.1.2 PP-00880 interface board................52
9.1.3 PP-00851 Converter and protection
circuitry for 230 VDC grinding motor........... 53
9.2 Electrical wiring diagram........................54
10 Service........................................................ 55
10.1 Safety and hygiene.................................. 55
10.2 Water lock and water filter ..................... 55
10.3 Safety inspection .................................... 55
10.4 Hygiene................................................... 55
10.5 Maintenance schedule ...........................56

4
EN
12 Malfunctions & repairs..............................58
12.1 Display malfunction messages ..............58
12.2 Repairs ...................................................60
13 Decommissioning..................................... 61
13.1 Temporary decommissioning ............... 61
13.2 Disposal ................................................. 61
14 Technical information............................... 62
14.1 EU-declaration of conformity ................ 63

5
EN
1 Important
1.1 Safety regulations
This machine is exclusively intended for the preparation of soup based on hot drinks, such as
espresso, coffee, cappuccino, hot chocolate based on fresh ground beans and freeze dried milk and
chocolate powder. Using the hot water key, other hot drinks can be prepared, such as hot tea.
It is forbidden to use the machine for other purposes than described above. Do not place the machine
in areas where high pressure or steam is used to clean.
Read the directions and especially these safety guidelines, before you install or use this machine. Keep
this manual with the machine to be able to consult them at a later time.
The following symbols indicate WARNINGS or safety risks:
!WARNING
Indicates a risk situation that may cause severe personal injury, danger to life and / or damage to the
machine.
!ATTENTION
Indicates a risk situation that may cause unsubstantial personal injury and / or damage to the
machine.
,BEWARE
Danger of electrical voltage.
1.2 Users’ qualifications
This machine is not intended for use by persons with reduced physical, sensory or mental capacities,
or lack of experience and knowledge, unless they have been supervised or have been instructed about
the use of the device by a person responsible for their safety.
Children may not operate the device and have to be supervised to ensure that they cannot play with
the device.
1.3 Use environment
The machine may only be used indoors, not outdoors. Place in a frost free area (between 10 and 32°
C.) where it is not exposed to humidity or excessive dust and cannot be sprayed with liquids.
1.4 Original parts
When replacing parts, only use original (spare) parts, available from Veromatic International B.V. This
also applies for the options mentioned. Parts must meet strict quality demands through which the
machine will continue to function optimally. When parts are used that are not original then the
warranty is null and void and Veromatic International B.V. is not responsible for any possible damage
that may occur as a result thereof.
1.5 Hygiene
For a good hygiene and safety it is important to maintain the machine according to the regulations.
Clean the product canisters and the removable parts that come into contact with food according to the

6
EN
regulations in this manual and make sure they are thoroughly dry before replacing them in the
machine.
1.6 Ingredients
Observe the storage and application regulations on the packaging of the ingredients. Make sure that
the ingredients do not become moist. Remove the ingredients that have been in the canister too long
or if you have doubts about their quality.
1.7 Ventilation openings
Prevent objects or liquids from entering the machine through the ventilation openings. Immediately
pull out the plug if liquids enter the machine inadvertently. Never spray water with a hose or other
implement in the direction of the machine.
1.8 Water filter
The water filter (optional) has to be replaced every 6 months, or after about 30,000 drinks. Your dealer
can inform you about this. A water filter used too long is detrimental for the operation of the machine
and can be dangerous for the health.
Do not use the water filter in areas where the water is not safe microbiologically or in areas where the
quality of the water is unknown. Follow the installation regulations as described in paragraph 3.1 or
follow the installation directions for the water filter.
1.9 Water temperature
In the machine there is also a water boiler with a water temperature of 80-95°C. The water remains hot
for a long time, even when the machine has been turned off.
Keep your hands away from the spout / cup when taking a drink or when rinsing, to prevent burns
caused by the hot water.
1.10 Dispense time
The drink will be dispensed almost immediately after making the selection.
1.11 Electrical safety
,BEWARE:
No parts may be removed if it requires tools. This may only be done by a licensed technician. See also
paragraph 3.1.
Do not use objects to poke into the different openings of the machine and do not spray water into or
on the machine. The machine may also not be placed in areas where cleaning takes place with steam
or high pressure devices.
1.12 Liability and warranty
With reference to the terms of delivery of Veromatic International BV, it is not liable and liable for
warranty as a result of:
•normal wear and tear
•external damage
•faulty and injudicious use
•Installation, assembly, modification or repair not carried out according to the manufacturer's
guidelines

7
EN
•not or incorrectly performed maintenance
•defects in or unsuitability of goods or used materials or tools by instructions or third partie.
1.13 Personal safety
Mind the following points before performing maintenance, to ensure a safe working environment:
1. Make sure the machine complies to the connection requirements.
2. When working on the machine, make sure the machine is without power. Remove the mains
cable from the wall socket. If the maintenance requires to have the machine on power, be very
careful.
3. The water in the boiler remains hot for a long time, even after removing the power. Be careful
to avoid burns of hot water.
4. Do not stick sharp objects through openings, unless specific maintenance actions require this,
and no damage may be done to wirings or components.
5. Do not put drinks or containers on top of the machine.
6. Do not clean the internals of the machine with wet cloths when safety covers are removed.
7. Never aim a water hose to the machine.
8. Check if removed earthing connections are re-applied the correct way and perform their
function as intended.

8
EN
2 Transportation and unpacking
2.1 Transportation
The transportation of this machine may only occur in the original packaging. Instructions necessary to
store and transport this machine are located on the packaging.
/2.1
Environmental temperature
During operation
+10° to +32°
Celsius
During transport and storage
+0° to +50°
Celsius
Dimensions packaging and transport weight
Height
680
mm
Width
410
mm
Depth
595
mm
Weight
34.5
kg
Check the packaging for damages. A damaged machine may be unsafe and may not be put into
service. In such a case, contact your dealer. Save the packaging if you expect that the machine may
have to be moved at a later date.
0°C.
50°C.

9
EN
3 Installation
!WARNING:
Only a qualified service technician may install the machine!
3.1 Operation schematic
1Water connection
2Reducing valve (optional)
3Water filter (optional)
4Intake valve
5Air break
6Flow meter
7Pressure pump
8Non-return valve
9Bypass valve
10 Espressoboiler
11 Threeway valve
12 Outlet valve 1 hot water
13 Outlet valve 2 extra hot
water
14 Outlet valve 3 mixer
15 Overflow to drip tray
16 Bean canister
17 Instant product canisters
18 Bean grinder
19 Espressobrewer
20 Safety switches
brewer/grinder
21 Waste bin
22 Mixer unit
23 Cup sensor left outlet
24 Cup sensor right outlet
The products are prepared according to several principles: espresso and instant.
The espresso/coffee products are prepared in the espresso brewer at approx. 8-9 bar. The water is
pressurized by the water pump, heated by the espresso boiler and subsequently flowing to the
espresso brewer. Before that, beans are ground to powder and dispensed in the brewer. The bean
variety, grind size, ground weight and pressing of the powder will affect the water pressure and the in-
cup quality.
Mix products are prepared according to the instant principle. The hot water required comes from the
espresso water boiler. A certain amount of hot water and powder(s) are being dispensed and brought
together in a mixer unit. In this unit both components are mixed by means of a quickly rotating mixer.
This mixture is being poured, whether or not combined with another soluble product, from the spout
into the cup or decanter.
3.2 General installation guidelines
The installation of the machine may only be done by a qualified service technician. This technician must
adhere to the guidelines issued by the manufacturer of the machine in accordance with the national and
/ 3-1
B
P
2
1
3
4
5
6
7
8
10
15
11
9
16
18
19
20
21
24
1717
22
23
12
13 14

10
EN
local legal guidelines. The technician instructs the operator about the operation, the maintenance and
the proceedings during possible malfunctions.
Do not place the machine in areas that are cleaned with water jets or steam.
It is required that a sufficiently fused wall outlet with proven grounding is present within 1½meters
and an aerated washing machine faucet.
Besides the legal guidelines that a service technician has to meet, Veromatic International BV
moreover makes the following demands of a service technician:
1The technician must be very well acquainted with the machine, through training by Veromatic
International B.V. or through similar training obtained elsewhere.
2The technician must use the instructions, diagrams etc. that are applied to this type and
model.
3The technician is well informed about the applicable guidelines for hygiene.
3.3 Installation location
The machine is intended only for use indoors, not outdoors. Place the machine in a frost-free location
where it is not exposed to moisture or excessive dust and cannot be sprayed with liquids. The machine
may not be used at an elevation over 2000 m.
The machine is only suited for use in household, office and light-industrial environments. The
machine is not suitable for professional kitchens where cleaning frequently occurs with water or in a
dusty environment. When placed in another environment, Veromatic International cannot guarantee
the correct operation or the safety of the
machine.
Do not place the machine in areas that are
cleaned with water jets or steam.
For correct operation the machine may not
be installed at an angle, but at a flat and
stable surface.
The ambient temperature has to be within
+10° to +32° Celsius for a correct operation
of the machine.
Make sure that the wall outlet and the
water valve remain free and easily
accessible after placement of the machine.
The main power switch is located on the
back of the machine. Make sure that this
also remains easily accessible.
Check to see that the electrical cable is not
damaged. A damaged electrical cable must
be replaced immediately!
Make sure there is enough open space
around the machine. Minimum needed
dimensions (in mm) see /3-2.
Place the machine as such that the highest surface of the machine is located at least 120 cm above the
floor surface.
If the unit is placed directly underneath a cupboard, allow a space of at least 150 mm. For a proper
operation of the machine it is necessary that cooling air can be supplied and discharged. For this
purpose many ventilation openings have been made in the machine. These openings may never be
covered.
/3-2

11
EN
3.4 Water connection
Connection data water
Water connection
¾’’
BSP
Water pressure
2.0 – 8.0
bar
0.2 – 0.8
MPa
Water lock Veromatic International BV instructs the use of a water lock (Veromatic
order code HL-00190) and does not accept any responsibility with
regard to water damage, in case the machine gets installed without this
water lock.
Water filter Install a water filter to ensure the best taste quality and to reduce scale
and thus maintenance. Replace the water filter regularly. See the water
filter specification for information. Your dealer can inform you about a
water filter and installment.
The machine must be placed within a distance of 1½meters from an aerated washing machine tap on
a riser pipe, which relates to the current regulations of the water company and the above-mentioned
operating pressure.
The dispenser must be equipped with a flexible hose set (not supplied) that complies with the current
water and food regulations of the country. The hose must be equipped on the machine side with a
gland with seal. Whether the machine is new or a replacement, always use a new hose set for the water
supply. Do not reuse the old set for safety reasons.
Connection procedure
1. Attach the water hose to the tap.
2. Rinse the water supply thoroughly so possible dirt cannot enter the machine.
3. When using a water filter, follow the installation guideline of it’s manual.
4. Attach the water hose to the inlet valve on the machine. Tighten the gland well.
5. Check to see if there are no kinks or damages on the hose.
6. Open the faucet.
7. Check for leakage.
3.5 Electrical connection
•The machine must be connected with the supplied power cord.
•It is required that a sufficiently fused socket outlet with proven grounding is present within 1½
meters.
•Use a separate group, for this machine only, with a 16A fuse.
Electrical specifications
Power supply
230
V~
Frequency
50
Hz
Electrical capacity
2000
W
Electrical safety class
Class I
IP classification
IP20
Pollution grade
2
Overvoltage category
II
!ATTENTION:
Allow the machine to acclimate. For that purpose, leave it at least half an hour standing on the
operation location, before plugging it in.

12
EN
3.6 Interface operation (short)
The interface of the machine consist of a two line information display, LED lit capacitive touch buttons
and information LED’s. The interface operates in two states, normal vending operation and menu
navigation.
/3-3
When opening the door, the maintenance menu is activated by activating the door switch (/4-1). When
doing this, the navigation symbols are lit (/4-2). Navigation is done by pressing the round touch keys
next to these symbols.
/4-1 /4-2
UP / DOWN button
The navigate buttons (UP and DOWN arrow) are used for scrolling through the menu options.
ENTER button
For accessing options deeper into the menu.
BACK button
For returning to a higher level in the menu or exiting the maintenance menu (from the top level).

13
EN
3.7 First installation
The machine is provided with two empty taste cards and a sheet of product stickers. Before
commissioning the correct stickers have to be placed onto the taste cards and installed behind the
glass. The correct sticker placement should correspond to the configuration of the machine. This can
be modified if wished by the service technician.
3.7.1 Standard configuration
The following configuration is pre-programmed as standard.
/3.3
Standard canister configuration (301)
Canister Product
1 Coffee beans
2 Topping
3 Cacao
Standard taste card order
Left taste card Right taste card
Espresso Cappuccino
Coffee Latte Macchiato
Cafe Americano Cafè latte
Wiener Melange Chocolate
Jug Hot water
3.7.2 Alternative configuration
A second configuration is build-in off factory for use with a different canister layout.
Alternative canister configuration (302)
Canister Product
1 Coffee beans
2 Topping
3 Sugar

14
EN
Alternative taste card order
Left taste card Right taste card
Espresso Cappuccino
Coffee Latte Macchiato
Cafe Americano Cafè latte
Double espresso
Jug Hot water
Procedure for changing the configuration:
1. Open the door with key and go to the rinse menu.
2. Scroll down to ‘password’ then press start.
3. Enter the password as ‘22222’ with the help of down scroll key, it will enable the factory menu.
4. Select ‘load defaults’, it will ask you ‘Defaults will overwrite all settings!” and counters will be
reset are you sure?”. Select start to accept. Machine will restart.
5. After machine restarts, it will show the machine types. Select your machine type as Minibar
Espresso.
6. It will ask you configuration type, select the required configuartion as config 1 or config 2.
Before changing the machine configuration from software, make sure that your canister type and content
is per the new configuration. Refer above tables for canister contains for the specific configuration.
Modification of the cacao canister to a sugar canister can be done by simply removing the agitator wheel.
Other types of product than mentioned above can require a new canister type or conversion kit. The
software has no extra configurations for those special canister/products. They can be used, but settings
have to changed manually in the Product settings in the Service menu. However, after doing that, the
settings can be saved to USB flash disk to save for later use.
3.7.3 Taste card installation
a.
b.
c.
d.
e.
/3.4

15
EN
1Open the lower panel of the door with the hand removable knurled nuts. (/3.4 a)
2Place the product stickers on the taste card in correspondance with the standard or desired
configuration. (/3.4 b)
3Insert the taste cards in the slot of the plastic holder (/3.4 c).
4Close the inner panel with the knurled nuts. (/3.4 d)
3.7.4 Using a customized key layout
1Close and re-open the door to activate the Rinse menu.
2Choose the password option and enter the password. (/3.4 e)
3Change the configuration of the buttons.
4Exit the menu.
3.8 Start Up
1Open the front door of the machine.
2Fill the bean canister with coffee beans.
3Take the instant product canisters out of the machine with the outlet upwards.
4Fill the canisters to maximum three quarters of the capacity. Don’t press the contents. See
paragraph 3.7.1 for the type and order of the canisters.
!ATTENTION!
Maximum filling will lead to spillage and cause poor hygiene. Overfilling can prevent proper
functioning of the machine. The products may not be tamped down!
5Place the canisters back in the machine.
!ATTENTION!
Mind that the outlets are turned downward inside the mixer.
6Close the door.
7Turn the machine on by means of the switch on the back of the machine.
8The airbreak is empty, so will trigger the boiler filling procedure. Follow the instructions on the
display or the following:
9Place a container (>1 L) underneath both the main outlet and the hot water outlet and press
start.
10 The airbreak and the boiler will fill with water. After that a message ‘Temperature too low’ will
appear on the display.
11 Wait until the water in the boiler reaches the correct temperature. (The message ‘Temperature
too low’ disappears from the screen.)
12 Open the door of the machine to activate the Rinse menu.
13 Rinse all lines of the machine through the Rinse option.
14 Close the machine door.

16
EN
15 Press the “Go back” key to start operation. Adjust the machine for taste and quantity desired.
16 Choose every product at least twice to check the adjustment. See chapter 4 how to change
flavours.
3.9 Customization of bean grind and product settings
This machine has been pre-adjusted for a general espresso grind and with general settings to provide
the best in-cup quality. However, since the type of bean and instant mixture greatly affect the in-cup
quality, the grind size, dosage and many other settings may need adjustments. See chapter 4 for a
short introduction. Full support can be given by your dealer.
3.10 Instructions for the operator
After the machine has been installed and made ready for operation, the service technician has to
instruct the operator, using this manual, regarding responsible maintenance of the machine according
to the local guidelines. Safety and hygiene are central to this.

17
EN
4 Adjustments
!WARNING:
Only a qualified service technician may make adjustments to the machine!
4.1 Introduction
For appropriate measurement of all products and water quantities, several motors and valves are built
in. Modern electronics allow different driving timing to be regulated precisely. Several combinations
are possible that can be implemented, within certain limits, by the service technician. The machine will
be delivered with a standard factory setting. You can always default back to this factory setting. Your
dealer will see to it that your machine will be adjusted to your taste on your location.
Adjustment may only be performed by a qualified service technician.
The settings for quantities of product and water may differ per machine. Every machine has a unique
machine number with a corresponding software version. If you would like to have the setting of your
machine adjusted, this machine number is important for the dealer. The number is located on the
identification plate which, depending on the model, is located inside the machine on the right hand
side wall, top corner.
4.2 Products
This vending machine is solely intended for use with coffee beans and dry instant products. Use of a
different product is not guarenteed to function well. Veromatic International BV is not liable for any
damage or quality degradation if a different product is used. Consult your dealer which products can
be used. Consult the regulations on the product packaging regarding the shelf life and replacement of
the products used.
The machine is set to a specific volume with a predefined mixture and specific timings. This coffee
machine is off factory provided with optimal settings which provide the best in-cup quality. Alternative
products however may require some specific adjustment to guarantee the best result for your drink.
Your dealer can help in making the right choice of products and its settings.
The quality of product depends on many factors, for example:
•The amount of coffee in the brewer.
•The amount and pressure of water running through the brewer.
•The grind size
•The duration of time that the product canister motor is on.
•The spiral auger used in the product canister to dispense the instant powder
•The amount of water added in the mixer.
4.3 Water temperature
The water temperature of the water inside the boiler can be adjusted by your dealer. In general the
following applies:
•Temperature too low ⇒Product does not dissolve adequately or wrong extraction
•Temperature too high ⇒Water may start to boil under certain circumstances, causing a
safety to turn off the machine. This has to be reset by a service
technician before the machine can be put back into service
The operating water temperature may not be set below 65° C. Below this temperature bacteria will not
be killed and the safety of the user can not be guarenteed.

18
EN
4.4 Grinder adjustment
The grinder is off factory pre-adjusted for a regular espresso grind. If desired, this can be adjusted.
1Open the door and enter the service menu (password protected).
2Go to Product settings, choose ‘Espresso’ product, then ‘Coffee’ setting. This determines the
grind time.
3Remove the waste bucket and the espressobrewer.
4Place a small canister or large cup underneath the grinder outlet and press the ‘jug’ button to
grind beans. Repeat this twice.
5Throw the powder away and tare the scale.
6Adjust the grind adjustment wheel counter clockwise for coarser grind, clockwise for finer grind.
7Repeat steps 5-9 until the required grind is reached.
8The same process can be used to determine the grind time. Use a scale to measure the weight
of the powder.
9Make adjustments to the ‘coffee’ time setting, throw away the first three grinds, then weigh.
10 Re-install the brewer and the waste bucket.
11 The full (espresso) product can be tested from within this menu by pressing the ‘hot water’ key
instead of the ‘jug’ key. Now a complete vend will be made.
12 Once satisfied, press back to exit the menu in steps. Each product can be adjusted by this
process, although each with different settings, depending on the type.
4.5 Canister calibration
For the canister empty detection to work properly, the canister has to be calibrated to the installed
beans and instant products.
1Open the door and enter the service menu (password protected).
2Go to ‘Container settings’, then treshhold of coffee or instant canister. The ‘jug’ key will be lit.
3Remove the espressobrewer and mixer.
4Place a small container or large cup, hold it underneath the chosen outlet (grinder or instant).
5Press the ‘jug’ key. Five powder dispenses will now be served.
6Weigh the powder on a scale (tare the empty cup first).
7Enter the value in the weight setting when asked in the display. Weight in grams.
8The software then calculates the correct setting in the background.

19
EN
5 Operation
The interface of the machine consist of:
1: Product keys 1 – 10 (8 product keys; 1 hot water key (right bottom); 1 jug key (left
bottom)
2: Navigation Indicators (LEDs)
Up (operated with product key 1)
Down (operated with product key 2)
Go back (operated with product key 3)
Enter (operated with Start key)
3: Taste cards
4 Start key
5: Sugar strength (only the [-] and [+] are touch keys; the three white areas in the
middle are only indicator lights)
6: Information display
7: Milk strength (only the [-] and [+] are touch keys; the three white areas in the
middle are only indicator lights
8: Coffee strength (only the [-] and [+] are touch keys; the three white areas in the
middle are only indicator lights)
/5-1
A distinction is made between product/start keys (1&4) and navigation functions (2). When the
product/start keys are active they will be lit. This is the case when a product should be selected or
when a password should be entered. In settings, the navigation indicators are used solely as indicators
and have to be operated by the product/start keys next to them, as the indication lights are not touch
keys (/5-2).

20
EN
/5-2
5.1 Taking a drink
1. Place a cup properly according to the cup positioning sticker. For hot water, place your cup on the
right. For all other beverages, place the cup on the left side. The display will give direction. (/5-3)
/5-3
2. The interface will be in start position. All selectable keys will be lit (/5-4).
/5-4
Other manuals for MBE01
1
Table of contents
Other Veromatic Coffee Maker manuals
Popular Coffee Maker manuals by other brands

Nespresso
Nespresso ESSENZA PLUS instruction manual

Cafection
Cafection Encore 29 Service & installation manual

Cuisinart
Cuisinart DCC-1170 Series user manual

Bestron
Bestron BREAKFAST CLUB ACM112Z instruction manual

saro
saro Saromica Thermo 24 operating instructions

Black & Decker
Black & Decker CM4200SC manual