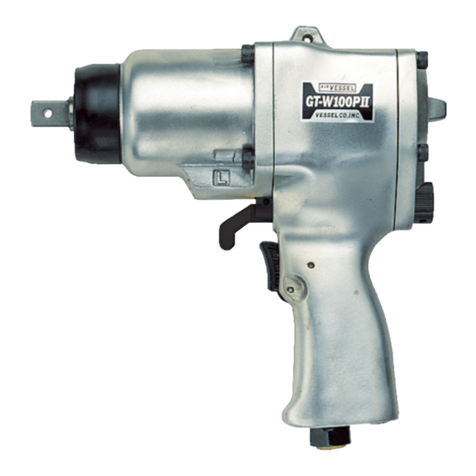
Vessel GT-3800PX User manual

OO

For Safe Use
1
Thank you very much for having purchased the "VESSEL Air Impact
Wrench GT-3800PX."
Please be sure to carefully read this manual before use and fully
understand the contents for the safe and correct use of the air tool.
Warning: Read these instructions carefully before operating,
maintaining or servicing this tool. Please keep these
instructions in a safe accessible place.
■Read to fully understand and observe the following safety precautions and
warnings. Careless or improper use of tool may cause serious or fatal injury.
Warning Indicates instant possibility of severe personal injury or loss of
life, if instructions are not followed.
Always were eye, head and ear protectors when using this tool.
Caution Indicates a possibility of personal injury or equipment damage, if
instructions are not followed.
Due to misuse of the tool, there is the possibility that users may
suffer disturbance and damage may occur only to the object.
* Depending on the situation, even items described in the
"Caution" sections may have serious consequences.
■Please safely store this manual in an easily accessible location so that it may
be used by users at any time.
■When the warning labels attached to this manual and product are lost or
stained, promptly obtain a replacement from our company or the store from
where the product was purchased and safely store or replace the label.
■Please send this manual together with the product when it is transferred to
another location or lent out.
If you have any questions about this product or manual, please contact our
company or the store from where the product was purchased.
Warning
For the correct use of the tool, please be sure to
carefully
read this manual before use and fully understand
the
contents.

For Safe Use
2
Warning ■The work environment for the air tool.
●Use tools at an appropriate air pressure.
Since using more than the specified air pressure may
cause
damage to the product and accidents, set the pressure
gauge and reduction
valve, etc., and use tools at an
appropriate air pressure (Air pressure by hand).
●Do
not use power sources other than the air
compressor.
The power source for the air tool is compressed air from an
air compressor.
There is a risk of explosion when high-
pressure gases
(oxygen/acetylene/propane, etc.) other than compressed air
are used.
●Use a proper air hose.
Use an oil-resistant air hose with the abrasion-
resistant
external,
which is appropriate for the air pressure of work for
the recommended inner diameter or more.
Additionally, do
not use hoses that are old or too long.
●Install the air hose installation parts securely.
It is very dangerous if the air hose detaches due to poor
installation because the high-
pressure air will cause the air
hose to fly around.
Install the air hose installation parts in the
air hose and air tool securely.
Warning
■Work environment
●Keep the work area clean and brightly lit.
Dark or disorderly work environments can lead to accidents.
Provide proper lighting and keep the area clean and tidy.
●
Do not use the air tool in areas where there is a danger
of explosion.
Never use the air tool in areas where there is afear of fire or
explosion because it is extremely dangerous.
Warning
■Working clothes during work
●Wear working clothes at work.
Do not wear baggy clothes, accessories such as
necklaces
etc. Wear only a
ttire suited for working. Tuck long hair under

For Safe Use
3
a hat or take other measures to prevent entanglement in
tools.
●Wear protective gear.
Wear protective gear suitable for work including a helmet,
protective goggles, earplugs, dust mask, gloves insulated
against vibration and safety shoes, etc.
Warning
■Using the Air Tool
●Avoid abusing by damaging, dropping or hitting.
Take utmost care of handling from parts damaged and
caused for defective or accidental non-function.
●Do not place your hands or cloth
, etc. close to moving
parts.
Never bring your hands or cloth
, etc. close to moving parts
while in use because it is very dangerous.
●It is dangerous to work in awkward positions.
Hold the air tool securely and guard against any unusual
movements. Conduct all work with a stable work posture.
●Avoid starting the tool suddenly.
Confirm whether the start switch is in the stop position when
connecting the air hose. When carrying the air tool,
do not
put your hand on the start switch.
●Hang securely.
Whe
n hanging the tool with balancers etc., check whether
the hanging tool such as balancers etc., is securely installed.
Periodically check that there is not any damage
to the
hanging tool and replace it if necessary.
●Do not allow the tool to come in contact with electricity.
Since the air tool is not insulated against electricity,
please
take care to use the tool in way that ensures it does not
come in contact with electricity.
●
Immediately stop using the tool when you notice any of
irregular operation and situation.
Immediately stop using the tool when you notice any trouble

For Safe Use
4
and request a maintenance inspection and repairs.
Warning
■Others
●Do not use the tool except for the specified application.
Be sure to never use the tool for work other than
the
specified application as it could lead to accidents.
●Never modify the tool.
Be sure to never use a modified tool as it could
lead to
accidents.
●Do not remove any parts.
Be sure to never use a tool with parts and screws that have
been removed as it could lead to accidents.
●
When there is a chance of danger, stop the supply of air
and remove the air hose from the air tool.
When not using the tool, conducting
a maintenance
inspection, replacing the tip of the tool, and
when there is a
chance of danger,
stop the supply of air and remove the air
hose from the air tool.
Caution
■Basic cautions for using the air tool.
●Work very carefully.
Since working carelessly and thoughtlessly or
using the tool
when tired could lead to injury or accidents, be
alert and
work carefully.
●Do not
allow access by anyone else to the work area to
those who are not involved in the work.
Do not
allow access by anyone else to the work area to
those who are not involved in the work.
It is especially
dangerous for children.
●Do not use the tool for unreasonable purposes.
Since improper use in overload
could lead to damage and
malfunction of the air tool, only use the tool within the
specified range of applications.
●Be aware of the direction of the exhaust.
Since it c
ould lead to accidents and illness, please note the
direction of the exhaust in order to avoid getting exhaust

For Safe Use
5
directly in the eyes or ears.
●Handle the air tool carefully.
Since handling the tool roughly could lead to accidents or
malfunction of the too
l, do not jar the air tool by throwing or
dropping it.
●Handle the air hose carefully.
Do not use the air hose to hold or to
raise and lower the air
tool. Damage to the air hose could lead to accidents.
●Be careful not to drop the air tool when working
in high
places.
To prevent accident caused by dropping
air tools, take
measures to prevent fall of the tool
by using safety wire etc.,
when working in high places.
●Be sure to store the tool safely.
When not in use, care for the tool adequately, keep it
out of
the reach of children and keep it in a dry place.
●Be aware of laws regarding noise.
There are national legislation
and restrictions set by each
prefecture regarding noise.
It is necessary to operate the
tool below the noise regulation limit so as
not to disturb
those in the surrounding environment.
Setup a sound
insulation wall etc., if necessary.
●Take breaks as required.
Since continuous work for extended periods of time could
lead to illness etc., take breaks as required.
If you feel
abnormaliti
es such as pain etc., immediately stop using the
tool and consult a physician.
Caution
■Regarding maintenance, inspections and repairs
●Check before use.
Be sure to check for loose screws and damaged parts etc.
before use. Loose screws and damaged p
arts not only cause
a decrease in performance and malfunction but there is also
a risk of danger.

For Safe Use
6
●Conduct maintenance and inspections.
To work safely and efficiently do not neglect maintenance or
inspections.
●Contact our company or a service factory
(assigned)
approved by our company for repairs.
Contact our company or a service factory (assigned)
approved by our company for repairs through the store or
agency etc. from where you purchased the tool.
Please be
aware beforehand we do not accept respons
ibility for
accidents and problems caused by the
improper treatment
of the tool by customers.
Prior to Use
・After opening the package, confirm that the correct accessories are
included.
・Be sure to read the instruction manual and do not handle the product or
exchange the tips of the tool without sufficiently understanding the
details.
・Always keep the instruction manual nearby. Be sure to check the manual
when there is something you don't understand.
・Keep the instruction manual in a safe place so as not to lose it. If you lose
the manual, be sure to order a new manual.
Applications
・This product is an air tool that has been designed and developed for
"Tightening and loosening bolts/nuts by compressed air with an air
compressor as the power source."
Do not use the air tool in the following situations.
* Do not use for more or less work than shown in the specifications.
* Do not use this product after modifications or welding.
* Do not use with power sources other than compressed air (oxygen,
acetylene, and propane, etc.).
* Do not use in water or an ignitable atmosphere.
* Do not use in other unexpected, different applications.

How to use the tool
7
・For handling and operation, be sure to follow the procedures in the
instruction manual.
・The following uses are prohibited.
* When the sockets or bits are incorrectly installed nor fit properly in size.
*Whenthe work stance is unstable or when the tool is not properly held and
cannot be operated.
* The work environment is slippery or unstable.
* Use in work other than tightening and loosening screws.
* When it has been remodeled and the parts are inadequate.
* Use with more air pressure than shown in the specifications.
*Use in conditions that exceed the recommended load of this product.
・When not in use or in the absence of the operator, stop the air
supply and remove it from the pipe.
Preparation before work
●Confirmation of air pressure
The air pressure of this product is 0.6MPa. Be sure not to use air
pressure exceeding the specifications since it influences performance,
lifespan and safety.
●Removal of the drain
When impurities such as moisture and rust in the pipes enter this product,
it could lead to a malfunction. Clean the drain in the compressor before
use. To supply normal dry air to this product, be sure to install the air filter
and remove any moisture or dirt.
●Selection of hoses
Refer to the specifications for the size of the air hose for the air supply.
When the internal diameter of the air hose is too small, sufficient power
cannot be exerted due to a drop in pressure. Note a similar pressure drop
is also generated if the hose is too long.
●Air coupling
When using the attached air coupling, purchase a compatible hose and
connect. When installing a hose directly in this product, purchase a hose
connection coupling separately. In both cases, confirm the size of the

How to use the tool
8
connected hoses.
●Turning the tool on for the first time following purchase
When first installing this device after purchase or when changing the
hoses, blow out any dirt in pipes and hose before installation. Also, it is
necessary to idle the device for a few seconds because oil in this tool is
expelled with the exhaust.
●Lubrication
Lubricate for the lubrication of the motor and exhaust impurities. It is easy
to supply lubricant if the lubricator is installed in the piping because the
lubricator will automatically drip lubricant in the tool. Or, you canlubricate
manually from the air supply port before or after use. (Oil: ISO VG10 or
equivalent hydraulic oil.)
●Tool Tips (Sockets/bits/extension bars, etc.)
When using the tip of the tool for manual operation there is a risk of
accident as the tip of the tool may become damaged and shatter, etc. Be
sure to use power tools for this device.
●Tightening bolts/nuts
To tighten bolts/nuts, first tighten bolts/nuts by hand for 1-2 revolutions or
a couple of thread pitches. After tightening is complete, immediately let
the lever released and stop the tool. By continuing to tighten further, bolts
could be broken and wear / tear on parts of the hammer will accelerate.
●When bolts/nuts do not loosen
When bolts/nuts do not loosen or when the torque does not tighten as
expected, an impact wrench with greater power is necessary.
●Using for unintended purposes
Do not throw or beat on the tool because it causes damage to the unit. Be
aware that dripping the tool in the organic solvents will deform the tool.
●Use in cold areas
Moisture collected internally may freeze in winter. Be sure to oil following
use and store in a safe place after removing any moisture.

How to use the tool
9
How to use the tool
●Starting and stopping
1.Connecting the air coupling.
2.Supply air with the compressor.
3.When the start lever is pulled or pushed,
the function starts.
4.When the start lever is released (disengaged),
the function stops.
5.When the start lever is pulled (pushed) fully,
it rotates at a high speed and when it is
pulled (pushed)slightly it rotates at a low speed.
●Changing the direction of rotation.
When the right/left switch lever is set to "R,"
it rotates clockwise.
When it is set to "L," it rotates counter
clockwise.
Do not operate the rotation switch while
pressing the start lever.
●Adjusting the torque.
Torque adjustment is possible by aligning the
right/left switch lever mark with the numbers. "1" is
the minimum and "3" is the maximum.
●Installing sockets.
There is a pinhole on the point of the anvil (□drive part). Align the
pinhole of the socket and attach the socket with the pin and O-Ring.
Install as shown in the figure.
* It is very dangerous because if it is not securely attached, the socket
may detach and fly off. Do not attach the socket when the tool is idling.
About handling
* Do not touch any rotating parts. It is very dangerous and could lead to
injury.
* Do not idle the tool with the tip of the tool without a load.

How to use the tool
10
* Start the product after confirming the rotation direction.
* When work is discontinued or finished, be sure to turn off the air.
* Do not point the exhaust towards people or fire. The exhaust is
dangerous since it contains oil.
* Do not touch the tip tool and screws immediately after the work because
they became hot from friction during work.
* When there is any abnormal operation, immediately turn off the air and
stop working.

Maintenance / Repairs
11
・We recommend periodic inspections for safe, worry free use. If
inspections are neglected, it may affect the performance, lifespan and
safety of the product.
・Inspection (maintenance) should be conducted only by those who
carefully read and fully understood the instruction manual for this
product.
・Contact the store from where the product was purchased for repairs. Do
not repair by yourself.
Inspection coverage of the product
When conducting inspections, be sure to remove the hose coupling and do
not supply any air.
●Anvil (□drive part on the tip)
Worn out …It will deteriorate the performance and decrease efficiency.
Early exchanging of parts is recommended.
Cracks ……Discontinue use and request repairs since there is a risk of
breaking and it is dangerous.
●Socket
Worn out square and hexagonal heads
…It may deteriorate the performance and the
socket may detach from the anvil.
Worn out pinholes …It may disable the fixing of the socket and the
socket may detach from the anvil.
Cracks …Discontinue use and replace with new parts since there is a
risk of damage and shattered fragments.
●Hose couplings
Loose screws …Re-tighten since it is dangerous if the hose comes off.
Worn out …Replace with new parts since the coupling may come off
if the connection is loose.

Maintenance / Repairs
12
●Start lever
Return condition …Confirm whether the lever returns correctly. It is very
dangerous to use the tool continuously in the
situation where the lever does not return correctly
because the tool will start suddenly after connected.
If the lever does not correctly return, please request
repairs.
●Bolts for each part
Loose bolts ……… It may lead to air leaks and malfunctions. Please
re-tighten the bolts.
●Surface damage
Cracks …………… Discontinue use and request repairs since there is
a risk of damage and shattered fragments.

Troubleshooting
13
Air tool troubleshooting
Symptom Cause Remedies
Air is not provided. Turn on the air.
The hose is twisted. Straighten the hose.
Air pressure is low. Adjust the air pressure.
Parts are rusted due to a
lack of lubrication. Lubricate/disassemble and
adjust.
Dirt contamination. Disassemble and adjust.
1. No rotation
Malfunction (worn
out/damaged, etc.) on
motor and hammer. Replace parts.
Rate of air flow is
inadequate. Confirm air flow rate.
Air pressure is low. Adjust air pressure.
2. Rotation is
uneven. Parts are rusted due to a
lack of lubrication. Lubricate/disassemble and
adjust.
Change of shape of the
start lever pin. Replace parts.
Change of shape of the
throttle valve. Replace parts.
Damage to throttle valve
and valve base. Replace parts.
3.Rotation does
not stop.
Contamination by a foreign
substance in the throttle
valve. Disassemble and adjust.
4.Switch lever or
the adjustment dial
cannot be set.
Stop spring is worn out,
damaged or rusted (Stop
ball does not come out). Install new parts.
5. Cannot adjust
with the switch
lever or adjust dial.
Rust and dirt
contamination. Disassemble and adjust.
6.The socket
cannot be
fastened. Socket pin damage. Replace parts.

Troubleshooting
14
7. Air is leaking. Trouble with the valve
(O-ring damage, ball rust,
or worn-out, damaged and
rusted springs) etc.
Replace parts.
Bolts came loose. Install new parts.
Worn out and damaged
bearings. Replace parts.
Damage to the hammer
case and impact part. Replace parts.
Worn out and damaged
rotor blade. Install new parts.
The rotor blade does not
come out at rotating. Install new parts.
8.Abnormal noise
is generated.
Run out of lubrication and
grease. Lubricate/disassemble and
adjust.
9.It rotates
without a load but
with a load it does
not rotate and the
power decreases.
Parts of the hammer are
damaged. Replace parts.
10.Water comes
out. The drain is clogged. Clean the drain.
Request repairs immediately when the tool is in a defective and abnormal
condition, etc., since it could lead to a product malfunction and accident.
Please consult with the store from which it was purchased for repairs.
Storage
Please store in a safe location and be aware of dust, humidity, dew and
freezing.

Exploded diagram drawing & Parts list
15
Specifications
Square Drive Size 25.4mm
Capacity(Bolt Dia.)39mm
Working Torque Range 353-1607Nm
Weight 8.9kg
Overall Length 269.5mm
Free Load 4100rpm
WorkingAir Pressure 0.6Mpa
Air Consumption 0.7 ㎥/min
Air Compressor 3.75kw or bigger
Air Hose Inner Dia. 12.7mm
Accessories
VESSELAir Coupling(BPB-4)1pc
“L” Wrench(A/F 5mm)1pc
Description

Exploded diagram drawing & Parts list
16

Exploded diagram drawing & Parts list
17
Parts List
Index No Description Size Number Required
per unit
1 Hammer Housing Complete 1
<2> Oil Seal VB40525 (Installed No. 1)1
<3> Pressed In Bushing (Installed No. 1)1
4 Washer, Spring M8 4
5 Hex Cap Bolt M8×37 4
6 D- Handle 1
7 Washer, Spring M6 4
8 Hex Cap Bolt M6×18 4
9 Bushing Anvil 1
10 Retainer Ring Anvil CP 1
<11> Ring, Retainer (Installed No. 10)1
<12> O- Ring, Retainer Ring NOKCO0414A(Installed No. 10)1
13 Hammer 1
14 Driver 1
15 Frame, Hammer 1
16 Front Gasket, Motor Housing 1
17 Motor Housing, Complete 1
18 Washer, Spring M8 4
19 Hex Nut M8 4
<20> Bearing 6205Z(Installed No.21)1
<21> Endplate Complete, Front (Installed No.17)1
<22> Cylinder Complete (Installed No.17)1
<23> Pin, Cylinder SP6×14 (Installed No.22)2
24 Rotor 1
25 Blade, Rotor 6
26 Endplate Complete, Rear 1
<27> Pin, Endplate SP4×10(Installed No.26)1
<28> Bearing 6204(Installed No.26)1
29 Rear Gasket, Motor Housing 1
30 Washer, Spring M8 4
31 Hex Cap Bolt M8×25 4
32 Reverse /Regulator Lever, Complete 1
33 O-Ring, Reverse Valve P16 1
34 Valve, Reverse 1
35 Stopper, Reverse Valve Retainer SP4×18 1
36 Spring, Reverse Lever Retainer 1
37 Ball, Reverse Lever Retainer φ4 Steel Ball 1
38 Case Cover 1
39 Throttle Lever 1
40 Screw, Throttle Lever RetainerM4×5 Flat Sq. 1
41 Fixing Pin, Plate M4×8 Dish Screw, Cross Hollow 2
42 Throttle Plate 1
43 Pin, Throttle 1
<44> Bush, Throttle Valve (Installed No.17)1

Exploded diagram drawing & Parts list
18
Index No.
Description Size Number Required
per Unit
45 Valve, Throttle 1
46 Spring, Throttle 1
47 Handle Cap 1
48 Screw, Handle Cap Retainer M4x12 Pan Screw, Cross Hollow 1
49 Inlet Bushing 1
50 Case, Silencer 1
51 O-Ring, Silencer Case N18 1
Parts with < > marked shall not be supplied individually even if ordered since it is an integrated component.
●The contents of this manual are subject to be changed without previous notice.

Manufactured by:
17-25, Fukae-Kita 2-chome,
Higashinari-ku, Osaka 537-0001 Japan
Tel : +81 6 6976 7778 Fax : +81 6 6972 9441
E-mail : export@vessel.co.jp
URL : http://www.vessel.jp
20061220
MODEL
GT-3800PX
SERIAL NO.
Table of contents
Other Vessel Impact Driver manuals

Vessel
Vessel HFB-300-1 User manual

Vessel
Vessel GT-3500GE-V-US User manual

Vessel
Vessel GT-1700BX User manual

Vessel
Vessel GT-1400P User manual

Vessel
Vessel GT-3500GE Assembly instructions

Vessel
Vessel GT-P10S2 User manual

Vessel
Vessel GT-P12 User manual

Vessel
Vessel 20USB-S1F Operator's manual

Vessel
Vessel GT-3500GE Assembly instructions

Vessel
Vessel GT-1600VP User manual