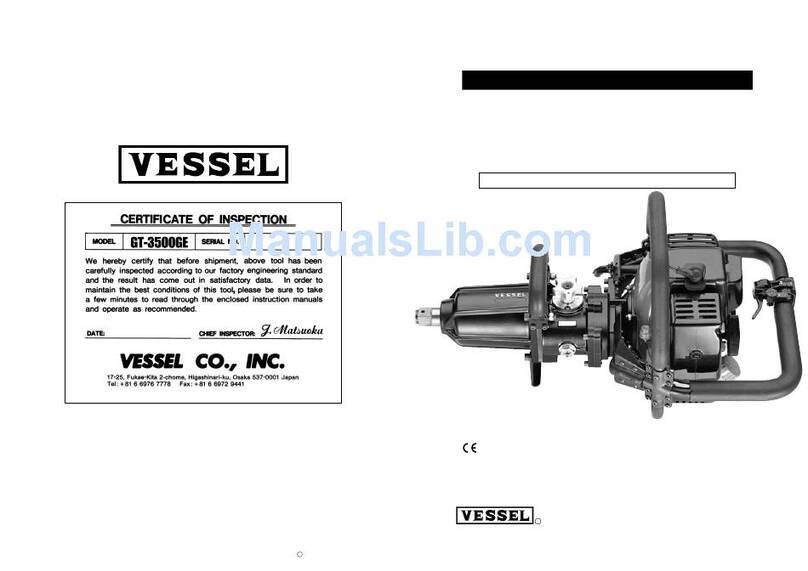
Vessel GT-3500GE-V-US User manual

4

1

2

3

CHAPTER 1 For safe use
4
Preface
Thank you for purchasing the gasoline enginetype impact wrench GT-3500GE –V - US.
GT-3500GE-V-US is a high-power two- stroke engine which can be used in places where power supply is not available. Please be sure to
read this manual carefully and fully understand thecontents before usingtheproduct, to ensure safe use
Warning: Pleaseread this manual after fully understanding the following terms
■The safety precautions are listed below. In each case, importantcontents concerning safety are described, so besure to observe them.
Warning
When it is assumed that the user may bekilled or seriously injured if improperly handled
Caution
When it is assumed that there is a possibility that the user will be injured or property damaged when handling the product
incorrectly.
■Please keep this manual in a place where you can useit at any time, and read it repeatedly
■If the warning label on the product is lost or soiled, promptly get it through our company or the dealer from which you purchased it, and put it
correctly
■When transferring or lending this product, be sure to attach this manual
If you have any questions about the product or the contents of this manual,please contact us or your dealer
Warning
■■Be sure to read this manual carefully and fully understand thecontents beforeusing the product.
Warning
■Take care when handling fuel.
●Storage
Gasoline is highly flammable and must behandled and storedcarefully. Gasolineshould be stored ina specially approved
container
●Handling or mixing gasoline at outdoor where there is no sourceof sparks or heat.
Gasoline is easily vaporized and highly ignitable.
● Do not smoke
Keep cigarettes away because of possible ignition.
●Refueling
・Always stop theengine when refueling.
・When removing the fuel tank cap, gasoline may blow out, so loosen it carefully.
・When refueling the fuel tank, do not fill the tank with fuel, but fill the tank about 10mm below the top of the tank .
・Allow the engine to cool down before refueling.
・Tighten the fuel cap securely after refueling.
●Before starting the engine
Wipe off any spilled fuel before startingthe engine.
When starting theengine, besure to start it at least 3m away from the refueling place.
●Never open the fuel tank cap immediately after stopping the engine.
●The engine remains hot for a while after the engine stopped. Do not place the engine near flammable materials such
as driedgrass. There is arisk offire.
●Storage
Makefuel tank empty and dry before the storage.
Keep the machine and fuel away from heat and fire.
Makesure that vaporized fuel does not reach any source offire or heat
Warning
■Work environment
●Use in an environment where ventilation is ensured.
This product emits exhaust gas. There is a risk of suffocation so useit outdoors or in a well-ventilated environment.
●Do not use where there is a risk of explosion
This machineuses gasoline as fuel. Never use the product where there is a danger of ignition or explosion.
Warning
■Clothes during work
●Please work with proper clothes
Do not wear necklace or large clothes. Also cover your long hair with a hat so that it does not get in thetool.
● Use work protection equipment.
To protect the human body, besure to usehelmets, protective glasses, earplugs, dust masks, anti-vibration gloves,

5
safety shoes, and other work protective equipment according to the work
Warning
■When using an impact wrench
●Keep hands and cloths away from moving parts
It is extremely dangerous duringuse. Donot bring your hands or cloths near any moving parts.
●Keep the grips clean of oil, fuel and dirt.
●Workinginanunreasonable posture is dangerous.
Please work in a stable working posture by securely holdingthe impact wrench and respondingto sudden movements.
●Avoid unexpected starting.
When starting the engine, makesure that thethrottle leveris in the stop position. When carrying, do not put your
hand on thethrottle lever
●Make sure when hang.
When hanging the unit with a balancer, etc., check that the hooks are securely attached. Check the hooks regularly
and replace it if necessary.
●Do not contact with electricity
This machineis not insulated from contact with electricity. Usewith care not to contact electricity.
●If you feel any abnormality, stop using it immediately
If you feel any abnormalityduring use, stop using immediately and request inspection and repair.
Warning
■Others
●Do not usefor any purpose other than specified.
Never use it for any purpose other than thespecified one, as it may cause an accident.
●Do not remodel
Never use theproduct after remodeling it, as it may causean accident
●Do not remove parts.
Never remove the attached parts or screws,as doing so may cause an accident
●If a danger is expected, stop the engine immediately.
Be sure to stop the engine when changing accessory tools or when other dangers are anticipated.
Caution
■Basic precautions when using
●Please work carefully
When you are careless, insaneor tired, itmay cause injuries or accidents.
●Keep away fromanyone other than authorized people.
Do not bring anyone other than the personnelinvolved in thework place.Especially children aredangerous.
●Do not use it with violence.
Violence may cause damage or failure, so use it carefully.
●Be careful of thedirection of exhaust
Be careful of theexhaust direction so that the exhaust does not directly hit your eyes orears, as it may cause an accident or
illness.
●Exhaust gases are extremely hot. Keep flammable materials, people and animals away 1m from the exhaust direction of
muffler.
Do not block exhaust gases with any objects. There is a risk ofcaching fire and getting burn.
●This machine will be hot.
This product gets hot when used so pleasedo not touch anythingother than the handleand theoperation unit.
●Please handle carefully.
Rough handling may cause an accident or a malfunction. Do not throw or drop it to givean impact.
●Be careful not to drop the machinewhen working at heights.
To prevent accidents caused by dropping, besure to take safety measures such as using safety wires when working in high
places.
●Please pay attention to the noise regulations
Regarding noise, there are regulations specified by laws and ordinances of each area.It must be used below the
regulation value. If necessary, provide sound insulation walls
●Please take a break at a regular interval.
Prolonged continuous work may causeillness, so take a break at a regular interval. If you feel any abnormality such as pain,
stop using it immediately, consult a doctor,and follow the instructions.
Caution
■Maintenance, inspection and repair
●Be sure to check before use.

6
Before use, besure to check for loosescrews and damage to components.Not only may it causeperformance degradation
or failure,but it can also be dangerous.
●Be sure to perform maintenance and inspection
Forsafe and efficient work, do not neglect maintenance and inspection.
●Please contact us or our authorized (designated) service factory for repair
For repairs, please contact us or our authorized (designated) service factory through your dealer or agency. Please note
that we will notbe responsible of any accidents or malfunctions caused by the customer's own actions.
Before use
・After unpacking, check that the accessories are correctly installed.
・Be sureto read the instructionmanual and do not operatethe product or change the accessory until you fully understand it.
• Always keep this instruction at hand.If you have any questions, be sure to checkthe instruction manual.
・Please keep theinstruction manual carefully so as not to lose it. If you loseit,pleaseorder a newone again.
Use
・This product is a tool designed and developed for the purpose of "the bolts and nuts tightening and loosening using the engine as a
power source" . Do not use it fora different purpose such as:
* Use above or below the abilities indicated in thespecifications.
* Modify or weldproducts.
* Use other fuel than mixed gasoline.
* Use in water or in a flammable atmosphere.
* Use for other unexpected uses.
Safety related symbols
Indicates a danger warning, or caution.
Before using the product, read the instruction manual carefully
and understand the contents before using it
This product uses mixed gasoline.
Gasoline is highly flammable and please notethat it is dangerous.
Stop the engine before refueling.
Keep heat and fire sources away from fuel
This product generates exhaust gas when used
The exhaust gas contains toxic components and is extremelydangerous.
Do not use in poorly ventilated environment
This product gets hot when used.
To avoidthe risk ofburns, do not directly touch the hot parts or others, stick to the handle
and lever.
Please usesafety glasses
Pleaseuse earplugs.
Vibration occurs.

7
CHAPTER2 Specifications
Sound Level
PA
L
〔dB〕
104.8
WA
L
〔dB〕
115.8
Vibrations Level
Without damper
〔m/s²〕
18.7
With damper
〔m/s²〕
14.7
* Vibration valueahv = 3-axis composite valueof frequency correctionvibration acceleration executionvalue
Vessel Co., Inc.
〒537-0001
Fukaekita 2 -chome, 17 -25, Higashinari ku, Osaka, Japan
Product name
Portable impact wrench
Model name
GT-3500GE-V
2006/42/EC(98/37/EC)
Vibration
measurement
standards:
JIS B 7761-1
JIS B 7761-3
JIS B 7762-7
Day vibration exposure
8
)8( T
ahvA=
(m/s²)
T = Exposure time per day (actual usage time per day)
Noise measurement
standards
ISO15744

CHAPTER2 Specifications
8
Engine
Engine model
CER420
Type
2 -stroke, air-cooled
Engine exhaust amount〔cm3〕
41.5
Idling speed〔m-1〕
2500-3000
Maximum engine output〔kw〕
(ISO8893)
1.57
Guaranteed engine output
〔kw〕
(ISO8893)
1.54
Mixed gasoline
Use only non-leaded regular petrol.
two-stroke oil mix 50~25:1 ratio must be approved for
air-cooled engines.
Fuel tank capacity〔cm3〕
1000 (1.06qts)
Carburetor type
Diaphragm
Spark plug
Type
BPM8Y
Electrode gap [ mm]
0.6-0.7 (0.024-0.028 in)
EMI
Test item
lawn mower
identification
lawn mower CE420
Serial No.
F00003
Sample No.
1
Sample receipt date
October 29, 2012
Test specification
CISPR 12:2007+A1:2009
Test date
October 30,2012
Test results
PASS
The value is smaller because the overall length is shorter than the lawnmower that
performed this inspection.
Impact wrench
Square drive section (mm)
25.4
Tightening torque (Nm)
Full throttle: 1700
Half throttle: 900
Tip rotation speed (m-1)
1200
Ability bolt diameter (mm)
32
Weight (kg)
Without damper: 19.8
With damper: 21.6
Dimensions (mm)
Length: 700
Height: 330
Width: 390
Accessories
Hex wrench (mm)
4mm 1pc.
5mm 1pc.
6mm 1pc.
Plug wrench
1pc.
Spanner (mm)
10-13 1pc.

CHAPTER3 Before use
9
Warning
・Be sure to follow the instructions in the operation manual.
・The following useareprohibited.
*Tip isnotproperlyinstalled orisnottherightsize.
*Workingpostureisunstable,cannotbeheldproperly,andcannotbeoperated.
*Slippery,unstable environment.
*Useforpurposes otherthan screws/boltstightening andloosening.
*Usewhen thereisnomodification or lackofparts.
*Usefuelother thanspecified.
*Useinan environmentwherethereis ariskoffireor explosion.
*Useina poorlyventilated environment.
*Useunderconditionsthat exceed theusageload ofthis product.Etc...
・When notin useorwhen notpresent ,removefuel and storein an environment freefrom fireandheat.
• This product getshot whenused.Toavoid theriskofburns,donot directly touch thehotparts.
Warning
●Exhaust gas
This product generates exhaust gas when used. The exhaust gas contains toxic components and is extremely dangerous. Do not use
in poorly ventilated environment
Warning
●Protectiveequipment
Useprotective equipment required to work such as safety glasses, ear plugs,dust-proof mask, helmet,safety shoes,and anti-vibration
gloves.
Work clothes shouldbeofappropriate size,fastenbuttons, zippers, belts,etc.,andbecarefulnotto get longhair caughtinthemechanism.
Caution
● Recommended oil
Use2cycle engineoilformixed gasoline.
Do not use water-cooled outboard motor2 -strokeoil. This typedoes not include air-cooled2 -stroke additives for engine and it may
damage theengine.
Do notuseautomobile motoroil.This typedoes notincludeair-cooled2 -strokeadditives forengine anditmaydamage theengine.
Caution
●Recommended fuel type
Use clean, unleaded petrol with an octane rating of 85 or higher. Useof unleaded petrol results in fewer combustion chamber deposits and
longer spark pluglife.Useofpremiumgrade fuelis notnecessary orrecommended.
IMPORTANT: Never usegasoholor alcohol blended fuelsin this engine.
Warning
●Blended gasoline
Theengineused for theGT-3500GE-V has atwo-cycledesign.Engineinternal moving parts (crankshaft bearings, piston bearing, piston,
cylinder wall contact portion, etc.) need 2 cycle engineoil forlubrication. Improper mixing ratio can damage theengine.
Petrol
Two-strokeoil
50:1
25:1
ISO-L-EGC/EGD, JASO classFC/FD, or
equivalent two-strokeoil
ISO-L-EGB, JASO classFB, or
equivalent two-strokeoil
1liter
20mL
40mL
2liters
40mL
80mL
3liters
100mL
200mL
※Do not mixgasolineinthetank. Prepare gasolinemixed in thecorrect ratio inadvanceandrefuel.
· When mixing gasoline, use an approved container.
・Put amark onthecontainer sothatitcanbeidentified asmixedgasoline.

CHAPTER3 Before use
10
・Make surethegasolineisevenlymixed beforerefuelinganddonot spill.
Warning
●Handlingoffuel
1. Petrol is highly flammable and must be handled and stored carefully. Use a container approved for fuel for storing petrol and/or fuel/oil
mixture.
2. Mixandpourfueloutdoors andwherethereareno sparksorflames.
3. Do notsmoke nearfuel or engine, or whileusingtheengine.
4. Do notoverfill thefueltank.Stopfilling10mmfromthetopofthetank.
5. Wipeupanyspilled fuel before startingtheengine.
6. If thefuelisleaking duringoperation,stop theengineimmediately,andrepair.Itmaycausethefire.
7. Movethe machineat least 3maway fromthe fuelinglocation beforestartingtheengine.
8. Do notremovethe fueltankcap immediately after stoppingtheengine.
9. Allow the engine to cool before refueling.
10. When removingthefuel tank cap,gasoline may blowout, so loosen it carefully.
11. Drain thetankandruntheenginedrybeforestoringthemachine.
12. Store fuel and the machine away from open flame, sparks and excessive heat. Make sure fuel vapors cannot reach sparks or open
flames fromwater heaters, furnaces,electric motors, etc.
●OPERATOR SAFETY
1. Readandunderstandthis Manualbeforeusingthisengine. Be thoroughlyfamiliar withtheproper useofthisengine.
2. Always weareye protectionand hearingprotection.
3. Always wear heavy long pants, a long sleeved shirt, boots and gloves. Do not wear loose clothing, jewelry, short pants, sandals, or go
barefoot. Secure hair soitisaboveshoulder height.
4. Never operate this enginewhen youare tired,ill, orunder the influenceofalcohol, drugsor medication.
5. Never start orruntheengineinsidea closed roomorbuilding. Breathingexhaust fumes cancausedeath.
6. Keep the grip of handles cleanof oil, fuel and dirt.
●ENGINE OPERATINGSAFETY
1. THIS ENGINE CAN CAUSE SERIOUSINJURIES.Readtheinstructionscarefully.Befamiliar withallcontrols andtheproperuseof theengine.
2. Inspect the engine each use. Replace damaged parts. Check for fuel leaks. Make sure all fasteners are in place and tightened securely.
Followthemaintenance instructionsbeginningon page12.
3. Never allow children to operate the engine. It is not a toy. Never allow adults to operate the engine without first reading this Operator’s
Manual.
4. Usethis engineonly indaylightor goodartificiallight.
5. Never operate this engine withoutattachclutchcasing. May clutchcome flyingand will cause seriousaccident.
6. Do not put hands or feet near or under any rotating parts. Keep clear at all times. Keep all parts of your body away from the rotating parts
andhotsurfacessuch asthemuffler.
7. The engineis hot during or immediately after operation. Do not touch themuffler and cylinder. In addition, Do not place near flammable
materials(ex.fuel,hay)engineto before cool down.
8. When increasing the enginespeed,operatethethrottle slowly.Ifoperaterapidly, maycauseto unexpected accident.
9. Do not touch “spark plug cable” and “spark plug cap” during the engine operation. There is riskofelectric shock.
10.Neverusereplacement parts that arenotapprovedbyVESSEL.
11.Usetheright toolforthejob.Do not usethis engineforany jobthat is notrecommended byVESSEL.

CHAPTER4 How to use
11
Caution
How to operate the engine
●Before starting the engine
1. Please check whether there is any abnormal (damage, loose bolt, missing parts…)
2. Create the mix fuel-oil and fill the fuel tank according to the instruction manual.
3. Please put the unit on the ground.
4. Please keep people, children or animals away from the work area.
Caution
Procedure to start the engine.
•Perform the following steps to properly start the engine.
1. Put the unit on a flat place.
2. Set the gear change lever to neutral. (Fig. 4-1)
3. Press the priming pump several times to send fuel to the carburetor
and make sure that the fuel is no longer foamy.
4. Set Choke lever (Figure 4-3) position to " ".
5. Pull the start lever and press the lock button (Figure 4-2). By
pressing the lock button, throttle is locked at half position. To unlock it,
pull the lever again.
6. Pull the starter handle and start the engine.
* Do not pull the starter rope completely when pulling the starter
handle. The rope may break and cause a malfunction.
7. When the engine starts, return the choke lever to the ”l l l”position, If the engine stops, start it again.
8. If the engine does not start in step 7, restart from step 4.
9. When the engine starts, return the throttle lever and let the engine idle for a few minutes to warm up.
Caution
●How to stop the engine.
1Release your hands completely from the throttle lever.
2Press the stop switch until the engine stops completely. (Fig. 4-3)
Fig. 4-3
Fig. 4.2
Fig. 4-1

CHAPTER4 How to use
12
Caution
●Adjusting idling speed
The carburetor of the engine of this product cannot be adjusted.
Only idle speed can be adjusted.
The rotation speed is about 2500-3000rpm when idling
To adjust the idling speed, slowly turn the adjusting screw
while idling. (Fig. 4-4)
・To speed up idling, turn the adjustment screw clockwise.
・To speed down, turn the adjustment screw counterclockwise.
・Adjust should be made when the engine is running.
・Be careful not to touch the moving parts.
・Please remove the tip tool etc.
・Keep people away during the adjustment.
Caution
●Switching rotation direction
When the gear change lever (Fig. 4-1) is set to "R", it rotates clockwise.
When set to “L”, it will rotate counterclockwise.
When the gear change knob is hard to turn when the engine is working,
pull the trigger a little to unlock.
When the gear change knob is hard to turn when the engine is not
working, turn the anvil a little to unlock.
Do not turn gear change knob while pulling the throttle lever.
Caution
●Adjustment of torque
This product has full throttle mode and half throttle mode by pushing
adjustment button. You can make fine adjustments using the adjustment
switch during half throttle.
"1 "is maximum, “3 " is minimum.
Caution
●Installation of socket
There is a pin hole at the end of the anvil (□ drive). This have to be aligned with the pin hole of the socket and secured with
the pin and O-ring.
* If not securely fixed, the socket may come off and pop out, which could be harmful. In addition, never run idle with a
socket
Warning
About handling
* Do not touch rotating parts. It is very dangerous and may cause injury.
* Do not run idle with the accessory tool attached.
* Check the direction of rotation before starting the product.
* Be sure to stop the engine when you stop or finish the work, or when you change the tools and parts.
* Do not touch the tools and screws during work because they are hot due to friction.
* Engine and other parts become hot. Do not touch anything other than the handle or the operation unit.
* If an abnormal occurs, stop the engine immediately and stop the work.
Fig. 4-4
Fig. 4-5

CHAPTER5 Maintenance and inspection
13
Caution
●Air filter (Fig. 5-1)
Maintenance intervals
・Clean every 100 hours and more often if used in a dusty working environment.
How to clean the air filter
1. Remove the filter cover and the foam element.
2. Rinse with warm soapy water. Dry the filter completely before use.
3. Apply a thin coat of SAE30 motor oil to the filter and remove any excess oil.
4. Reassemble the filter cover and the foam element.
Caution
●Fuel filter
Maintenance intervals
The fuel filter must be replaced every 100 hours of operation
How to replace the fuel filter (Figure 5-2)
The fuel filter is attached to the end of the pickup hose in the fuel tank
Replacement procedure :
1Ensure that the engine is not running.
2Make sure the fuel tank is empty.
3Loosen the fuel tank cap and remove it.
4Using a wire hook, carefully pull out the fuel filter from the fuel tank.
5Grab the fuel hose and remove the filter. Be careful not to disconnect
the fuel hose at that time
6Replace the fuel filter while holding the fuel hose
7Carefully return the new fuel filter to the fuel tank
8Before refueling, check that the fuel filter is not trapped in the corner
of the fuel tank and that the hose is not twisted or broken.
Caution
●Spark plug
・It is necessary to remove the spark plug from the engine and check
it every 25 hours
・Replace the spark plug every 100 hours of operation
Maintenance of spark plug (Fig. 5-3)
1Cooldown the engine and remove the socket head screws and remove the
Rear cover by lifting up rib as Figure 5-3.
2Twist the connecting cord boot of the spark plug back and forth several times
to loosen the boot, and pull it out from spark plug.
3Remove the spark plug with the correct tool
4Clean the electrodes with a brush
5Adjust the electrode gap to 0.6mm-0.7mm
6Replace Spark plug when it is dirty, damaged, or worn out.
7Be careful not to overtight the spark plug during installation. (Tightening
torque is 10.7Nm-16.6Nm)
8Reassemble the rear cover and tighten the screw.
Fig. 5-2
Fig. 5-3
FILTER COVER
FOAM ELEMENT
図5-1

CHAPTER5 Maintenance and inspection
14
Caution
●CYLINDER COOLING FINS
MAINTENANCE INTERVAL
•The cylinder cooling fins should be cleaned after every 25 hours of operation, or
once a week, whichever comes first.
•Air must flow freely around and through the cylinder cooling fins to prevent
engine overheating. Leaves, grass, dirt and debris buildup on the fins will
increase the operating temperature of the engine, which can reduce engine
performance and shorten engine life.
COOLING FIN CLEANING
1. With the engine at ambient (room) temperature, loosen the knob and remove
the air filter cover.
2. Remove the two socket head screws and remove the rear cover. It can be
easily removed by pushing the rib up as shown.(Fig.5-3.)
3. Loosen the knob and lift off the cylinder cover.
4. Clean all dirt and debris from the cooling fins and from around the cylinder base.
5. Do not overlook cleaning of the cooling air intake area below the crankcase and above the fuel tank! This area must be
free of debris and obstruction for the engine to cool properly.
6. Reinstall the cylinder cover and the air filter cover.
7. Reinstall the rear cover. Press the outside of the rib to attach it to the topcover, then tighten the screws. (Refer to the
figure of SPARK PLUG MAINTENANCE.)
Caution
●Long-term storage
Transfer remaining fuel to a suitable fuel storage container
1Run the engine to remove any remaining fuel in the carburetor
2Perform necessary maintenance and repairs.
3Remove the spark plug and put a little engine oil in the cylinder.
4Slowly pull the starter to move the piston to the top of the cylinder.
5Reinstall the spark plug
6Store the machine in a dry place without excessive heat, sparks or fire.
・When the starter is pulled without the spark plug, oil may blow out from
the opening.
・It is dangerous if oil gets into your eyes or gets on your skin.
・Wear protective equipment such as eyeglasses and remove your face
from the opening when you pull the starter.
We recommend periodic inspections otherwise it will affect the
performance, lifetime and safety of the product.
・Inspection (maintenance) should be performed only by those who have read and understood the instruction manual for
this product.
・For repairing, contact your dealer and don’t do it yourself.
Warning
●Spark Arrester
POTENTIAL HAZARD
・Muffler surface, Tail pipe and Adjustable tail pipe becomes hot when GT-3500GE-V is in operation and
remains hot for some time after the engine is shut off.
WHAT CAN HAPPEN
・Contact with hot muffler surface, Tail pipe and Adjustable tail pipe could cause a burn.
HOW TO AVOID THE HAZARD
・Make sure the muffler, Tail pipe and Adjustable tail pipe is cool before inspecting and cleaning the spark
arrester.
Fig. 5-5
Fig. 5-4

CHAPTER5 Maintenance and inspection
15
Maintenance Interval
•The spark arrester should be inspected and cleaned after every 25 hours of operation.
Replace the screen if it cannot be thoroughly cleaned or if it is damaged.
●Spark Arrester Maintenance
1Tail pipes and adjustable tail pipes are very dangerous as they become
hot after use.Wait for the temperature to decrease before servicing the
spark arrester.
2Loosen the Phillips screw (M4 x 8) (part number 395) and pull the
adjustable tail pipe (part number 394) to remove it.
3Pull out the spark arrester (part number 396) from the tail pipe bracket
(part number 340).
4Clean spark arrestor with a non-flammable solvent and a hard brush.
5Be careful not to deform the spark arrester when removing or cleaning.
6Insert the cleaned and dry spark arrestor into the tail pipe bracket.
7Insert the adjustable tail pipe into the tail pipe bracket with the spark
arrester inside.
8Adjust the angle of the inserted adjustable tail pipe and tighten the
Phillips screw (M4 x 8) with the U nut (part number 358) to secure it.
Caution
Product inspection range
When performing the inspection, be sure the engine is stopped and empty. The durability of parts differs depending on the
frequency of use.
When the impact or rotation sound is abnormal (the impact rhythm is different, the work efficiency is reduced, the
vibration is large, etc.) request inspection and repair.
● Anvil (□ drive at the tip)
Wear out : Reduce performance and efficiency. We recommend early replacement.
Cracks. There is a risk of breakage, so stop using and request a repair.
●Socket
Wear out of square part: It may cause performance degradation and fall off from the anvil.
Worn pinholes: Cannot be fixed and may fall of the anvil.
Cracks: There is a risk of breakage and scattering. Stop using and replace with a new one.
●Throttle lever
When pulling the throttle lever, take care that there is no abnormality in pulling or returning.
●Bolts
Make sure all the bolts are tightened.
●Leakage of fuel or oil
Engine: If fuel leakage is confirmed, it may cause an accident or malfunction. Stop using it immediately, check the engine,
and request repair if necessary.
Main unit: If an oil leak is confirmed, it may cause an accident or breakdown. Stop using the unit immediately, check the
unit, and request repair if necessary.
●Fuel pipe
Check that the fuel pipe is not twisted or broken. When it is broken, please replace it.
Fig. 5-5

CHAPTER5 Maintenance and inspection
16
MAINTENANCE PERIOD
CHAPTER6 Trouble shooting
Caution
Symptoms
Cause
treatment
Engine does not
start
<Fuel system>
Fuel tank is empty
Refuel the mixed gasoline.
Insufficient pressing of priming pump
Press Priming pump for several and send the fuel.
Fuel pipe bent or damaged
Fix or replace of fuel pipe.
Carburetor damage
Replace or repair
Wet spark plug due to too much intake of fuel.
1 Remove the spark plug
2 Exhaust exceeded fuel by pulling the starter handle 5 or 6 times.
3 Install spark plug
4 Turn choke lever to opens and pull the starter handle.
<Electrical system>
Dirt on spark plug
Clean up or replace
No spark from spark plug
1 Ignition coil bad connection
2 Improper gaps between spark plug electrodes
3 Ignition coil failure
Improper gap between spark plug electrodes
Adjust to 0.6-0.7mm.
Defective ignition coil
Replace
Idling abnormality
Idling speed is not set correctly
Setting the idling speed
Lack of power
Air filter dirt
Cleaning or replacing the air filter
Hammer wear
Replace
Gear breakage
Replace
Engine stops
Fuel shortage
Refuel the mixed gasoline.
Chalk position is closed
Open the chalk.
Carburetor abnormalities
Replace or repair.
Fuel pipe breakage
Replace or repair.
Poor rotation
Gear breakage
Replace or repair.
Damage to gear change lever
Replace or repair.
If the product is used with a defect or abnormal condition, it may lead to a failure or accident.
Request repair immediately to your deale

CHAPTER7 Exploded view / parts list
17
●Engine explodedview 1

CHAPTER7 Exploded view / parts list
18
PartNo.
EDPNo.
Partsname
Size
One-unit
quantity
502
848502
Cylinder
1
503
848503
Gasket
1
504
848504
Hexagonsocketheadbolt
M5×25
4
505
848505
Insulator
1
506
848506
Gasket
1
507
848507
Hexagonsocketheadbolt
M5×25WSW
2
508
848508
Muffler
1
509
848509
Gasket
1
510
848510
undercover
1
511
848511
Hexagonsocketheadbolt
M5×60
2
512
848512
Hexagonsocketheadbolt
M5×12W-12
1
513
848513
Topcoverassembly
(Built-in partsNo.514-No.516)
1
<514 >
848514
Topcover
(PartsNanba13built-in parts)
1
<515 >
848515
Knobbolt
(PartsNanba13built-in parts)
1
<516>
848516
Capbottomwasher
(PartNo.13Built-in parts)M6
1
517
848517
Rearcover
1
518
848518
Crankcase
1
519
848519
Bearing
6202 C3
2
520
848520
Oilseal
1
521
848521
Oilseal
1
522
848522
C-typeretainingring
35forholes
1
523
848523
Hexagonsocketheadbolt
M5×30
4
524
848524
Piston
1
525
848525
Pistonring
2
526
848526
Pistonpin
7.5×11×33.5
1
527
848527
NeedleBearing
KTV111414EG01B2
1
528
848528
Circlip
2
529
848529
Shaftcomplete(crankshaft)
1
530
848530
Clutchassembly
(Built-in partsNo.531-No.532)
1
<531>
848531
Clutchshow(clutcharm)
(PartNo.530 Built-in part)
2
<532 >
848532
Clutchspring
(PartNo.530 built-in part)2.3-44.8L
1
533
848533
Clutchbolt
M8×1.25
2
534
848534
Plainwasher
8×22×T1.2
2
535
848535
Wavewasher
2
536
848536
Fancover
1
537
848537
Hexagonsocketheadbolt
M5×20WSW
3
538
848538
Hexagonsocketheadbolt
M5×25WSW
1
<540 >
848540
Rotor
(PartNo.580 built-in part)
1
542
848542
Woodruffkey
3×10
1
543
848543
Nutswithcountersunkwashers
M10×17×t8
1
544
848544
Spacer
2
545
848545
Clamp
M4
1

CHAPTER7 Exploded view / parts list
19
546
848546
Hexagonsocketheadbolt
M4×25WSW
2
547
848547
Sparkplug
BPMR8Y
1
548
848548
Grommet
1
549
848549
Lead
1
550
848550
Stopswitchassembly
1
551
848551
Stay
1
552
848552
Smallhexagonnut
M8×1
1
553
848553
Recoilstarterassembly
(PartNo.554-No. 568built-in)
1
<554 >
848554
Starterassembly
(PartNo.553 built-in part)(PartNo.555-No. 563built-in)
1
<555 >
848555
Reel
(PartNo.554 Built-in part)
1
<556 >
848556
Camplate
(PartNo.554 Built-in part)
1
<557 >
848557
Damperspring
(PartNo.554 Built-in part)
1
<558 >
848558
Spiralspring
(PartNo.554 Built-in part)
1
<559>
848559
Setscrew
(PartNo.554 Built-inpart)
1
<560 >
848560
Ropeassembly
(PartNo.554 built-in part)(PartNo.561-No. 563built-in)
1
<561 >
848561
Starterrope
(PartNo.561-No.563 built-in)
1
<562 >
848562
Starterknob
(PartNo.561-No.563 built-in)
1
<563>
848563
Knobcap
(Part No.561-No.563 built-in)
1
<564 >
848564
Starterpulleyassembly
(PartNo.553 built-in part)(PartNo.565-No. 568built-in)
1
<565 >
848565
Starterpulley
(PartNo.565 built-in part)
1
<566 >
848566
Ratchet
(PartNo.565 built-in part)
2
<567>
848567
Returnspring
(PartNo.565 built-in part)
2
<568 >
848568
E-typeretainingring
(PartNo.565 built-in part)
2
569
848569
Hexagonsocketheadbolt
M5×18WSW
2
570
848570
Hexagonsocketheadbolt
M5×25L
2
571
848571
Nut(Hexlownut)
M8
1
572
848572
Packing
17×8×2
4
573
848573
Label
1
580
848580
Magnetassembly
(PartNo.540,No.581 built-in)
1
<581 >
848581
Ignition coilassembly
(PartNo.580 built-in part)
1
The<>markisabuilt-inpart,sobecarefulwhenordering.
Table of contents
Other Vessel Impact Driver manuals

Vessel
Vessel GT-P10S2 User manual

Vessel
Vessel GT-1700BX User manual

Vessel
Vessel GT-S6CD User manual

Vessel
Vessel GT-1600VP User manual

Vessel
Vessel 20USB-S1F Operator's manual

Vessel
Vessel HFB-300-1 User manual

Vessel
Vessel GT-P12 User manual

Vessel
Vessel GT-3500GE Assembly instructions

Vessel
Vessel GT-3500GE Assembly instructions

Vessel
Vessel GT-3800PX User manual