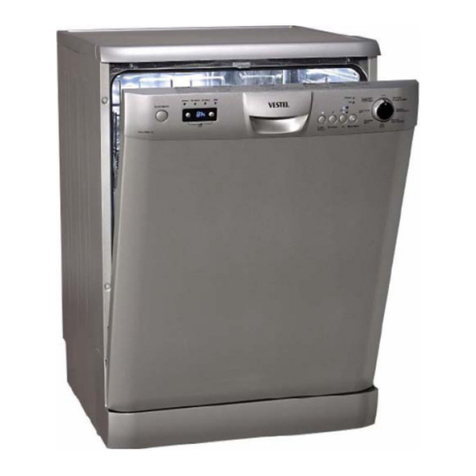
VESTEL A Series User manual

A SERIES
1

Contents
Information sheet………………………………………………………………..2
Electrical components…………………………………………………………...3
Detergent / rinse aid dispenser…………………………………………………9
Washing specification and programs…………………………………………...11
Service failure codes…………………………………………………………...12
Setting the water hardness……………………………………………………...24
Failure codes (possible problems)……………………………………………...25
Necessary ınformation have to be gıven to users whıle ınstakkatıng the
dıshwasher………………………………….......................................................28
Repair techniques components and resistance values.........................................29
Component value measurement………………………………………….…….31
Poor drying……………………………………………………………………..45
Disassembly……………………………………………………………...…….46
1
2

INFORMATION SHEET
BARCODE STICKER CODE EXPLANATION / DISHWASHER:
SERIAL NO
PRODUCT
CODE
01- w/o cartoon; w strip
02- w/o cartoon; w/o strip
03- w cartoon ; w strip
04- w cartoon ; 4- lane
05- w/o cartoon ; 4-lane
Work order
number Increases by
numeratically
In front of this numbers “55”
should be added for an order
number:
00205458 - 5500205458 is
the order number
In front of this numbers
“10” should be added for
an product code:
668316 - 10668316 is
the product code
WHITE GOODS
CUSTOMER
SUPPORT
04 668316 0001
00205458
3

ELECTRICAL COMPONENTS
BUTTON ( ON / OFF SWITCH )
Voltage 250 V
Currency 16 (4 ) A
DOOR LOCK
It is a mechanical lock/release system that is
closing the door, supplying the connection of
electrical parts in the machine and cutting off
the connection.
Currency 16 (4 ) A
CIRCULATION PUMP
Single direction, single phase, asynchronus and
two pole.
It turns opposite clock direction.
It is assambled to the basement with rubber
hangers.
FLOATER
Button is assambled in the control panel unit.
ON /OFF (two pole)
4

Capacitor is permanently connected
to the circulation pump coils.
CAPACITOR
DRAIN PUMP
Voltage 220/240 volt
Total power 1800W
27.6-30.6 ohm
HEATER
NTC
5

PRESSURE SWITCH
Voltage 220/240 v
Frequency 50/60 Hz
16 A - 3 Pins
DIVERTER
There is diverter at A15 and A23
models It is assembled to the heater
Casing Group.
WATER INLET VALVE
Single inlet and single outlet standard
single coil selenoid valve.
It is assembled to the basement and connect
to the airbreak by hose.
6

REGENERATION VALVE
Regeneration valve is assembled on the
water softener.
PARASITE FILTER
It is used to prevent parasites from
the main supply It has been
assemblied to basement.
TURBO FAN MOTOR
There is a thermal protector shaded pole motor,
two pole temperature is between -40-150 °C
There is turbo fan motor only at A models.
7

SALT SENSOR
Voltage 250 V
Currency 50 mA
It is assembled to the water softener. It warns if
the salt is less than requested quantity.
POWER CORD
DRAIN HOSE
8

UPPER SPRAY ARM
It distributes water from upper spray arm to dirty dishes in the upper basket.
It provides to wash the dishes in the upper basket through turning by the holes with various
angles.
LOWER SPRAY ARM
It distributes water from lower spray arm to dirty dishes in the lower basket.
It provides to wash the dishes in the lower basket through turning by the holes with various
angles.
9

DETERGENT / RINSE AID DISPANSER
Detergant dispenser consists of rinse aid and detergant compartment. It has been assemlied to the
ınner door by the snap fits. Only one bobbin has been used for operation the system.
RINSE AID SET
In order to enter rinse aid set, user applies below
steps.
Power ON; press Up button at least for 5” for models without display
Power ON; press Program button at least for 5” for models with display.For A4 models,
use delay button and press it for 5”.
If “Rinse aid set” is recognized;
all leds blink twice if model is without display. If model has display, “rA” is shown.
Release program button. The last setting level is viewed*.
Press program button to set the desired level.
At any pressure of program button rinse aid level is incremented. The level 1 returns after level 5.
For models without display; rinse aid levels are the same with water hardness levels as shown in the
table.
10

WATER HARDNESS SET
Only service can execute this procedure. This procedure erases the cycle
counter. For AU Y models, water hardness level is level 1 as default.
For models w/o display;
Power ON and press Up button at least for 3”.
If “Hardness set” is recognized all leds blink for 2”. This means that all leds blink once.
Release Up button. The last setting level is viewed*. Press Up button to increase press down
button to decrease the level.
At any pressure of up button hardness level is increased. Hardness level 1 returns after
hardness level 6. At any pressure of down button hardness level is decreased. Hardness level 6
returns after hardness level 1. If it is the first hardness set, hardness level is level 3.
11

WASHING SPECIFICATIONS AND PROGRAMS
SELECTING AND STARTING PROGRAM AT POWER ON(BEFORE PROGRAM
STARTS)
When the dishwasher is switched on,
For models w/o display;
When user selects a program, related program led is ON. After pressing Start/Stop button, related
program and wash led are ON. Note: When user always presses up button, first program follows
last program. (ex: Program1-2-3-4-5-6-1-2-…)When user always presses down button, last
program follows first program.(ex: Program 6-5-4-3-2-1-6-5-4-..)
SERVICE TEST
Only service can execute this procedure.
- Power OFF; press Start/Stop button.
- For all models: Power ON by pressing On/Off button and continue to press Start/Stop button at
least for 6”.
- When “Service test” is recognized
•For models w/o display: All leds are ON.If model has sliding dispenser, all leds blink three
times and service test starts.
•For models w/ display: All leds are ON, SP is visualized on display and service test starts.
During the first 6” of test, if a failure code is stored in memory, its codification blinks. Also at
the end of the test if an error occurs its error code blinks.
During the test, SP is shown.
Step Time Tested Load
0 Show code 6” Before start, the code of last error is visualized (see below)
1 Drain 6” Drain pump.
2 Fill (3l/2,5l)* ~ 1’ Flow meter; Inlet Valve;
3 Fill + Wash (0,5/1lt)** Flow meter; Inlet Valve; Pressure Switch;
Turb. Sensor 30” Measure of turbidity sensor
5 Wash 1’ Circulation pump; Regeneration Valve; detergent dispenser.
6 Wash + Heat *** 5’ Heater (PSW); NTC; diverter (position).
7/8 Reg. Valve +
Turbo Fan 1’ Regeneration Valve + Turbo Fan
9 Water V+Drain 1’20” Water Valve; Drain pump; Pressure switch
10 Drain 20” Drain pump; pressure switch.
11 End - Code error or end led
4
12

* 3lt in A1; 2,5lt in A2.
** 0,5lt in A1; 1lt in A2.
*** In service test the unsuccessful heating failure routine works with reduced time of
recognize (first measure at 2’20”, second measure t 4’20”)
If during the service test, the door is opened, Start/Stop led blinks (for models w/ display “SP” is
shown).
If during the service test, the Start/Stop button is pressed, the program corresponding
on the program leds(for models w/o display) or display(for models w/ display) position
starts.
To reset the service test, press On/Off button or plug out and then plug in.
Also at the end of the test, if an error does not occur, any error code is not visualized.
Machine will be standby position.
Note: If user did not set water hardness level before service test, “SE” is shown at the
beginning and end of service test.
SERVICE FAILURE CODES
For models w/o display;
Name S_P Wash Dry End display Notes
Overflow/Leakage - Blink - Blink F0/F1 In the normal work only leakage is
visualized.
Drain time out Blink - - Blink F2
Presence Flow
meter impulses - - - Blink F3
Absence Flow
meter imp. - Blink - - F4 In the normal work is not visualized.
Empty Level Blink - - - F5
Re-Fill time out Blink - - - F5
NTC ca/cc Blink Blink - - F6
Overheating Blink - Blink - F7
Unsuccessful
heating - Blink Blink - F8 In the normal work is visualized at the end of
prg
Parameter set salt
incorrect Blink Blink - Blink SE In the normal work this failure is not
visualized.
CK Parameters Blink Blink Blink Blink FE
HIGH VOLTAGE Blink Blink Blink - HI
LOW VOLTAGE - Blink Blink Blink LO
13

For models w/ display;
Name DISPLAY Notes
Overflow F0 In the normal work this failure is not visualized.
Leakage F1
Draining time out F2
Presence of Flow meter impulses F3
Absence of Flow meter F4 In the normal work this failure is not visualized.
Empty Level F5
Re-Fill time out F5
NTC ca/cc F6
Overheating F7
Unsuccessful heating F8
Diverter opened F9
Turbidity Sensor FA In the normal work this failure is not visualized.
Parameter set salt incorrect SE In the normal work this failure is not visualized.
CK Parameter FE
High Voltage HI In the normal work this failure is not visualized.
Low Voltage LO In the normal work this failure is not visualized.
WASHING SPECIFICATIONS AND PROGRAMS
SELECTING AND STARTING PROGRAM AT POWER ON(BEFORE PROGRAM STARTS)
When the dishwasher is switched on,
For models w/o display;
COMMANDS On/Off Start/Stop Wash Dry End
Switch on ON ON OFF OFF OFF
Select program ON ON OFF OFF OFF
Pressure of Start/Stop
button ON OFF ON OFF OFF
When user selects a program, related program led is ON. After pressing Start/
Stop button, related program and Wash led are ON.
Note: When user always presses up button, first program follows last program. (ex:
Program1-2-3-4-5-6-1- 2-…)When user always presses down button, last program
follows first program.(ex: Program 6-5-4-3-2-1- 6-5-4-..)
For models w/ display;
- The duration of the selected cycle is shown on the display.
14

COMMANDS On/Off Start/Stop Wash Rinse Dry End
Switch on ON ON OFF OFF OFF OFF
Select program ON ON OFF OFF OFF OFF
Pressure of Start/Stop
button ON OFF ON OFF OFF OFF
- Default program is “Eco program”.
- When the dishwasher is powered off and on again in selection situation, the last
executed program and options are not visualized on screen anymore. Every time
machine is energized, Eco program is set as default.
OPENING AND CLOSING DOOR(BEFORE PROGRAM STARTS)
For models w/o display;
COMMANDS On/Off Start/Stop Wash Dry End
Door open ON ON OFF OFF OFF
Door closed ON ON OFF OFF OFF
For models w/ display;
COMMANDS On/Off Start/Stop Wash Rinse Dry End
Door open ON ON OFF OFF OFF OFF
Door closed ON ON OFF OFF OFF OFF
OPENING AND CLOSING DOOR DURING PROGRAM(NOT IN DRY STEPS)
During the program if the door is opened and re-closed without any modifications on the
program button and without the pressure of Start/Stop button, the program continues.
Washing program re-starts after 8” if the measured temperature is equal or more than 45°C.
For models w/o display;
COMMANDS On/Off Start/Stop Wash Dry End
Door open ON Blink ON OFF OFF
Door closed ON OFF ON OFF OFF
* When the door is opened, Washled is ON together with the blinking Start/Stop led.
For models w/ display;
COMMANDS On/Off Start/Stop Wash Rinse Dry End
Door open ON Blink ON/OFF* ON/OFF* OFF OFF
Door closed ON OFF ON/OFF* ON/OFF* OFF OFF
*
14
For models w/ display;
- The duration of the selected cycle is shown on the display.
15

OPENING AND CLOSING DOOR DURING PROGRAM(IN DRY STEPS)
During dry step: if the door is opened and re-closed, the program is ended.
For models w/o display;
COMMANDS On/Off Start/Stop Wash Dry End
Door open ON Blink OFF ON OFF
Door closed ON OFF OFF OFF ON
*When the door is opened, Dry led is ON together with the blinking Start/Stop led.
When the door is closed, program ends and End led is ON.
•Next, if user presses program or Start/Stop or delay button, machine is in standby
position( last executed programme led and Start/Stop led are ON)
•Then, if user presses Start/Stop button, wash led is ON.
For models w/ display;
During dry step: if the door is opened and re-closed, the program is continued.
COMMANDS On/Off Start/Stop Wash Rinse Dry End
Door open ON Blink OFF OFF ON OFF
Door closed ON OFF OFF OFF ON OFF
OPENING AND CLOSING DOOR DURING PROGRAM(IN REGENERATION
FIRST STEP)
During regeneration and resin washing step: if the door is opened and re-closed, the program
continues.
For models w/o display;
COMMANDS On/Off Start/Stop Wash Dry End
Door open ON Blink OFF ON OFF
Door closed ON OFF OFF ON OFF
*When the door is opened, Dry led is ON together with the blinking Start/Stop led.
When the door is closed, Dry led is
ON. For models w/ display;
COMMANDS On/Off Start/Stop Wash Rinse Dry End
Door open ON Blink OFF OFF ON OFF
Door closed ON OFF OFF OFF ON OFF
16

OPENING AND CLOSING DOOR DURING PROGRAM(IN REGENERATION
SECOND STEP)
During regeneration and resin washing step: if the door is opened and re-closed, the program is
ended.
For models w/o display;
COMMANDS On/Off Start/Stop Wash Dry End
Door open ON Blink OFF ON OFF
Door closed ON OFF OFF OFF ON
*When the door is opened, Dry led is ON together with the blinking Start/Stop led.
When the door is closed, the program ends. Machine is in standby position( last executed
programme led and Start/Stop led are ON)
For models w/ display;
COMMANDS On/Off Start/Stop Wash Rinse Dry End
Door open ON Blink OFF OFF ON OFF
Door closed ON OFF OFF OFF OFF ON
When the door is opened and re-closed, program ends and display shows 0:00”.
SELECTING AND STARTING PROGRAM WHEN DOOR IS OPENED(BEFORE
PROGRAM STARTS)
For models w/o display;
COMMANDS On/Off Start/Stop Wash Dry End
Switch on ON ON OFF OFF OFF
Door open ON ON OFF OFF OFF
Select program ON ON OFF OFF OFF
Pressure of Start/Stop
button ON Blink* ON OFF OFF
Door closed ON OFF ON OFF OFF
*If user presses Start/Stop button, Start/Stop led blinks and also related program led(s)is ON.
After closing the door, Wash led is ON and selected program starts.
For models w/ display;
COMMANDS On/Off Start/Stop Wash Rinse Dry End
Switch on ON ON OFF OFF OFF OFF
Door open ON ON OFF OFF OFF OFF
Select program ON ON OFF OFF OFF OFF
Pressure of Start/Stop
button ON Blink* ON OFF OFF OFF
Door closed ON OFF ON OFF OFF OFF
17

If user selects a program when the door is open, related program duration is seen on
the display. Then, if user presses Start/Stop button, duration of the selected program
led blinks. After closing the door, Wash led is ON and selected program starts.
TERMINATION OF A PROGRAM(END OF PROGRAM)
For models w/o display;
COMMANDS On/Off Start/Stop Wash Dry End
End of program ON OFF OFF OFF ON
Door open ON OFF OFF OFF ON
Door closed ON ON OFF OFF OFF
When the door is closed, last executed program led and Start/stop led are ON.
Namely, Machine is in standby position.
For models w/ display;
COMMANDS On/Off Start/Stop Wash Rinse Dry End Digit
End of program ON OFF OFF OFF OFF ON “0:00”
Door open ON OFF OFF OFF OFF ON “0:00”
Door closed ON ON OFF OFF OFF OFF
duration
of last
executed
program
is shown
At the end of program, display shows 0:00.
CANCELLING OF A PROGRAM(DURING PROGRAM)
For models w/o display;
COMMANDS On/Off Start/Stop Wash Dry End
Pressure of Start/Stop
button 3” ON ON OFF OFF Blink
End of program ON OFF OFF OFF ON
While pressing the Start/Stop button for 3”,End led blinks.After cancelling is finished, “End
Led” is ON.
For models w/ display;
COMMANDS On/Off Start/Stop Wash Rinse Dry End Digit
Pressure of Start/Stop
button 3” ON ON OFF OFF OFF Blink “0:01”
End of program ON OFF OFF OFF OFF ON “0:00”
•Display shows “0:01” during cancelation process and End led blinks.
•Display shows 0:00 at the end of the cancelation process and End led is ON.
18

For both models with and without display:
If cancelling operation is paused, S/P led and end led blinks together.
IF USER PRESSES ANY BUTTON(AT THE END OF PROGRAM)
For models w/o display;
COMMANDS On/Off Start/Stop Wash Dry End
End of program ON OFF OFF OFF ON
Selection of new program or
pressed option ON ON OFF OFF OFF
Pressure of Start/Stop button ON OFF ON OFF OFF
-When user selects a program at the end of program, related program led and Start/
Stop led are ON. If selected, related option led(s) is ON.
After pressing Start/Stop button Wash led is ON. If selected, related option led(s) is ON.
For models w/ display;
COMMANDS On/Off Start/Stop Wash Rinse Dry End Digit
End of program ON OFF OFF OFF OFF ON 0:00
Selection of new program or
pressed option ON ON OFF OFF OFF OFF
Duration
of new
program
is shown
Pressure of Start/Stop button ON OFF ON OFF OFF OFF Duration
of new
program
When user selects a program at the end of program, related program duration is shown on
the display. If selected, related option led is ON.
After pressing Start/Stop button, program starts and Wash led is ON. If selected, related
option led(s) is ON.
MODIFICATION OF A PROGRAM WITHOUT RESET
The program continues with the flow program but with the parameters (temperature,
times) of the new program. In heating step: If temperature is over than the new desired
temperature, cut off heating step and go on with the next step with new parameters.
If temperature is lower than the new desired temperature heat up water to the desired
temperature level. In washing step: If the washing duration is over than the washing
duration of new program, cut off washing step and go on with next step of new program.
If the washing duration is lower than the washing duration of new program, go on with
washing step. When new program is selected, display duration is changed to same
step of new program.
For models w/o display;
COMMANDS On/Off Start/Stop Wash Dry End
Washing cycle is in progress ON OFF ON/OFF ON/OFF OFF
19

Pressure of Start/Stop
button ON Blink ON/OFF ON/OFF OFF
Select new program ON Blink ON/OFF ON/OFF OFF
Pressure of Start/Stop
button ON OFF ON/OFF* ON/OFF* OFF
If user selects new program, related new program led is ON.
*Program continues with the new parameters and related washing led is ON.
For models w/ display;
COMMANDS
On/Off
Start/Stop
Wash
Rinse
Dry
End
Digit
Washing cycle is in
progress
ON
OFF
ON/OFF
ON/OFF
ON/OFF
OFF
Duration
of
program
Pressure of Start/Stop
button
ON
Blink
ON/OFF
ON/OFF
ON/OFF
OFF
Duration
of
program
Select new program
ON
Blink
ON/OFF
ON/OFF
ON/OFF
OFF
duration
of new
program
Pressure of Start/Stop
button
ON
OFF
ON/OFF*
ON/OFF*
ON/OFF*
OFF
Duration
of new
program
*If user presses Start/Stop button, program continues with the new parameters and related
washing led is ON
MODIFICATION OF A PROGRAM WITH RESET
For models w/o display;
COMMANDS On/Off Start/Stop Wash Dry End
Washing cycle is in
progressON OFF ON/OFF ON/OFF OFF
Pressure of Start/Stop
button 3” ON OFF OFF OFF Blink
Drain of water ON OFF OFF ON Blink
End of Drain ON OFF OFF OFF ON*
Select new program ON ON OFF OFF OFF
*During the cancellation process End led blinks. After cancelling is finished, “End Led” is ON.
After the cancellation process, if user selects new program, related program led is ON.
For models w/ display;
COMMANDS On/Off Start/Stop Wash Rinse Dry End Digit
Washing cycle is in
progress ON OFF ON/OFF ON/OFF ON/OFF OFF Duration
of
program
20
Table of contents
Other VESTEL Dishwasher manuals

VESTEL
VESTEL BMJ-L501 X User manual

VESTEL
VESTEL BMH-L406 W User manual

VESTEL
VESTEL BMH-M301 S User manual

VESTEL
VESTEL BMA-407 I User manual

VESTEL
VESTEL BLDC Pyrojet Series User manual

VESTEL
VESTEL DW 5006 User manual

VESTEL
VESTEL DW 5003 User manual

VESTEL
VESTEL LCD Series User manual

VESTEL
VESTEL ABX-402 E User manual

VESTEL
VESTEL BMH-L401 W User manual

VESTEL
VESTEL S-D0460 User manual

VESTEL
VESTEL DW 5003 User manual

VESTEL
VESTEL NOVUS Series User manual

VESTEL
VESTEL BMH-XL 608 X User manual

VESTEL
VESTEL ANGELO FNAC11 Manual

VESTEL
VESTEL DL Series User manual

VESTEL
VESTEL I Series User manual

VESTEL
VESTEL Dishwasher User manual

VESTEL
VESTEL S-E0440 User manual

VESTEL
VESTEL DW 5006 User manual