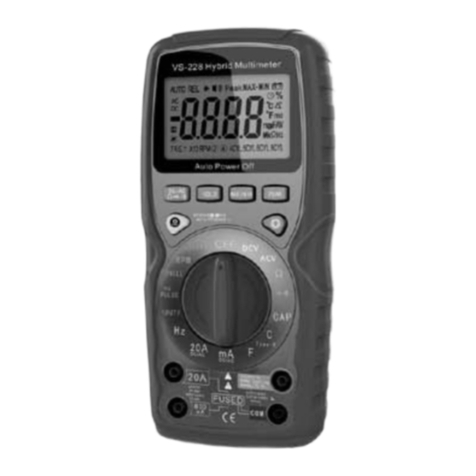
Veto DF68D User manual

User's Guide
Mini Clamp Multimeters

- 10 -
Mini Clamp Multimeter DF68D

- 12 -
- 13 -
User's Guide of Mini Clamp Multimeters DF68A/DF68D
CONTENTS
1 Summary.........................................................................13
2 Safety instruction.............................................................13
2-1. Safety signs.............................................................13
2-2. Notes.......................................................................13
3 Feature............................................................................14
3-1. General feature........................................................14
3-2. Technical feature.....................................................15
4 Operating instruction.......................................................19
4-1. AC /DC measurement..............................................19
4-2. DCV measurement..................................................20
4-3. ACV measurement..................................................20
4-4. Resistance measurement........................................20
4-5. Interrupted circuit and diode measurement..............21
4-6. Temperature measurement.....................................21
4-7. Frequency, Duty cycle measurement......................22
4-8. Capacitance measurement......................................22
4-9. Automatic shutdown................................................22
4-10. Back light...............................................................22
5. Maintenance..................................................................23

- 12 -
- 13 -
User's Guide of Mini Clamp Multimeters DF68A/DF68D
1 SUMMARY
DF68D is 3 3/4 handheld digital clamp multimeter, and has the
ability to measure DC, AC, DCV/ACV, resistance, capacitance,
temperature, frequency, Duty cycle, Diode and interrupted circuit.
And it is suitable for lab, eld measurement, household and large
current measurement.
2 SAFETY INSTRUCTION
This instrument follows the IEC1010-I (EN61010-I) pollution2,
CAT.600V and UL3111-1 safety standards. Please read the manual
carefully before use.
2-1. Safety signs
Cautions! Please refer to the manual before use
Cautions! Electric shock!
Double insulation
Power insufcient
2-2. Notes
2-2-1. please read the manual carefully before use, and operates
the multimeter following the instruction strictly, in order to
avoid damaging the personal safety and the multimeter.
2-2-2. please disconnect the probes and input signal before opening
the outer layer, in order to avoid electric shock or damaging
the multimeter, and keep the multimeter away the water.
2-2-3. please don’t use the multimeter before fixing the layer or
tightening the screw.

- 14 -
- 15 -
User's Guide of Mini Clamp Multimeters DF68A/DF68D
2-2-4. doesn’t exceed the limited value during measurement.
2-2-5. it is prohibited to connect the voltage in the resistance range
terminals.
2-2-6. please removes the battery if keep the multimeter for a
long time, in case the battery leakage damages the inner
components.
2-2-7. it will cause serious electric shock if the DCV>36V or
ACV>25V.
2-2-8. it should be especially careful when clamping the uninsulated
conductor or maternal lines, to avoid electric shock by
contacting the conductor accidentally.
3 FEATURE
3-1. General feature
3-1-1. Display: LCD display
3-1-2. Maximum display: 3 3/4 (3999 character) automatically
polarity display
3-1-3. over range display: maximum display”OL”
3-1-4. V, Ω, CAP automatic range (some current range is manual
range)
3-1-5. Data hold function
3-1-6. Sampling speed: 3 times/second
3-1-7. low battery display
3-1-8. Manual back light
3-1-9. Continuity Buzzer measurement: <(50±)Ω buzzer ringing
3-1-10. Automatic shutdown (about 30mins)

- 14 -
- 15 -
User's Guide of Mini Clamp Multimeters DF68A/DF68D
3-1-11. Power: 2X 1.5V AAA battery
3-1-12. Jaw opening size: 28mm, cable 26mm
3-1-13. Multimeter operating current: <2mA (no back light)
3-1-14. Operating environment: 0°C~40°C, Relative humidity: <
70% RH
3-1-15. Storage environment: -10°C~60°C, Relative humidity: <
80% RH
3-1-16. Volume: 185mm*51mm*25mm
3-1-17. Weight: about 160g
3-1-18. Attachment: operating manual:1, probe:1, 1.5V AAA
battery:2
3-2. Technical feature
3-2-1. Function (the multimeter has the function with the sign ”▲”)
DF68D
DCV ▲
ACV ▲
DC ▲
AC ▲
Resistance/interrupted circuit ▲
Capacitance ▲
Temperature ▲
Frequency ▲
3-2-2. Accuracy: ±(a% reading+number), guarantee the accuracy
and the environment temperature (23±5°C); Relative
humidity<70%
3-2-3. Temperature coefcient: 0.1×Specied accuracy/1°C(<18°C
or >28°C)

- 16 -
- 17 -
User's Guide of Mini Clamp Multimeters DF68A/DF68D
3-2-4. AC
Range Accuracy Resolution
40A ±(3%+5) 10mA
400A 100mA
600A ±(3%+8) 1A
Caution: The current measurement should be done between
0°C and 40°C. At AC stall, it may be display 10 unstable words or
ncorrect reading, and it will not effect the results.
Press and hold the trigger and don't release it suddenly. The clamp
head buit-in Hall element is a sensitive device, except for sensitive
for magnetism, it has different degrees of sensitivity for thermal and
mechanical stress. It will cause reading changing in a short time
when hitting the multimeter.
Overload Protection: maximum input: 600A, and the time <1 min
Frequency response: 50Hz-60Hz
3-2-5. DC
Range Accuracy Resolution
20A ±(2.5%+5) 0.01A
400A ±(2.5%+8) 0.1A
Caution: The current measurement should be done between 0°C
and 40°C. During DC measurement, if the reading is positive, the
current direction is from bottom to top. (the panel is top,and the
bottom cover is bottom)
The clamp head buit-in Hall element is a sensitive device, except
for sensitive for magnetism, it has different degrees of sensitivity for
thermal and mechanical stress. It will cause reading changing in a
short time when hitting the multimeter.

- 16 -
- 17 -
User's Guide of Mini Clamp Multimeters DF68A/DF68D
3-2-6. ACV
Range Accuracy Resolution
4V
±(1.5%+5)
1mV
40V 10mV
400V 100mV
600V 1V
Input impedance: 10MΩ
Frequency response: 50Hz-400Hz
Overload Protection: 600V DC/AC
3-2-7. DCV
Range Accuracy Resolution
400mV
±(0.8%+3)
100μV
4V 1mV
40V 10mV
400V 100mV
600V ±(1.0%+3) 1V
Input impedance: 10MΩ
Overload Protection: 600V DC/AC
3-2-8. Resistance
Range Accuracy Resolution
400Ω ±(1.2%+3) 0.1Ω
4KΩ
±(1.0%+3)
1Ω
40KΩ 10Ω
400KΩ 100Ω
4MΩ 1KΩ
40MΩ ±(1.5%+3) 10KΩ
Overload Protection: AC250V
Caution: prohibit inputting voltage in this range!!!

- 18 -
- 19 -
User's Guide of Mini Clamp Multimeters DF68A/DF68D
3-2-9. Capacitance
Range Accuracy Resolution
40.00nF ±(3%+18) 10pF
400.0nF
±(1.0%+3)
100pF
4.000μF 1nF
40.0μF 10nF
100μF 100nF
Overload Protection: AC250V
Caution: prohibit inputting voltage in this range!!!
3-2-10. Temperature
Range Accuracy Resolution
0°C-400°C ±(1.0%+3) 1°C
Caution: prohibit inputting voltage in this range!!!
3-2-11. Diode/ Interrupted circuit
Range Display Test condition
positive PN pressure
drop value
Voltage of open-circuit is
about 1.5V
Interrupted circuit
The resistance of two
tested points is <(50±5)
Ω, and the buzzer is
ringing
Cautions: the buzzer is ringing or not if the resistance is between
50-100Ω, and the buzzer will not ring if it is >100Ω.
Overload Protection: AC250V
Caution: prohibit inputting voltage in this range!!!
3-2-12. Frequency
Range Accuracy Resolution
10Hz ±(0.8%+3) 0.01Hz
100Hz 0.1Hz

- 18 -
- 19 -
User's Guide of Mini Clamp Multimeters DF68A/DF68D
1KHz
±(0.8%+3)
1Hz
10KHz 10Hz
100KHz 100Hz
1MHz 1KHz
10MHz Only for reference 10KHz
Sensitivity: ≤100KHz: ≥300mV rms
>100KHz: ≥600mV rms
≤1MHz: ≥800mV rms
Overload Protection: AC250V
3-2-13. Duty cycle (Duty%)
Range Accuracy Resolution
0.1%-99.9% Only for reference 0.1%
Overload Protection: AC250V
4 OPERATING INSTRUCTION
4-1. AC /DC measurement
4-1-1. Set the function switch to the ACA /DCA range.
4-1-2. Open the jaw and hold one wire, and in order to obtain the
accurate reading, the wire is suggested to locate to the
middle of the closed jaw.
Caution:
1. Please do not input the current exceeding the limited value,
otherwise the multimeter will be damaged.
2. DC measurement: Pre-set to zero (Press REL button)
On 400/600A stall, use the zeroing button and go into the 400A
fixed range. If measuring the current higher than 400A , it

- 20 -
- 21 -
User's Guide of Mini Clamp Multimeters DF68A/DF68D
need to switch to other stall then switch back to the 400/600A
stall. The multimeter is in the automatic range, and do not use the
zeroing button to clear. ( on 600A stall, if need the accurate data,
please subtract the base number).
4-2. DCV measurement
4-2-1. Set the function switch to the DCV range. Put the red probe
into the “V/Ω” jack, and the black probe into the “COM” jack.
4-2-2. Connect the tested probe to the tested circuit, and the
voltage and the polarity of the point connecting to the red
probe will be displayed on the screen.
Cautions:
1. Please do not input the current exceeding the limited value,
otherwise the multimeter will be damaged.
2. When measuring the maximum voltage, please pay attention to
avoid high voltage electric shock.
4-3. ACV measurement
4-3-1. Set the function switch to the ACV range. Put the red probe
into the “V/Ω” jack, and the black probe into the “COM” jack.
4-3-2. Connect the tested probe to the tested circuit and obtain the
value from the LCD screen.
Caution:
Doesn’t input the current exceeding the limited value, otherwise the
multimeter will be damaged.
4-4. Resistance measurement
4-4-1. Set the function switch to the Ω range. Put the red probe into

- 20 -
- 21 -
User's Guide of Mini Clamp Multimeters DF68A/DF68D
the “V/Ω” jack, and the black probe into the “COM” jack.
4-4-2. Connect the tested probe to the tested circuit and obtain the
value from the LCD screen.
Caution:
1. Please cut off all the power in the circuit and all capacitors exhausted
residual charge before measuring the online resistance in order
to ensure measurement correctly. (it is better to pick up one side
of the resistance)
2. It is prohibited to input voltage in the resistance range.
3. The display will show “OL” if the tested resistance of the circuit is
open.
4. When the probes are connected shortly, there will be some
clutter resistance about 1Ω.
4-5. Interrupted circuit and diode measurement
4-5-1. Set the function switch to the Ω/ /range. Put the red
probe into the “V/Ω” jack, and the black probe into the “COM”
jack.
4-5-2. Set the function switch to the“ / ” range.
4-5-2. Connect the probes to the tested circuit, and if the buzzer
ringing, the value is <(50±5)Ω.
4-6. Temperature measurement
4-6-1. Set the function switch to the relative range (°C).Put the red
probe into the “V/Ω” jack, and the black probe into the “COM”
jack.
4-6-2. Put the exposed end of the temperature probe on the surface
of the tested objective.

- 22 -
- 23 -
User's Guide of Mini Clamp Multimeters DF68A/DF68D
Caution:
It is prohibited to input the voltage in the temperature range
4-7. Frequency, Duty cycle measurement
4-7-1. Put the red probe into the “Hz” jack, Put the red probe into
the “V/Ω” jack,and the black probe into the “COM” jack.
4-7-2. Connect the tested probe to the tested circuit and obtain the
value from the LCD screen.
4-7-3. Press Hz/DUTY button and test the duty cycle.
4-8. Capacitance measurement
4-8-1. Set the function switch to the Ω range. Put the red probe into
the “V/Ω” jack, and the black probe into the “COM” jack.
4-8-2. Press function switch and choose the (Ω/ //CAP) CAP
stall.
4-8-3. Connect the tested probe to the tested circuit and obtain the
value from the LCD screen. If the tested capacitor is >10μF,
it will take longer time to measure, and it can obtain the
reading when the reading is stable.
4-9. Automatic shutdown
The multimeter will shut down automatically and go to sleep mode,
if it is not used for 30mins; if restart it, please any button and
reconnect the power.
4-10. Back light
Touch the back light button, and the back light will be lit immediately,

- 22 -
- 23 -
User's Guide of Mini Clamp Multimeters DF68A/DF68D
and the light will be extinguished after 3 seconds.
5. MAINTENANCE
This multimeter is very precious and don’t change the circuit
casually.
5-1. When the LCD display under voltage " " prompt, it should be
to replace the built-in battery.
5-2. When replacing the battery, the power switches to "off"
position, and make the probe away from the input jack. Using a
screwdriver to tighten the screws of the Battery cover, remove
the battery cover, you can replace the battery of the under
voltage.
5-3. Keep the multimeter away from the direct sunlight, high
temperature and high humidity, ammable and explosive and
strong magnetic eld environment.
5-4. Please pay attention to the waterproof, dustproof and falls.
5-5. Clean the instrument can only use a damp cloth and a small
amount of detergent, do not use chemical solvents to clean the
case.
5-6. Please recalibrate the multimeter one year later.
Table of contents
Other Veto Measuring Instrument manuals
Popular Measuring Instrument manuals by other brands

dynasonics
dynasonics 901 Series Operation & maintenance manual

LOVATO ELECTRIC
LOVATO ELECTRIC DME D310 T2 MID instruction manual

Thermo Scientific
Thermo Scientific appliedbiosystems SeqStudio Flex Series user guide

halstrup-walcher
halstrup-walcher PU Original instruction manual

Saluki
Saluki S3602 Series user manual

Agilent Technologies
Agilent Technologies InfinityLab LC Series user manual