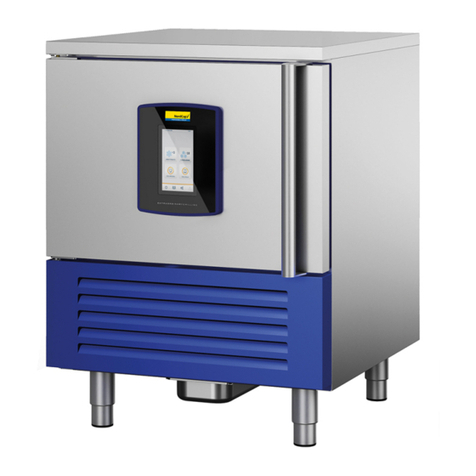
ViaAqua Polar Bear Chiller CC-25B User manual

Model: CC-25B and CC-50
• Titaniumheatexchanger
• Easytoprogramdigitalthermostat
• Compactefcientdesign
• Maximumcoolingefciency
• Forfreshorsaltwaterenvironments
WARNING
Buyer/User assumes all responsability for safety and proper
use not in accordance with the directions and sately labels.

-2-
FEATURES
1. Compressorisarotarytypethatisenergyefficientandquiet.
2. RotarycompressoriscertifiedULandCElisted.
3. Theheatexchangerismanufacturedonlyofpuretitanium.Titaniumisnotcorrosive
andwillnotbreakdowninsaltwaterthusensuringasafeenvironmentforsaltwaterfish,
invertebrate,freshwaterfish,reeffishandseafoodaquariums.
4. Temperaturecontrollerusescomputertechnologythatmakesiteasytouse,accurate
andreliable.
5. TheR134arefrigerantmeetsallenvironmentalandinternationalguidelines.
6. Thermalprotectedcompressor.
PRECAUTION AND SAFEGUARD
WARNING
»This product may contain chemicals known to the State of California to cause cancer and/
or birth defects or other reproductive harm. Wash you hand after handling the product.
»It is your sole responsability to verify that the plug and receptacle are clean/free of
moisture and salt build up at all times. The receptacle must be free of water, salt, calcium,
and magnesium. Failure to do so may cause re and/or loss of life.
»Do not plug into an extension cord.
»A drip loop must be used when plug into any electrical devices. A drip loop is part of the
cord hanging below the receptacle.
»The national code requires all aquarium equipment to be plugged into a G.F.C.I. (Ground
Fault Circuit Interrupter) electrical outlet. If you do not have a G.F.C.I., have an electrician
install one prior to operating any aquarium components.
* Readandfollowallprecautions,safeguardsandinstructions.
* Thechillermustnotcomeincontactwithwater.
* Intendedforindooruseonly.
* Verifythechillersvoltageisthesameasthepowersupply.
* Verifythechillerisonthepropersizeaquarium.
* Placethechilleronalevelsurface.
* Donotplacethechillerinsideofacabinetoraquariumstand.
* Donotcoverthechiller.
* Keepchillerawayfromdirectsunlight.
* Iftheunitisplacednearawalltheremustbeadequateventilation.Thechillerneedsto
bepositionedaminimumof10”fromthewall.
* Aminimumof10”ofclearanceinthefrontandbackofthechillerand5”clearanceonthe
sidesisnecessaryforadequateventilation.
* Iftheunitistogetwetordrippedondonotreachfortheunitunplugrst.
* Priortomaintenanceonanyelectricalaquariumapplianceormaintenancetothe
aquarium,youmustdisconnectallelectricalaquariumdevices.
-3-
* Donotoperateifthecordisdamaged,ifyouunitismalfunctioningdonotoperate
* Anymodicationstothechiller,chillerscomponentsand/orcontrolboardvoidswarranty.
INSTRUCTIONS FOR INSTALLATION
Required Tools (notincluded):Hoseclampsandwatersource.
1. Placethechillerinawellventilatedlevelsurface.
2. Attachthebarbedcompressionfittingtothechillerintakeandoutput.
3. Attachflexibletubingtotheintakebarbonthechillerusingahoseclamptoensure
tightness.
4. Connecttowatersupplyorwaterpumptotheunit.Waterflowshouldbeamin.of100
GPHandnottoexceed400GPH.Itisrecommendedtopre-filterthewaterfirst.
5. Attachapieceofflexibletubingtotheoutputbarbofthechillerusingahoseclamp.
6. Verifythatthewaterreturningfromthechillerisnotincloseproximitytotheintakewater
source.
7. Securethereturnline.
8. Verifythattherearenotanykinksinthetubingsupplyingwatertothechillerorinthe
outputtubereturningwatertotheaquariumorsump.
9. Turnonwaterpumporwatersupply.
10. Checkallconnectionstoverifythattherearenotanyleaks.
Setting the Thermostat
1. PlugthechillerintoaG.F.C.I.outlet.
2. SwitchtheunitON.
3. TheLEDscreennowwillreadthetemperatureofthecurrentaquariumwater.
4. PresstheSETbutton.TheLEDscreenwillnowflashandthegreenledlightwillbelit.
5. AdjustthetemperatureusingtheUP/DOWNbuttons.OncetheLEDscreenreadsthe
correcttemperature,PresstheSETbuttonagain.ThegreenLEDlightwillthengoout.
6. Thereisa2-3minutesdelaypriortothechillerturningon.WhenthechillerisON,the
greenLEDlightwillbelit.
NOTE:
* Ifinstallingonapreexistingaquarium,lowerthetemperatureby1-2degreesperday.
* Iftheunitisturnedoff,itwilltakeaminimumof3min.tocomebackon.Itwilltakeup
to5min.forthecomputer/thermostattoadjusttotheaquariumtemperatureandtheset
temperaturepriortoturningon.

-4-
FREQUENTLY ASKED QUESTIONS
If“EL”isdisplayed,thenthechillerismalfunctioning.Unplugimmediately.
If“EH”isdisplayedwiththealarmsound,thenthereisanelectricalshort.Unplug
immediately.
Problem: LED lights do not come on
* Checktoseeifthechillerispluggedin.
* Unplugtheunitandverifythatthefuseisgood.Ifthefuseneedstobereplaced,replace
withthesamesizefuse.
Problem: The compressor continues to turn on/off
* Incorrectpowersupply
* Lowwaterows
Problem: The unit is not cooling or not cooling adequately
* Thechillerisnotplacedinanareawithadequateventilation.
* Theradiatorneedstobemaintained.Cleanofalldustanddebris.
* Thesettemperatureishigherthanthewatertemperature.
* Radiatorisblocked.
* Thewaterowistoslowortofast.(Min.100GPHandmax.400GPH).
* Thechilleristoosmallfortheaquarium.
* Thereisnotaminimumof10”clearancearoundthechillerforadequateventilation.
* Thechillerisinstalledinsideanaquariumstand.
Problem: Too much noise
* Thechillermustbeplacedonalevelsurface
* Thechillerisnotfreestanding.Removeanyitemthatmaybeindirectcontactwiththe
chillercausingexcessvibration.
Problem: “EL” or “EH” is displayed
* Ingeneral,theprimaryreasonfor“EL”or“EH”tobedisplayediswhenthetemperature
sensorhasmalfunctioned.Pleasereferstotheinstructionbelowforproperdirections.
MAINTENANCE
1. Itisrecommendedtocleantheradiatoronceamonth.Todothis,gentlyvacuumthe
radiatortoremovealldustanddebris.
2. Donothosedownorusewatertocleantheradiatororotherexternalcomponents.
3. Onceamonth,ushtheinternalheatexchangerwithcleanfreshwater.Donotuseany
soapordetergents.
4. Donotsubmergeinwater.Thechillermustbecompletelyfreeofallmoisture.
5. Onceamonth,cleanthepre-lterofthepumpsupplyingwatertothechiller.

-5-
REPLACING TEMPERATURE SENSOR
Ifyouhaveanyquestionsorconcernsaboutworkingonthechilleralwaysconsultacertied
electricianrst.Requiredtools:wirecuttersandPhillipsscrewdriver.
Replacing temperature sensor for CC-25B
1. Unplugthechiller.
2. Unplug/disconnectthewaterbeingsuppliedtothechiller.
3. Disconnecttubing.
4. Drainthewaterfromtheheatexchanger.
5. Removetheeightscrewsthatholdonthecoverofthechiller.
6. Removecover.Caution:Connectedtothecoveristhetemperaturecontroller.Remove
slowly.Then,disconnecttheconnectionbetweenthecover/controllerandthechiller.
7. Ontheheatexchangeriscompressionfittingholdingthesensor.Loosenthefittingand
slideoutthesensor.
8. Withapairofdykes,removetheziptiesholdingthesensorwire.
9. Disconnectthesensorfromthetemperaturecontroller.
10. Installnewsensor.UseTeflontapeonthecompressionnut.
11. Securesensorwirewithnewziptiescuttingoffexcess.
12. Reconnectthetemperaturecontroller.
13. Replacecoverandsecurewithscrews.
14. Reinstall.
Replacing temperature sensor for CC-50
1. Unplugchiller.
2. Unplug/disconnectthewatersuppliedtothechiller.
3. Disconnecttubing.
4. Drainthewaterfromtheheatexchanger.
5. Removecompressiontubingconnectors.
6. Removethesixscrewsthatsecurethebackcoverofthechiller.
7. Removebackcover.Caution:connectedtothefrontcoverofthechilleristhe
temperaturecontroller.Removeslowly.
8. Disconnectwirefromcontrollertochillerusingthewhitequickwiredisconnect.
9. Removethefourscrewsthatsecurethefrontcovertothechiller.
10. Cutziptiesaroundtheinsulationandwiresgoingtothecompressorandheat
exchanger.
This manual suits for next models
1
Table of contents
Popular Chiller manuals by other brands

Trane
Trane RTAA-70 Installation & maintenance guide

Carrier
Carrier Omnizone 50BVC Installation, Start-Up, Service and Controls Operation and Troubleshooting

York
York YGWH 115 Installation, commissioning & operation

Galletti
Galletti PERFORMA MPE Series Technical manual

SMC Networks
SMC Networks HRR Series manual

Daikin
Daikin EWAQ016CAW Installation and operation manual