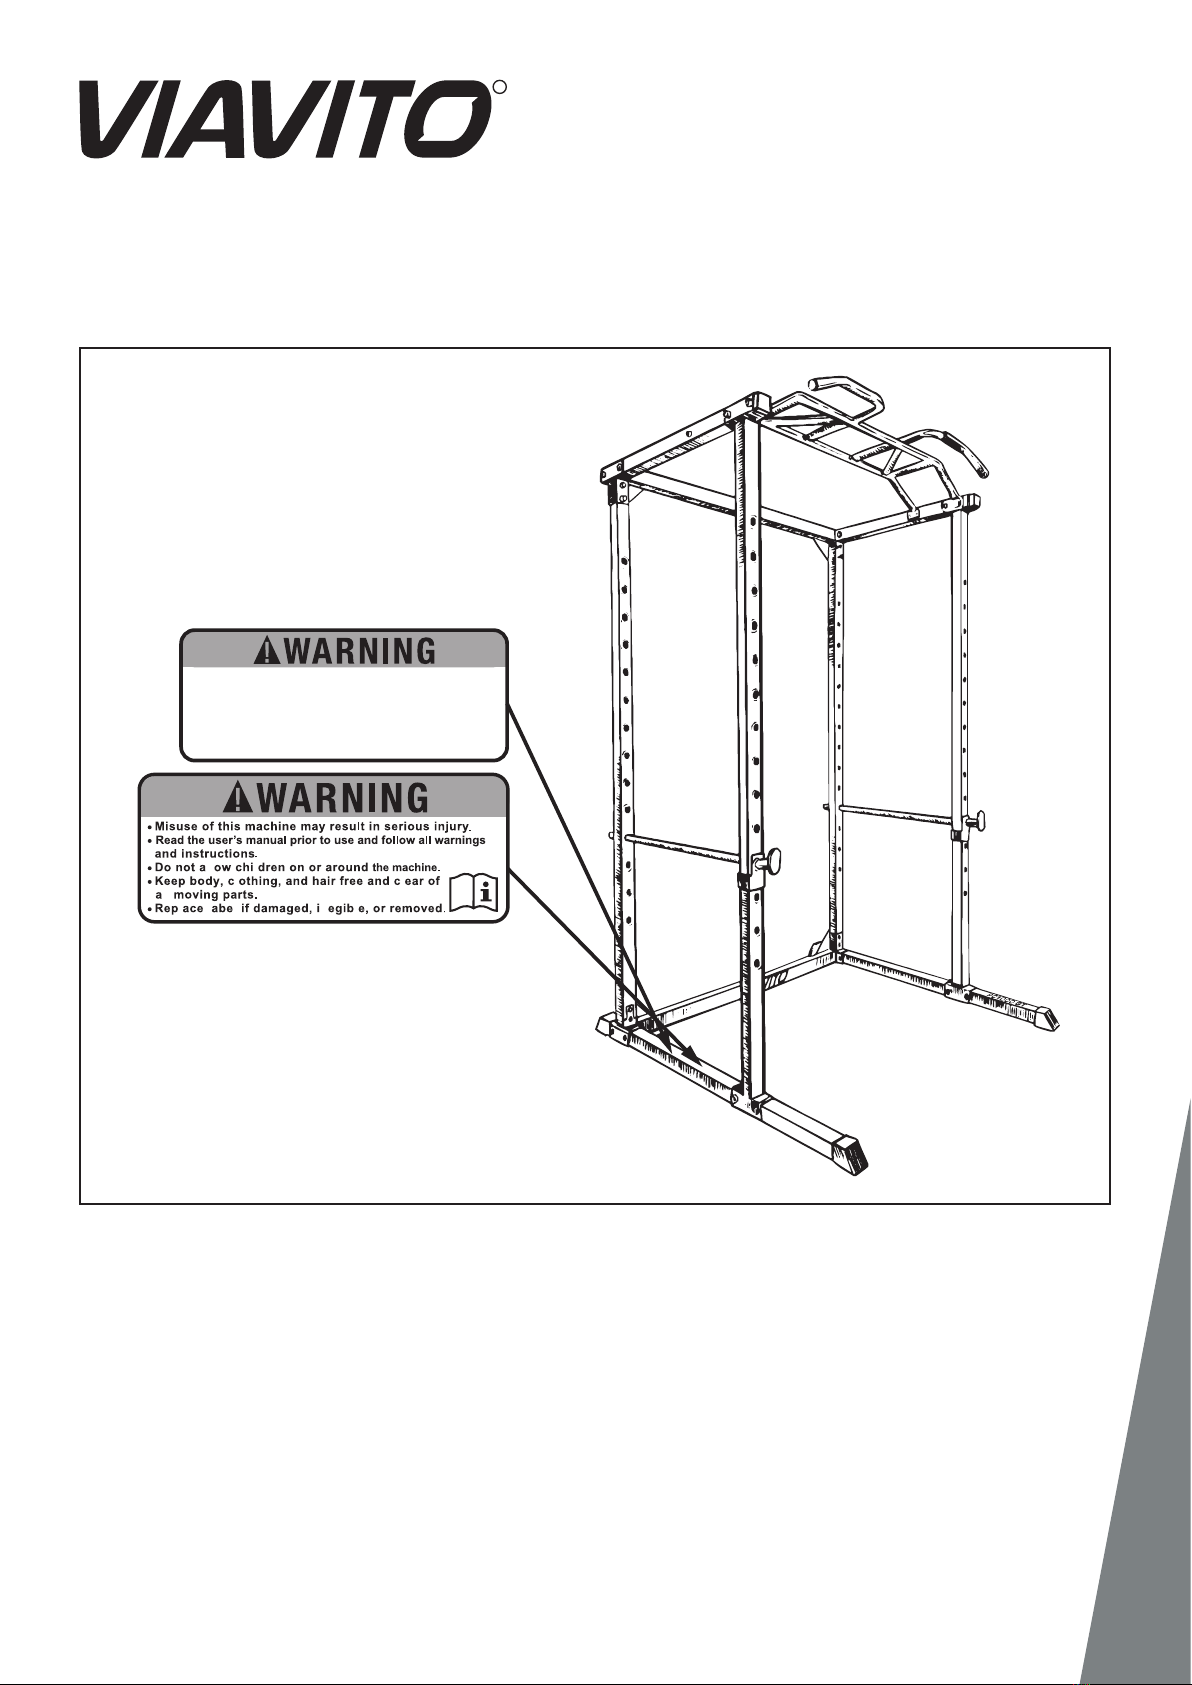
Viavito PC1000 User manual

Owner’s Manual.
GT Power Cage
PC1000
www.viavito.com
Manual version 1.1
R

02 www.viavito.com
Congratulations
on purchasing your
very own PC1000
GT Power Cage.
Manual Contents
You have chosen a high-quality, safe and
innovative piece of exercise equipment as
your training partner and we are certain
it will keep you motivated on the way to
achieving your personal tness goals.
Please take the time to read this owner’s
manual as it will help you to get the most
out of your new piece of equipment.
For more information, or if you require
any assistance please email us at
support@viavito.com
Safety Standards:
The weight bench conforms
to the following standard:
EVS-EN ISO 20957-1-2013
R
Safety Information 03/05
Assembly 06/13
Product Overview 06
Parts Identication Chart 07
Before You Begin 08
Assembly Instructions 09/13
Conditioning Guidelines 14/17
Beginner’s Guide to Exercise 15
Stretching Guide 16/17
Customer Support 18/19
Contact Information 18
Manufacturer’s Warranty 19
Technical Information 20/22
Exploded Diagram 20
Parts List 21
Space Required 22

03www.viavito.com
Safety Information
R
• Please read all the instructions carefully
before using this product.
• Retain this manual for future reference.
• The specications of this product may
vary slightly from the illustrations and
are subject to change without notice.
This exercise machine is built for optimum
safety. However, certain precautions apply
whenever you operate a piece of exercise
equipment. Be sure to read the entire
manual before you operate your machine.
In particular, note the following safety
precautions:
01 It is the responsibility of the owner
to ensure that all users of the power
cage are adequately informed of all
precautions.
02 The power cage is intended for home
use only. Do not use the power cage in
any commercial, rental, or institutional
setting.
03 Keep the power cage indoors, away
from moisture and dust. Do not put
the power cage in a garage or covered
patio, or near water.
04 Use the power cage only on a level
surface. Cover the oor beneath the
power cage to protect the oor.
05 Children and pets shall not play
unsupervised around the power cage.
06 Damaged or worn parts may be
dangerous for users and the integrity
of the power cage. Replace worn or
damaged components immediately
and do not use the power cage until
any issues have been resolved. Use only
spare parts supplied by Viavito.
07 Always wear appropriate workout
clothing when exercising. Sports
shoes are required when using this
equipment.
08 If you feel pain or dizziness at any time
while exercising, stop immediately and
begin cooling down.
09 Choking hazard! Keep small parts and
polybags away from children.
10 Make sure the is enough clearance
around the power cage (at least 0.6m
in all directions).
11 Only use the power cage for its
intended purpose. It is not suitable for
therapeutic or medical purposes.
12 Check all the bolts, nuts and other
connections before using the power
cage for the rst time and ensure that
it has been built correctly and is safe to
be used.
13 Unauthorized repairs or altering the
power cage’s design or functions may be
dangerous and will void the warranty.

04 www.viavito.com
R
14 Periodically check all bolts, nuts and
other connections to make sure that
they are secure and in good working
condition.
15 WARNING! Inappropriate use of this
machine such as while under the
inuence of drugs or alcohol, not in line
with instructions or excessive usage,
may result in serious injury or death.
16 Disabled persons should not use this
equipment without a qualied person
or physician in attendance.
17 The power cage is designed to
18 WARNING! Before beginning this or
any exercise program, consult your
physician. This is especially important for
persons over the age of 35 or persons
with pre-existing health problems. Read
all instructions before using. Viavito
takes no responsibility for personal
injury or property damage sustained by
or through the use of this product.
Viavito assumes no responsibility for the
personal injury and/or property damage
sustained by or though the use of this
product.
SAVE THESE INSTRUCTIONS.
support a maximum weight of 330kg
on the pull up station. Do not place
more than 300kg, including a barbell,
on the weight rests and spotter bars.

ll l
l l
ll
l l l ll l
Weight Capacity:
Pull Up Station: Max. 330kg
Weight Rests: Max. 300kg
Spotter Bars: Max. 300kg
05www.viavito.com
R
Warning Decal Placement

Pull-up Bar
Barbell Rest
Barbell Spotter
Rear Upright
Front Upright
Length: 128 cm
Width: 124 cm
Height: 210 cm
Support Frame
06 www.viavito.com
R
Thank you for selecting the Viavito PC1000 GT power cage. This manual will guide you
through the assembly process.
Assembly
Product Overview

M10 Washer (13)
M10 Locknut (14)
M10 x 70mm Bolt (12)
07
www.viavito.com
Parts Identication Chart
R
Refer to the drawings below to identify small parts used in assembly. The number in
brackets by each drawing is the key number of the part, from the Parts List on page 21.
Note: Some small parts may have been preattached. If a part is not in the hardware
kit, check if it has been preattached.

08 www.viavito.com
R
Before You Begin
Before beginning assembly, carefully
read the following information and
instructions:
• The power cage must be assembled by 3
adults on a clear, level surface.
• Because of its weight and size, assemble
the power cage in the location where it will
be used. Make sure that there is enough
clearance to walk around the weight
system.
• Place all parts in a cleared area and remove
the packing materials. Do not dispose of
the packing materials until you complete all
assembly steps.
• For help identifying small parts, use the
PART IDENTIFICATION CHART on page 07.
Assembly requires the following tools
(not included):
- 2 adjustable wrenches
- 1 rubber mallet
Assembly may be easier if you have a set of
wrenches. To avoid damaging parts, do not
use power tools.

5
5
3
3
8
14
14
14
13
12
12
Decal
Decal
9
9
9
9
09
www.viavito.com
Assembly Instructions
Step One.
01 Orient the Bases (5) and Support Frame
(8) as shown.
02 Orient the Bases (5) so that the decals
are in the position shown.
03 Attach the End Caps (9) to Bases (5).
04 Attach the Support Frame (8) and one
Rear Upright (3) to the Base (5) with
four M10 x 70mm Bolts (12), two M10
Washers (13) and four M10 Locknuts (14).
Do not fully tighten the Locknuts yet.
05 Repeat to complete the assembly of
another side.
R
Please Note: Hand tighten bolts and locknuts until the machine is fully assembled.
Locknuts may require additional force to tighten completely.

4
4
12
12
5
5
14
14
10 www.viavito.com
R
Step Two.
01 Attach two Front Uprights (4) to two Bases (5) with four M10 x 70mm Bolts (12) and
four M10 Locknuts (14). Do not fully tighten the Locknuts yet.

8
14
14
14
14
14
14
13
13
12
12
12
12
3
3
4
4
2
2
11
www.viavito.com
Step Three.
01 Attach the Support Frame (8) and two Frames (2) to two Rear Uprights (3) with eight
M10 x 70mm Bolts (12), four M10 Washers (13) and eight M10 Locknuts (14).
Do not fully tighten the Locknuts yet.
R

1
14 14
14
12
12 12
13
13
2
2
12 www.viavito.com
R
Step Four.
01 Attach the Crossbar (1) to the Frames
(2) with six M10 x 70mm Bolts (12),
two M10 Washers (13) and six M10
Locknuts (14).
03 See steps 1– 4. Tighten all the M10
Locknuts (14).

6
6
4
4
3
3
7
7
13
www.viavito.com
Step Five.
01 Insert the two Barbell Rests (6) into the
Front Uprights (4).
02 Insert the two Barbell Spotters (7) into
the Front Uprights (4) and the Rear
Uprights (3).
03 Make sure that both Barbell Rests (6)
and both Barbell Spotters (7) are set at
the same height.
04 Make sure that all parts are properly
tightened before you use the power
cage.
R

14 www.viavito.com
R
Conditioning Guidelines
The following guidelines will help you to
plan your exercise program and exercise
safely. Remember that proper nutrition
and adequate rest are essential for
successful results.
WARNING: Before beginning this or any
other exercise program consult your
doctor. This is especially important for
pregnant women and new mothers, all
people over the age of 35, and those
with medical problems such as heart
disease, high or low blood pressure,
injuries, joint problems, obesity and
asthma.
Why exercise?
Exercise has been proven essential for
good health and general wellbeing.
Regular exercise will:
• Relieve tension and stress
• Provide enjoyment and fun
• Stimulate the mind
• Help maintain stable weight
• Control appetite
• Boost self-image
• Improve muscle tone and strength
• Improve exibility
• Lower blood pressure
• Relieve insomnia

15
www.viavito.com
R
If you’re beginning an exercise program
for the rst time or starting a new exercise
program, you must check with your doctor
that you are t to do so, particularly if:
• You have been diagnosed with heart
problems, high blood pressure or other
medical conditions.
• You have not exercised for over a year.
• You are over 35 and do not currently
exercise.
• You are pregnant or are a new mother.
• You have diabetes.
• You have chest pain, or experience
dizziness or fainting spells.
• You are recovering from an injury
or illness.
Workout tips
• Always perform a warm-up and
stretching exercises before your
workout and a cool-down and
stretching exercises at the end.
• Start slowly and build up your time,
speed and resistance gradually; doing
too much too soon can lead to injuries.
• If you are sore or tired, give yourself
a few extra days to recover.
How to begin
• Start with two or three 15-minute
sessions per week with a rest day
between workouts.
• Warm up for 5 to 10 minutes with gentle
movements incorporating the whole
body such as walking while swinging your
arms in a circle and then stretch
the muscles you’ll use during your
workout.
• Increase the intensity to slightly harder
than comfortable and exercise for as
long as you can. You may only be able
to exercise for a few minutes at a time,
but that will change quickly when you
exercise regularly.
• End each workout with a 5-minute
cool-down. You should then stretch the
muscles you’ve just worked to develop
exibility, reduce muscle soreness and
prevent injury.
• Increase your workout time by a few
minutes each week until you can work
continuously for 30 minutes per session.
How hard should you work?
Always be aware of how you feel when you
exercise. If you feel dizzy or light-headed,
stop immediately and rest.
Beginner’s Guide to
Exercise

16 www.viavito.com
R
Stretching Guide
Tips for stretching
• Begin with small mobility exercises of all
the joints e.g. simply rotate the ankles,
bend the knees and roll your hips.
Gradually make the movements larger
and faster. This will allow the body’s
natural lubrication (synovial uid) to
protect the surface of your bones at
these joints.
• Always warm up the body before stretch-
ing, as this increases blood ow around
the body, creating warmth which makes
the muscles more supple.
• Start with your legs, and steadily work up
the body.
• Each stretch should be held for at least
10 seconds (working up to 20 to 30
seconds) and usually repeated
about 2 or 3 times.
• Do not stretch until it hurts. If there’s any
pain, ease o.
• Don’t bounce. Stretching should be
gradual and relaxed.
• Don’t hold your breath during a stretch.
• Stretch after exercising to prevent
muscles from tightening up.
• Stretch at least three times a week to
maintain exibility.
Warm-up and cool-down
A successful cardio-vascular exercise pro-
gram consists of a full-body warm-up,
aerobic exercise, and a cool-down. Do the
entire program at least two and preferably
three times a week, resting for a day be-
tween workouts. After several months, you
can increase your workouts to four or ve
times per week.
Warm-up
The purpose of warming up is to prepare
your body for exercise and to minimise
injuries. Warm up for ve minutes before
strength-training or exercising aerobically.
Perform activities that raise your heart rate
and warm the working muscles.
Activities may include brisk walking,
jogging, jumping jacks, jump rope, and
running on the spot. Try to incorporate
moves that take the joints through their
full range of motion.
Stretching
Stretching while your muscles are warm af-
ter a proper warm-up and again after your
strength or aerobic training session is very
important. Muscles stretch more easily at
these times because of their elevated tem-
perature, which greatly reduces the risk of
injury. Stretching develops exibility and
reduces muscles soreness.
Stretches should be held for
15 to 30 seconds.

Side Stretch
17
www.viavito.com
COOL-DOWN
The purpose of cooling down is to return the body to its normal or near normal, resting
state at the end of each exercise session. A proper cool-down slowly lowers your heart
rate, allows blood to return to the heart and helps prevent muscle soreness caused by the
build-up of lactic acid in the muscles.
Do not bounce or over-stretch. Take your time on each stretch. Gradually take each
stretch a little deeper on every out breath to your personal maximum.
R

18 www.viavito.com
R
Customer Support
Should you require any assistance
regarding this product please gather
the following information and then
contact us using the details below:
• Serial No. - This can be found on
a label on the product itself
• Original purchase date
• Place of purchase
• Information about the place and
conditions of use
• Precise description of the issue
or defect.
IMPORTANT! Please retain your sales
receipt. Viavito Customer Care may
request proof of purchase to validate
eligibility for warranty service.
Warranty cover starts from the date
shown on the proof of purchase.
The best way to contact us is via the
website: www.viavito.com
Viavito
94 Cleveland Street
London
W1T 6NW
Email: support@viavito.com
Contact Information
https://www.facebook.com/MyViavito
https://twitter.com/MyViavito
https://instagram.com/Viavito

19
www.viavito.com
Viavito warrants this product to be free
of defects of material and workmanship,
under normal use and conditions, for a
period of 12 months from the date of the
original purchase.
Warranty extensions may apply to this
product subject to registering this product
with Viavito. To qualify for this, please
complete the warranty registration form
on the Viavito website at www.viavito.com
Full details of warranty extensions and
the Viavito Manufacturer’s Warranty are
available online at www.viavito.com.
Terms.
This warranty extends only to the original
purchaser and is not transferable.
The warranty does not cover:
01 Normal wear and tear
02 Any changes to upgrade this product
from its normal state or use other than
as described in the user manual
03 Damage resulting from:
a) Transport
b) Abuse, misuse, failure to follow instruc-
tions or improper or abnormal use
c) Non-home use - including commercial,
professional, or rental purposes
d) Repairs not provided by Viavito
e) Accidents, lightning, water, re, or any
other causes beyond the control of Viavito
f) Improper location including, but not
limited to, humid, dusty, or outdoor
environments.
Viavito is not responsible or liable for
direct, indirect, or consequential losses
arising out of or in connection with the use
of this product or damages with respect
to any loss of property, revenue, prots,
enjoyment or use, nor for any costs of
removal or installation of this product.
This warranty covers products purchased
as new inside the United Kingdom.
In the event of the machine requiring a
repair, this may need to be performed at
a Viavito authorised repair centre.
This warranty is in addition and does not
in any way aect your statutory rights.
Manufacturer's Warranty
R

www.viavito.com
1
2
2
33
4
4
5
5
6
6
7
7
8
8
9
9
9
9
10
10
10
10
11
11
16
16
12
12
12 12
12
12
12
12
12
12
12
12
12
12 13
13
14
14
14
14
14
14
14
14
14
14
14
15
15
15
15
13
13
13
14
13
14
20
R
Technical Information
Exploded Diagram
This manual suits for next models
1
Table of contents