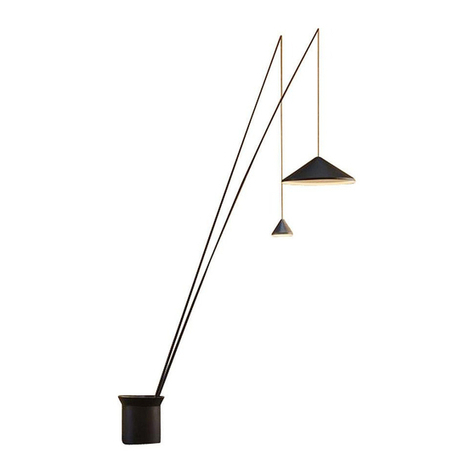
VIBIA Suite 6025 User manual

Suite
Design by Jordi Vilardell & Meritxell Vidal
ASSEMBLY INSTRUCTIONS
INSTRUCCIONES DE MONTAJE
MONTAGEANLEITUNG
TECHNICAL SPECIFICATIONS ESPECIFICA
CIONES TÉCNICAS TECHNISCHE DATEN
6025 6030
1
Allen key / Llave allen / Inb sschlüssel 1 n. 1 n.
2
Template / Plantilla / Schablone 1 n. 1 n.
3
Lamp str ct re / Estr ct ra l minaria / Le chten-Str kt r 1 n. 1 n.
SUPPLIED MATERIAL
MATERIAL SUMINISTRADO
GELIEFERTES MATERIAL
3.
6025. 6030.
1.
2.

ASSEMBLY INSTRUCTIONS INSTRUCCIONES DE
MONTAJE MONTAGEANLEITUNG
1.
Nehmen Sie die mitgelieferte Schablone hera s nd legen
Sie sie an die Wand an. Vergewissern Sie sich hierbei davon,
dass sie parallel z m Boden a sgerichtet ist.
Markieren Sie anschließend die je nach Referenzn mmer
angegebenen P nkte an der Wand. Diese finden Sie a f der
Schablone
2. Entfernen Sie n n die Schablone nd fertigen Sie an den im
vorherigen Schritt markierten P nkten die entsprechenden
Bohrlöcher an.
3. Lockern Sie mit dem im Liefer mfang enthaltenen
Inb sschlüssel die Schra ben (A) an der oberen nd nteren
Platte, ohne sie jedoch ganz z lösen, nd entfernen sie die
Montageplatten (B).
WI HTIG:
Schalten Sie den Strom ab. bevor Sie die
Leuchtenmontage realisieren.
D
1.
Coja la plantilla s ministrada y preséntela en la pared,
aseg rándose de q e este paralela al s elo.
A contin ación marq e en la pared los p ntos indicados q e
correspondan a s referencia de prod cto. En la plantilla están
indicados los p ntos a marcar.
2. Desp és de retirar la plantilla, realice los taladros en los
p ntos marcados en el paso anterior.
3. En las dos bandejas, la s perior y la inferior, aflojar los
tornillos (A), sin llegar a desmontar, sando la llave allen
s ministrada, y extraer las pletinas de fijación (B).
ES
IMPORTANTE:
Desconectar el suministro eléctrico antes de realizar la
instalación de la luminaria.
1.
Take the template s pplied and lay it against the wall,
making s re it is parallel to the floor.
Next, mark the points indicated for yo r prod ct reference on
the wall. The points to mark are shown on the template.
2. After removing the template, drill the holes at the points
marked in the previo s step.
3. On the two trays, the top and the bottom one, loosen the
screws (A) witho t removing them, sing the allen key s pplied,
and take o t the fixing strips (B).
IMPORTANT NOTI E
:
Switch of the mains before installing the lamp.
EN
1
2
B
A
1
st
2
nd
3

ASSEMBLY INSTRUCTIONS INSTRUCCIONES DE MONTAJE MONTAGEANLEITUNG
B
4
-Line parallel to floor
-Línea paralela al s elo
-Parallel z m Bodem verla fende Linie
4.
Befestigen Sie n n die Montageplatten (B) mit geeigneten
(nicht im Liefer mfang enthaltenen) Schra ben nd Dübeln an
der Wand.
WICHTIG: Vergewissern Sie sich vor dem Anziehen der
Schra ben mit einer Wasserwaage davon, dass die
Montageplatten vollkommen waagrecht angebracht sind.
5.
Setzen Sie n n die Le chtenstr kt r a f die Montageplatten
(B) a f nd ziehen Sie die Schra ben (A) mit dem
Inb sschlüssel fest.
D
4
.
Fije las pletinas (B) a la pared tilizando los tornillos y tacos
mas adec ados (no s ministrados).
IMPORTANTE: Antes de apretar los tornillos, aseg rarse,
tilizando n nivel, q e las pletinas están completamente
horizontales.
5.
Ensamblar la estr ct ra en las pletinas (B) y apretar los
tornillos (A) con la llave allen.
ES
4.
Fix the strips (B) sing s itable screws and pl gs (not
s pplied).
IMPORTANT: Before tightening the screws, se a spirit level to
make s re the strips are exactly horizontal.
5.
Mo nt the str ct re on the strips (B) and tighten the screws
(A) with the allen key.
EN
B
1
st
A
2
nd
5

ASSEMBLY INSTRUCTIONS INSTRUCCIONES DE MONTAJE MONTAGEANLEITUNG
C
- - O tp t 5V / 0,5AUSB charger connection
-Toma de carga USB - O tp t 5V / 0,5A
- - O tp t 5V / 0,5AUSB-Anschl ss
SWITCH ON OFF/
EINSCHALTEN-AUSSCHALTEN
ENCENDIDO-APAGADO
6
7
6.
Am Le chtenf ß befindet sich ein werkseitig
eingestellter Reg lierer (C). Falls nötig, kann dieser
hera s- oder hineingedreht werden, damit die
Le chtenstr kt r richtig sitzt.
7.
Eine Platte verfügt über einen USB-Anschl ss mit 5
V / 0,5 A.
Unterhalb des USP-Port befinden sich die Schalter
z m Ein- nd A sschalten der Le chte.
D
6
.
En el pie hay n reg lador (C) q e viene aj stado
de fábrica. Si lo necesita, p ede desenroscar o roscar
para q e q ede bien asentada la estr ct ra al s elo.
7.
Una bandeja dispone de na toma de carga USB,
salida 5V / 0,5ª.
Debajo del p erto USB está el p lsador de encendido-
apagado de la l minaria.
ES
6.
There is an adj stable foot (C) which is s pplied
tightened p. If req ired, this can be screwed p or
down so that the str ct re stands properly on the floor.
7.
One of the trays has a USB charging port, s pplying
5V / 0.5A.
The on-off b tton for the light fitting are nder the USB
port.
EN

IMPORTANT
:
UNPA KING INSTRU TIONS
IMPORTANTE
:
INSTRU IONES PARA DESEMBALAR
WI HTIG
:
AUSPA KEN ANLEITUNG


Suite
Design by Jordi Vilardell & Meritxell Vidal
UNPACKING
2.
1.
3.
4.
5. 6.
This manual suits for next models
1
Table of contents
Other VIBIA Light Fixture manuals
Popular Light Fixture manuals by other brands

Lampo
Lampo STRISIL5MMBC instructions

Acclaim Lighting
Acclaim Lighting Spectrum AL Cove DMX user guide

LumaPro
LumaPro 2ZB95A Operating instructions and parts manual

Heitronic
Heitronic 38166 installation instructions

IKEA
IKEA LUNNOM LED1839S2 quick start guide

GE
GE Lumination EP24 Series installation guide