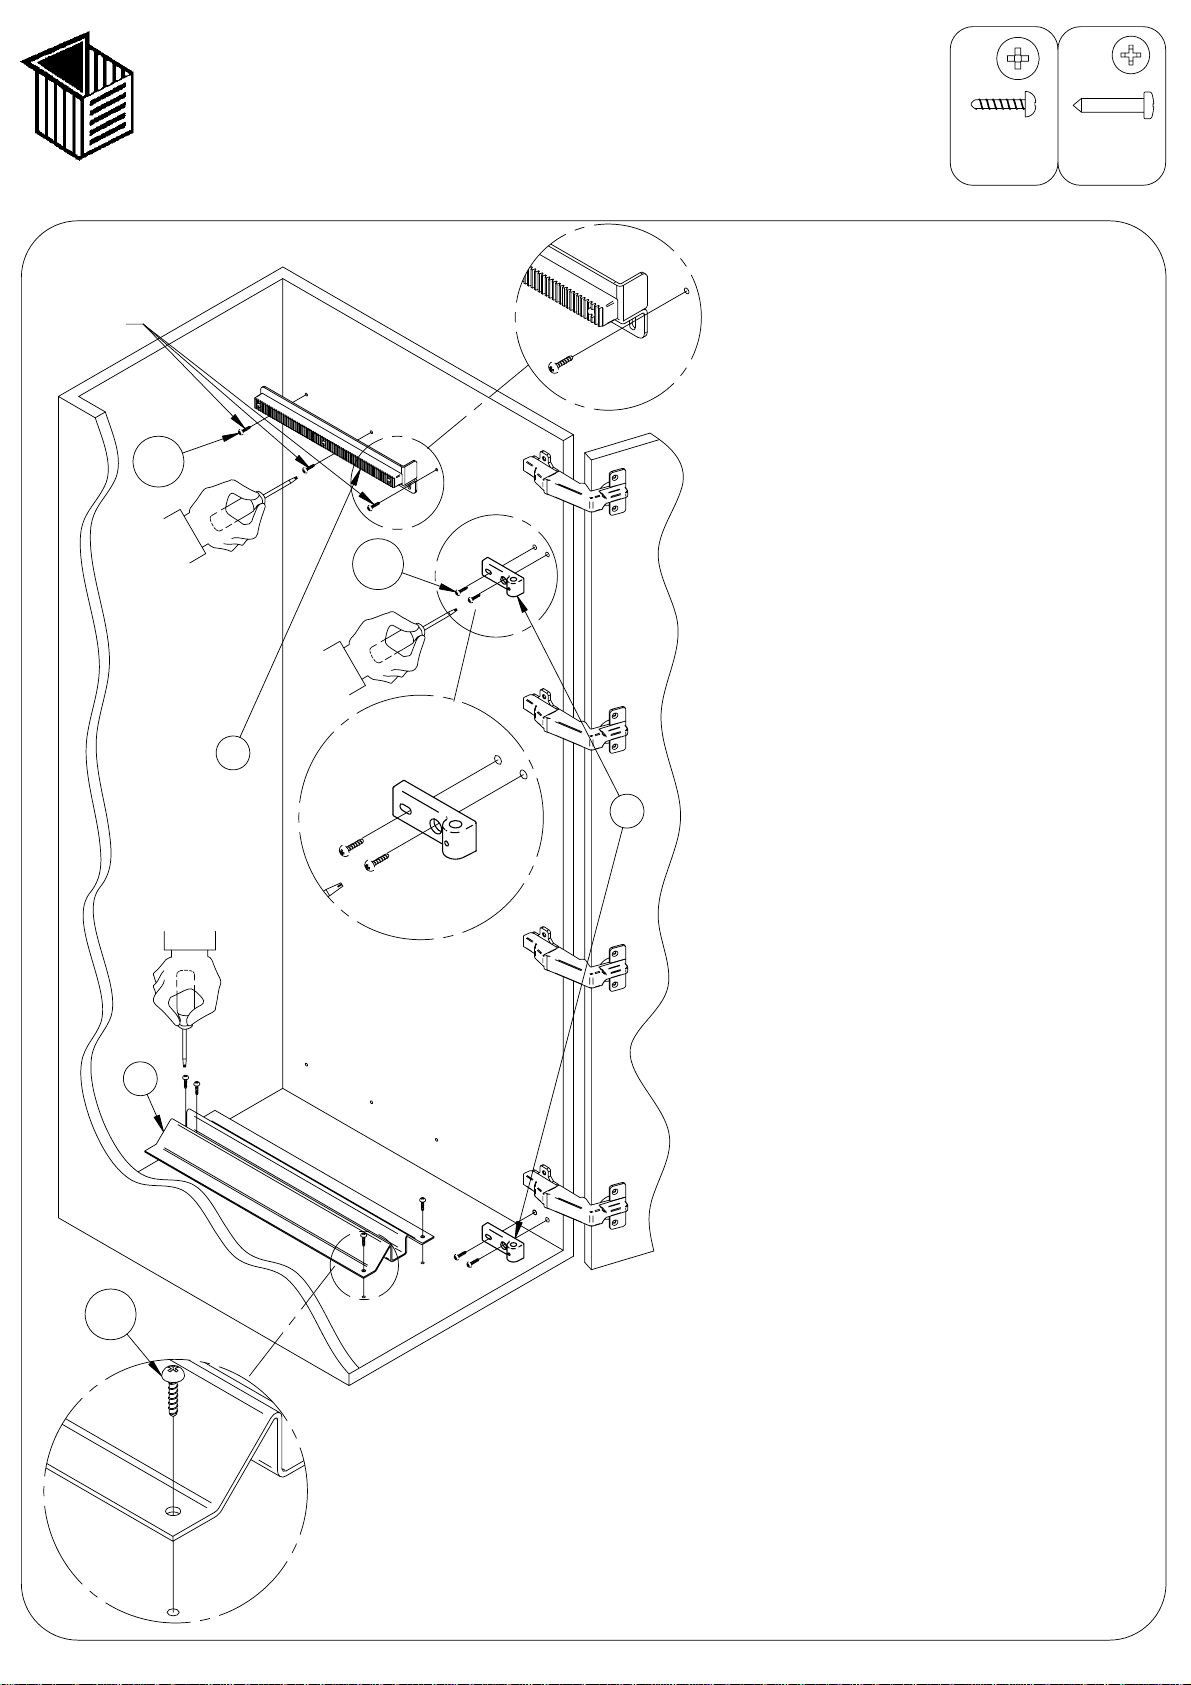
Sequenza di montaggio estraibile doppio
Installation instructions for double pull-out unit
Instructions de montage pour amovible double
Instrucciones de montaje para extraíble doble
Montageanleitung für den Doppelauszug
Monteringsplan for dobbelt udtræk
Monteringsanvisningar dubbel låda
20/07/2005 cod.4004107430 3/11
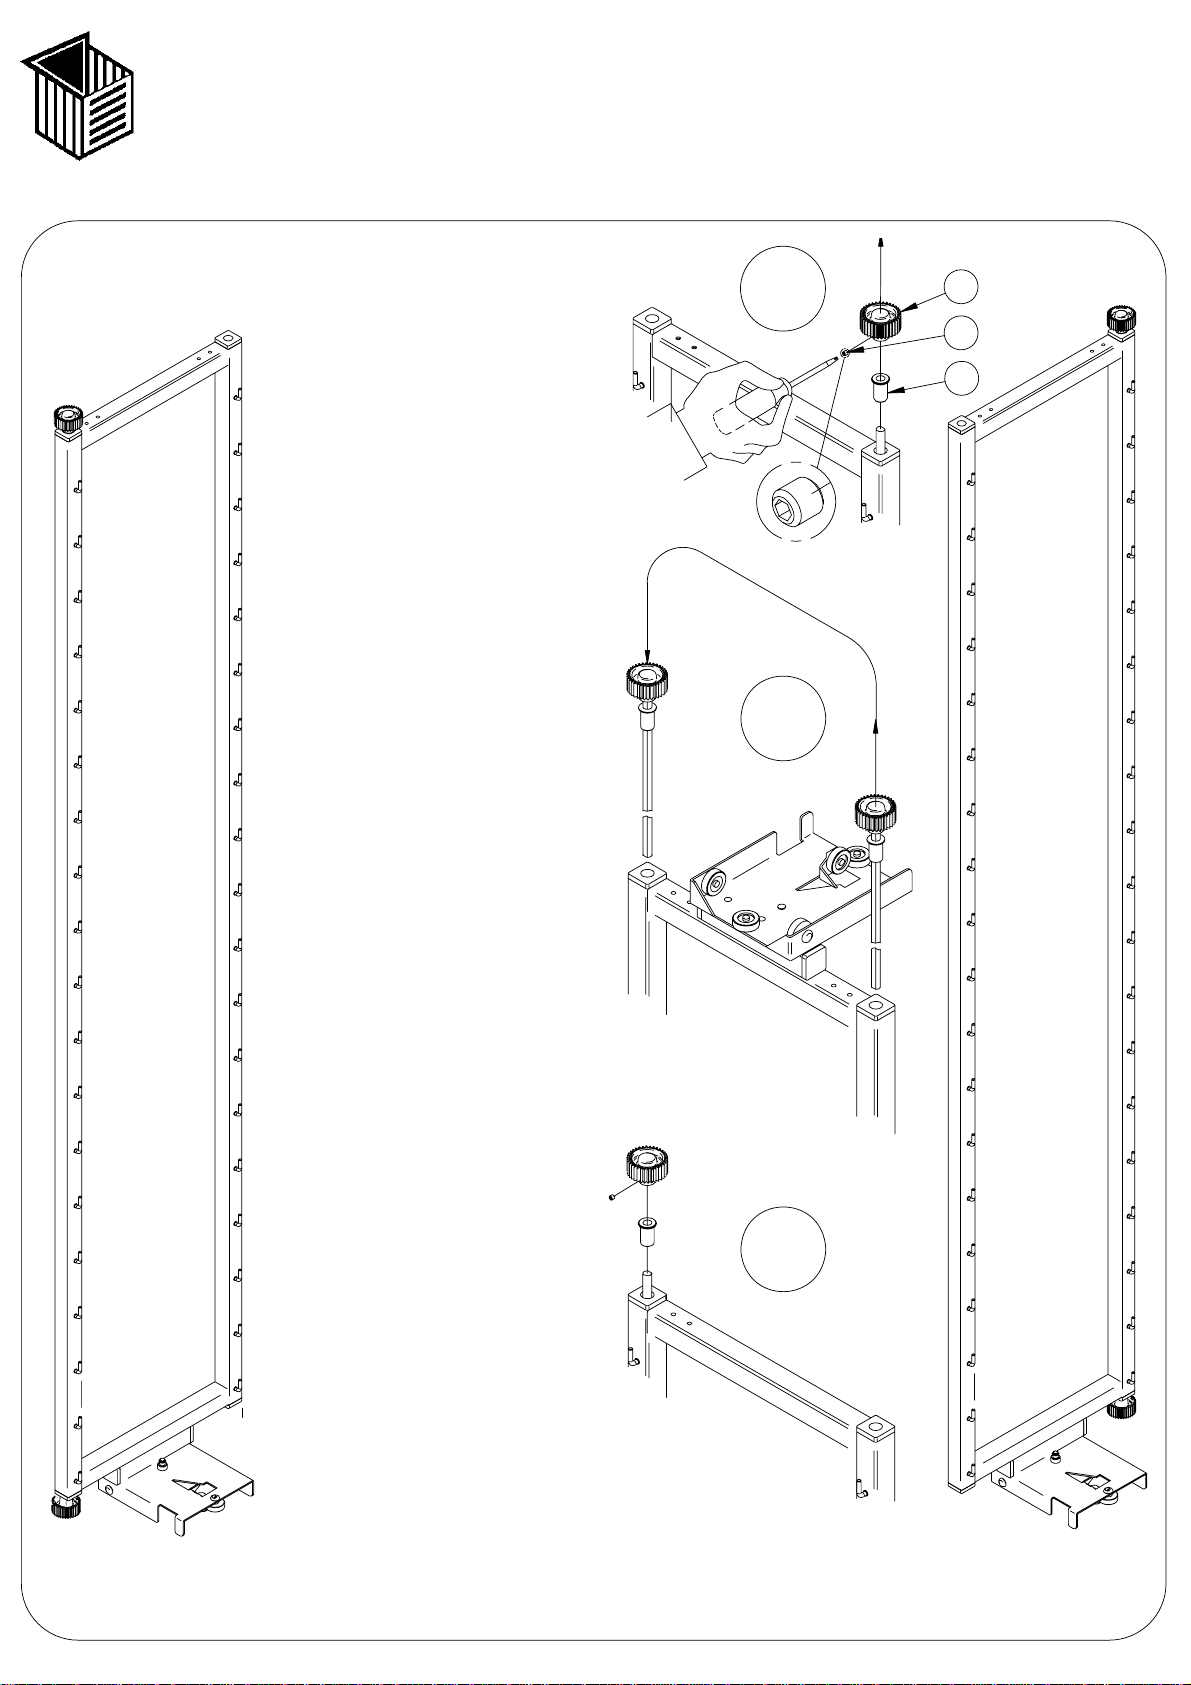
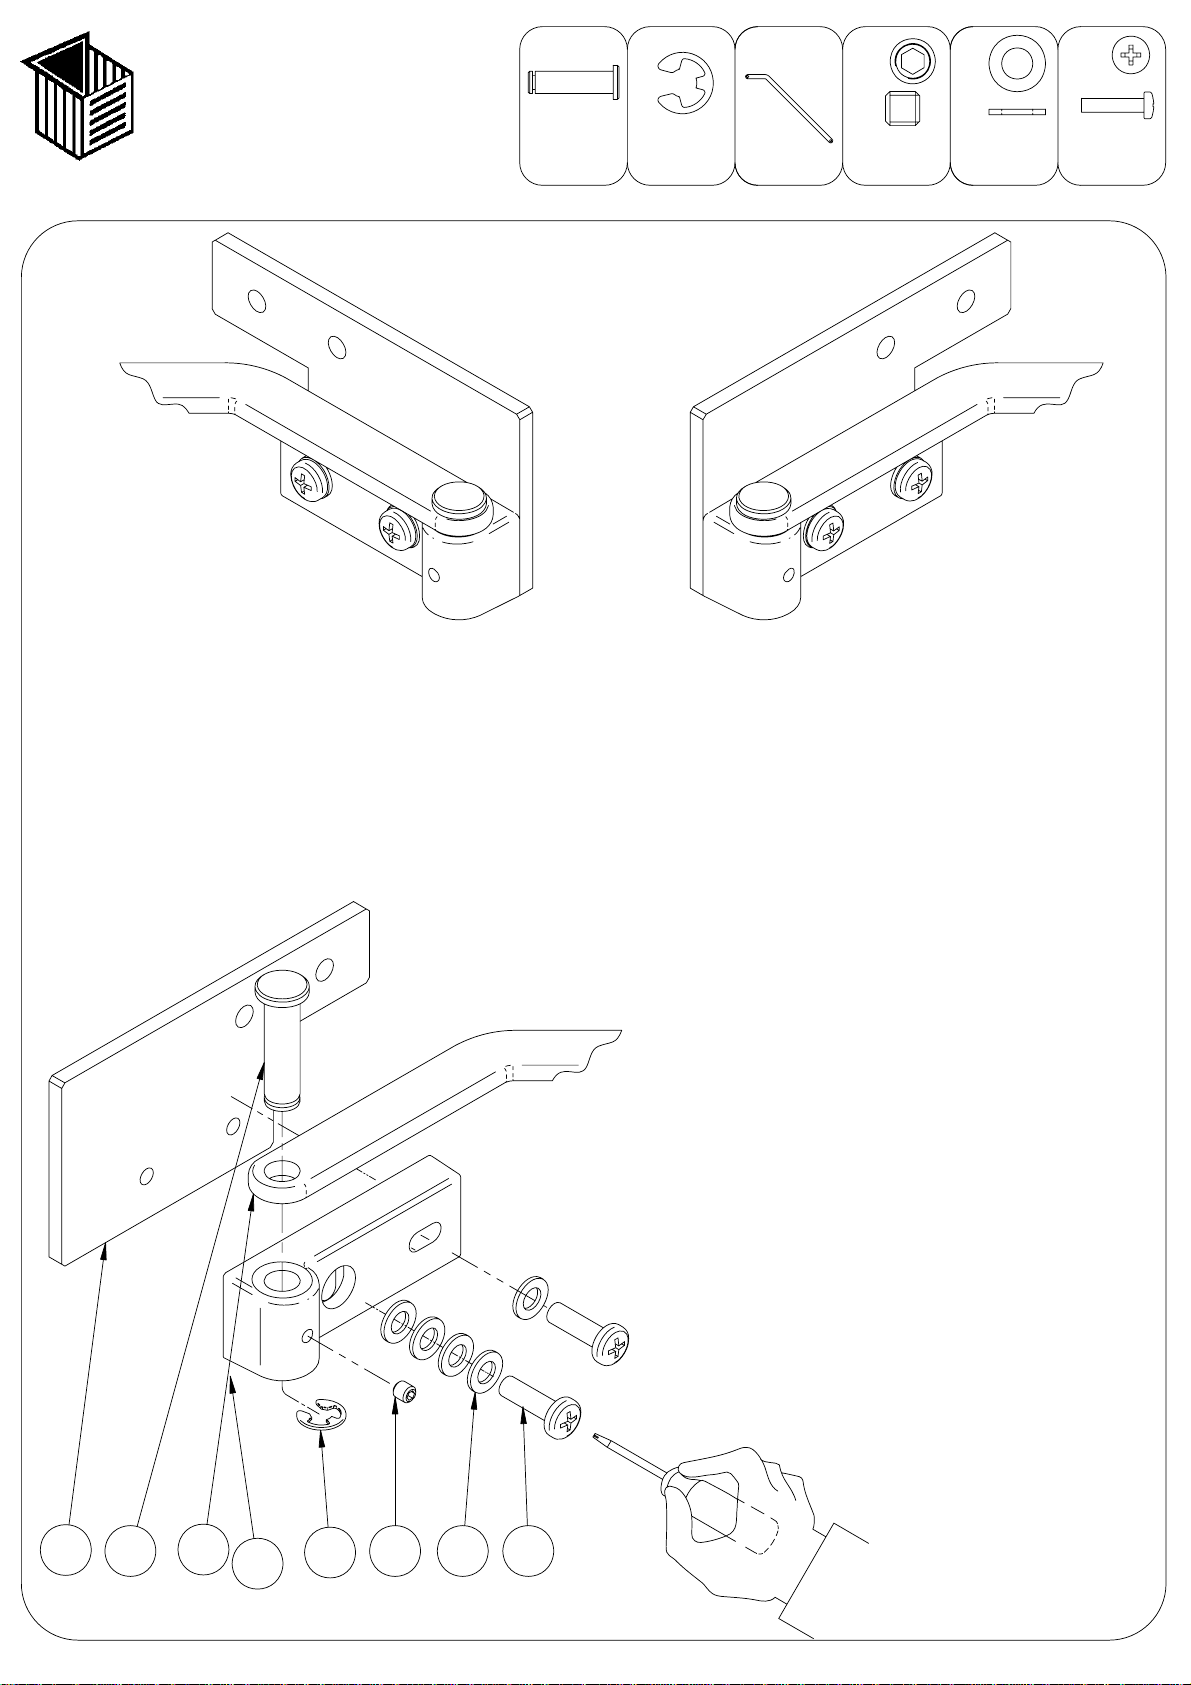
Sinistro
Left
Gouche
Isquierdo
Link
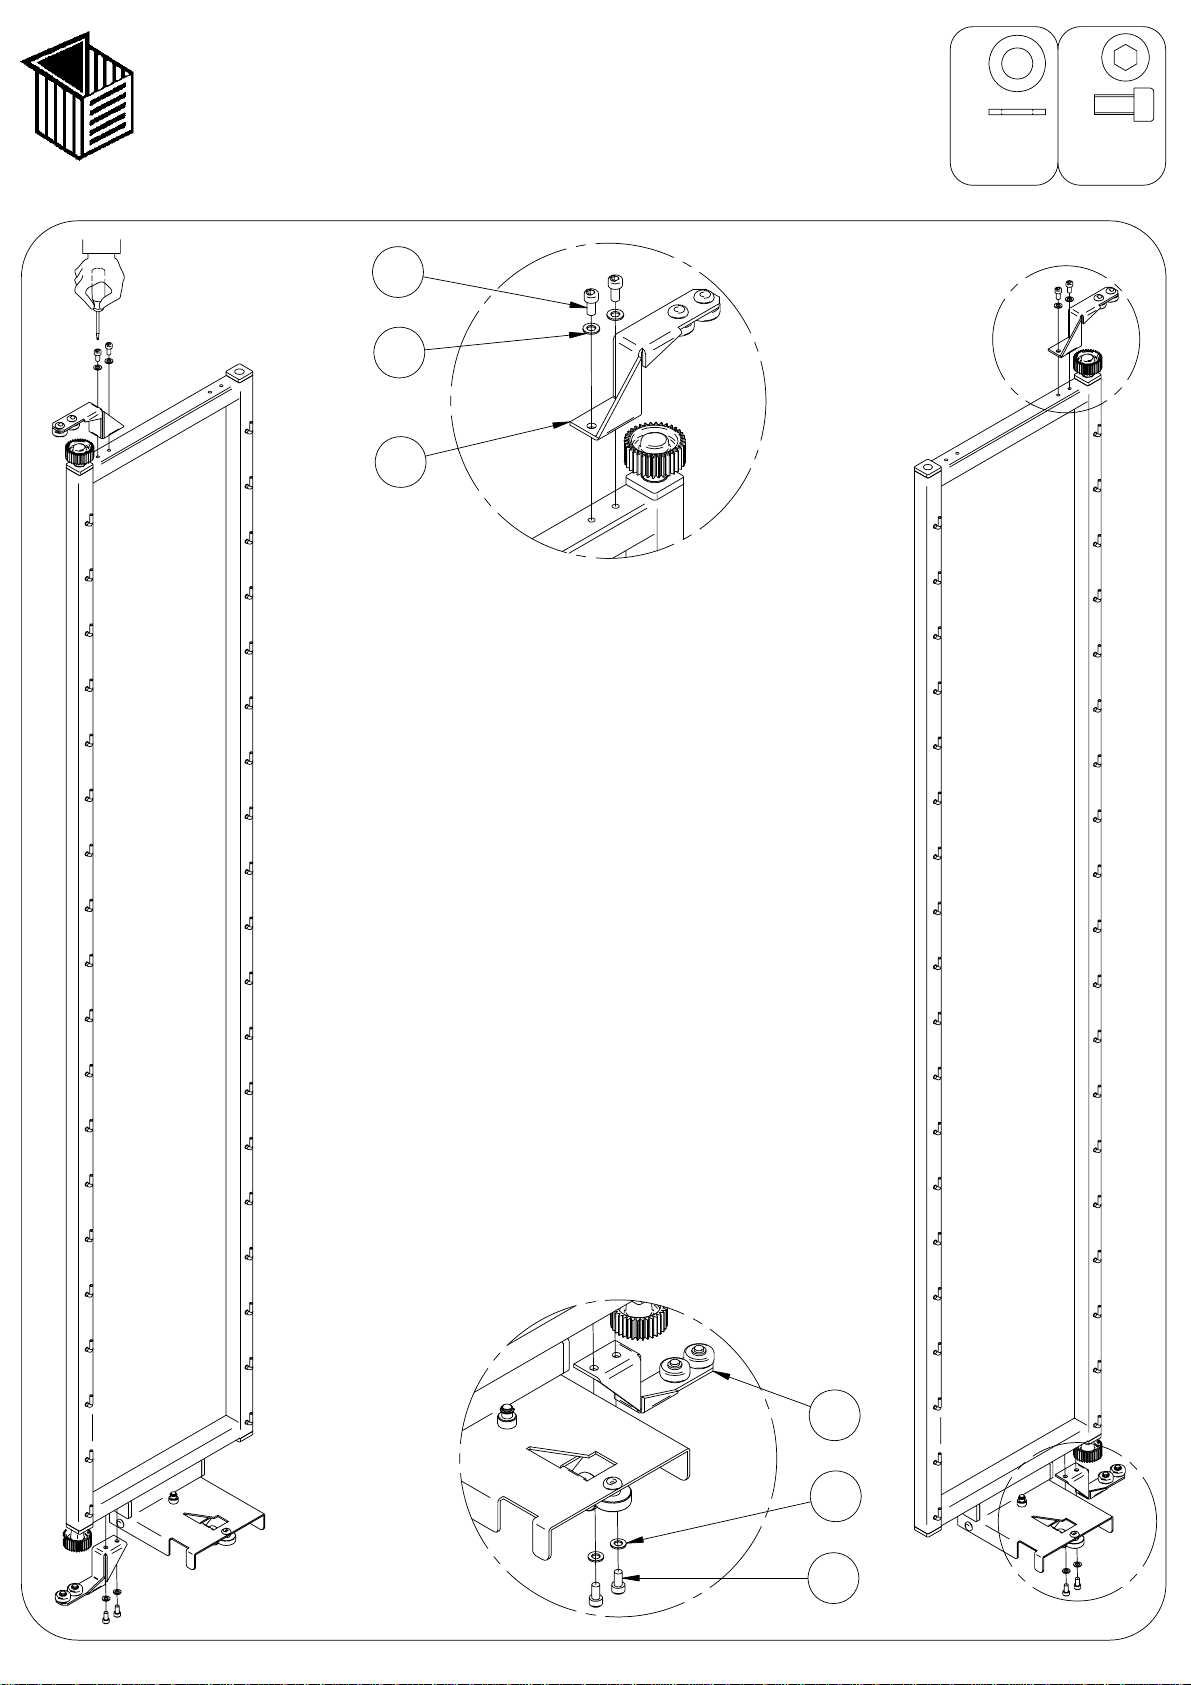
Destro
Right
Droite
Destro
Recht
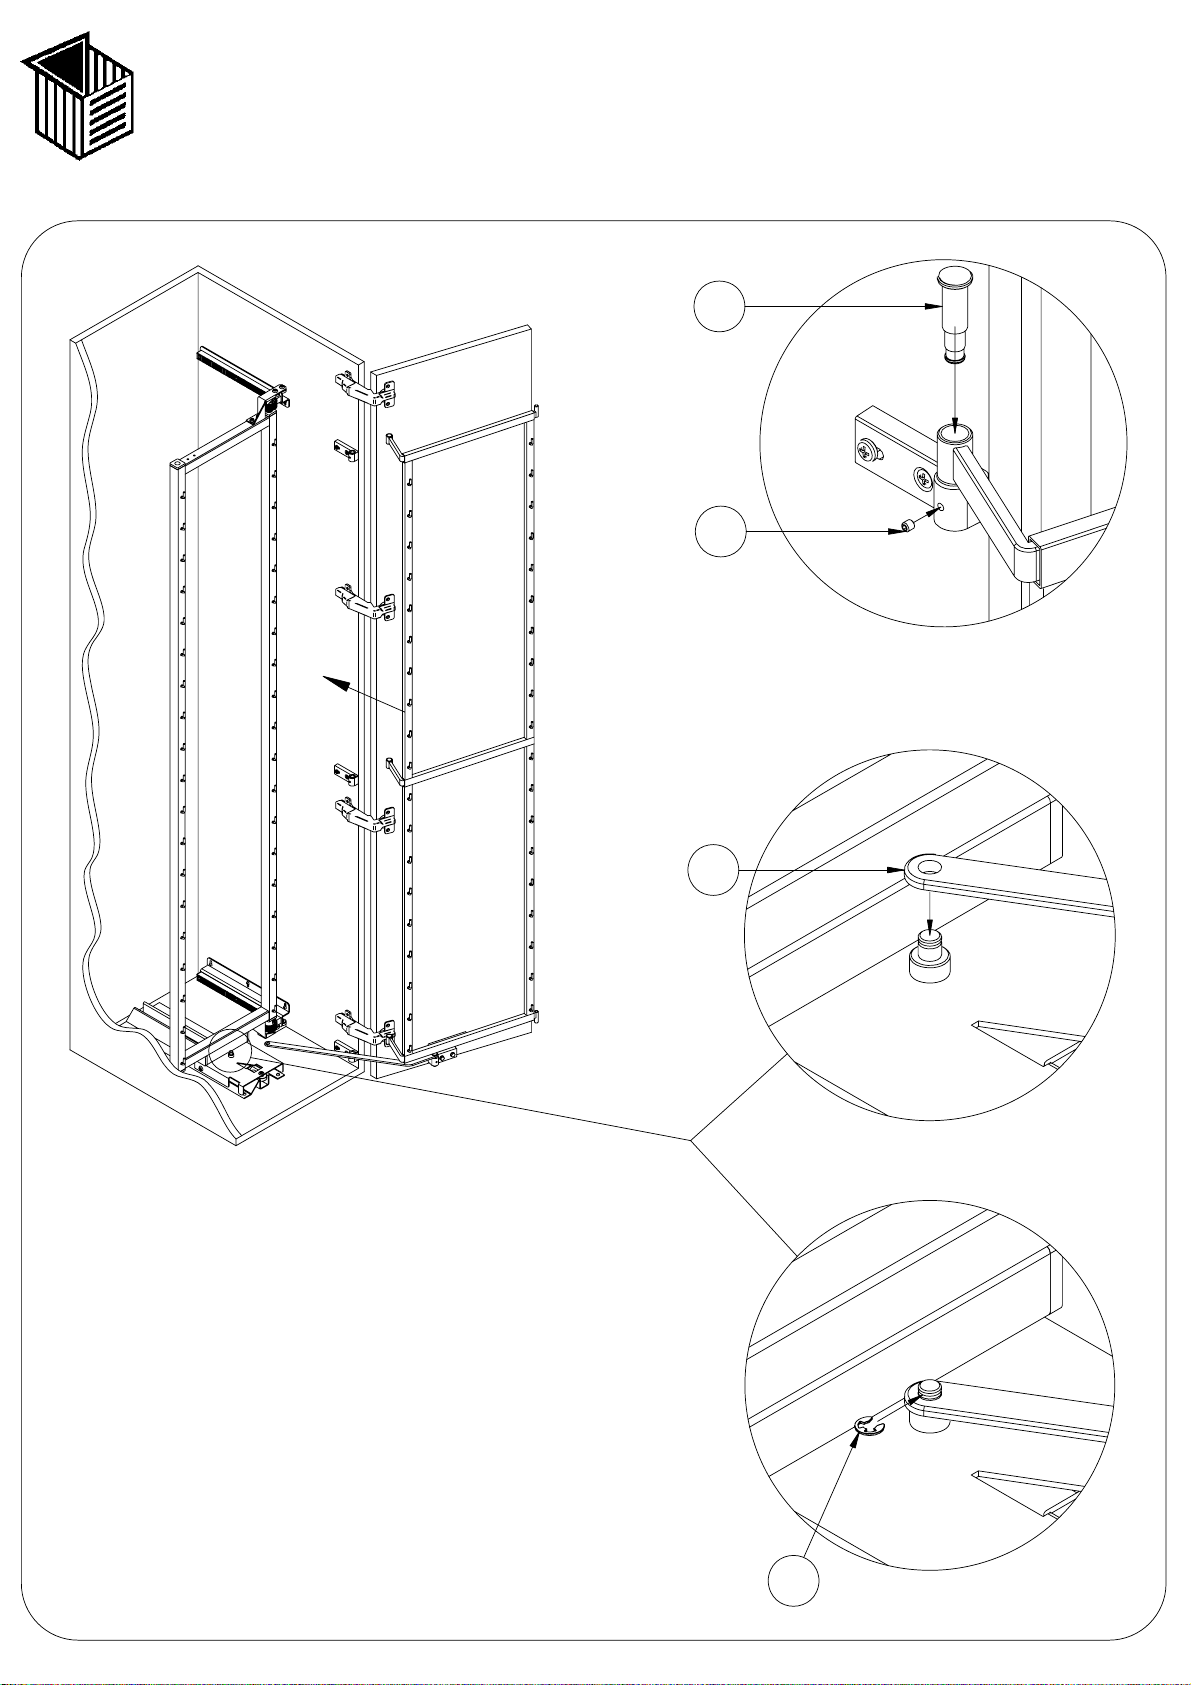
1-Allentareil grano G, sfilare il pignone
P e la bronzina B.
2-Capovolgere la struttura e sfilare
l'alberocompleto con la bronzina e
inserirlo nel lato opposto.
3-Rimontare la bronzina B il pignone P
e fissare il tutto con il grano G.
1-Loosen the screw G, slide out the pinion
P and the brass B.
2-Turn the structure upside down, slide out
the shaft together with the brass and insert
it in the opposite side.
3-Re-mount the brass B, the pinion P and
fasten the assembly with the screw G.
1-Desserrer la vis sans tête G, ôter le
pignon et le coussinet en bronze B.
2-Retourner la structure et ôter l'arbre avec
le coussinet en bronze et l'introduire sur le
côté opposé.
3-Remonter le coussinet en bronze B, le
pignon P et fixer le tout avec la vis sans
tête G.
1-Aflojar el tornillo sin cabeza G, extraer
el piñón P y el casquillo B.
2-Invertir la estructura y extraer el eje
completo con el casquillo e insertarlo en el
lado contrario.
3-Volver a montar el casquillo B y el piñón
P y fijar todo con el tornillo sin cabeza G.
1- Den Gewindestift G lockern, den Ritzel
P und die Bronzebuchse B entnehmen.
2- Das Gestell wenden, die Welle komplett
mit Bronzebuchse entnehmen und an der
Gegenseite einsetzen.
3- Die Bronzebuchse B und den Ritzel P
wieder anbringen und alles zusammen mit
dem Gewindestift G fixieren.
1 Stopskrue G løsnes, tanddrev P og
bøsning B trækkes ud.
2 Vend strukturen om og træk den
komplette drivaksel ud sammen med
broncelejet, sæt den derefter ind i modsatte
side.
3 Monter igen bøsning B og tanddrev P og
fastgør det hele med stopskruen G.
1-Lossa stift G, ta ur pinjon P och
bronslager B.
2-Vända ramen och ta bort det kompletta
axeln med bronslager. Montera den på den
andra sidan.
3-Återmontera bronslager B, pinjon P och
fästa med stift G
G
P
B
1
2
3
Istruzioni per inverdione da destro a sinistro.
Right to left inversion instructions.
Instructions pour inversion de droite à gauche.
Instrucciones para la inversión de derecho a izquierdo.
Anleitung für die Umkehrung von rechts nach links.
Monteringsplan ved ombytning fra højre til venstre.
Anvisningar för att ändra från höger till vänster.