2User ManualVisit the ViewZ USA website at https://www.viewzusa.com
07132021-Rev. A
CONTENTS
Safety Instrucon
Installaon
Setup
Trouble Shoong
Warranty
1. Mark Indicaon & Substance
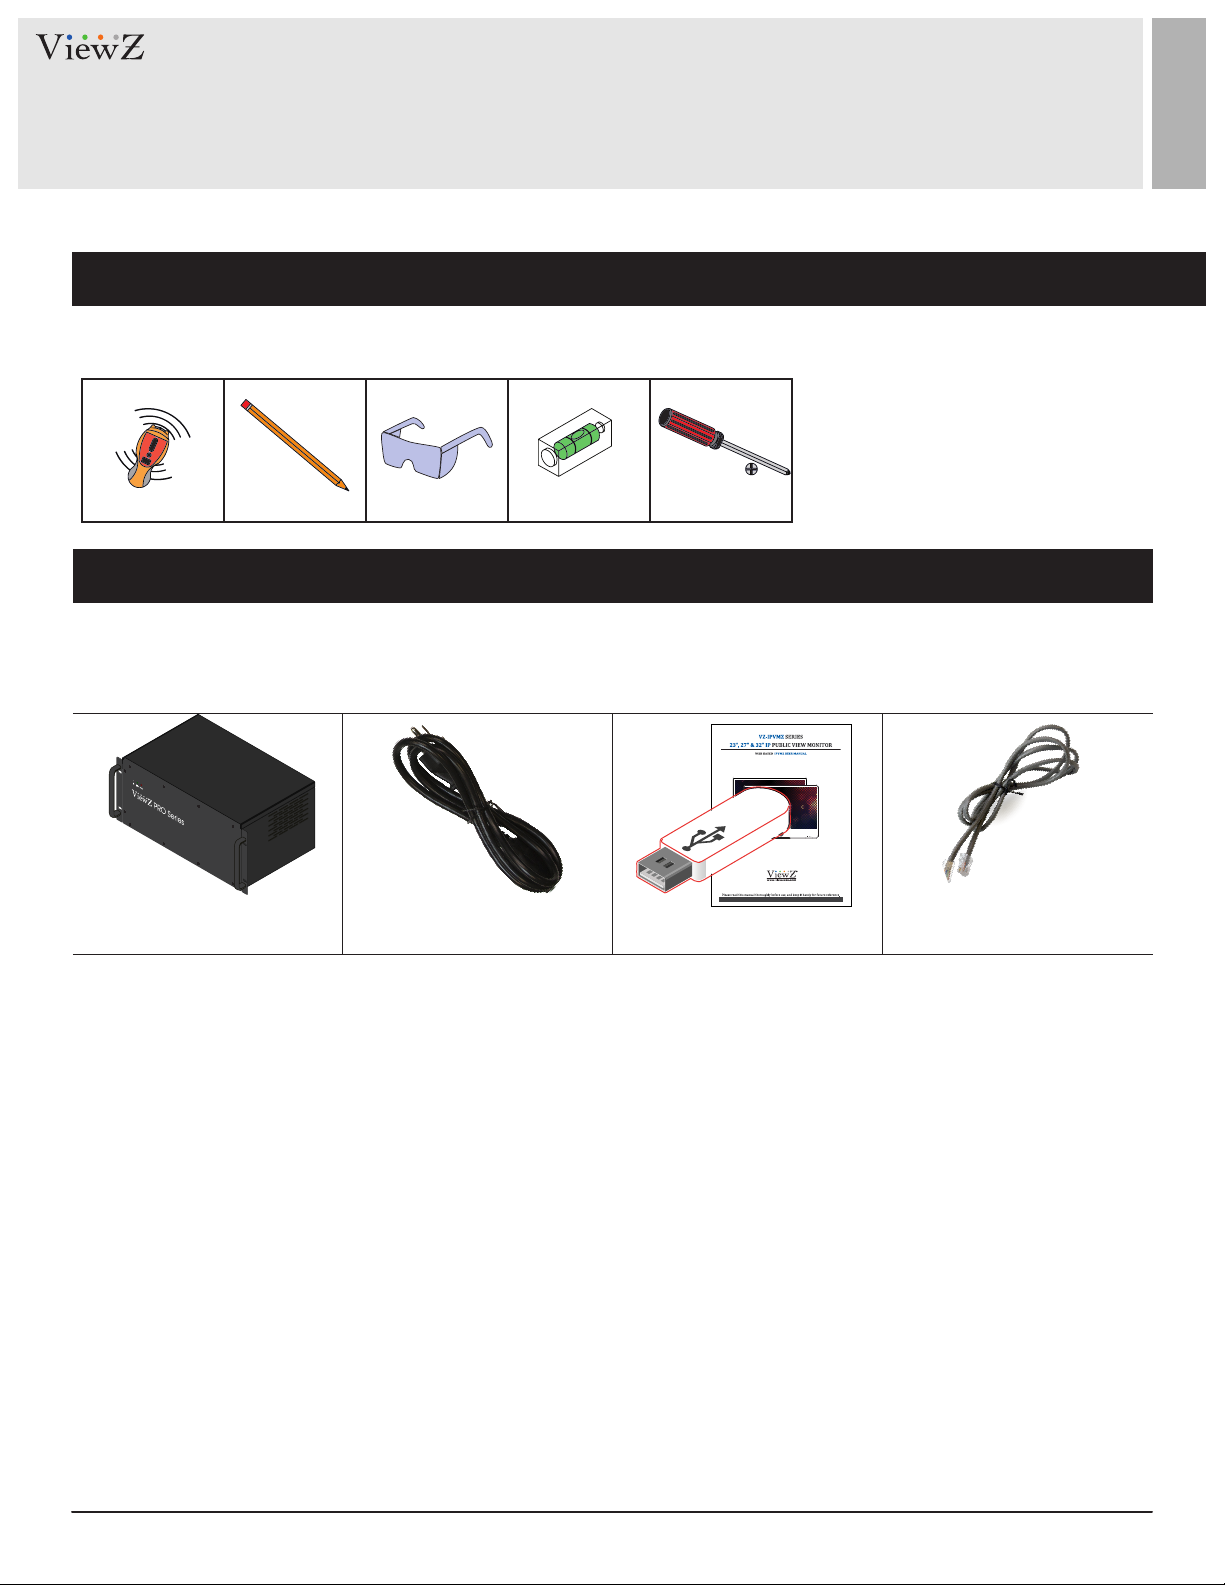
1. Package & Features
1. Soware Interface
2. Controller Connecon
4. Videowall Display Setup
6. Schedule Setup
3. Control Soware Operaon
5. Main Screen Layout Setup
7. Input Source Setup
8. IP Input Source Setup
2. Warning
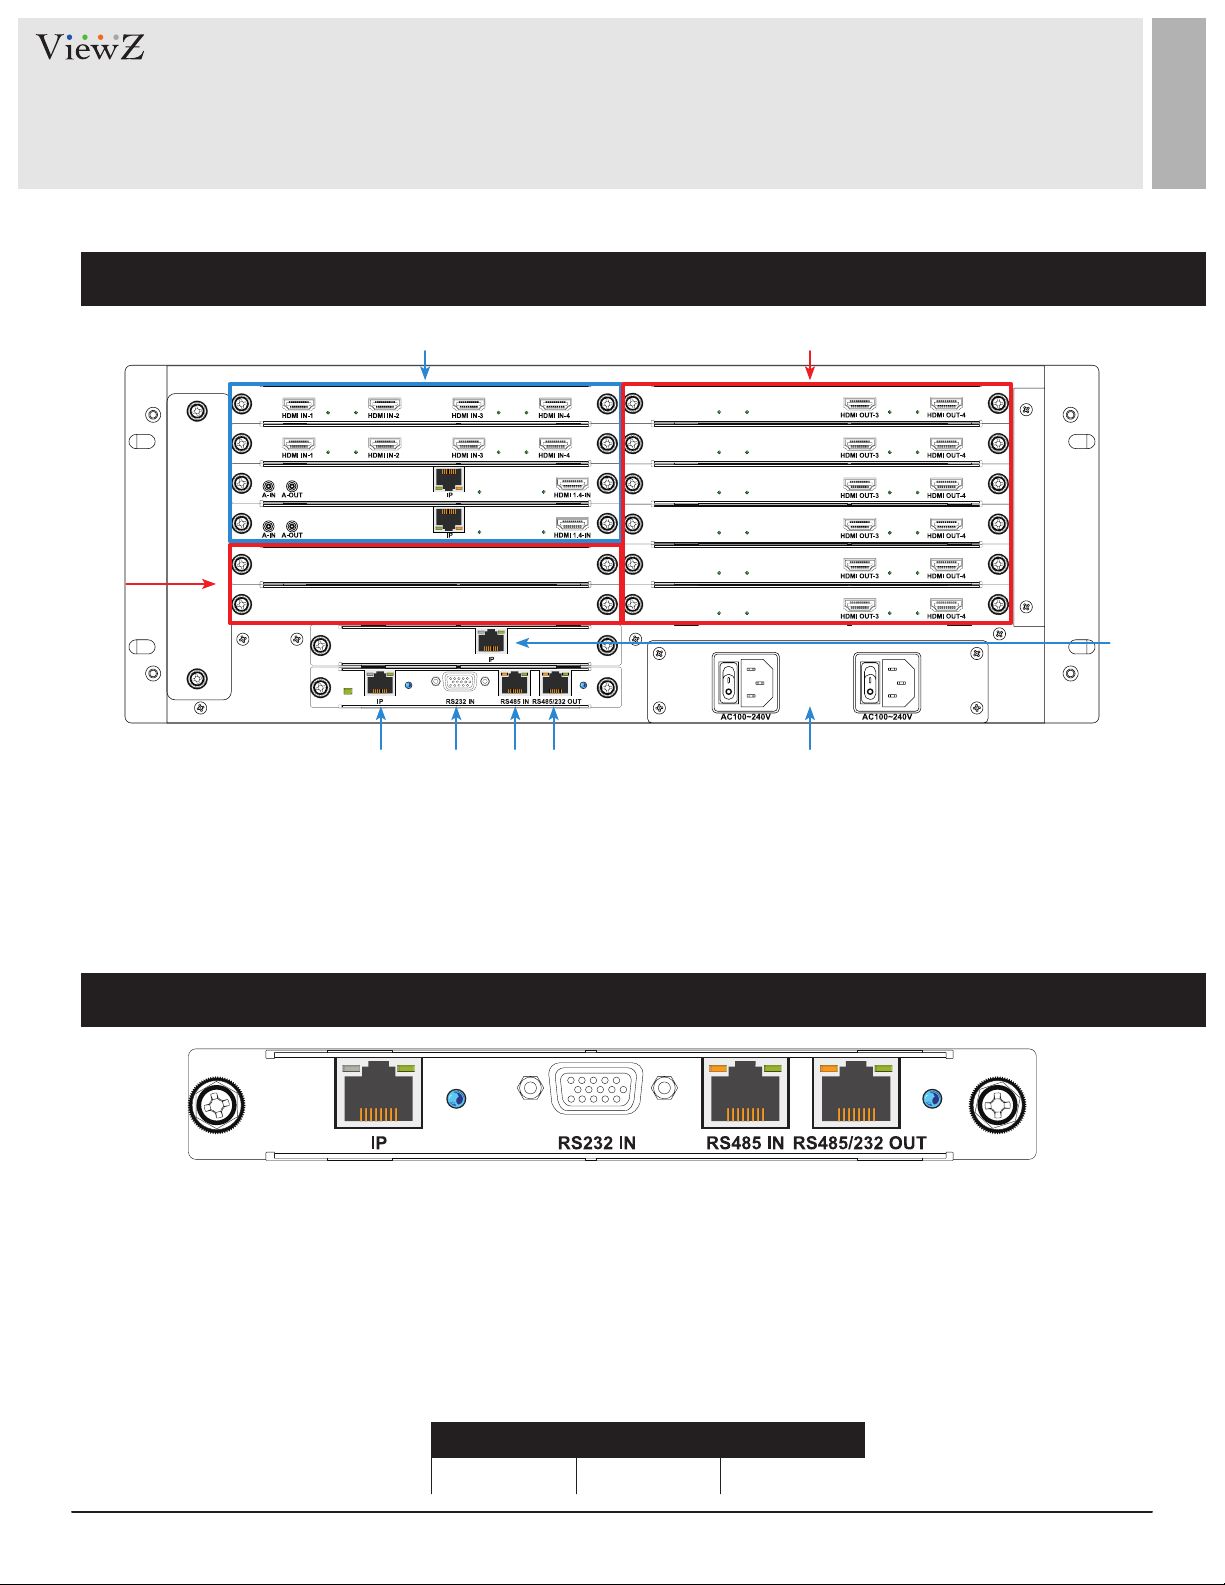
2. I/O Interface
3. System Diagram
4. SW Installaon
3. Cauon
4. Operaonal Temperature & Humidity
3
6
15
20
43
49
25
46
55
59
63
65
4
6
4
10
12
13
5
5
14
.......................................................................................................................................................................................
.......................................................................................................................................................................................................
.............................................................................................................................................................................
.....................................................................................................................................................................
..................................................................................................................................................................
....................................................................................................................................................................................
..........................................................................................................................................................
.............................................................................................................................................................
...........................................................................................................................................................................
.......................................................................................................................................................................
..........................................................................................................................................................................................
........................................................................................................................................................................................................
.......................................................................................................................................................
.......................................................................................................................................................................
................................................................................................................................................................................................
..........................................................................................................................................................................................
..................................................................................................................................................................................
.....................................................................................................................................................................................
..................................................................................................................................................................................................
.....................................................................................................................................
..................................................................................................................................................................................................................