manuals.online logo
Brands
  1. Home
  2. •
  3. Brands
  4. •
  5. Viking
  6. •
  7. Oven
  8. •
  9. Viking F20686 User manual

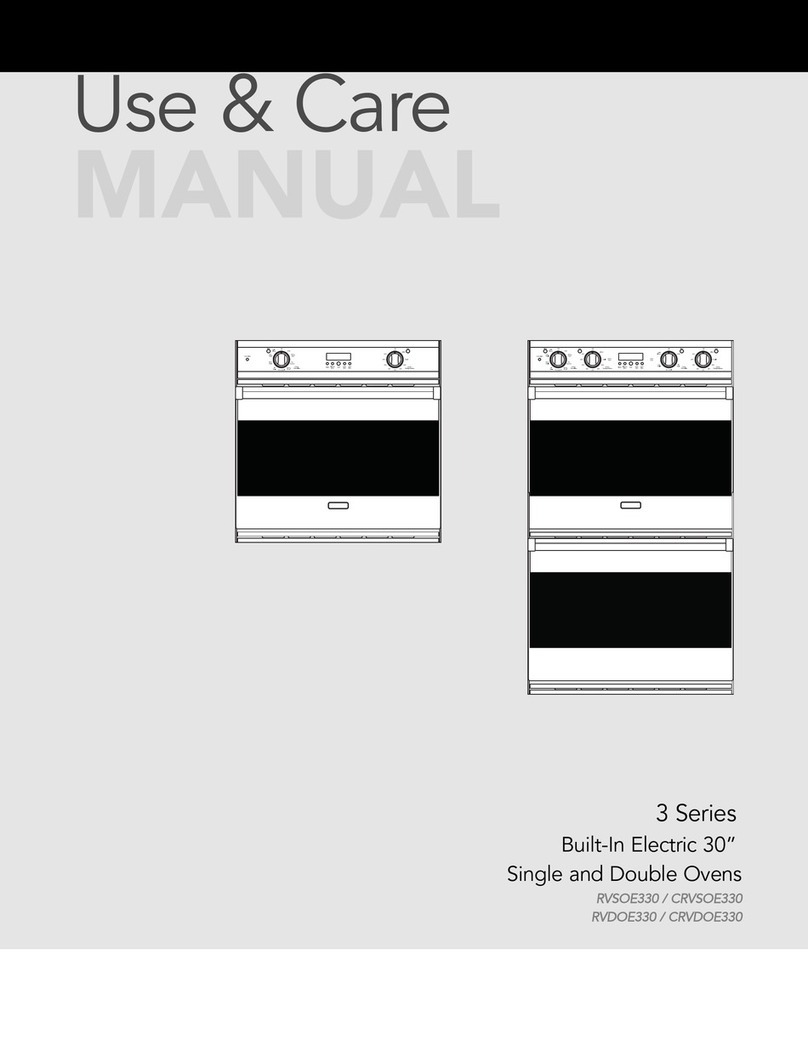
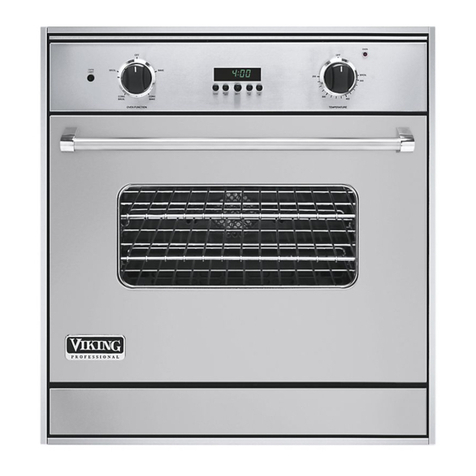
Viking F20686 User manual

Other manuals for F20686

1

This manual suits for next models

6

Other Viking Oven manuals

Viking Professional VEDO266 User manual

Viking

Viking Professional VEDO266 User manual

Viking veso165 Product guide

Viking

Viking veso165 Product guide

Viking VESO166SS User manual

Viking

Viking VESO166SS User manual

Viking DEDO127SS User manual

Viking

Viking DEDO127SS User manual

Viking VERO3200** User manual

Viking

Viking VERO3200** User manual

Viking RDSOE306 User manual

Viking

Viking RDSOE306 User manual

Viking Professional VGSO100 User manual

Viking

Viking Professional VGSO100 User manual

Viking VEDO127 User manual

Viking

Viking VEDO127 User manual

Viking RVDOE330 User manual

Viking

Viking RVDOE330 User manual

Viking VCTSO5200SS User manual

Viking

Viking VCTSO5200SS User manual

Viking Professional VESO127SS Service manual

Viking

Viking Professional VESO127SS Service manual

Viking DEDO127(T) User manual

Viking

Viking DEDO127(T) User manual

Viking VGDO271 Service manual

Viking

Viking VGDO271 Service manual

Viking Professional VEDO127T User manual

Viking

Viking Professional VEDO127T User manual

Viking Professional VESO5302 User manual

Viking

Viking Professional VESO5302 User manual

Viking DCSO244SS User manual

Viking

Viking DCSO244SS User manual

Viking MVDOE630 User manual

Viking

Viking MVDOE630 User manual

Viking VMOD241 User manual

Viking

Viking VMOD241 User manual

Viking MVSOC530SS User manual

Viking

Viking MVSOC530SS User manual

Viking M0706VR User manual

Viking

Viking M0706VR User manual

Viking RVSOE330WH User manual

Viking

Viking RVSOE330WH User manual

Viking VCSO244 Series User manual

Viking

Viking VCSO244 Series User manual

Viking Professional Custom VESO1302T User manual

Viking

Viking Professional Custom VESO1302T User manual

Viking Outdoor Range BQC053T1 User manual

Viking

Viking Outdoor Range BQC053T1 User manual

Popular Oven manuals by other brands

Brandt FC 222 user manual

Brandt

Brandt FC 222 user manual

aumate TOA20M04N-1E instruction manual

aumate

aumate TOA20M04N-1E instruction manual

Maytag CWE4100AC - 24" Single Electric Wall Oven Dimension Guide

Maytag

Maytag CWE4100AC - 24" Single Electric Wall Oven Dimension Guide

Kernau KBO 1076 S PT B instruction manual

Kernau

Kernau KBO 1076 S PT B instruction manual

Bosch HB 37 N Series User manual and installation instructions

Bosch

Bosch HB 37 N Series User manual and installation instructions

Electrolux EOD5420AA user manual

Electrolux

Electrolux EOD5420AA user manual

Mx Onda MX-HC2183 instruction manual

Mx Onda

Mx Onda MX-HC2183 instruction manual

Daewoo F6EV19SM2 Service manual

Daewoo

Daewoo F6EV19SM2 Service manual

Blodgett MT3870 Specifications

Blodgett

Blodgett MT3870 Specifications

GE ZET2F owner's manual

GE

GE ZET2F owner's manual

GE JK3000DF3WW owner's manual

GE

GE JK3000DF3WW owner's manual

eka EKF 523 NT Operating and instruction manual

eka

eka EKF 523 NT Operating and instruction manual

AEG Electrolux E3191-5 user manual

AEG Electrolux

AEG Electrolux E3191-5 user manual

Pratica Rocket Express quick start guide

Pratica

Pratica Rocket Express quick start guide

FM RX203 instruction manual

FM

FM RX203 instruction manual

Bosch HBN331 9B Series instruction manual

Bosch

Bosch HBN331 9B Series instruction manual

NEFF B95M42N0MK Instructions for use

NEFF

NEFF B95M42N0MK Instructions for use

Miele H 5961 B User instructions

Miele

Miele H 5961 B User instructions

manuals.online logo
manuals.online logoBrands
  • About & Mission
  • Contact us
  • Privacy Policy
  • Terms and Conditions

Copyright 2025 Manuals.Online. All Rights Reserved.

F20686 EN (102909J)
Viking Range Corporation
111 Front Street
Greenwood, Mississippi 38930 USA
(662) 455-1200
For product information,
call 1-888-VIKING1 (845-4641)
or visit the Viking Web site at
vikingrange.com
Viking Use & Care Manual
Designer Series Built-In Electric
Touch Control Single and Double Ovens
Getting Started
Warnings & Important Safety Information ________________________4
Product Controls
Before Using Oven __________________________________________12
Setting the Clock ____________________________________________13
Oven Control Panel__________________________________________14
Oven Features ______________________________________________16
Clocks and Timers ___________________________________________17
Oven Settings_______________________________________________21
Operation
Using the Oven _____________________________________________30
Preheat __________________________________________________30
Meat Probe Function ______________________________________30
Rack Positions_____________________________________________32
Conventional and Convection Cooking ______________________33
Condensation _____________________________________________34
Pan Placement Tips________________________________________35
Baking _____________________________________________________36
BAKE (Two-Element Bake) __________________________________36
CONV BAKE (Convection Bake) _____________________________36
TRU CONV (TruConvec™) __________________________________37
Bake Instructions __________________________________________38
Solving Baking Problems _____________________________________43
Roasting____________________________________________________44
CONV ROAST(Convection Roast)____________________________44
Roast Instructions__________________________________________47
Broiling_____________________________________________________51
CONV BROIL(Convection Broil) _____________________________51
HI BROIL _________________________________________________51
MED BROIL ______________________________________________51
LOW BROIL ______________________________________________51
Broiling Instructions________________________________________53
Warming Modes_____________________________________________56
Convection Dehydrate _____________________________________56
Convection Defrost ________________________________________57
Proofing__________________________________________________57
Product Care
Cleaning and Maintenance ___________________________________58
Self-Clean Cycle_____________________________________________60
Replacing Oven Lights _______________________________________62
Troubleshooting _____________________________________________63
Error Handling ______________________________________________64
Service Information __________________________________________65
Table of Contents
Your purchase of this product attests to the importance you place
upon the quality and performance of the major appliances you use.
With minimal care, as outlined in this guide, this product is designed
to provide you with years of dependable service. Please take the few
minutes necessary to learn the proper and efficient use and care of
this quality product.
Some of the key features of this appliance include
• A broad range of baking and broiling modes—up to 11 cooking
modes in all—to make even your most challenging baking projects
a success.
• A two-speed convection fan that allows you to cook foods more
thoroughly and evenly—even when baking large quantities.
• Four convection modes offering greater air circulation to shorten
cooking times and cook foods more evenly.
• Dual broiling elements producing intense radiant heat for faster
broiling and a larger coverage area.
• Three broiling modes including a new low-broil mode for delicate
broiling and top-browning.
• A halogen lighting system to provide more light with less glare.
• A concealed bake element for easier cleaning.
• Five adjustable rack positions to accomodate all your baking needs.
Your complete satisfaction is our ultimate goal. If you have any
questions or comments about this product, please contact the dealer
from whom you purchased it, or contact our Consumer Support
Center at 1-888-VIKING1 (845-4641).
We appreciate your choosing a Viking Range Corporation product
and hope that you will again select our products for your other major
appliance needs. For more information about the complete and
growing selection of Viking products, contact your dealer or visit us
online at vikingrange.com
Congratulations
5
Getting Started
4
Warning and Important Safety Instructions appearing in this manual
are not meant to cover all possible conditions and situations that may
occur. Common sense, caution, and care must be exercised when
installing, maintaining, or operating the appliance.
ALWAYS contact the manufacturer about problems or conditions you do not
understand.
Recognize Safety Symbols, Words, Labels
Read and follow all instructions before using this appliance to prevent
the potential risk of fire, electric shock, personal injury or damage to the
appliance as a result of improper usage of the appliance. Use appliance
only for its intended purpose as described in this manual.
To ensure proper and safe operation: Appliance must be properly
installed and grounded by a qualified technician. DO NOT attempt to
adjust, repair, service, or replace any part of your appliance unless it is
specifically recommended in this manual. All other servicing should be
referred to a qualified servicer.
KEEP THESE INSTRUCTIONS FOR FUTURE REFERENCE.
Hazards or unsaf practic s which WILL r sult in
s v r p rsonal injury or d ath
Hazards or unsaf practic s which COULD r sult in
d ath or s v r p rsonal injury
DANGER
Hazards or unsaf practic s which COULD r sult in
minor p rsonal injury.
All safety messages will identify the hazard, tell you how
to redu e the han e of injury, and tell you what an happen if
the instru tions are not followed.
WARNING
CAUTION
WARNING
DO NOT use ommer ial oven leaners inside the oven. Use of these
leaners an produ e hazardous fumes or an damage the por elain
finishes.
WARNING
NEVER over any slots, holes or passages in the oven bottom or over
an entire ra k with materials su h as aluminum foil. Doing so blo ks air
flow through the oven and may ause arbon monoxide poisoning.
Aluminum foil linings may also trap heat, ausing a fire hazard.
WARNING
To avoid risk of property damage, personal injury or death;
follow information in this manual exa tly to prevent a fire or
explosion. DO NOT store or use gasoline or other flammable
vapors and liquids in the vi inity of this or any applian e.
IMPORTANT– Please Read and Follow IMPORTANT– Please Read and Follow
Getting Started
7
Cooking Safety
• Use dry, sturdy pot-holders. Damp pot-holders may cause burns from steam.
Dishtowels or other substitutes should NEVER be used as potholders
because they can get caught on appliance parts.
• Loose-fitting or hanging garments should never be worn while using the
appliance.
DO NOT
drape towels or materials on oven door handles. These
items could ignite and cause burns.
•
ALWAYS
place oven racks in the desired positions while oven is cool.
Slide oven rack out to add or remove food, using dry, sturdy pot-holders.
ALWAYS
avoid reaching into the oven to add or remove food. If a rack
must be moved while hot, use a dry pot-holder.
•
ALWAYS
turn the oven off at the end of cooking.
•
DO NOT
heat unopened food containers; buildup of pressure may cause
the container to explode and result in injury.
• Use care when opening the oven door. Let hot air or steam escape before
moving or replacing food.
•NEVER use aluminum foil to cover oven racks or oven bottom. This could
result in risk of electric shock, fire, or damage to the appliance. Use foil only
as directed in this guide.
•PREPARED FOOD WARNING:
Follow food manufacturer's instructions. If a
plastic frozen food container and/or its cover distorts, warps, or is otherwise
damaged during cooking, immediately discard the food and its container.
The food could be contaminated
.
Heating Elements
• NEVER touch oven heating elements, areas near elements, or interior
surfaces of oven.
• Heating elements may be hot even though dark in color. Areas near elements
and interior surfaces of an oven may become hot enough to cause burns.
•
During and after use, DO NOT touch or let clothing or other flammable
materials contact heating elements, areas near elements, or interior surfaces
of oven until they have had sufficient time to cool.
Self-Clean Oven
•
Clean only parts listed in this guide. DO NOT clean door gasket. The door
gasket is essential for a good seal. Care should be taken not to rub, damage,
or move the gasket. DO NOT use oven cleaners of any kind in or around
any part of the self-clean oven.
• Before self-cleaning the oven, remove broiler pan, oven racks and other
utensils and wipe up excessive spill-overs to prevent excessive
smoke,
flare-ups or flaming.
• This oven features a cooling fan which operates automatically during a
clean cycle. If the fan does not turn on, cancel the clean operation and
contact an authorized servicer.
Getting Started
6
To Prevent Fire or Smoke Damage
• Be sure all packing materials are removed from the appliance before
operating it.
• Keep area around appliance clear and free from combustible materials,
gasoline, and other flammable vapors and materials.
• Many aerosol-type spray cans are EXPLOSIVE when exposed to heat and
may be highly flammable. Avoid their use or storage near an appliance.
• Many plastics are vulnerable to heat. Keep plastics away from parts of the
appliance that may become warm or hot.
• Combustible items (paper, plastic, etc.) may ignite and metallic items
may become hot and cause burns.
DO NOT
leave oven unsupervised
when drying herbs, breads, mushrooms, etc., as this may create a fire
hazard.
In Case of Fire
Turn off appliance to avoid spreading the flame.
•Smother fire or flame by closing the oven door.
• DO NOT use water on grease fires. Use baking soda, a dry chemical or
foam-type extinguisher to smother fire or flame.
Child Safety
• NEVER leave children alone or unsupervised near the appliance when it is in
use or is still hot.
•DO NOT store items of interest to children over the unit. Children climbing
to reach items could be seriously injured.
• Children must be taught that the appliance and utensils in it can be hot.
Let hot utensils cool in a safe place, out of reach of small children.
Children should be taught that an appliance is not a toy. Children should not
be allowed to play with controls or other parts of the appliance.
Getting Started
IMPORTANT– Please Read and Follow IMPORTANT– Please Read and Follow
9
Getting Started
8
Getting Started
WARNING
ELECTRICAL SHOCK HAZARD
Dis onne t the ele tri power at the main fuse or ir uit
breaker before repla ing bulb.
WARNING
BURN OR ELECTRICAL SHOCK HAZARD
Make sure all ontrols are “OFF” and oven is COOL before
leaning. Failure to do so an result in burns or ele tri al
sho k.
WARNING
ELECTRICAL SHOCK HAZARD
DO NOT
tou h a hot oven light bulb with a damp loth as
the bulb ould break. Should the bulb break, dis onne t
power to the applian e before removing bulb to avoid
ele tri al sho k.
Important Safety Notice and Warning
The California Safe Drinking Water and Toxic Enforcement Act of 1986
(Proposition 65) requires the Governor of California to publish a list of
substances known to the State of California to cause cancer or
reproductive harm, and requires businesses to warn customers of potential
exposures to such substances. Users of this appliance are hereby warned
that when the oven is engaged in the self-clean cycle, there may be some
low-level exposure to some of the listed substances, including carbon
monoxide. Exposure to these substances can be minimized by properly
venting the oven to the outdoors by opening the windows and/or door in
the room where the appliance is located during the self-clean cycle.
Important notice regarding pet birds:
NEVER keep pet birds in the kitchen or in rooms where the fumes from the
kitchen could reach. Birds have a very sensitive respiratory system. Fumes
released during an oven self-cleaning cycle may be harmful or fatal to
birds. Fumes released due to overheated cooking oil, fat, margarine and
overheated non-stick cookware may be equally harmful.
About Your Appliance
• For proper oven performance and operation, DO NOT block or obstruct the
oven vent duct located on the right side of the air grille.
• Avoid touching oven vent area while oven is on and for several minutes after
oven is turned off. When the oven is in use, the vent and surrounding area
become hot enough to cause burns. After oven is turned off, DO NOT
touch the oven vent or surrounding areas until they have had sufficient time
to cool.
WARNING
To prevent possible damage to abinets and abinet finishes, use only
materials and finishes that will not dis olor or delaminate and will
withstand temperatures up to 194°F (90°C). Heat and moisture resistant
adhesive must be used if the produ t is to be installed in laminated
abinetry. Che k with your builder or abinet supplier to make sure that
the materials meet these requirements.
WARNING
NEVER use applian e as a spa e heater to heat or warm a room to
prevent potential hazard to the user and damage to the applian e. Also,
DO NOT use the oven as a storage area for food or ooking utensils.
• Other potentially hot surfaces include oven vent, surfaces near the vent
opening, oven door, areas around the oven door, and oven window.
• The misuse of oven doors (e.g. stepping, sitting, or leaning on them) can
result in potential hazards and/or injuries.
WARNING
This applian e features a self- leaning y le. During this y le, the
oven rea hes elevated temperatures in order to burn off soil and
deposits. A powder ash residue is left in the bottom of the oven after
ompletion of the self- lean y le.
Note: DO NOT use commercial oven cleaners inside the oven. Use of
these cleaners can produce hazardous fumes or can damage the
porcelain finishes. DO NOT line the oven with aluminum foil or other
materials. These items can melt or burn during a self-clean cycle,
causing permanent damage to the oven.
IMPORTANT– Please Read and Follow IMPORTANT– Please Read and Follow
11
Getting Started
10
Getting Started
CAUTION
DO NOT store items of interest to hildren over the unit. Children
limbing to rea h items ould be seriously injured.
WARNING
BURN HAZARD
When self- leaning, surfa es may get hotter than usual.
Therefore, hildren should be kept away.
CAUTION
DO NOT tou h the exterior portions of the oven after
self- leaning y le has begun, sin e some parts be ome
extremely hot to the tou h!
During the first few times the self- leaning feature is used, there may
be some odor and smoking from the “ uring” of the binder in the high-
density insulation used in the oven. When the insulation is thoroughly
ured, this odor will disappear. During subsequent self- leaning
y les, you may sense an odor hara teristi of high temperatures.
KEEP THE KITCHEN WELL-VENTED DURING THE
SELF-CLEAN CYCLE.
CAUTION
You must arefully he k the food during the dehydration pro ess to
ensure that it does not at h fire.
WARNING
To avoid si kness and food waste when using automati time baking:
•DO NOT use foods that will spoil while waiting for ooking to start, su h
as dishes with milk or eggs, ream soups, ustards, fish, pork, poultry,
or foods with stuffing.
• Any food that has to wait for ooking to start should be very old or
frozen before it is pla ed in the oven.
•DO NOT use foods ontaining baking powder or yeast with automati
time baking. They will not rise properly.
•DO NOT allow food to remain in the oven for more than 2 hours after
the end of the ooking y le.
• To avoid si kness and food waste, DO NOT allow defrosted food to
remain in the oven for more than 2 hours.
CAUTION
BURN HAZARD
The oven door, espe ially the glass, an get hot. Dang r of
burning: DO NOT touch th glass!
CAUTION
To avoid si kness and food waste, DO NOT allow defrosted food to
remain in the oven for more than 2 hours.
NOTICE
DO NOT turn the Temperature Control on during defrosting. Turning
the onve tion fan on will a elerate the natural defrosting of the food
without the heat.
NOTICE
Avoid any damage to oven vents. The vents need to be unobstru ted
and open to provide proper airflow for optimal oven performan e.
NOTICE
The ooling fan should be operating when the unit is in operation.
If you noti e the ooling fan is not operating or you observe unusual
or ex essive noise oming from the ooling fan, onta t a Viking
Authorized Servi e Center before ontinuing operation. Failure to do
so an result in damage to the oven or surrounding abinets.
IMPORTANT– Please Read and Follow IMPORTANT– Please Read and Follow
13
Product Controls
12
Setting the Clock
The time-of-day must be set
before any other program can
be used. When your oven is first
connected to the power in your
home, the timer display will
show 12 00.
To program the Time-Of-Day:
1. Press either the “UPPER OVEN” or “LOWER OVEN” button.
2. Press the “CLOCK SET” button. The clock will begin to flash.
The word “CLOCK” will be lit on the display.
3. Type in the correct time on the electronic number keypad.
4. Press the “CLOCK SET” button again. The clock is now set.
Alternate method:
1. Press either the “UPPER OVEN” or “LOWER OVEN” button.
2. Press the “CLOCK SET” button. The clock will begin to flash. The
word “CLOCK” will be lit on the display.
3. Use the up and down arrows to change the current time.
4. Press the “SET” button on the temperature control or the “CLOCK
SET” button on the electronic timing center. The clock is now set.
Note: The time-of-day ca ot be cha ged while there is a bake hours
or start time cycle programmed i to the timer.
Setting the Clock
Before Using Oven
Oven
Important! Before first use, wipe interior with soapy water and dry
thoroughly. Then set the oven selector to “BAKE”, the thermostat
to 350°F, and operate for an hour.
All models include:
• A broad range of baking and broiling modes—up to 11 cooking
modes in all—to make even your most challenging baking projects
a success.
• A two-speed convection fan that allows you to cook foods more
thoroughly and evenly—even when baking large quantities.
• Four convection modes offering greater air circulation to shorten
cooking times and cook foods more evenly.
• Dual broiling elements producing intense radiant heat for faster
broiling and a larger coverage area.
• Three broiling modes including a new low-broil mode for delicate
broiling and top-browning.
• A halogen lighting system to provide more light with less glare.
• A concealed bake element for easier cleaning.
• Five adjustable rack positions to accomodate all your baking needs.
Press and Release Press and Hold
LTime increases by 1 minute Time increases by 10 minutes
MTime decreases by 1 minute Time decreases by 10 minutes
Product Controls
15
Oven Control Panel
Product Controls
14
Product Controls
Oven Control Panel
Oven Function and
Temperature Controls
Each oven function has a separate setting.
(See descriptions)
The SET control up and down arrows can
be used to set any temperature from
150˚ F (65.6˚ C) to 550˚ F (287.8˚ C).
Electronic Timing Center
The electronic timing center is used to
program and control all timing
functions.
IMPORTANT–The time-of-day
must be set before any other
program can be used.
Electronic Keypad Entry
The electronic keypad entry is
used to program and control
all oven functions.
Bake
Conventional, single-rack baking (breads,
cakes, cookies, pastry, pies, entrees,
vegetables)
Convection Bake
Multi-rack baking for heavier or frozen
foods (e.g., frozen pies, pizzas, entrees,
vegetables)
Defrost
Natural defrosting of food using fan
without heat
Auto Roast
Automatic searing of the outside of
meats; simplifies roasting
TruConvecTM
Multi-rack baking for breads, cakes,
cookies (up to 6 racks of cookies at once)
Convection Roast
Roasting whole turkeys, whole chickens,
hams, etc.
Self-Clean
A self-cleaning cycle using high heat to
burn off soils and deposits
Proof
Creates an optimal environment for the
rising of yeast in many kinds of dough
Recipes
Accesses, programs, and saves cooking
cycles from favorite recipes
Oven Light Controls
Controls the interior lights in the upper
and lower ovens
Oven Lock
Childproofing feature preventing the
controls from being activated when the
oven is not in use
Settings
Accesses custom features such as display
brightness, Sabbath mode, and tones
Broil
Three conventional broil settings for cuts
of flat pieces of meat or meat 1-2 inches
thick
Convection Broil
Faster than regular broiling with less
smoke generation for thicker meats
Dehydrate
Using the convection fan over a
period of time, water is removed
from food by evaporation
Meat Probe
An audible alarm sounds when the
internal temperature of the meat being
roasted is reached
Oven Selector Controls
The oven selector controls are
used to turn the upper or
lower oven on and off.
Note: DDOE305T model co trol pa el show .
Oven Selector Options
17
Clocks and Timers
Product Controls
16
Electronic Timing Center
The Electronic Timing Center is
used to program and control all
timing functions on your Viking
appliance. It has four display
and programming modes that
are activated by the four push
buttons. Both the timer and the
Cook Time/Stop Time modes can be used to time cooking periods.
These features can even be used at the same time when both ovens
are in use. For example, you can time-bake a casserole in the upper
oven using the Cook Time/Stop Time mode, while broiling in the lower
oven using the timer. One oven can also be cleaned while timing foods
in the other oven using the timer.
Timer Alarm
• At the end of a program, the alarm will consist of three beeps,
followed by two beeps every 10 seconds until the “CLEAR” button
is pressed.
• Whenever a valid function key is pressed or when a control function
starts automatically, one beep will sound.
• When an invalid function key is pressed, two beeps will sound.
Product Controls
Oven Features
1
2
5
4
36
7
1. TruConvec™
element
(behind baffle)
2. Oven light
3. Oven racks
(three upper,
three lower)
4. Model/Serial
number plate
(behind vents)
5. Broil element
6. Bake element
7. Lower oven
19
Clocks and Timers
Product Controls
18
Cook Time and Stop Time
With the Viking oven, you can choose what times you need to start
and stop cooking your food. The cook time and stop time functions
allow you to program your preferences.
Here’s how it works:
It is 2 00 PM and you would like to have your dinner ready at 6 00 PM. By
programming your oven with a 2-hour cook time and a 6 00 PM stop
time, your oven will delay cooking until 3 50 PM. At 3 50, the oven will
begin preheating. At 4 00 PM, the oven will begin its 2-hour cook time.
Cook Time and Stop Time facts:
Both ovens can be set individually for cook time and stop time
functions.
To set Cook Time:
1. Select “UPPER OVEN” or “LOWER OVEN”.
2. Select an oven function and temperature before setting Cook
Time and Stop Time functions.
3. Press “COOK TIME” and the display will flash “0 00” and
“COOK TIME” will be lit below.
4. Use numeric keyboard to enter the amount of time needed for
cooking.
5. After the time is entered, the display will show “COOK TIME”
under the timer field. (To cancel the entry, press the “CLEAR”
button on the left side of the control panel.)
6. Press “SET” or “ENTER” if the cook time is correct. Cook time
is set.
Note: To ca cel cook time duri g its cycle, press “COOK TIME” a d
the press the “CLEAR” butto o the left side of the ove co trol.
Cooki g will co ti ue if the ove is o .
Clocks and Timers
Product Controls
Setting the Timer
The timer is designed for accurate timing and is ideal for baking
delicate items such as biscuits, cookies, and popovers, and for precise
broiling. The timer can be used for timing up to 12 hours. When
setting the timer, the time displayed will decrease in 1 minute
increments. When the timer counts down to 1 minute, the timer alarm
will give one short beep and the display will change to seconds. When
the timer reaches 0 00, the alarm will give a long beep.
To set the Timer:
1. Press the “TIMER” button. The timer will display “0 00” and the
word “TIMER.”
2. Type in the desired duration time on the electronic number keypad.
3. The timer will start automatically. (To cancel the entry, press the
“CLEAR” button on the left side of the control panel before the
count down begins and the time is still flashing.)
4. The timer is now set.
Alternate method:
1. Press the “TIMER” button. The timer will display “0 00” and the
word “TIMER” will be lit on the display.
2. Use the up and down arrows to set the timer.
3. Press “SET” or “TIMER” to program the timer. (To cancel the entry,
press the “CLEAR” button on the left side of the control panel.)
4. The timer is now set.
Press and Release Press and Hold
LTime increases by 1 minute Time increases by 10 minutes
MTime decreases by 1 minute Time decreases by 10 minutes