manuals.online logo
Brands
  1. Home
  2. •
  3. Brands
  4. •
  5. Viking
  6. •
  7. Range
  8. •
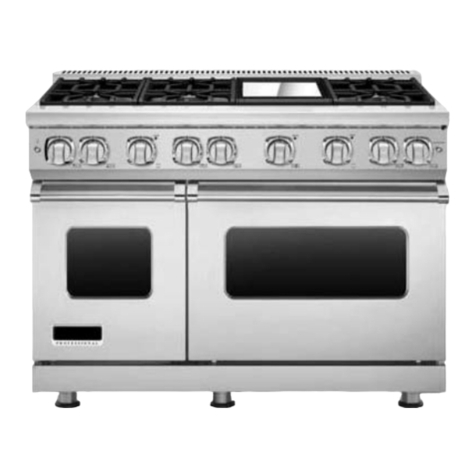
  9. Viking F20533 EN User manual

Viking F20533 EN User manual

Other Viking Range manuals

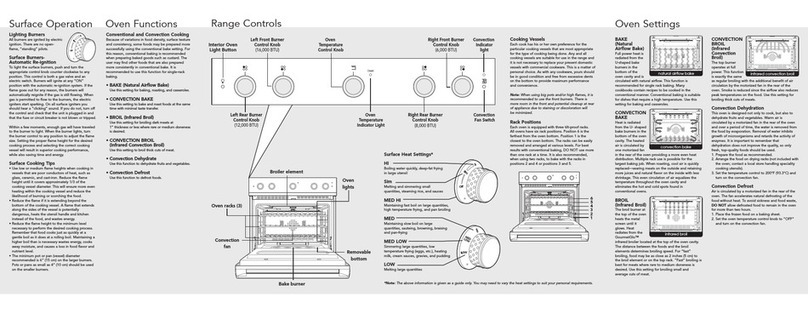
Viking D3 Series User manual

Viking

Viking D3 Series User manual

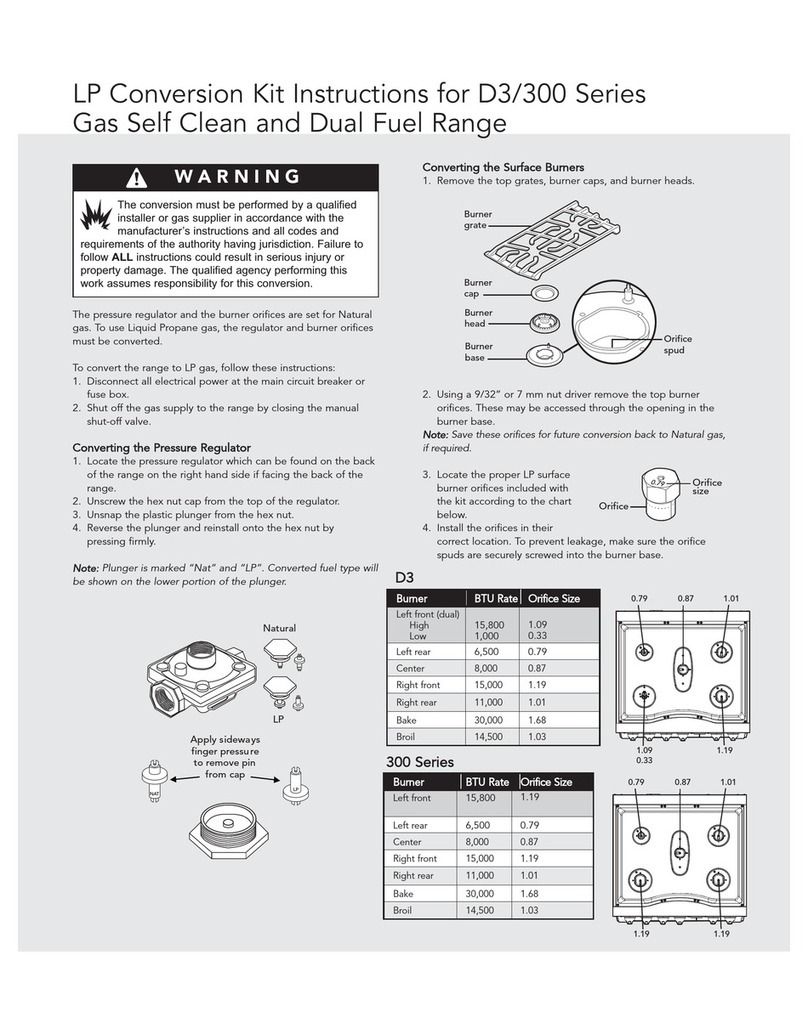
Viking Professional Custom VDSC5304BSS User manual

Viking

Viking Professional Custom VDSC5304BSS User manual

Viking RDSCD230 User manual

Viking

Viking RDSCD230 User manual

Viking VGR304B User manual

Viking

Viking VGR304B User manual

Viking RVER330 User manual

Viking

Viking RVER330 User manual

Viking BVGRC8366BWSS User manual

Viking

Viking BVGRC8366BWSS User manual

Viking CVDR7362 User manual

Viking

Viking CVDR7362 User manual

Viking TVDR3614B User manual

Viking

Viking TVDR3614B User manual

Viking Professional Freestanding Ranges User manual

Viking

Viking Professional Freestanding Ranges User manual

Viking VDR5304B User manual

Viking

Viking VDR5304B User manual

Viking Professional Custom VDSC5304B User manual

Viking

Viking Professional Custom VDSC5304B User manual

Viking VGSC530-4B* User manual

Viking

Viking VGSC530-4B* User manual

Viking F20533 User manual

Viking

Viking F20533 User manual

Viking DSCD Series User manual

Viking

Viking DSCD Series User manual

Viking VGR30 User manual

Viking

Viking VGR30 User manual

Viking RDSCE230-5B User manual

Viking

Viking RDSCE230-5B User manual

Viking RVGR330 User manual

Viking

Viking RVGR330 User manual

Viking 36" W User manual

Viking

Viking 36" W User manual

Viking VDSC530T-4B User manual

Viking

Viking VDSC530T-4B User manual

Viking F20532A Owner's manual

Viking

Viking F20532A Owner's manual

Viking RVER User manual

Viking

Viking RVER User manual

Viking Professional Custom VGSC548-4GQ User manual

Viking

Viking Professional Custom VGSC548-4GQ User manual

Viking VDSC530 Series User manual

Viking

Viking VDSC530 Series User manual

Viking VGR7362 User manual

Viking

Viking VGR7362 User manual

Popular Range manuals by other brands

Maytag MGR5875QDW - 30 Inch Gas Range Use and care guide

Maytag

Maytag MGR5875QDW - 30 Inch Gas Range Use and care guide

Frigidaire FFGF3024SS use & care

Frigidaire

Frigidaire FFGF3024SS use & care

Capital Precision Series GCR484W Specifications

Capital

Capital Precision Series GCR484W Specifications

Officine Gullo GGS8P Installation and use instruction

Officine Gullo

Officine Gullo GGS8P Installation and use instruction

LG LSD4913 Series owner's manual

LG

LG LSD4913 Series owner's manual

Kenmore 4101 - Elite 30 in. Slide-In Electric Range installation instructions

Kenmore

Kenmore 4101 - Elite 30 in. Slide-In Electric Range installation instructions

Moffat Blue Seal Evolution G576 Technical data sheet

Moffat

Moffat Blue Seal Evolution G576 Technical data sheet

CornuFé C1NF user guide

CornuFé

CornuFé C1NF user guide

GE JGS650SEFSS Dimensions and installation information

GE

GE JGS650SEFSS Dimensions and installation information

LG LDG3015ST Manual De Propietario

LG

LG LDG3015ST Manual De Propietario

Whirlpool RF350PXP Use and care guide

Whirlpool

Whirlpool RF350PXP Use and care guide

Samsung FCQ321HTUW Service manual

Samsung

Samsung FCQ321HTUW Service manual

Kenmore 790.45712 Use & care guide

Kenmore

Kenmore 790.45712 Use & care guide

Wolf CHR CHSSR owner's manual

Wolf

Wolf CHR CHSSR owner's manual

Smeg Built-in Microwave Oven Instructions for the user

Smeg

Smeg Built-in Microwave Oven Instructions for the user

Zanussi ZCG054G user manual

Zanussi

Zanussi ZCG054G user manual

GE JCSS630 quick start guide

GE

GE JCSS630 quick start guide

Samsung NX58M9960P series installation manual

Samsung

Samsung NX58M9960P series installation manual

manuals.online logo
manuals.online logoBrands
  • About & Mission
  • Contact us
  • Privacy Policy
  • Terms and Conditions

Copyright 2025 Manuals.Online. All Rights Reserved.

Viking Range Corporation
111 Front Street
Greenwood, Mississippi 38930 USA
(662) 455-1200
For product information,
call 1-888-VIKING1 (845-4641)
or visit the Viking Web site at
vikingrange.com
F20533A EN (120908J)
®
Viking Installation Guide
Professional Freestanding Dual Fuel Ranges
IMPORTANT–Read and Follow!
3
2
Table of Contents
Warnings & Important Safety Instructions_____________________________________________________3
Dimensions __________________________________________________________________________________6
Specifications ________________________________________________________________________________8
Clearance Dimensions (Proximity to Cabinets) _______________________________________________10
Clearance Dimensions (Wood/Composite Overlay)___________________________________________11
Electrical & Gas Requirements ______________________________________________________________12
General Information ________________________________________________________________________14
Installation__________________________________________________________________________________15
Door Removal __________________________________________________________________________15
Leg Installation _________________________________________________________________________16
Electrical Connection (3 Wire)___________________________________________________________17
Electrical Connection (4 Wire)___________________________________________________________19
Leveling/Adjustments/Alignment________________________________________________________21
Anit-tip Device Installation ______________________________________________________________22
Connecting Gas & Electrical ____________________________________________________________23
Standoff Bracket Removal_______________________________________________________________24
Final Installation ________________________________________________________________________24
Door Replacement and Adjustment _____________________________________________________25
Final Preparation____________________________________________________________________________26
Performance Checklist ______________________________________________________________________26
Service & Registration ______________________________________________________________________27
• Before beginning, please read these
instructions completely and carefully.
• Do not remove permanently affixed labels,
warnings, or plates from product. This may
void the warranty.
• All local and national codes and ordinances
must be observed. Installation must
conform with local codes or in the absence
of codes, the National Fuel Gas Code ANSI
Z223.1-latest edition.
• The installer must leave these instructions
with the consumer who should retain for
local inspector’s use and for future
reference.
In Canada: Installation must be in accordance
with the current CAN/CGA B149.1 & 2 Gas
Installation codes and/or local codes. Electrical
installation must be in accordance with the
current CSA C22.1 Canadian Electrical Codes
Part 1 and/or local codes.
In Massachusetts: All gas products must be
installed by a “Massachusetts” licensed
plumber or gasfitter. A “T” type handle
manual valve must be installed in the gas
supply line to the appliance.
Your safety an the safety of others is
very important.
We h ve provided m ny import nt s fety
mess ges in this m nu l nd on your
ppli nce. Alw ys re d nd obey ll
s fety mess ges.
This is the s fety lert symbol. This
symbol lerts you to h z rds th t
c n kill or hurt you nd others.
All s fety mess ges will be preceded by
the s fety lert symbol nd the word
“DANGER,” “WARNING” or “CAUTION.”
These words me n:
Hazar s or unsafe practices
which WILL result in severe personal
injury or eath.
DANGER
Hazar s or unsafe practices
which COULD result in severe personal
injury or eath.
Hazar s or unsafe practices which
COULD result in minor personal injury or
property amage.
All s fety mess ges will identify the
h z rd, tell you how to reduce the ch nce
of injury, nd tell you wh t c n h ppen if
the instructions re not followed.
WARNING
CAUTION
IMPORTANT–Read and Follow!
5
4
DANGER
Gas leak hazar .
To void risk of person l injury
or de th; le k testing of the
ppli nce must be conducted
ccording to the m nuf cturer’s
instructions. Before pl cing ppli nce in
oper tion, lw ys check for g s le ks
with so py w ter solution.
• DO NOT USE AN OPEN FLAME TO
CHECK FOR GAS LEAKS.
DANGER
Electrical shock hazar .
To void risk of electric l shock,
person l injury or de th; verify
your ppli nce h s been
properly grounded in ccord nce with
loc l codes or in bsence of codes, with
the N tion l Electric l Code (NEC).
ANSI/NFPA 70-l test edition.
WARNING
Moving hazar .
To void risk of severe
person l injury; this ppli nce
requires two or more personnel
while h ndling nd moving. Possible
use of ppli nce moving devices is
recommended.
DANGER
Fire/explosion hazar .
IF THE INFORMATION IN
THIS MANUAL IS NOT
FOLLOWED EXACTLY, A
FIRE OR EXPLOSION MAY RESULT
CAUSING PROPERTY DAMAGE,
PERSONAL INJURY, OR DEATH.
•DO NOT store or use g soline or other
fl mm ble v pors nd liquids in the
vicinity of this or ny other ppli nce.
•WHAT TO DO IF YOU SMELL GAS:
–DO NOT try to light ny ppli nce.
–DO NOT touch ny electric l switch;
DO NOT use ny phone in your
building.
–Immedi tely c ll your g s supplier from
neighbor’s phone.
–Follow the g s supplier’s instructions.
–If you c nnot re ch your g s supplier,
c ll the fire dep rtment.
• Inst ll tion nd service must be
performed by qu lified inst ller, service
gency, or the g s supplier.
DANGER
Chemical hazar .
To void risk of property
d m ge nd/or person l injury
or de th; this ppli nce is not
too be used s he ting source.
• Benzene is chemic l which is p rt of
the g s supply to this cooking product,
which is consumed in the fl mes during
combustion. Exposure to sm ll
mount of benzene is possible if g s
le k occurs. Form ldehyde nd soot re
by-products of incomplete combustion.
• This ppli nce cont ins or produces
chemic ls which c n c use serious
injury or de th nd which re known to
the st te of C liforni to c use c ncer,
birth defects or other reproductive h rm.
To reduce the risk from subst nces in
the fuel or from fuel combustion m ke
sure this ppli nce is inst lled,
oper ted, nd m int ined in ccord nce
to the instructions in this document.
WARNING
Tipping hazar .
To reduce the risk of property
d m ge or person l injury;
inst ll nti-tipping device
provided in ccord nce with
the inst ll tion instructions in
this document. Device must be
eng ged properly to prevent
product from tipping over.
• This r nge c n tip.
• Injuries to persons c n result.
• Inst ll nti-tip device p cked with r nge.
• See inst ll tion instructions.
Dimensions
7
Dimensions
6
Dual Fuel 30”, 36”, 48” and 60” W. Ranges
35-7/8”
(91.1cm)min.
to
37”
(94cm)max.
1”(2.5cm)
29-7/8”
(75.9cm)
35-7/8”
(91.1cm)
47-7/8”
(121.6cm)
60”
(152.4cm)
Note: Unit shown with standard island trim. Note: Unit shown with standard island trim.
Dual Fuel 30”, 36”, 48” and 60” W. Ranges
25-3/4” (65.4 cm)
45-1/8” (114.6 cm)
19-3/8”
(49.2 cm)
8-1/8”
(20.6 cm)
26-7/16” (67.2 cm)
1-5/8”
(4.1cm)
1” (2.5 cm)
35-7/8”
(20.3 cm) min.
to
37”
(94 cm) max.
24-5/16” (61.8 cm)
28-1/16” (71.2 cm)
*A 3/4” (1.9 cm) standoff is included on each 48” and 60”W. VDSC model range and is
required for installation against a combustible wall. These standoffs can easily be removed if
installing against a non-combustible wall. (See instructions on page 24.)
Specifications
9
Specifications
8
Dual Fuel 30” and 36” W. Ranges
Description
30” W. Models 36” W. Models
Overall width 29-7/8”
(75.9 cm)
35-7/8”
(91.1 cm)
Overall height To top of side trim - 35-7/8” (91.1 cm) min 37” (94.0 cm) max
Legs adjust - 1-1/8” (2.9 cm)
Overall depth
from rear
To end of side panel - 24-5/16” (61.8 cm)
To front of door - 25-3/4” (65.4 cm)
To end of landing ledge - 28-1/16” (71.2 cm)
To end of door handle - 28-11/16” (72.9 cm)
Additions to Base
Height
To top of island trim - add 1” (2.5 cm)
To top of backguard - add 8” (20.3 cm)
To top of high shelf - add 23-1/2” (59.7 cm)
Gas Requirements Shipped Natural or LP/Propane, field convert with conversion kit (purchased separately);
accepts standard residential 1/2” (1.3 cm) ID gas service line
Gas Manifold Pressure Natural 5.0” W.C.P./ Liquid Propane L/P 10.0” W.C.P.
Electrical Requirements 240-208 VAC 60 Hz electrical connection box on product, connect with locally supplied 3-
wire, flexible cord or “pigtail” rated 40 amp (50 amp for 48” and 60” models) 125-250
VAC minimum. Cord must be agency approved for use with household electric ranges.
Max Amp Usage 240V - 25.4 amps
208V - 22.9 amps
240V - 28.5 amps
208V - 24.7 amps
Surface Burner Rating
Natural/LP 18,500 BTU (5.4 kW)/16,600 BTU (4.9 kW)
15,000 BTU (4.4 kW)/12,500 BTU (3.7 kW)
Griddle Burner Rating NA 15,000 BTU Nat./12,500 BTU LP/Propane
(4.4 kW Nat/ 3.7 kW LP)
Grill Burner Rating NA 18,000 BTU Nat./16,000 BTU LP/Propane
(5.3 kW Nat/ 4.7 kW LP)
Oven(s) Interior Width 25-5/16” (64.6 cm) 30-5/16” (76.9 cm)
Oven(s) Interior Height 16-1/2” (41.9 cm)
Oven(s) Interior Depth Overall - 19-1/2” (49.5 cm) AHAM 16-13/16” (42.7 cm)
Oven(s) Volume
Overall
AHAM
4.7 cu. ft.
4.1 cu. ft.
5.6 cu. ft.
4.9 cu. ft.
Approximate
shipping weight
410 lbs.
(184.5 kg)
500 lbs.
(225 kg)
Dual Fuel 48” and 60” W. Ranges
Description
48” W. Models 60” W. Models
Overall width 47-7/8”
(121.6 cm)
60”
(152.4 cm)
Overall height To top of side trim - 35-7/8” (91.1 cm) min 37” (94.0 cm) max
Legs adjust - 1-1/8” (2.9 cm)
Overall depth
from rear*
To end of side panel - 24-5/16” (61.8 cm)
To front of door - 25-3/4” (65.4 cm)
To end of landing ledge - 28-1/16” (71.2 cm)
To end of door handle - 28-11/16” (72.9 cm)
*Add 3/4” (1.9 cm) to overall depth for 48” and 60”W. VDSC models installed against a
combustible wall.
Additions to Base
Height
To top of island trim - add 1” (2.5 cm)
To top of backguard - add 8” (20.3 cm)
To top of high shelf - add 23-1/2” (59.7 cm)
Gas Requirements Shipped Natural or LP/Propane, field convert with conversion kit (purchased separately);
accepts standard residential 1/2” (1.3 cm) ID gas service line
Gas Manifold Pressure Natural 5.0” W.C.P./ Liquid Propane L/P 10.0” W.C.P.
Electrical Requirements 240-208 VAC 60 Hz electrical connection box on product, connect with locally supplied 3-
wire, flexible cord or “pigtail” rated 40 amp (50 amp for 48” and 60” models) 125-250
VAC minimum. Cord must be agency approved for use with household electric ranges.
Max Amp Usage 240V - 37 amps
208V - 32 amps
240V - 40 amps
208V - 34.7 amps
Surface Burner Rating
Natural/LP
18,500 BTU (5.4 kW)/16,600 BTU (4.9 kW)
15,000 BTU (4.4 kW)/12,500 BTU (3.7 kW)
Griddle Burner Rating 15,000 BTU Nat./12,500 BTU LP/Propane
(4.4 kW Nat/ 3.7 kW LP)
Grill Burner Rating 18,000 BTU Nat./16,000 BTU LP/Propane
(5.3 kW Nat/ 4.7 kW LP)
Oven(s) Interior Width Right - 25-5/16” (64.6 cm)
Left - 13-3/4” (34.9 cm)
25-5/16” (64.6 cm)
Oven(s) Interior Height 16-1/2” (41.9 cm)
Oven(s) Interior Depth Overall - 19-1/2” (49.5 cm) AHAM 16-13/16” (42.7 cm)
Oven(s) Volume
Overall
AHAM
Right - 4.7 cu. ft. Left - 2.6 cu. ft.
Right - 4.1 cu. ft. Left - 2.2 cu. ft.
Both Ovens 4.7 cu. ft.
Both Ovens 4.1 cu. ft.
Approximate
shipping weight
575 lbs.
(258.8 kg)
750 lbs.
(337.5 kg)
Minimum clearances from adjacent combustible construction
Below cooking surface (36” [91.4 cm] and below)
• Sides - 0”
• Top grate support - 36” (91.4 cm)
Above cooking surface (above 36” [91.4 cm])
• Sides - 6” (15.2 cm)
• Within 6” (15.2 cm) side clearance, wall cabinets no deeper than 13” (33.0 cm) must be minimum 18” (45.7 cm)
above cooking surface
• Wall cabinets directly above product must be a minimum of 42” (106.7 cm) above cooking surface
• Rear - 0” with 8” backguard or high shelf; 0” with island trim and non-combustible rear wall;
• 6” (15.2 cm) with island trim and combustible rear wall
42”min.
(106.7cm)
13”max.
(
33.0cm)
6”min.
(15.2cm)
18”min.
(45.7cm)
3/8”
(0.95cm)
36”
(91.4cm)
29-7/8”
(75.9cm)
Clearance Dimensions (Wood/Composite Overlay)
11
Clearance Dimensions (Proximity to Cabinets)
10
• This range may be installed directly
adjacent to existing 36” (91.4 cm) high
base cabinets.
IMPORTANT: The side trim MUST be
3/8” (.95 cm) above the adjacent base
cabinet countertop. This can be
accomplished by raising the unit using
the adjustment spindles on the legs.
• The range CANNOT be installed
directly adjacent to sidewalls, tall
cabinets, tall appliances, or other
side vertical surfaces above 36”
(91.4 cm) high. There must be a
minimum of 6” (15.2 cm) side
clearance from the range to such
combustible surfaces above the
36” (91.4 cm) counter height.
• Within the 6” (15.2 cm) side
clearance to combustible vertical
surfaces above 36” (91.4 cm), the
maximum wall cabinet depth
must be 13” (33.0 cm) and wall
cabinets within this 6” (15.2 cm)
side clearance must be 18”
(45.7 cm) above the 36”
(91.4 cm) high countertop.
• Wall cabinets above the range must be a
minimum of 42” (106.7 cm) above the
range cooking surface for the full width
of the range. This minimum height
requirement does not apply if a range
hood is installed over the cooking surface.
The bottom of a standard hood should be
30” (76.2 cm) min. to 36” (91.4 cm) max.
above the countertop. This would typically
result in the bottom of the hood being
66” (167.6 cm) to 72” (182.9 cm) above the
floor. Refer to the range hood installation
instructions for additional information. These
dimensions provide for safe and efficient
operation of the hood.
66”min.
(167.6cm)
to
72”max.
(182.9cm)
30”
(76.2cm)
6”
(15.2cm)
Wood/Composite
Overlay
30”min.
(76.2cm)
to
36”max.
(91.4cm)
66”min.
(167.6cm)
to
72”max.
(182.9cm)
24”
(61.0cm)
or
27”
(38.6cm)
Wood/Composite
Overlay
0”
(
0cm)
30”min.
(76.2cm)
to
36”max.
(91.4cm)
Wall Installation
Island Installation
Note: Minimum clearance for back wall is 0” with
backguard or high-shelf.
Note: If a range hood is installed, wall cabinets
above the range have a different minimum
clearance height.
Note: Minimum clearance for back wall
is 0” with backguard or high-shelf.
CAUTION
Burn hazar .
To void risk of person l injury;
the use of c binets for stor ge
bove the ppli nce m y result
in potenti l burn h z rd. Combustible
items m y ignite, met llic items m y
become hot nd c use burns. If c binet
stor ge is to be provided the risk c n be
reduced by inst lling r ngehood th t
projects horizont lly minimum 5”
(12.7 cm) beyond the bottom of c binets.
Important: This range comes standard
with an Island Trim. There must be a
minimum of 6” clearance from rear of
range to a combustible wall or 0”
clearance to a non-combustible wall.
13
Electrical & Gas Requirements
Flexible Connections:
If the unit is to be installed with flexible
couplings and/or quick-disconnect fittings,
the installer must use a heavy-duty AGA
design-certified flexible connector of at least
1/2” (1.3 cm) ID NPT (with suitable strain
reliefs) in compliance with ANSI Z21.41
and Z21.69.
12
Electrical Requirements
Check your national and local codes
regarding this unit. This range requires
3 wire or 4 wire, 240-208 VAC/60 Hz. See
Electrical Connection” section for
grounding instructions. Must be fused
seperately from any other circuit.
Gas Connection
The gas supply (service) line must be the
same size or greater than the inlet line of the
appliance. This range uses a 1/2” (1.3 cm) ID
NPT (Sch40) inlet. Sealant on all pipe joints
must be resistive to LP gas.
The range is designed speci ically or
natural gas or liquid propane (LP) gas.
Be ore beginning installation veri y that
the model is compatible with the intended
gas supply.
Manual shut-o valve:
This installer-supplied valve must be installed
in the gas service line before the appliance
in the gas stream and in a location where it
can be reached quickly in the event of
an emergency.
In Massachusetts: A “T” handle type
manual valve must be installed in the gas
supply line to the appliance.
IMPORTANT: Any conversion required
must be per ormed by your dealer or a
quali ied licensed plumber or gas service
company. Please provide the service person
with this manual before work begins.
Pressure Regulator:
• All heavy-duty, commercial type cooking
equipment must have a pressure regulator
on the incoming service line for safe and
efficient operation, since service pressure
may fluctuate with local demand. External
regulators are not required on this range
since a regulator is built into each unit at
the factory. Under no condition bypass
this built-in regulator.
• Manifold pressure should be checked with
a manometer, natural gas requires 5.0”
W.C.P. and LP gas requires 10.0” W.C.P.
Incoming line pressure upstream from the
regulator must be 1” W.C.P. higher than
the manifold pressure in order to check
the regulator. The regulator used on this
range can withstand a maximum input
pressure of 1/2” PSI (14.0” W.C.P.). If the
line pressure is in excess of that amount, a
step down regulator will be required.
• The appliance must be disconnected from
the gas supply piping system during any
pressure testing of that system.
2” dia.
(5.1 cm)
2-3/4”
(7.0 cm)
2-1/2”
(6.4 cm)
1-3/4”
(4.4 cm)
28-5/16”
(71.9 cm)
23-7/16”
(59.5 cm)
Gas or electrical
connection in
this area
Gas connection
in this area
4-3/8”
(11.1 cm)
31-1/16”
(78.9 cm)
In Canada: CAN 1-6, 10-88 metal
connectors for gas appliances and CAN
1-6.9 M79 quick disconnect devices for use
with gas fuel.
In Massachusetts: This appliance must be
installed with a 36” (3-foot) long flexible
gas connector.
WARNING
Electrical shock hazar .
To void the risk of electric l
shock, person l injury or de th;
verify electric l power is turned
off t the bre ker box nd g s supply is
turned off until the r nge is inst lled nd
re dy to oper te, inst ll tion by n
uthorized inst ller only.
1514
General Information Installation
READ AND FOLLOW ALL WARNING
AND CAUTION INFORMATION WHEN
INSTALLING THIS APPLIANCE.
• All openings in the wall behind the
appliance and in the floor under the
appliance must be sealed.
• Do not obstruct the flow of combustion and
ventilation air.
Moving, Handling, and Unpacking
Remove and discard all packing materials,
including cardboard and tape on the outside
and inside of the range.
Remove the burner grates and styrofoam
off the top cooking surface. Be sure to
remove the burner caps packaged in
styrofoam below the burner grates.
Do not discard the anti-tip metal
bracket supplied with the range.
This is the anti-tip device and must
be installed with the unit. Refer to
Anti-tip Device Installation”
section.
Some stainless steel parts may have a plastic
protective wrap which must be peeled off.
The interior should be washed thoroughly
with hot, soapy water to remove film
residues and any dust or debris before being
used, then rinsed and wiped dry. Solutions
stronger than soap and water are rarely
needed.
NOTICE
DO NOT use the h ndle or oven door to
lift the oven. Remove door before
inst ll tion to ensure th t it is not used to
lift the unit. DO NOT lift or c rry the door
by the h ndle.
Removing the door must be done by your
de ler, qu lified licensed plumber, or
certified g s inst ller.
Door Removal
1
Open door completely. Place pins, supplied with unit, in
pin hole. For personal safety, ONLY use pins
supplied with the unit.
2
Remove hinge trim screws. Take off hinge trim. Identify
right and left hinge for future re-installation.
3
Close until pins stop door.
4
Lift door up and out.
16 17
1
Remove access door.
Electrical Connection (3-wire)
Note: If you have a 4-wire connection, see following section for
4-wire connection instructions.
Use a 3-wire power supply cord kit rated for
40 amps – 125/250 volts with closed loop
terminals and marked for use with ranges.
Do not use a GFI circuit. Where local codes
do not permit grounding through neutral,
use a 4-wire power supply cord. The cord or
conduit must be secured to the range with
the strain relief bracket.
The electrical connection is made at the
terminal block, which is located behind the
access door on the back of the range.
2
Remove supply cord strain relief
bracket and three supply cord mounting screws
on terminal block.
WARNING
Electrical shock hazar .
To void risk or electric l
shock, person l injury or de th;
grounding product to the fr me
of the unit m y or m y not be permitted
through your loc l codes. If ground to the
fr me is not permitted then 4 conductor
power cord must be used.
WARNING
Electrical shock hazar .
To void risk of electric l shock,
person l injury or de th; verify
your ppli nce h s been
properly grounded in ccord nce with
loc l codes or in bsence of codes, with
the N tion l Electric l Code (NEC).
ANSI/NFPA 70-l test edition.
1
1
1
2
3
2
Legs are packed in styrofoam top pack.
Note: Legs should be installed near to where
appliance is to be used, as they are
not secure for long transit.
Note: It is strongly recommended
that a pallet or lift jack be used rather than tilting.
Raise unit about a foot.
Unscrew temporary legs from
couplings on all four corners
.
4
Lower range gently to keep any undue strain from
legs and internal mounting hardware.
3
Screw legs into couplings on all
four corners.
Leg Installation
3
Feed supply cord up through hole in bottom
of range back.
1918
1
2
Remove access door.
Remove supply cord strain relief
bracket and three supply cord mounting screws on
the terminal block.
Electrical Connection (4-wire)
Electrical Connection (3-wire) (cont.)
WARNING
Electrical shock hazar .
To void risk or electric l
shock, person l injury or de th;
grounding product to the fr me
of the unit m y or m y not be permitted
through your loc l codes. If ground to the
fr me is not permitted then 4 conductor
power cord must be used.
WARNING
Electrical shock hazar .
To void risk of electric l shock,
person l injury or de th; verify
your ppli nce h s been
properly grounded in ccord nce with
loc l codes or in bsence of codes, with
the N tion l Electric l Code (NEC).
ANSI/NFPA 70-l test edition.
Use a 4-wire power supply cord kit rated for
40 amps – 125/250 volts with closed loop
terminals and marked for use with ranges.
Do not use a GFI circuit. Where local codes
do not permit grounding through neutral,
use a 4-wire power supply cord. The cord or
conduit must be secured to the range with
the strain relief bracket.
The electrical connection is made at the
terminal block, which is located behind the
access door on the back of the range.
3
Remove grounding screw. Cut-off
and discard ground strap.
4
1
1
5
Attach line #1 (red) and line #2 (black)
leads to outside terminal. Attach neutral wire (white)
to center terminal on the terminal block.
Push supply cord toward terminal
block to relieve strain, reattach supply cord strain relief
bracket over supply cord.
6
Reattach access door.