manuals.online logo
Brands
  1. Home
  2. •
  3. Brands
  4. •
  5. Viking
  6. •
  7. Refrigerator
  8. •
  9. Viking Designer DDFF136DSS User manual

Viking Designer DDFF136DSS User manual

Other manuals for Designer DDFF136DSS

3

Other Viking Refrigerator manuals

Viking DFRB364L User manual

Viking

Viking DFRB364L User manual

Viking VCSB5481 Series Manual

Viking

Viking VCSB5481 Series Manual

Viking Designer DDFF136SS User manual

Viking

Viking Designer DDFF136SS User manual

Viking Designer DDSB423 User manual

Viking

Viking Designer DDSB423 User manual

Viking D3 RDFN536D User manual

Viking

Viking D3 RDFN536D User manual

Viking Quiet Cool FDBB5361R User manual

Viking

Viking Quiet Cool FDBB5361R User manual

Viking Professional VCFB304 User manual

Viking

Viking Professional VCFB304 User manual

Viking High-Performance Kitchen User manual

Viking

Viking High-Performance Kitchen User manual

Viking Quiet Cool FDBB5361R Assembly instructions

Viking

Viking Quiet Cool FDBB5361R Assembly instructions

Viking VCSB423 User manual

Viking

Viking VCSB423 User manual

Viking Designer DFBB363 User manual

Viking

Viking Designer DFBB363 User manual

Viking F20841 EN User manual

Viking

Viking F20841 EN User manual

Viking F20481 User manual

Viking

Viking F20481 User manual

Viking CVRUO5240 User manual

Viking

Viking CVRUO5240 User manual

Viking VCSB360 Service manual

Viking

Viking VCSB360 Service manual

Viking Freestanding French DoorBottom-Mount Refrigerator/Freezerwith... User manual

Viking

Viking Freestanding French DoorBottom-Mount Refrigerator/Freezerwith... User manual

Viking Quiet Cool VCSB5421 User manual

Viking

Viking Quiet Cool VCSB5421 User manual

Viking Custom Front series User manual

Viking

Viking Custom Front series User manual

Viking Professional VIBB536R User manual

Viking

Viking Professional VIBB536R User manual

Viking Designer DDFF136SS User manual

Viking

Viking Designer DDFF136SS User manual

Viking Quiet Cool FDSB5421 User manual

Viking

Viking Quiet Cool FDSB5421 User manual

Viking VCBF136RSS Guide

Viking

Viking VCBF136RSS Guide

Viking F20394 User manual

Viking

Viking F20394 User manual

Viking FDBB5361 Series User manual

Viking

Viking FDBB5361 Series User manual

Popular Refrigerator manuals by other brands

Frigidaire FRS26TS7DW2 Use & care manual

Frigidaire

Frigidaire FRS26TS7DW2 Use & care manual

Fisher Scientific 10ECEEFSA manual

Fisher Scientific

Fisher Scientific 10ECEEFSA manual

Summit FF22BDRSS user manual

Summit

Summit FF22BDRSS user manual

Frigidaire FFRU17B2QWE use & care

Frigidaire

Frigidaire FFRU17B2QWE use & care

Hotpoint ENBGH 19xxx FW operating instructions

Hotpoint

Hotpoint ENBGH 19xxx FW operating instructions

Hitachi R-SG28KPH instruction manual

Hitachi

Hitachi R-SG28KPH instruction manual

Dometic RMH 7390 L operating instructions

Dometic

Dometic RMH 7390 L operating instructions

AEG S71700TSW0 user manual

AEG

AEG S71700TSW0 user manual

Electrolux ENB3669 Instruction book

Electrolux

Electrolux ENB3669 Instruction book

Electrolux ERN 2930 Instruction book

Electrolux

Electrolux ERN 2930 Instruction book

Beko GNE 60520 X user manual

Beko

Beko GNE 60520 X user manual

Jenn-Air JUR248LBES00 Use & care guide

Jenn-Air

Jenn-Air JUR248LBES00 Use & care guide

Dometic RGE 4000 Installation and operating manual

Dometic

Dometic RGE 4000 Installation and operating manual

Dometic L-0191B Brochure & specs

Dometic

Dometic L-0191B Brochure & specs

LG LRBP1031W - 10 Cu. Ft. Cabinet Depth Bottom Freezer... owner's guide

LG

LG LRBP1031W - 10 Cu. Ft. Cabinet Depth Bottom Freezer... owner's guide

Daewoo RN-33 Series user manual

Daewoo

Daewoo RN-33 Series user manual

Haier RF-8888-174 Service manual

Haier

Haier RF-8888-174 Service manual

Blaupunkt 5CK2 Series user manual

Blaupunkt

Blaupunkt 5CK2 Series user manual

manuals.online logo
manuals.online logoBrands
  • About & Mission
  • Contact us
  • Privacy Policy
  • Terms and Conditions

Copyright 2025 Manuals.Online. All Rights Reserved.

F20854 EN
W10440767
(081511)
Viking Range Corporation
111 Front Street
Greenwood, Mississippi 38930 USA
(662) 455-1200
For product information,
call 1-888-VIKING1 (845-4641)
or visit the Viking Web site at
vikingrange.com
Viking Use & Care Manual
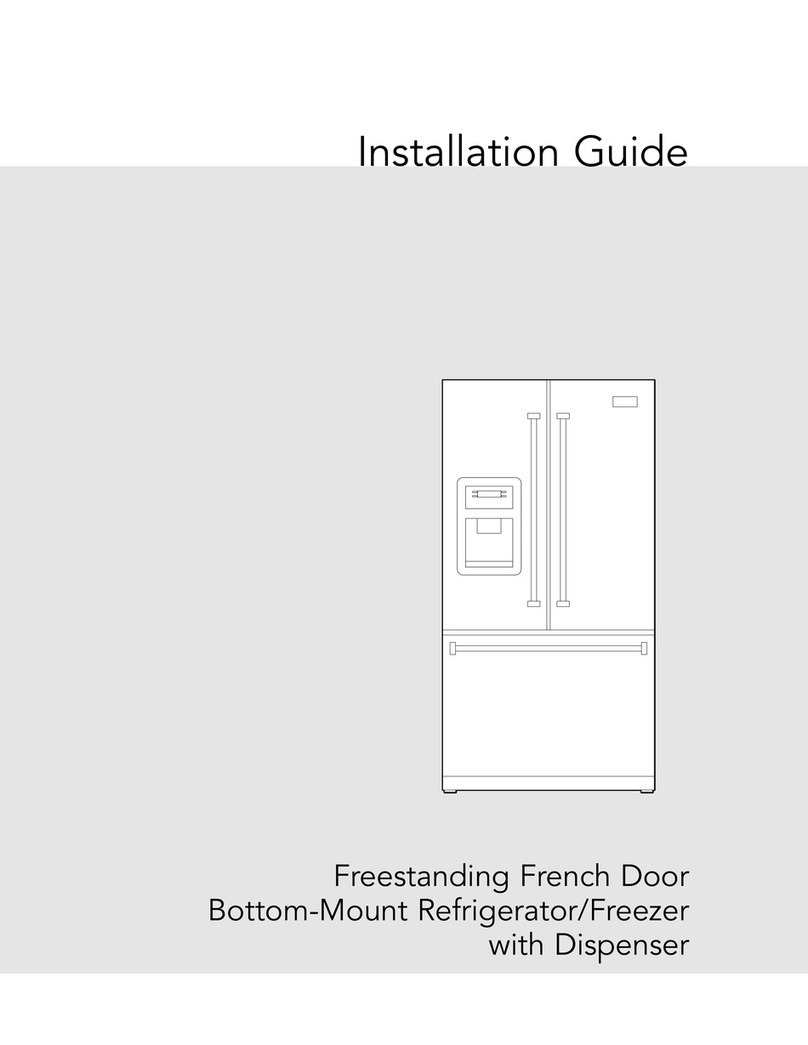
Designer Freestanding French Door
Bottom-Mount Refrigerator/Freezer
with Dispenser
Getting Starte
Refrigerator Safety ____________________________________________4
Important Safety Instructions ___________________________________5
Proper Disposal (of old refrigerator)_____________________________6
Using the Controls ____________________________________________7
Pro uct Controls
Temperature Controls _________________________________________8
Adjusting Controls ____________________________________________9
Options ____________________________________________________10
User Settings________________________________________________12
Operation
Opening & Closing Doors ____________________________________15
Ice Maker & Ice Storage Bin __________________________________15
Water & Ice Dispenser _______________________________________17
Water Filtration System_______________________________________19
Water Filter _________________________________________________21
Water Filter Certifications_____________________________________23
Pro uct Care
Cleaning ___________________________________________________24
Changing the Light Bulb _____________________________________25
Troubleshooting _____________________________________________26
Service Information __________________________________________32
Warranty ___________________________________________________33
Table of Contents
Congratulations and welcome to the elite world of Viking ownership.
We hope you will enjoy and appreciate the care and attention we have
put into every detail of your new, state-of-the-art refrigerator.
Your Viking appliance is designed to offer years of reliable service. This
Use and Care Guide will provide you with the information you need to
become familiar with your refrigerator’s care and operation.
Your complete satisfaction is our ultimate goal. If you have any
questions or comments about this product, please contact the dealer
from whom you purchased it, or contact our Consumer Support Center
at 1-888-VIKING1.
We appreciate your choice of a Viking refrigerator and hope that you
will again select our products for your other major appliance needs.
For more information about the complete and growing selection
of Viking products, contact your dealer or visit us online at
vikingrange.com
Congratulations
3
2
5
Getting Starte
Your safety and the safety of others are very important.
We have provided many important safety messages in this manual and
on your appliance. Always read and obey all safety messages.
DANGER
WARNING
This is the safety alert symbol.
This symbol alerts you to potential hazards that can
kill or hurt you and others.
All safety messages will follow the safety alert
symbol and either the word “DANGER” or “WARNING.”
You can be killed or seriously injured if you don't immediately follow
instructions.
You can be killed or seriously injured if you don't follow
instructions.
All safety messages will tell you what the potential hazard is, tell you how
to reduce the chance of injury, and tell you what can happen if the
instructions are not followed.
4
Refrigerator Safety
Getting Starte
WARNING: To reduce the risk of fire, electric shock, or injury when
using your refrigerator, follow these basic precautions:
Plug into a grounded 3-prong outlet.
DO NOT remove ground prong.
DO NOT use an adapter.
DO NOT use an extension cord.
Disconnect power before servicing.
Replace all parts and panels before operating.
Remove doors from your old refrigerator.
Use nonflammable cleaner.
Keep flammable materials and vapors, such as gasoline, away from
refrigerator.
Use two or more people to move and install refrigerator.
Disconnect power before installing ice maker (on ice maker kit ready
models only).
Use a sturdy glass when dispensing ice (on some models).
SAVE THESE INSTRUCTIONS
Important Safety Instructions
7
The control panel is located on the front of the ice and water
dispenser.
To access the main control menu, press any of the four touch pads
located on either side of the display. Then, touch the pad next to the
desired option or user setting to access the various features.
Note: Press only the touch pads next to your selection on the display
screen, not the selection itself.
IMPORTANT: Wait 24 hours for your refrigerator to cool completely
before adding food. If you add food before the refrigerator has cooled
completely, your food may spoil.
Note: Adjusting the refrigerator and freezer temperature controls to
a colder than recommended setting will not cool the compartments
any faster.
The recommended settings should be correct for normal
household refrigerator use. The controls are set correctly when milk
or juice is as cold as you like and when ice cream is firm.
If the temperature is too warm or too cold in the refrigerator or
freezer, first check the air vents to be sure they are not blocked
before adjusting the controls.
Using the Controls
Pro uct Controls
6
Proper Disposal (of old refrigerator)
Getting Starte
IMPORTANT:
Child entrapment and suffocation are not problems of the past. Junked
or abandoned refrigerators are still dangerous—even if they will sit for
“just a few days”. If you are getting rid of your old refrigerator, please
follow these instructions to help prevent accidents.
Before You Throw Away Your Ol Refrigerator or
Freezer:
Take off the doors.
Leave the shelves in place so that children may not easily climb
inside.
A. Touch pads
A
A
WARNING
Suffocation Hazard
Remove doors from your old refrigerator.
Failure to do so can result in death or brain damage.
9
A justing Controls
The Fresh Food Temp control adjusts the refrigerator compartment
temperature. The Freezer Temp control adjusts the freezer
compartment temperature.
If you need to adjust the temperature in either the refrigerator or
freezer compartment, use the settings listed in the chart as a guide.
To A just Set Point Temperatures:
The display will show the set point for approximately three seconds.
Press the touch pad next to “WARMER” or “COLDER” to adjust the
set point to the desired temperature. Then, press the touch pad next
to “DONE” to lock in the new set point temperature.
Note: Except when first turning on the refrigerator, DO NOT adjust
either temperature control more than one setting at a time. Wait 24
hours for the temperature to stabilize between adjustments.
Temperature A justment Chart
Adjusting Controls
Pro uct Controls
8
For your convenience, your temperature controls are preset at the
factory. When you first install your refrigerator, make sure the controls
are still set to the recommended set points.
Press the touch pad next to “FRESH FOOD TEMP” on the main
menu to display the current set point of the compartment. Press the
touch pad next to “WARMER” or “COLDER” to adjust the set point
to the recommended 38°F. Press the touch pad next to “DONE” to
lock in the setting.
Press the touch pad next to “FREEZER TEMP” on the main menu to
display the current set point of the compartment. Press the touch
pad next to “WARMER” or “COLDER” to adjust the set point to the
recommended 0°F. Press the touch pad next to “DONE” to lock in
the setting.
To Turn Cooling Off/On:
Cooling Off controls all cooling functions, the control panel and the
dispenser. It does not disconnect power to the refrigerator.
Press and hold the “COOLING OFF” touch pad for three seconds.
The LED will light up to indicate that cooling is OFF. Neither
compartment will cool.
Press the “COOLING OFF” touch pad again to turn “ON” the
cooling. The LED will turn off.
Temperature Controls
Pro uct Controls
Con ition/Reason A justment
Refrigerator too warm Fresh Food Control
1° lower
Freezer too warm/too little ice Freezer Control
1° lower
Refrigerator too cold Fresh Food Control
1° higher
Freezer too cold Freezer Control
1° higher
11
Max Cool
The Max Cool feature assists with periods of high refrigerator or
freezer use, full grocery loads, or temporarily warm room temperatures
by lowering the freezer and refrigerator to the minimum temperatures.
1. On the main menu, press the touch pad next to “OPTIONS”.
2. In each of the following screens, continue to press the touch pad
next to “MORE OPTIONS” until “MAX COOL IS OFF” appears on
the display.
3. Press the touch pad next to “MAX COOL IS OFF” to switch
between ON and OFF. Press the touch pad next to “DONE” to lock
in the desired setting and return to the main menu.
Note: The Max Cool feature will automatically shut off in approximately
two hours.
Sabbath Mo e
The Sabbath Mode feature turns off all lights, disables the water and
ice dispenser, disables all alarms and tones, disables the automatic
defrost feature and disables the control panel.
While the refrigerator is operating in Sabbath Mode, any touch of the
control panel will display the Sabbath Mode control which will allow
you to turn OFF the Sabbath Mode feature.
Turn Sabbath Mo e on:
1. On the main menu, press the touch pad next to “OPTIONS”.
2. In each of the following screens, continue to press the touch pad
next to “MORE OPTIONS” until “SABBATH IS OFF” appears on
the display.
3. Press the touch pad next to “SABBATH IS OFF” to switch between
ON and OFF. Press the touch pad next to “DONE” to lock in the
desired setting and return to the main menu.
Temp Alarm
The Temp Alarm feature alerts you if the temperature exceeds normal
operating temperatures, for an hour or longer, in either or both the
refrigerator and freezer compartments. An audible alarm will sound
repeatedly and the highest temperature reached in each compartment
will be displayed.
Note: Touch any pad on the control panel to turn off the audible
alarm. Temp Alarm will automatically reset once the warm condition
has been corrected for 30 minutes.
Options
Pro uct Controls
10
Door Alarm
The Door Alarm feature sounds an audible alarm every few seconds
when either refrigerator door has been left open for three continuous
minutes. The alarm will sound until the door is closed or Door Alarm is
turned off.
1. On the main menu, press the touch pad next to “OPTIONS”.
2. Press the touch pad next to “DOOR ALARM IS ON” to switch
between ON and OFF. Press the touch pad next to “DONE” to lock
in the desired setting and return to the main menu.
Humi ity Control
The Humidity Control feature turns on a heater to help reduce
moisture on the door hinge seal. Use in humid environments or when
you notice moisture on the door hinge seal. The refrigerator uses more
energy when Humidity Control is on.
1. On the main menu, press the touch pad next to “OPTIONS”.
2. Press the touch pad next to “HUMID CTRL IS ON” to switch
between ON and OFF. Press the touch pad next to “Done” to lock
in the desired setting and return to the main menu.
Vacation Mo e
The Vacation Mode feature decreases the number of automatic defrost
cycles. Once set, Vacation Mode will remain on until a door is opened
or the feature is turned “OFF” on the control panel.
Note: Door openings are ignored for the first hour after Vacation
Mode is activated.
1. On the main menu, press the touch pad next to “OPTIONS”.
2. In each of the following screens, continue to press the touch pad
next to “MORE OPTIONS” until “VAC. MODE IS OFF” appears on
the display.
3. Press the touch pad next to “VAC. MODE IS OFF” to switch
between ON and OFF. Press the touch pad next to “DONE” to lock
in the desired setting and return to the main menu.
Options
Pro uct Controls
13
Display Brightness
The Display Brightness preference adjusts the backlight level of
the control panel.
1. On the main menu, press the touch pad next to “USER SETTINGS”.
2. In each of the following screens, continue to press the touch pad
next to “MORE SETTINGS” until “DISPLAY BRIGHTNESS” appears
on the display.
3. Press the touch pad next to “LIGHTER” or “DARKER” to adjust the
setting between 1 (darkest) and 5 (lightest). Press the touch pad
next to “DONE” to lock in the desired setting and return to the
main menu.
A just Light Sensor
The Adjust Light Sensor preference allows you to adjust the level at
which the Light Sensor will detect darkness and activate the Auto On
mode for the dispenser light.
1. On the main menu, press the touch pad next to “USER SETTINGS”.
2. In each of the following screens, continue to press the touch pad
next to “MORE SETTINGS” until “ADJUST LIGHT SENSOR”
appears on the display.
3. Press the touch pad next to “LIGHTER” or “DARKER” to adjust the
setting between 1 (darkest) and 9 (lightest). Press the touch pad
next to “DONE” to lock in the desired setting.
Alarm Soun
The Alarm Sound preference allows you to turn off any audible alarms
(door open, too warm etc.) when quick and simple remedies are not
possible. It will not disable alarm features or visual displays.
1. On the main menu, press the touch pad next to “USER SETTINGS”.
2. In each of the following screens, continue to press the touch pad
next to “MORE SETTINGS” until “ALRM SOUND IS ON” appears
on the display.
3. Press the touch pad next to “ALRM SOUND IS ON” to switch
between ON and OFF. Press the touch pad next to “DONE” to lock
in the desired setting and return to the main menu.
User Settings
Pro uct Controls
12
Temp Alarm (cont.)
1. On the main menu, press the touch pad next to “OPTIONS”.
2. In each of the following screens, continue to press the touch pad
next to “MORE OPTIONS” until “TEMP ALARM IS OFF” appears on
the display.
3. Press the touch pad next to “TEMP ALARM IS OFF” to switch
between ON and OFF. Press the touch pad next to “DONE” to lock
in the desired setting and return to the main menu.
Replace H2O Water Filter
See “Water Filtration System” section.
User Settings
The control center allows you to set user preferences, if desired.
Language
The Language preference allows you to change the control panel
display to English, French or Spanish.
1. On the main menu, press the touch pad next to “USER SETTINGS”.
2. Press the touch pad next to “SELECT LANGUAGE”.
3. Press the touch pad next to either “METTRE EN FRANÇAIS” or
“CAMBIAR EN ESPAÑOL.” Press the touch pad next to “CONFIRM”
to lock in the setting and return to the main menu.
Temperature Display
The temperature display preference allows you to change the
control panel display from degrees Fahrenheit to degrees Celsius.
1. On the main menu, press the touch pad next to “USER SETTINGS”.
2. Press the touch pad next to “FAHRENHEIT IS ON” to switch
between Fahrenheit and Celsius. Press the touch pad next to
“DONE” to lock in the desired setting and return to the main menu.
Options
Pro uct Controls
15
There are two refrigerator compartment doors. The doors can be
opened and closed either separately or together. There is a
vertically-hinged seal on the left refrigerator door.
When the left side door is opened,
the hinged seal automatically folds
inward so that it is out of the way.
When both doors are closed, the
hinged seal automatically forms a
seal between the two doors.
Ice Maker & Ice Storage Bin
Alarm Soun
The ice maker and storage bin are located in the upper left-hand side
of the refrigerator compartment.
Turning the Ice Maker On/Off
The On/Off switch is located on the ice maker.
To turn on the ice maker, press the switch to the “ON” position.
To manually turn off the ice maker, press the switch to the “OFF”
position.
Note: Your ice maker has an automatic shutoff. The ice maker sensors
will automatically stop ice production, but the control will remain in the
ON position.
Opening & Closing Doors
Operation
14
Moisture A justable Pro uce Drawer
You can control the amount of humidity in the moisture adjustable
produce drawer. Adjust the control to any setting between LOW and
HIGH. LOW (open) for best storage of fruits and vegetables with skins.
HIGH (closed) for best storage of fresh, leafy vegetables.
MeatSavor™/Pro uce Drawer
The MeatSavor™ drawer is a full-width drawer with adjustable
temperature control. This drawer can be used for large party trays, deli
items, beverages or miscellaneous items. There is a divider to organize
the drawer into sections if desired.
MeatSavor Control
The control, located on the right of the drawer, regulates the air
temperature inside the drawer. Set control to “COLD” to provide
normal refrigerator temperature. Use the COLDEST setting for meats
or other deli items.
Cold air directed to the MeatSavor™ can decrease refrigerator
temperature. Refrigerator control may need to be adjusted.
DO NOT place leafy vegetables in the MeatSavor™ drawer. Colder
temperatures could damage leafy produce.
To Remove:
Lift lid. Pull drawer out to full extension. Tilt the drawer front up and
pull straight out.
To Install:
Push metal glide rails to the back of the refrigerator. Place drawer
onto rails and slide drawer back until it falls into place.
To Remove Divi er:
Pull drawer completely out and raise the front of the divider to
unhook it from rear wall of the drawer and lift it out.
To Install Divi er:
Hook back of divider over rear wall of drawer and lower into place.
User Settings
Pro uct Controls
A
A. Hinged seal
17
IMPORTANT:
After connecting the refrigerator to a water source, flush the water
system. Press the “WATER” touch pad on the control panel. Use a
sturdy container to depress and hold the dispenser lever for five
seconds, then release it for five seconds. Repeat until water begins
to flow. Once water begins to flow, continue depressing and
releasing the dispenser lever (five seconds on, five seconds off) for an
additional five minutes until a total of 4 gal. (15L) has been
dispensed. This will flush air from the filter and water dispensing
system. Additional flushing may be required in some households. As
air is cleared from the system, water may spurt out of the dispenser.
Note: After five minutes of continuous dispensing, the dispenser will
stop dispensing water to avoid flooding. To continue dispensing,
remove the container and press the dispensing lever again.
Allow 24 hours for the refrigerator to cool down and chill water.
Dispense enough water every week to maintain a fresh supply.
Allow 24 hours to produce the first batch of ice. Discard the first
three batches of ice produced.
Dispense Ice an Water
The dispenser will dispense either water or cubed ice.
The EASY FILL control allows you to fill containers that will not fit
within the dispenser area, such as sport bottles.
Water & Ice Dispenser
Operation
16
Removing an Replacing Ice Storage Bin
To Remove the Ice Storage Bin:
1. Hold the base of the storage bin and press the release button on
the lower right.
2. Pull the storage bin out until resistance is felt. Lift up the front of the
ice bin and remove.
3. Press the switch to the “OFF” position.
To Replace the Ice Storage Bin:
IMPORTANT: It may be necessary to turn the auger driver, behind the
ice bin, counterclockwise to properly align the ice bin with the auger
driver. The ice storage bin must be locked in place for proper ice
dispensing.
1. Press the switch to the “ON” position.
2. Slide the ice bin into the guide rails located
on either side of the enclosure.
3. Push the ice bin in until resistance is felt.
Raise the front slightly and push the ice bin
in until an audible “click” is heard.
Ice Pro uction Rate
Allow 24 hours to produce the first batch of
ice. Discard the first three batches of ice
produced.
The ice maker should produce approximately 8 to 12 batches of ice
in a 24-hour period.
To increase ice production, lower the freezer and refrigerator
temperature. See “Using the Controls.” Wait 24 hours between
adjustments.
Remember
The quality of your ice will be only as good as the quality of the
water supplied to the ice maker. AVOID connecting the ice maker to
a softened water supply. Water softener chemicals (such as salt) can
damage parts of the ice maker and lead to poor quality ice. If a
softened water supply cannot be avoided, make sure the water
softener is operating properly and is well maintained.
DO NOT use anything sharp to break up the ice in the bin. This
can cause damage to the ice bin and dispenser mechanism.
DO NOT store anything on top of the ice maker or in the ice
storage bin.
Ice Maker & Ice Storage Bin (cont.)
Operation
A. ON position
B. Auger driver
A
B
Cut Hazard
Use a sturdy glass when dispensing ice.
Failure to do so can result in cuts.
WARNING
19
Water & Ice Dispenser (cont.)
Operation
18
Dispense Ice an Water (cont.)
1. Select either water or cubed ice by touching “WATER” or “ICE” on
the control panel. The light above the control indicates your
selection.
2. Press a sturdy container against the dispenser lever.
IMPORTANT: You do not need to apply a lot of pressure to the
lever in order to activate the dispenser. Pressing hard will not make
the water or ice dispense faster or in greater quantities.
3. Remove the container to stop dispensing.
Dispenser Light
The dispenser lights are LEDs which should
not need to be changed.
When you use the dispenser, the lever will
automatically turn the light on. If you want
the light to be on continuously, you may
choose either ON or AUTO.
Auto: The light sensor monitors the light level in the room. The
dispenser light will illuminate at half-power when the light level is low.
To activate the Auto option press the “LIGHT” touch pad. The Auto
indicator light will illuminate.
On: For continuous light, press the “LIGHT” touch pad a second time.
The ON indicator light will illuminate.
Off: To turn the dispenser light OFF, press the “LIGHT” touch pad a
third time.
Dispenser Lock
The dispenser can be locked for easy cleaning or to avoid
unintentional dispensing by small children and pets.
Note: The dispenser lock does not shut off power to the product, to
the ice maker, or to the dispenser light. It just deactivates the
dispenser lever.
Water & Ice Dispenser (cont.)
Operation
To Lock an Unlock Dispenser:
Press and hold the “LOCKED” touch pad for three
seconds to lock the dispenser. The indicator light will
illuminate when Lock is on.
Press and hold the “LOCKED” touch pad again for three
seconds to unlock dispenser. The indicator light will turn OFF.
Water Filtration System
The water filter is located in the upper right-hand corner of the
refrigerator compartment.
Note: DO NOT use with water that is microbiologically unsafe or of
unknown quality without adequate disinfection before or after the system.
Systems certified for cyst reduction may be used on disinfected waters that
may contain filterable cysts.
Water Filter Status
The control panel will remind you when it is time to order and replace
your water filter by displaying a message when you dispense water.
ORDER WATER FILTER means it is almost time to change the water
filter and REPLACE WATER FILTER means a new water filter should be
installed. It is recommended that you replace the water filter when you
see the REPLACE WATER FILTER message OR earlier if the flow of
water to your water dispenser or ice maker decreases noticeably.
Reset Water Filter Status
After replacing the water filter, you must reset the water filter
status to turn off the message.
1. On main menu, press the touch pad next to “OPTIONS”.
2. In each of the following screens, continue to press the touch pad
next to “MORE OPTIONS” until you reach the “REPLACE FILTER”
screen.
3. Press the touch pad next to “YES” to reset the water filter status.
Press the touch pad next to “NO” if you do not wish to reset the
water filter status.