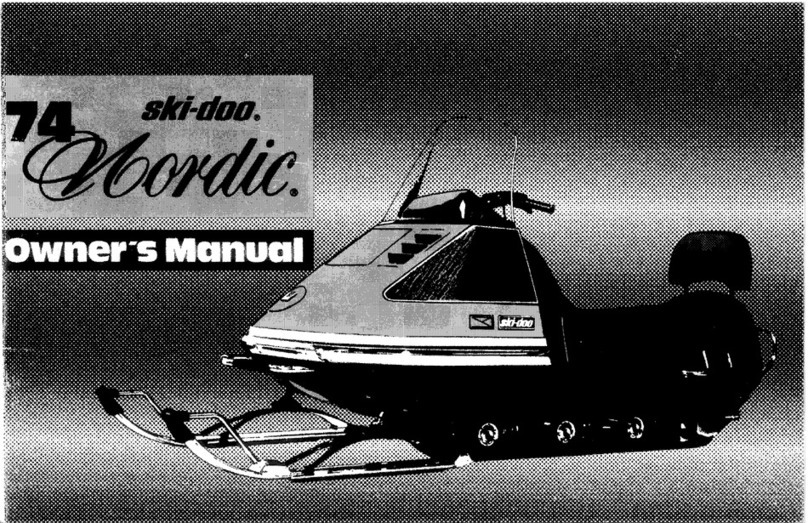
Viking Vagabond User manual

SNOWMOBILES
OPERATORS
MANUAL

FULL
SEASON
WARRANTY
VIKING SNOWMOBILES, INC. warrants each new VIKING for a complete snowmobile season against
structural defects in materials and workmanship; providing the machine was
properly
maintained and used
under
normal conditions.
In the case
of
a purchase made within 60 days prior
to
the
end
of
a season, considered to
be
April
30th,
of
any
year,
the
warranty
will apply
from
date
of
purchase
until
January
1st
of
the following year.
The
Manufacturer's obligation under this
warranty
is limited
to
the
repair or
replacement
of
defective
parts
by
an
authorized
VIKING dealer, proven
to
be
defective in
either
material or workmanship.
This
warranty
is
not
valid
if
the
VIKING snowmobile has been subjected
to
misuse, improper
maintenance, negligence, accident, immersion
under
water, altered,
rented,
used
for
racing, repaired
by
unauthorized
persons or with parts
not
designed for VIKINGS, or used on surface
other
than
snow or ice.
Further,
this
warranty
docs
not
apply
to
VANQUISHER models
of
VIKING snowmobiles as
they
are
specifically
intended
for racing purposes.
This
warranty
does
not
apply
to
engine, carburetor,
torque
converters or drive tracks.
They
arc subject
to
warranty
of
their
own
manufacturer. Drive belts, windshields, ski skags
and
brake and
throttle
cables
are
not
covered by warranty.
This
warranty
is expressly in lieu
of
all
other
warranties, expressed or implied including all
other
obligations and liabilities
on
the
part
of
VIKING SNOWMOBILES, INC. And VIKING SNOWMOBILES,
INC.
neither
assumes
nor
authorizes
any
other
person
to
assume for
it
any
responsibility in
connection
with
VIKING machines.
VIKING
SNOWMOBILES,
INCORPORATED
TWIN VALLEY, MINNESOTA
56584

pr~G
SNOWMOBI
L
ES
INDEX
Recommended
Pre-Operating Tips
Operating
Controls
Starting Procedure
Fuel
Mixture
Break-In Period
Carburetor
Adjustment
Lubrication
'Maintenance . . . .
Operation
and Care
of
Two
Cycle Engines
Summer
Storage
Engine
and
Chassis Specifications
Records . . . . . . . . .
Page
1
2
3
4
5
6
7
. 8-10
11-14
.15
.16
.17

RECOMMENDED
PRE-OPERATIN
G T
IPS
CHECK THE FOLLOWING ITEMS EACH TIME BEFORE STARTING
YOUR
VIKING
I. Check
throttle
and brake controls
to
be certain
they
operate
freely. Brake should
not
be
too
tight
but
must
have
proper
adjustment
to insure good
braking action.
2.
Rock the machine
to
make certain track is
not
frozen
to
the
ground.
3.
Check fuel supply. Always fill fuel
tank
before
making
any
trip
and carry
enough
spare fuel for
extended trips.
4.
Check
the
steering mechanism
to
be certain skis
turn
freely.
5.
After
starting engine,
turn
machine on side
and
accelerate slowly to make certain
track
turns
freely.
2.
6.
Always carry a ·spare drive belt
and
extra
spark
plugs as well as tools
to
facilitate changing. These
items should be regarded as
important
as a spare
tire in an automobile.

OPERATING
CONTROLS
1.
FINGER
TIP
BRAKE
CONTROL
2.
FINGER
TIP
THROTTLE
CONTROL
3.
OFF
/
ON/START
SWITCH
4.
PRIMER
BUTTON
5. CHOKE
CONTROL
6.
HI-LOW
LIGHT
SWITCH
Operates
only
when
ignition is on.
7.
SPEEDOMETER
8.
TACHOMETER
(Optional)
9.
STARTING
CABLE
10.
TOOL
AND
GLOVE
COMPARTMENT
3.

r
STARTING
PROCEDURE
1.
Check Pre-Operating tips
on
page
1.
2.
Turn
ignition key
to
"ON"
position.
3. Push primer
button
until pressure is felt,
then
push
one more time.
4.
Pull
out
choke.
5.
(Manual Start Machines) Pull
starter
rope
slowly
until
it
engages and compression is felt,
then
pull
hard. CAUTION: Avoid
pu
ll
ing
rope
to
its limit or
dropping
rope
from an
extended
position. When
engine starts, push in choke slowly.
4.
6.
(Electric Start Machines)
Turn
ignition key
to
"START"
position. As soon as engine starts, allow
key to
return
to
"ON"
position. Push in choke
slowly.
7.
When starting cold engine, let
the
unit idle a few
minutes before starting
out.
NOTE: Choking may
not
be necessary
to
start
warm
engine.

FUEL
MIXTURE
1.
Always
use a
good
grade
of
gasoline, free
of
water
and
dirt.
2.
Use a
good
grade
of
2 cycle
air
cooled
engine
oil
which
is specially
blended
for
snowmobile
use.
Common
outboard
motor
oil
will
break
down
under
excessive heat. Whenever possible, have
gasoline
and
oil
at
room
temperatures
when
m1xmg.
3.
*Recommended
oil-fuel
mixture
ratio:
FUEL
20
Parts
OIL
I
Part
*Check
engine
manufacturer's
recommendation.
5.
4.
Do
not
mix gas
and
oil in
the
machine
tank.
Using
a clean
container,
fill
to
about
Y2
with
gas,
then
add
the
full
amount
of
oil
and
mix
thoroughly,
then
fill
with
gas
and
re-mix.
5. When filling
machine
with
pre-mixed
supply,
shake
can
to
re-mix
before
filling.
Gas
and
oil
mixture
may
have a
tendency
to
separate
while setting.
CAUTION
Excessive
oil
will cause
carbonization
of
pistons
,
spark
plugs,
ports,
and
exhaust
systems.
Too
little oil
may
cause
piston
seizure,
overheating,
and
rod
and
bearing
failure.

BREAK-IN
PROCEDURE
YOUR
NEW
VIKING
IS DESIGNED
TO
PROVIDE YEARS
OF
SNOWMOBILE PLEASURE.
AN
IMPROPER BREAK-IN PERIOD CAN SHORTEN
THAT
LIFE.
I. Allow engine
to
warm-up a
minute
or
two
before accelerating
into
motion.
2.
Do
not
operate
engine
at
prolonged full throttle.
For
the
first 20 hours
(approximately)
Y2
to
%throttle
is
recommended.
3.
The
carburetor
has been set slightly rich for
the
break-in period.
If
you feel some
adjustment
is
necessary, consult
your
dealer
to
check
this
for you.
6.

CARBURETOR
ADJUSTMENT
7.
Your carburetor has had approximate settings made
on
it
at
the
factory, however, altitude and
temperature
differences may necessitate changes.
Your dealer should have made these adjustments
in
his pre-delivery service
of
your machine.
No. I
is
the idle mixture screw. Approximately 1
Y2
turns
open
is
the
recommended initial setting. Poor
acceleration may indicate improper setting.
No. 2 is the high speed mixture screw. Recommended
initial setting
is
from
I
~
to
I
Y1
turns open.
Too
lean
setting will lead
to
engine over-heating and possible
failure.
Too
rich a setting will cause excess exhaust
smoke, "four-cycling" and plug fouling.
Just
at
the
point
of
eliminating
the
"four-cycling" effect
at
full
throttle
is
the
correct setting. Only under full
operating load can tests
of
setting be made.
No. 3
is
the
idle speed setting. This should be
adjusted after the idle mixture screw
is
set
to
a speed
below clutch engagement. Spring loaded
adjustment
screw is on
the
opposite side
of
carburetor.
CAUTION
Do
not
adjust
any
part
of
carburetor while
engine is running.
Note:
If
in
doubt
about
any setting, contact your
dealer.

LUBRICATION
I. OIL BATH CHAIN CASE
During every
month
of
operation, remove lower chain case cover.
If
necessary, fill
with
type
"A"
automatic
transmission fluid
to
the
top
of
the
chain as it is wrapped
around
the
bottom
of
the
sprocket.
2.
DRIVEN CLUTCH PULLEY
Every 40 hours
of
operation, remove belt (see maintenance section),
open
pulley and
apply a
thin
coat
of
low
temperature
grease
on
shaft.
Rotate
movable face and apply a
small
amount
of
grease
to
ramp bushings.
3.
STEERING POST
Ocassionaly, a small
amount
of
light oil may be placed in the
upper
and lower steering
post bearings.
CAUTION:
Do
not
oil brake
or
throttle
cables, as
they
will stiffen in cold temperatures.
8.

MAINTENANCE
9.
CHANGING CLUTCH BELT (Removal)
Apply pressure on brake handle, grasp moveable face
of
driven pulley and
rotate
backwards.
Then
grasp
belt (A) with
both
hands and pull upwards until
driven pulley (B) spreads allowing enough slack
to
roll belt
off
drive clutch (C).
Then
roll
belt
off
upper
side
of
driven pulley and
rotate
pulley
until
belt is
free.
INSTALLATION
Place belt
around
drive clutch, spread driven pulley in
same
manner
as above,
then
roll belt
unto
driven
pulley.
CLUTCH ALIGNMENT
Your clutches have been pre-set
at
the
factory for
alignment, however,
if
you experience pre-mature
belt failure
or
tendency
for belt
to
turn
over, consult
your
dealer
to
have
clutch
alignment checked.

MAINTENANCE
(CONTINUED)
10.
BRAKE ADJUSTMENT
The brake cable
is
adjusted
at
the factory so
that
when brake handle
is
released, caliper lever (A)
contacts stop pin. To adjust the brake shoes, tighten
nut
(B). CAUTION: Do
not
over tighten, always leave
about
% inch free travel
on
the brake handle. Check
that
clutch turns freely between shoes.
TRACK TENSION AND ALIGNMENT
Track tension should be determined by measuring the
distance from
the
front
bogie axle center
to
the
bottom
of
upper
track
in
tunnel.
If
bogie axle
is
in
lower setting, this dimension should be 4 7
/8".
If
bogie axle
is
in upper setting, dimension should be 3
3/4"
0
If
adjustment
is
required, loosen nuts (A)
on
both
sides
of
machine. Tighten
or
loosen bolts (B)
to
provide proper track tension.
Raise rear
of
machine, start engine and
run
track.
If
track is
not
centered
in
tunnel, adjust tension bracket
on
either side
to
compensate. Re-tighten
nuts
(A).

MAINTENANCE
(CONTINUED)
DRIVE
CHAIN TENSION
Drive chain should have
approximately
l/
8"
deflection mid-way between sprockets in chain case.
If
adjustment
is necessary, loosen
the
four
nuts
around
the
upper
input
shaft eccentric.
Rotate
eccentric
until
the
l
/8"
deflection
is
attained.
If
shaft position is
back
of
center,
rotate
eccentric
forward.
If
shaft position
is
ahead
of
center,
rotate
backward. Check brake for
proper
alignment
on
brake
drum
and retighten
the
four
nuts.
II.
SKI ALIGNMENT
For
proper alignment, skis should be parallel. This
can be checked
by
measuring
the
front and rear span
between
skis.
If
adjustment
is
necessary, remove the
bolts
attaching
the
tie rods
to
the
steering arms.
Loosen
jam
nut
and screw tie rod end
to
proved
proper
alignment. Tighten
jam
nuts
and replace bolts.
NOTE: When adjusting ski alignment, make certain
both
the skis and
the
handle bar are in a centered,
"straight
forward"
position.
Check skag wear
on
skis periodically. Replace when
excessive wear is evident.

OPERATION
AND
CARE
OF
TWO
CYCLE
E
NGINES
FIRST, GET ACQUAINTED
Understanding how a two-cycle engine operates helps
you
understand why it needs
the
right diet
of
gasoline
and oil, why it needs the right spark plug and why
engine manufacturers tell you,
"Don't
baby
it."
Much
of
the
information you
want
is in the pages
that
follow,
but
you
have some
other
"must"
reading as
well -
the
operators
manual
that
comes with
your
engine. Read it -and understand it -before
you
start
your
engine.
A two cycle engine differs from the four-cycle in
your
automobile
or in
your
garden tractor.
*It uses a gasoline-oil
mixture
for
combustion
and
lubrication,
not
gasoline and oil separately as in
your
automobile engine.
*It fires on every second
stroke
of
the
piston.
Every down stroke
of
the
piston
is
a power stroke
12.
- a power
stroke
for every revolution
of
the
crankshaft.
When a piston in a two-cycle engine moves upward in
the
cylinder (its first stroke), it draws a charge
of
fuel
into
the
crankcase below and
at
the
same
time
compresses the fuel in
the
combustion
chamber
above.
As
the piston completes
the
up stroke,
the
spark plug
ignites
the
compressed fuel and the burning fuel
expands and forces
the
piston downward (second
stroke,
or
power stroke).
In
this
down
stroke,
the
piston
not
only provides power
to
turn
the
crankshaft
but
also compresses
the
new charge
of
fuel in
the
crankcase,
then,
as it continues downward, it clears
the
transfer
ports
in
the
cylinder wall, releasing the
new charge
of
fuel
through
the
ports
and
up into the
combustion chamber where
the
new charge displaces
the
burned gasses, forcing
them
out
through
the
exhaust port.

That's
a lot
of
action
to
take
place in a fraction
of
a
second.
You
can realize what is going
on
inside
your
engine when you consider
that
at
high speed -
6000
RMP, for example -
the
piston travels up and down
and all this action takes place I
00
times a second.
OIL-
IT'S IMPORTANT
The
oil
you
pre-mix with the gasoline is
the
only
lubrication
your
engine gets. Use a good oil, add
it
to
the
gasoline in
the
ratio prescribed by
the
engine
manufacturer
and mix
the
oil and gasoline
thoroughly.
Oil is vital
to
the
life
of
your
engine.
Too
little oil
means insufficient lubrication; it means
that
you may
have
to
buy
a replacement engine in short order.
Too
much
oil means rapid fouling
of
spark plugs, rapid
build-up
of
deposits in
the
combustion
chamber, and
excessive
exhaust
smoke.
13.
CARBURETOR ADJUSTMENT-
A
JOB
FOR
YOUR DEALER
The
gasoline-oil
mixture
is
the
life
blood
of
your
engine and
the
more carefully you handle it
the
longer and more faithfully
your
engine will perform.
The
mixture
of
gasoline and oil
is
fed
to
your
engine
by
the
carburetor. When
the
carburetor is properly
adjusted, it mixes
the
fuel with the correct
proportion
of
air
to
make a volatile
mixture
which
serves as fuel
for
combustion
as well as lubricant and
coolant. Yes,
"coolant"
is
right-
the
mixture helps
to
cool internal surfaces and
to
cool spark plug
electrodes.
When
the
mixture is
too
"lean"
-
that
is,
too
little fuel
and
too
much
air-
the
spark plug electrodes heat
rapidly until
they
glow; in fact,
they
become so
hot
that
they
pre-ignite
the
fuel. This pre-ignition may
cause serious
problems
-piston burning for example,

or complete engine failure and an expensive repair
bill.
A lean mixture and the resultant overheating also
may cause
other
major problems -such as piston
seizing and bearing failure -again, expensive repair
bills.
Adjusting 'the carburetor
is
a
job
for
your
dealer.
Proper adjustment
is
critical, and he has the technical
information and know-how.
Fuel line restrictions, dirt or
other
foreign material in
the carburetor, clogged fule filters, loose impulse
fittings and tubes also may cause fuel lean-out. Since
the fuel pump
is
an integral part
of
the
carburetor, its
ability
to
supply fuel
is
regulated by the pulsing or
varying pressures in the crankcase.
If
the pulse line -
the one coming
out
of
the engine crankcase and
connecting
to
the carburetor -
is
loose, the pumping
capacity
is
reduced and the result may be lean-out
14.
and additional related problems. The following are
indicators
of
poor
pump
performance:
* Hard starting
* Loss
of
power
*Backfiring
*Erratic engine performance
SPARK PLUGS AND IGNITION
Now for
the
heartbeat
of
your
engine -
the
ignition
system. The ignition system has a flywheel magneto
equipped with ignition points -
just
like
your
automobile. Points must be adjusted properly for
good engine performance, and this
too
is a
job
for
your
service dealer, who has the necessary
instruments, factory specifications, and know-how.
Spark plugs deliver
the
spark
that
ignites the fuel-air
mixture to make
the
engine run.

Spark plugs are carefully selected by the engine
manufacturer to give
top
performance under most
conditions. The recommendations
of
the engine
manufacturers should be followed carefully when
spark plugs are replaced. Always carry spare plugs
when touring with
your
machine -and a wrench to
remove and install them.
Spark plug fouling, a common problem,
is
of
two
types
primarily:
1.
Carbon deposits. This build-up
of
deposits comes
from everyday running. After many hours
of
operation, you may find
that
the
plug gap
is
bridged
by
particles
of
carbon.
If
the bridge
is
removed, the plug can be re-installed.
If
the
build-up
of
carbon is excessive, it is best to replace
the
plug with a new one.
2.
Wet fouling. This usually occurs when the engine
is
flooded during cold starting. Wet fouling can be
15.
cleared by removing
the
plug and holding a match
or cigarette lighter
to
the
point section
to
burn
off
excess fuel. Crank the engine over a few times with
the
plug removed to clear excessive fuel, install
plugs, and start.
Both
wet fouling and bridging may occur because
of
prolonged idling. Avoid excessive idling at all times.
In stop-and-go operation, it is much easier
to
stop and
re-start
your
engine each time
than
to remove and
clean spark plugs
that
have fouled.
CAUTION: Do
not
attempt
to clean spark plugs
by sand blasting. Some sand could remain in the
plug and ruin an expensive engine very quickly.

SUMMER
STORAGE
The
following steps
are
recommended
to
prepare
your
VIKING
for
summer
storage.
I. Thoroughly clean
off
machine
and
engine
of
dirt,
oil, etc.
2.
Hood and chassis can be cleaned and polished with
an
automotive
type
cleaner wax.
3.
Track and suspension should be cleaned with a
water hose, and allowed
to
dry
thoroughly.
4.
Apply grease
to
rear suspension arms.
5.
Apply light oil
around
steering post bushings and
spindle shafts, and all bare surfaces
of
ski
assemblies.
16.
6.
Siphon gas from fuel
tank
and
run
engine until it
stops. Remove spark plug
and
apply small
amount
of
oil into spark plug hole.
Turn
engine over a few
times and replace plug.
7.
On
electric start equipped models, remove
battery,
clean, charge and store in a cool
dry
place.
It
is
recommended
that
an inactive
battery
be
trickle-charged every
30
to
40 days.
8.
Store
machine in shed,
off
ground
or
cement
on
wooden blocks
or
boards.
If
stored outside, cover
with tarpaulin, making sure windshield is
not
exposed
to
sunlight.

SPECIFICATIONS
CHASSIS
APPRO
X.
LENGTH HEIGHT WIDTH TRACK TRACK
MODEL DRY.
WT.
W/
SKIS Less
W.S.
O.A.
FUEL
CAP. CLUTCH BELT NO. WIDTH LENGHT
Vagabond 365 lbs. 107 in. 28 in.
32
in. 8 gal. *SV116
h~L\f
15
\6
in. 127 in.
Voyageur 365 lbs. 105 in. 28 in. 35 in. 8 gal.
41636
18
in. 114 in.
Vanquisher
370
lbs. 105 in. 28 in. 35 in. 5 gal.
41636
18
in. 114 in.
*All other engine models use No.
41636
Belt
ENGINE
NO. APPRO
X.
DISP. IGN. TMG. BOSCH SPARK PLUG CARBURETOR
MFGR. MODEL CYL.
H.P.
CV.CM. BORE STROKE BTOC NORMAL HEAVY MFGR. MODEL
Kohler
340
2
24
338 2.44 in. 2.2 in. .90 W240-TI W280-TI WALBRO
WRI-1
Kohler
399
2 28
399
2.56 in. 2.36 in. .90 M240-TI M280-Tl WALBRO
WRI-1
Kohler
440
2
30
437
2.68 in. 2.36 in. .90 M240-TI M280-TI TILLOT- HR-79B
SON
'v/'2i!t!-T~
'IV.:>'ilo~r~
Sachs
440
2 35 438 2.65 in. 2.40 in. .0126* I WALBRO
WDI-1
Hirth
650
2
65
647 65.5mm
64mm
3.3-3.7
mm
M240-TI M280-Tl WALBRO
WDI-1
*Retarded VIKING SNOWMOBILES, INC. reserves the right
to
change specifications
at
any
time without notice.

Use
this
space
to
keep
a record
of
the
Model and Serial numbers
of
your
machine and engine.
MACHINE:
-------------------------------
Model No. Serial No.
----------
ENGINE: Make
--------------------
Model No. Serial No.
----------
4fHK(HG
SNOWMOBILES
This manual suits for next models
2
Table of contents
Popular Snowmobile manuals by other brands

Polaris
Polaris 550 Shift 136 Owner's manual for maintenance and safety

Polaris
Polaris 120 Pro X owner's manual

Yamaha
Yamaha Phazer Venture Lite PZ50MTA 2011 Supplementary service manual

Yamaha
Yamaha RS90NL Supplementary service manual

Arctic Cat
Arctic Cat BEARCAT 2015 Operator's manual

BOMBARDIER
BOMBARDIER ski-doo MX-Z Blair MORGAN Operator's guide supplement