Vimar 46DVR.504 User manual

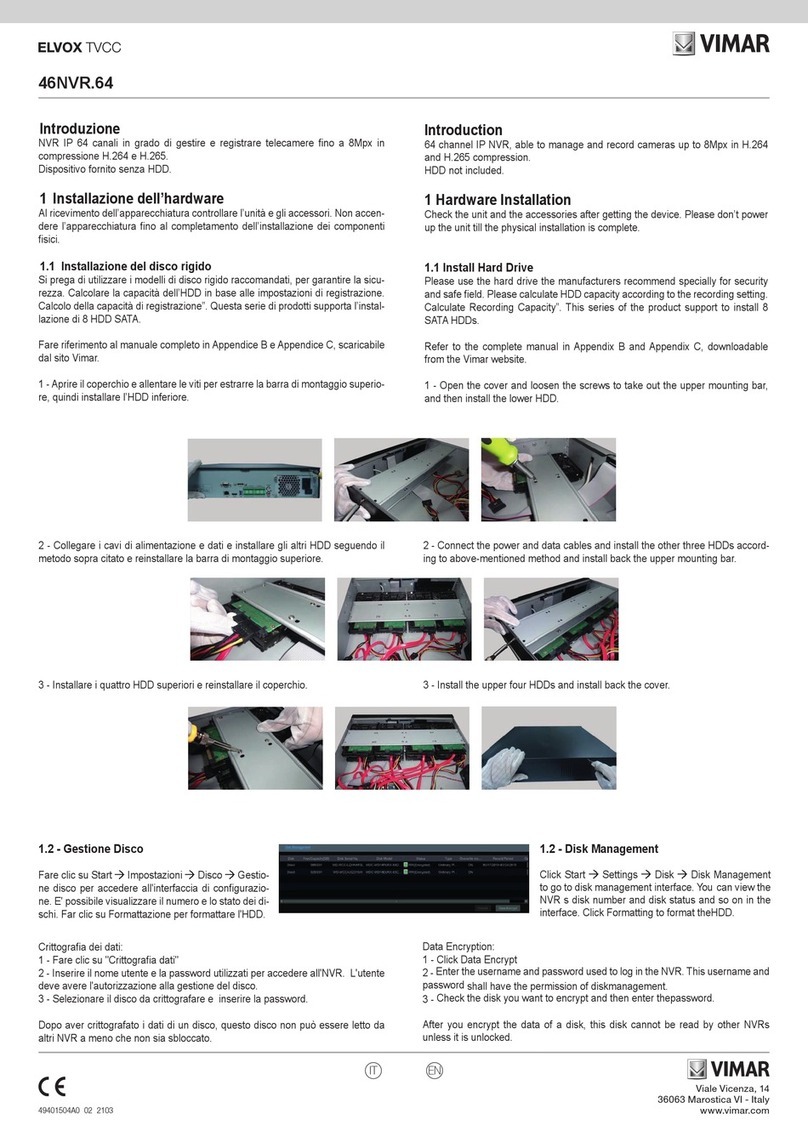
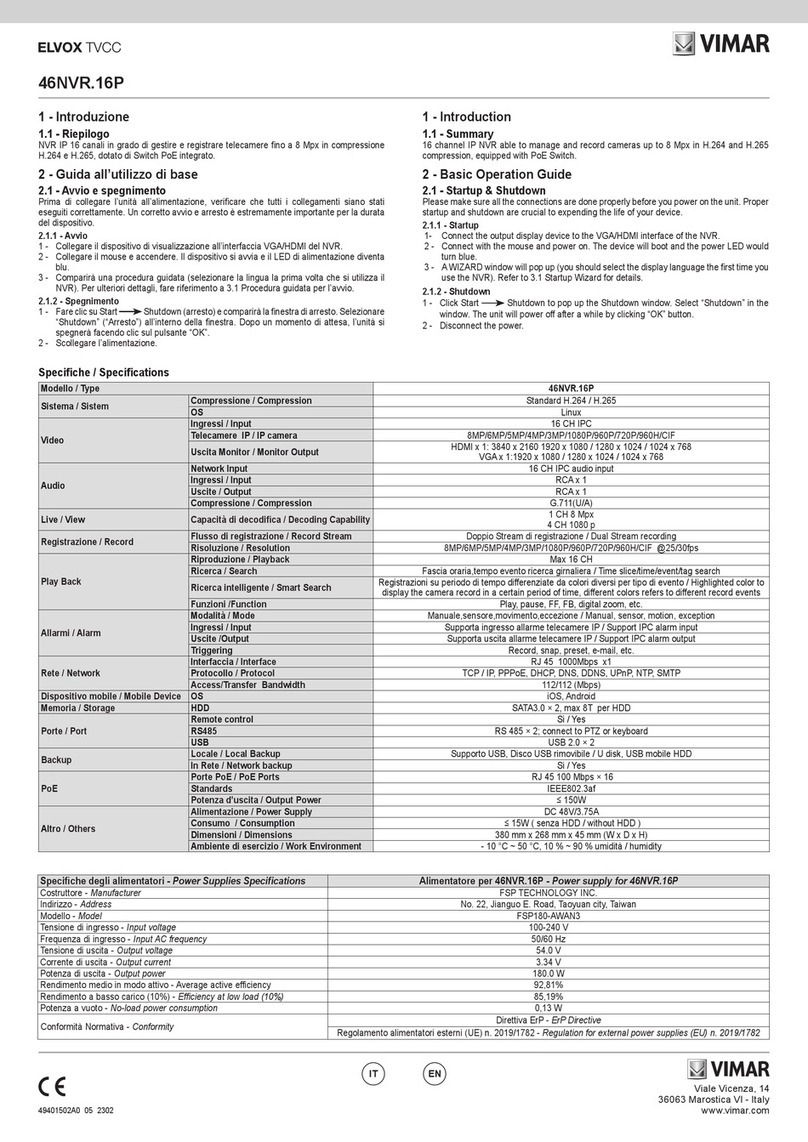
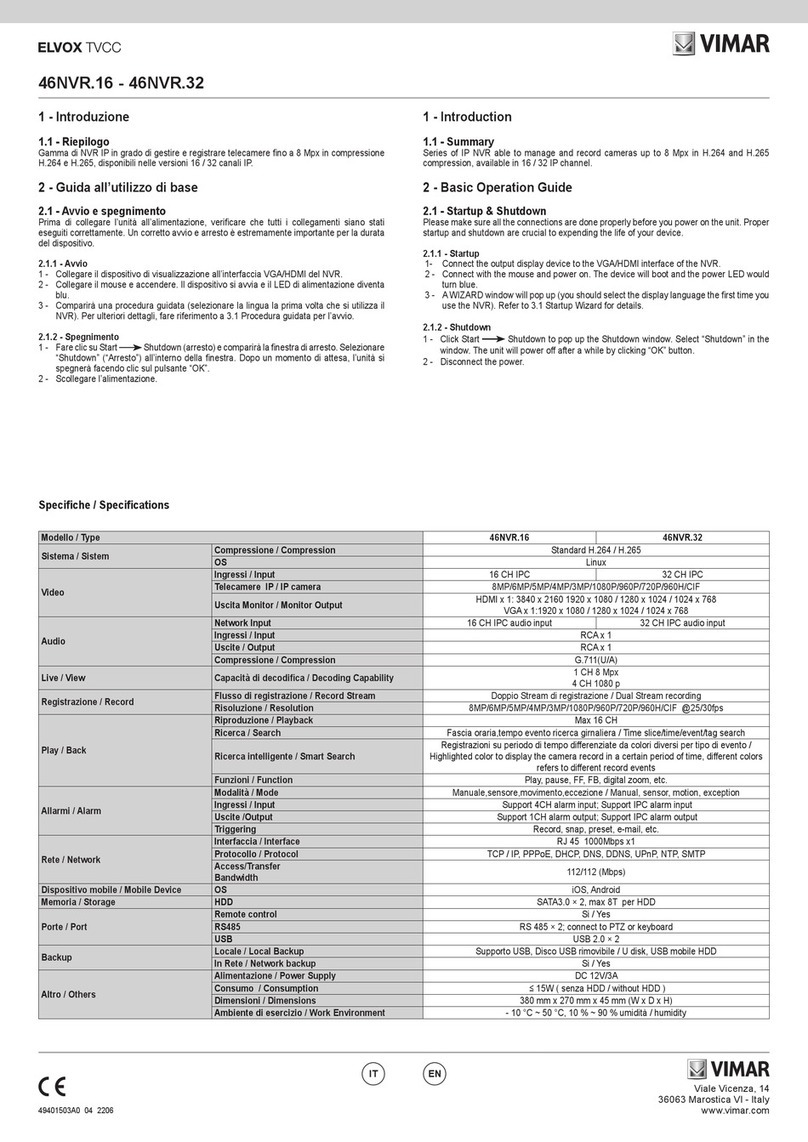
46DVR.504 - 46DVR.508
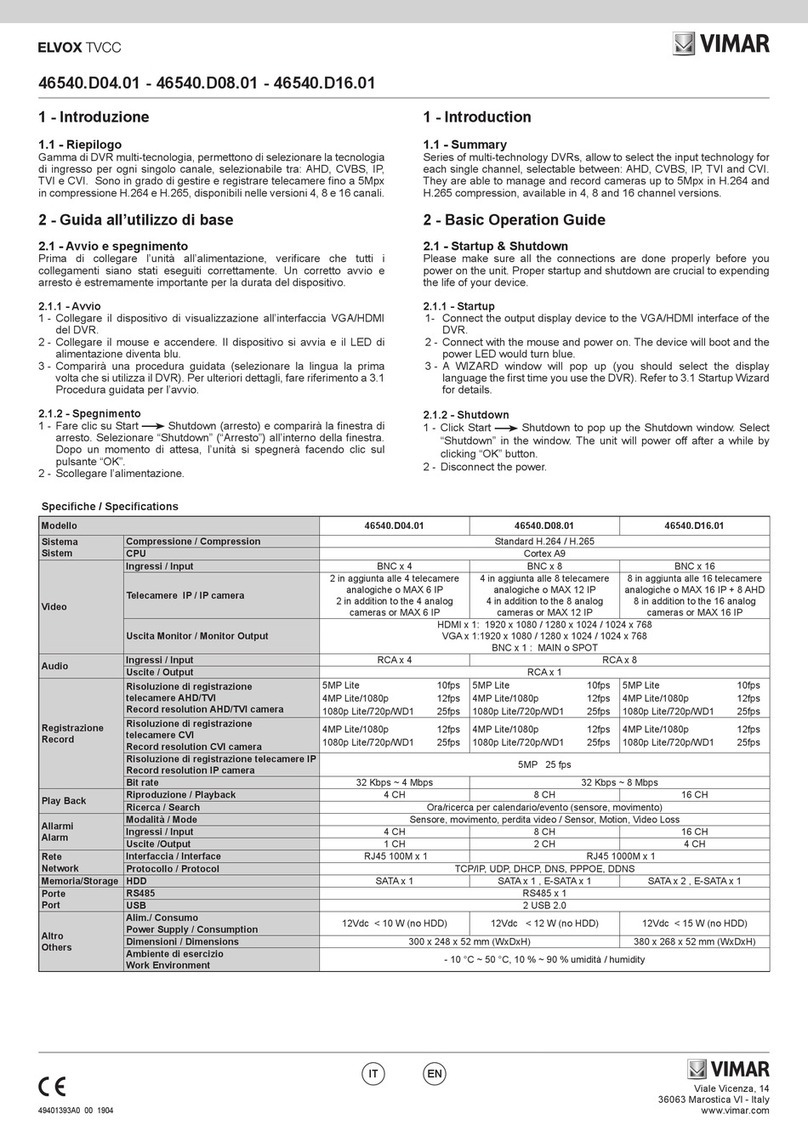
DVR con tecnologia AHD a 4/8 canali in tempo reale e HDD 1TB
DVR AHD realtime 4/8 channel HDD 1TB
Guida rapida
Quick guide

2
1 Descrizione
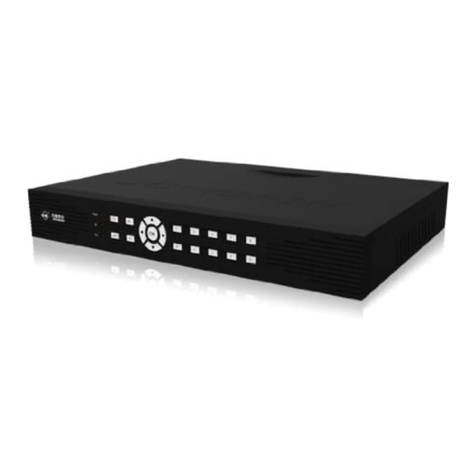
1.1 Descrizione del pannello anteriore
Avvertenza: La descrizione del pannello anteriore ha solo valore indicativo. Far riferimento all'apparecchiatura in dotazione.
Pannello anteriore
Nome Descrizione
REC Durante la registrazione la luce è blu
Net (Rete) Quando è attivo l'accesso alla rete la luce è blu
Power (Alimentazione) Spia di alimentazione, quando è collegata la luce è blu
1.2 Istruzioni pannello posteriore
Fig. 1-1 Pannello posteriore DVR per 4 canali
Fig. 1-2 Pannello posteriore DVR per 8 canali
Elemento Nome Descrizione
1 Porta VGA Uscita VGA, collegamento al monitor
2VIDEO IN Ingressi video
3 DC 12V Ingresso alimentazione
4 LAN Porta di rete
5 Porta USB Consente di connettere dispositivi USB esterni come memorie USB flash, HDD
USB per il backup o l'aggiornamento del firmware, o un mouse USB.
6 Porta HDMI Collegamento al dispositivo di visualizzazione ad alta definizione
7Audio In Ingresso audio 1 canale
8 Audio Out Uscita audio, collegare agli altoparlanti
I

1
I
2 Istruzioni per le funzioni base
2.1 Accensione/Spegnimento
Prima di accendere l'unità assicurarsi che tutte le connessioni siano in ordine.
2.1.1 Accensione
1. Collegare l'apparecchio all'alimentazione di rete.
2. Il dispositivo si avvia e il LED di alimentazione diventa blu.
3. Viene visualizzata una nestra con la procedura guidata in cui sono indicate le informazioni sul fuso orario, l'impostazione dell'ora,
la congurazione di rete, la congurazione di registrazione e la gestione del disco. L'utente può eseguire la congurazione in questa schermata facendo
riferimento alla procedura di congurazione descritta nei capitoli corrispondenti. Se si preferisce non utilizzare la procedura guidata, fare clic sul pulsante
Exit per uscire.
2.1.2 Spegnimento
L'utente può spegnere il dispositivo con il telecomando, la tastiera e il mouse.
1. Andare al Menu e selezionare l'icona "Spegnimento" per aprire la nestra di spegnimento.
2. Fare clic su OK. Dopo qualche istante l'unità si spegne.
3. Scollegare l'alimentazione.
2.2 Login
L'utente può effettuare l'accesso con credenziali (login) o disconnettersi dal sistema DVR (logoff). Una volta disconnesso l'utente non potrà eseguire alcuna
operazione ad eccezione della modica della visualizzazione multi schermo.
Fig. 2-1 Login
Avviso: Il nome utente predenito è "admin" e la password "123456".
2.3 Anteprima Live
Fig. 2-2 Anteprima live
Simbolo Significato
Verde Registrazione manuale
Giallo Registrazione per rilevamento movimento
Blu Registrazione programmata

2
3. QR CODE
Abilitazione servizio NAT
1 - Andare al Main Menu Setup Network interfaccia NAT (4.6.5).
2 - Attivare OPZIONE NAT ed inserire il server NAT (il server NAT predenito è www.autonat.com).
3 - Fare clic su “Apply” (Applica) per salvare le impostazioni.
Fig. 3.1 Congurazione di rete - NAT
Instalazione dell’applicazione su smartphone
Accedere al market del proprio smartphone, ricercare l’APP SUPERLIVE PRO e installarla.
Congurazione
Premere il tasto CODICE QR (freccia rossa sulla foto sotto) per entrare nella modalità scansione
L’utente può accedere rapidamente al client mobile leggendo il codice QRCODE. Andare a Main Menu / Information, scheda QRCODE. Fare riferimento alla
Fig. 3.1.A
Fig. 3-1.A Infromazioni per la congurazione
I
Fig. 3-1.B Congurazione informazioni
In questa interfaccia è possibile leggere il codice QRCODE con un telefono cellulare. Fare riferimento alla Fig. 3-1.B.
Appena la scansione viene eseguita, l’indirizzo MAC del DVR / NVR compare sul campo “Server” su Superlive PRO
Inserire nome utente e password del DVR / NVR
Default:
User: admin
Password: 123456
Premere il pulsante “Login” sull’interfaccia SUPERLIVE PRO ed il telefono cellulare è connesso al DVR / NVR.

3
1. Description
1.1 Front Panel Descriptions
Notice: The front panel descriptions are only for reference; please make the object as the standard.
One kind of front panel
Name Description
REC When recording, the light is blue
Net When access to network, the light is blue
Power Power indicator, when connection, the light is blue
1.2 Rear Panel Instructions
Item Name Description
1 VGA Port VGA output; connect to monitor
2Video In video inputs
3 DC 12V Power input
4 LAN Network port
5 USB Port To connect external USB devices like USB flash, USB HDD for backup or
update firmware; or connect to USB mouse
6 HDMI Port Connect to high-definition display device
7Audio In 1-ch audio input
8 Audio Out Audio output, connect to the sound box
Rear Panel for 4-channel
Rear Panel for 8-channel
EN

4
2 Basic Function Instruction
2.1 Power On/Off
Before you power on the unit, please make sure all the connection is good.
2.1.1 Power On
1. Connect with the source power.
2. The device will boot and the power LED would turn blue.
3. A WIZZARD window will pop up and show some information about time zone, time setup,
network conguration, record conguration and disk management. User can set up here and refer to the concrete setup steps from the corresponding
chapters. If users don‟t want to set up Wizard, please click Exit button to exit.
2.1.2 Power Off
User can power off the device by using remote controller, keyboard and mouse.
1. Go to Menu and then select “Shut Down” icon to pop up the Shut down window.
2. Click OK. Then the unit will power off after a while.
3. Disconnect the power.
2.2 Login
User can login or log off the DVR system. Once logged off the user cannot do any other operation except changing the multi-screen display.
Fig 2-1 Login
Notice: The default user name and password is “admin” and 123456”.
2.3 Live Preview
Fig 2-2 Live Preview Interface
EN
Symbol Meaning
Green Manual record
Yellow Motion detection record
Blue Schedule record

5
3. QR CODE
Enabling NAT service
1 - Go to Main Menu Setup Network NAT Interface (4.6.5).
2 - Enable NAT and input the NAT Server (The default NAT Server is www.autonat.com).
3 - Click “Apply” to save the settings.
Fig 3-1 Network Conguration-NAT
EN
Go to Main Menu Information QRCODE tab. Refer to Fig 3.1.A.
Instalation application on smartphone
App installation on smartphone search for “SUPERLIVE PRO” App on your mobile market and install It
Conguration
Press the QR CODE button (red arrow on below picture) to get ready for the scan
Fig 3.1.A Information Conguration
In this interface, you can scan the QRCODE through the mobile phone. Refer to Fig 3.1.B.
Fig 3.1.B Information Conguration
As soon as the scan is done, the MAC Address of the DVR/NVR appear on the “Server” eld on Superlive PRO Input on SUPERLIVE PRO the user and
password of the DVR/NVR
Default:
User: admin
Password: 123456
Press the “login” button on SUPERLIVE PRO and the mobile phone is connected to the DVR/NVR

Vimar SpA: Viale Vicenza, 14
36063 Marostica VI - Italy
Tel. +39 0424 488 600 - Fax (Italia) 0424 488 188
Fax (Export) 0424 488 709
www.vimar.com
49400922A0 00 15 10
VIMAR - Marostica - Italy
This manual suits for next models
4
Table of contents
Languages:
Other Vimar DVR manuals
