manuals.online logo
Brands
  1. Home
  2. •
  3. Brands
  4. •
  5. Vimar
  6. •
  7. Security Camera
  8. •
  9. Vimar ELVOX 46235.020C User manual

Vimar ELVOX 46235.020C User manual

Viale Vicenza, 14
36063 Marostica VI - Italy
www.vimar.com
46235.020C
49401142A0 00 1611
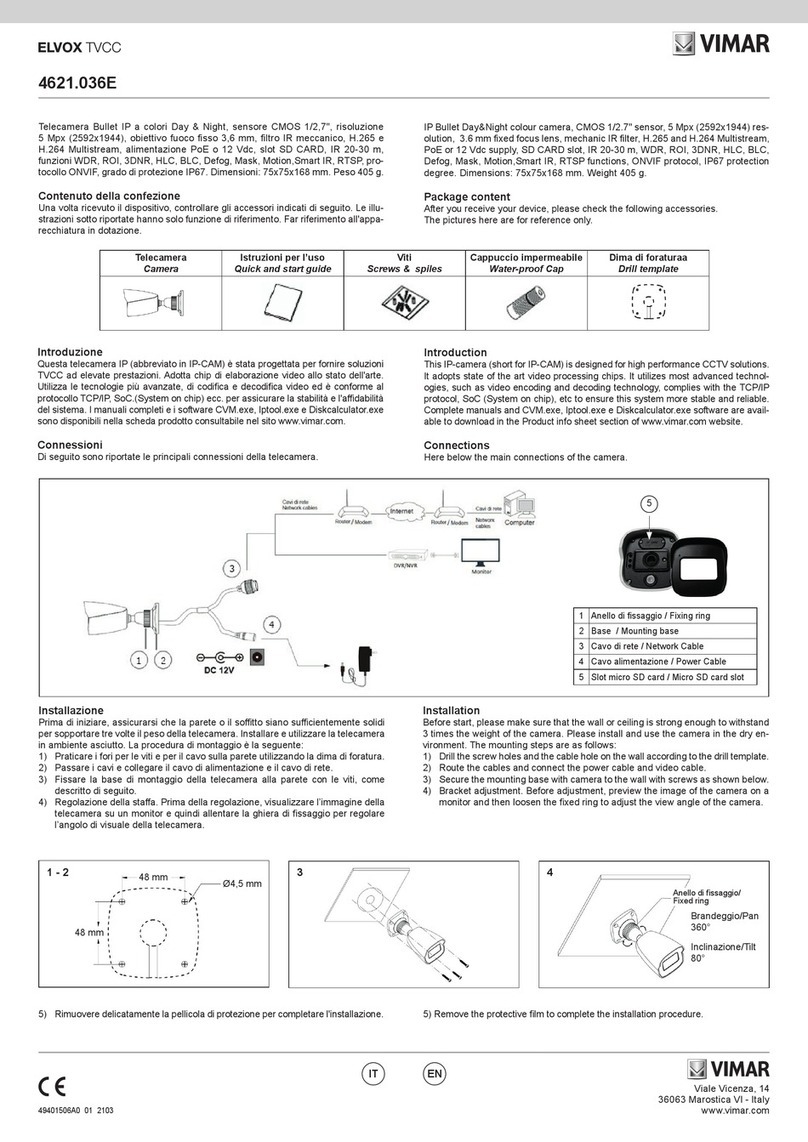
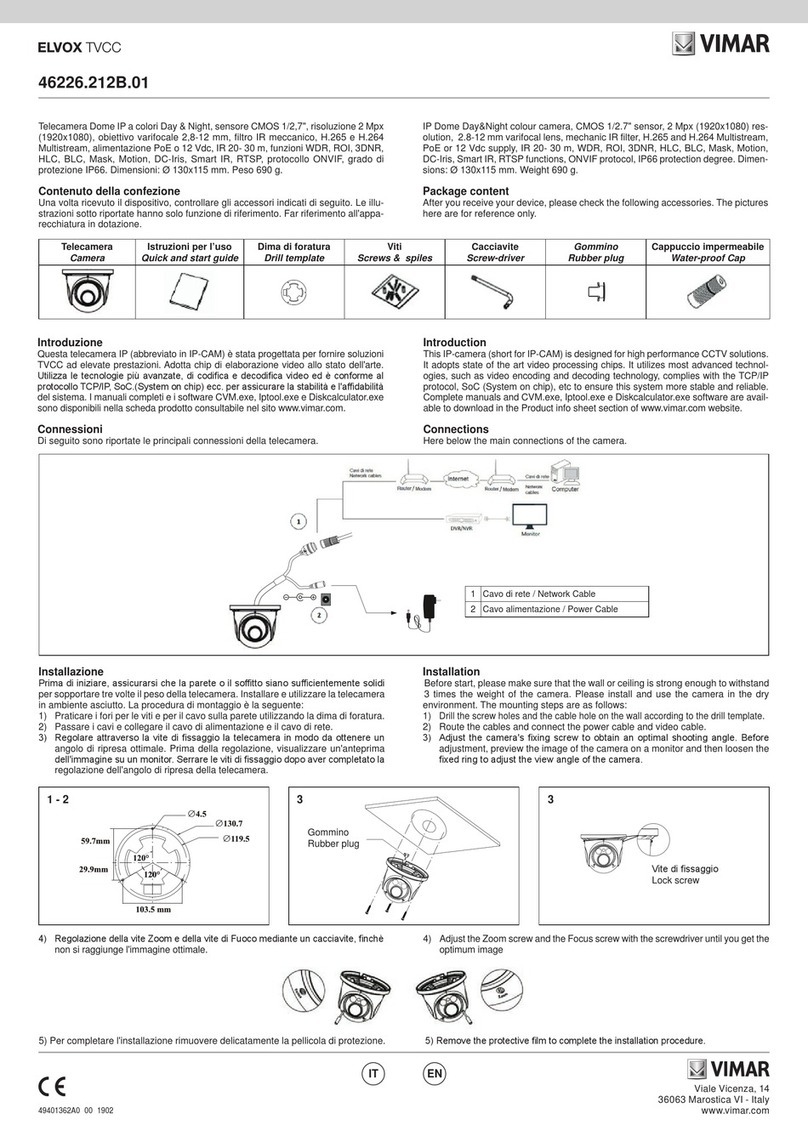
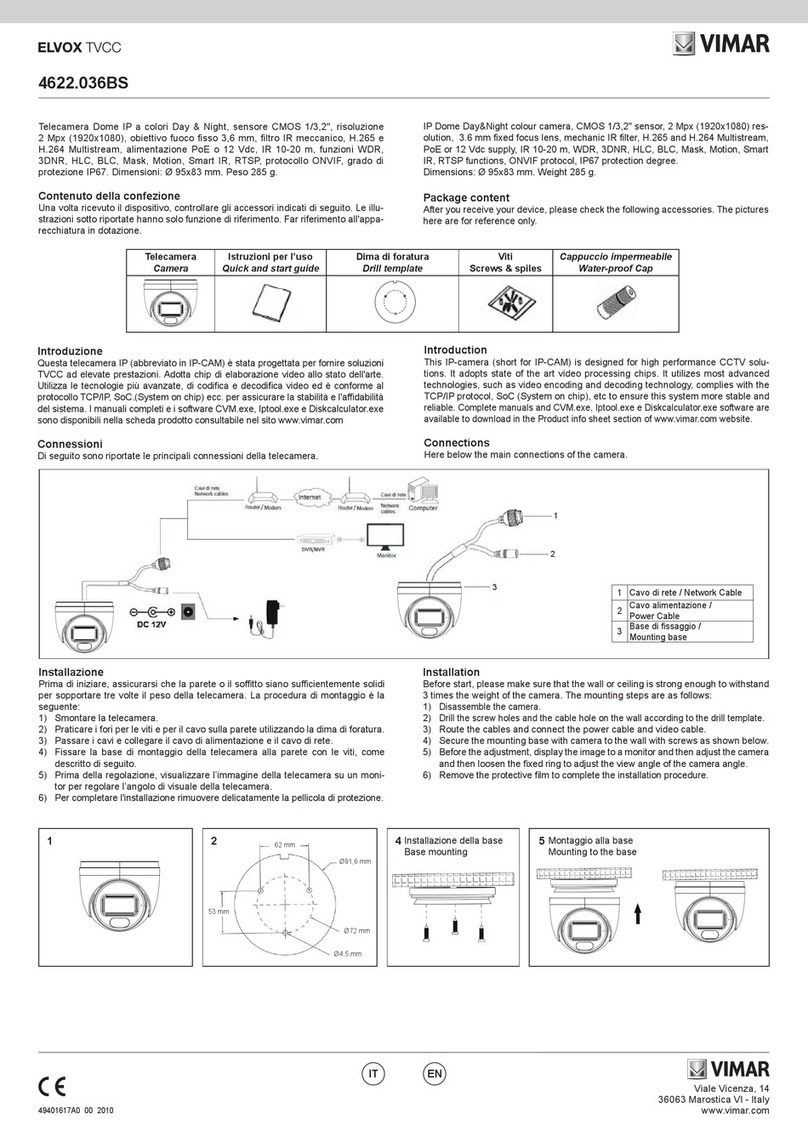
2 Installazione e connessione
2.1 Installazione scheda TF e collegamento dell’alimentazione
Installare la scheda di archiviazione:
1 - Allentare le viti sse della parte posteriore come illustrato di seguito.
2 - Estrarre il modulo camera come indicato e inserire la scheda TF nello slot della
scheda di archiviazione
3 - Rimontare la parte posteriore e ssarla con le viti.
2.2 Connessione
La PTZ Art. 46235.020C può gestire no a n°7 ingressi e 1 uscita allarme, con collega-
mento diretto degli allarmi sui contatti della PTZ, secondo lo schema di gura 1
.
LAN
HP
MIC
VIDEO
POWER
1
2
3
4
5
6
8
9
7
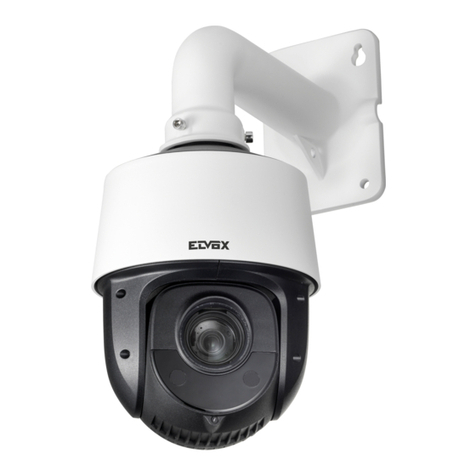
Telecamera Speed Dome IP 3Mpx 20x 100m IR H.265
1 Introduzione
1.1 Panoramica
La telecamera Speed Dome è un'apparecchiatura front-end utilizzata per acquisire
video. La tecnologia di ip digitale consente di riprendere immagini in tutte le dire-
zioni e monitorare senza punti ciechi. Utilizza le tecnologie più avanzate, quali la
tecnologia di codica e decodica video ed è conforme al protocollo TCP/IP, SoC.
ecc. per assicurare la stabilità e l'afdabilità del sistema. L'unità comprende due
parti: il dispositivo IP-CAM e il software di gestione centrale (abbreviato in CVM
Elvox). Il CVM Elvox consente di centralizzare tutti i dispositivi via Internet o LAN e
creare un buon impianto di sorveglianza che offre gestione unicata e attivazione in
remoto di tutti i dispositivi in rete.
Questo prodotto è ampiamente utilizzato nelle banche, nei sistemi di telecomunica-
zione, siti di fornitura elettrica, enti statali, fabbriche, magazzini, centri urbani ecc. È
inoltre la scelta ideale per aree di sorveglianza a medio e alto rischio.
1.2 Interfacce e parti
LAN
HP
MIC
VIDEO
POWER
1
2
3
4
5
6
8
9
7
1 LAN 2 Uscita HP Audio 3 Ingresso MIC
4 Uscita CVBS Video 5 Ingresso allarme/Uscita allarme 6 RS485
7 Alimentazione 8 Cavo anticaduta 9 Piastra di base
IP SpeedDome camera 3Mpx 20x 100m IR H.265
1 Introduction
1.1 Overview
This IP speed dome camera is front-end equipment used for video capture. Its
digital ip technology makes omni-directional and non-blind-spot monitoring into re-
ality. It utilizes most advanced technologies, such as video encoding and decoding
technology, and complies with the TCP/IP protocol, SoC., etc, to ensure this system
more stable and reliable. This unit consists of two parts: the IP-CAM device and
central management software (short for CVM ELVOX). This CVM ELVOX centra-
lizes all devices together via internet or LAN and establishes a sound surveillance
system to realize unied management and remote operation to all devices in one
network.
This product is widely used in banks, telecommunication systems, electricity power
departments, law systems, factories, storehouses, uptowns, etc. In addition, it is
also an ideal choice for surveillance sites with middle or high risks.
1.2 Interfaces and Parts
1 LAN 2 HP Audio Out 3 MIC In
4 CVBS Video Out 5 Alarm In/Alarm Out 6 RS485
7 Power 8 Safety Wire 9 Base Tray
2 Installation & Connection
2.1 Install TF Card and Power Connection
Install Storage Card:
1 - Loosen the xed screws of the rear as shown below.
2 - Pull out the camera module as shown and insert the TF card into the storage
card slot.
3 - Install back the rear and x it with the xed screws.
2.2 Connection
PTZ Art. 46235.020C can handle up to No. 7 inputs and 1 alarm output, with direct
connection to the alarm contacts of PTZ, according to the diagram of Fig. 1.
IT EN
Viale Vicenza, 14
36063 Marostica VI - Italy
www.vimar.com
46235.020C
49401142A0 00 1611
Descrizione/Description Colore / Color
Allarme-IN1/Alarm-IN1 Viola / Purple
Allarme-IN2/Alarm-IN2 Grigio / Grey
Allarme-IN3/Alarm-IN3 Bianco / White
Allarme-IN4/Alarm-IN4 Rosa / Pink
Allarme-IN5/Alarm-IN5 Rosso / Red
Allarme-IN6/Alarm-IN6 Nero / Black
Allarme-IN7/Alarm-IN7 Marrone / Brown
Allarme-n-COM/Alarm-n-COM Arancio-Nero / Orange-Black
Allarme-OUT +/Alarm-OUT + Giallo-Nero / Yellow-Black
Allarme-OUT -/Alarm-OUT - Verde-Nero / Green-Black
Descrizione / Description Colore / Color
RS485TA Giallo / Yellow
RS485TA Arancio / Orange
Contatti N.O./ Contacts N.O.
-
+
5-12 Vdc
-
+
5-12 Vdc
LAN
HP
MIC
VIDE
O
POWER
1
2
3
4
5
6
8
9
7
3 Accesso remoto da Internet Explorer
È possibile collegare la telecamera IP tramite LAN o WAN. In questo documento
viene utilizzato come esempio il browser Internet Explorer 6.0. Di seguito sono
indicati i dettagli:
3.1 LAN
In una LAN è possibile accedere alla telecamera IP in due modi: 1. Accesso da IP-
Tool; 2. Accesso diretto da Internet Explorer.
3.2 Accesso da IP-Tool
Collegamento alla rete:
1- Assicurarsi che PC e telecamera IP siano collegati alla LAN e che IP-Tool sia
stato installato sul PC dal CD.
2- Fare doppio clic sull'icona IP-Tool sul desktop per eseguire il software, come
illustrato di seguito:
3- Modicare l'indirizzo IP. L'indirizzo IP predenito di questa telecamera è
192.168.226.201. Fare clic sulle informazioni della telecamera elencate nella
tabella sopra riportata per visualizzare le informazioni di rete sulla destra. Mo-
dicare l'indirizzo IP e il gateway della telecamera e assicurarsi che l'indirizzo
di rete si trovi nello stesso segmento della rete locale del computer. Modicare
l'indirizzo IP del dispositivo in base alla situazione specica.
3 IE Remote Access
You may connect IP-Cam via LAN or WAN. Here only take IE browser (6.0) for
example. The details are as follows:
3.1 LAN
In LAN, there are two ways to access IP-Cam: 1. access through IP-Tool; 2. directly
access through IE browser.
3.2 Access through IP-Tool
Network connection:
1 - Make sure the PC and IP-Cam are connected to the LAN and the IP-Tool is
installed in the PC from the CD.
2 - Double click the IP-Tool icon on the desktop to run this software as shown
below:
3 - Modify the IP address. The default IP address of this camera is 192.168.226.201.
Click the information of the camera listed in the above table to show the network
information on the right hand. Modify the IP address and gateway of the camera
and make sure its network address is in the same local network segment as
the computer’s. Please modify the IP address of your device according to the
practical situation.
Fig. 1
IT EN
Viale Vicenza, 14
36063 Marostica VI - Italy
www.vimar.com
46235.020C
49401142A0 00 1611
Ad esempio, l'indirizzo IP del computer in uso è 192.168.1.4. Di conseguenza l'indirizzo
della telecamera deve essere cambiato in 192.168.1.X. Dopo la modica inserire la pas-
sword di amministratore e fare clic sul pulsante "Modica" per modicare l'impostazione.
4 - Fare doppio clic sull'indirizzo IP, il sistema aprirà Internet Explorer per collegare
la telecamera IP. Internet Explorer scarica automaticamente i controlli ActiveX.
Dopo il download si apre la nestra di accesso illustrata di seguito.
Inserire il nome utente e la password per accedere.
Il nome utente predenito è "admin" e la password "123456".
Accesso diretto da Internet Explorer
Le impostazioni di rete predenite sono indicate di seguito:
Indirizzo IP: 192.168.226.201
Subnet Mask: 255.255.255.0
Gateway: 192.168.226.1
HTTP: 80
Data port (Porta dati): 9008
È possibile utilizzare le impostazioni predenite sopra riportate quando si esegue
l'accesso alla telecamera per la prima volta. È possibile collegare direttamente la
telecamera al computer mediante il cavo di rete.
1 - Impostare l'indirizzo IP del PC e assicurarsi che il segmento della rete corri-
sponda a quello delle impostazioni predenite della telecamera IP. Aprire la rete
e il centro di condivisione. Fare clic su "Connessione alla rete locale (LAN)" per
visualizzare la seguente nestra.
Selezionare "Proprietà" e quindi il protocollo Internet opportuno (ad esempio, IPV4).
Inne, fare clic sul pulsante "Proprietà" per impostare la rete del PC.
2 - Aprire Internet Explorer, inserire l'indirizzo predenito della telecamera IP e con-
fermare. Internet Explorer scarica automaticamente i controlli ActiveX.
3 - Dopo il download dei controlli ActiveX viene visualizzata la nestra di dialogo di
accesso.
4 - Inserire il nome e la password predeniti quindi premere Invio.
For example, the IP address of your computer is 192.168.1.4. So the IP address of
the camera shall be changed to 192.168.1.X. After modication, please input the
password of the administrator and click “Modify” button to modify the setting.
4 - Double click the IP address and then the system will pop up the IE browser to
connect IP-CAM. IE browser will auto download the Active X control. After down-
loading, a login window will pop up as shown below.
The default password of the administrator is “123456”.
Input the username and password to log in.
The default username is “admin”; the default password is “123456”.
Directly Access through IE
The default network settings are as shown below:
IP address: 192.168.226.201
Subnet Mask: 255.255.255.0
Gateway: 192.168.226.1
HTTP: 80
Data port: 9008
You may use the above default settings when you log in the camera for the rst
time. You may directly connect the camera to the computer through network cable.
1 - Set the IP address of the PC and make sure the network segment should be as
the same as the default settings of the IP camera. Open the network and share
center. Click “Local Area Connection” to pop up the following window.
Select “Properties” and then select internet protocol according to the actual situation
(for example: IPV4).
Next, click “Properties” button to set the network of the PC.
2 - Open the IE browser and input the default address of IP-CAM and conrm. The
IE browser will download Active X control automatically.
3 - After downloading Active X control, the login dialog box will pop up.
4 - Input the default username and password and then enter to view.
La password predenita dell'amministratore è "123456".
IT EN
Viale Vicenza, 14
36063 Marostica VI - Italy
www.vimar.com
46235.020C
49401142A0 00 1611
4 WAN
Accesso tramite router o server virtuale
1 - Assicurarsi che la telecamera sia correttamente collegata tramite la LAN, quindi
accedere alla telecamera tramite LAN e andare al menu Cong (Congurazio-
ne) Network Cong (Congurazione di rete) Port (Porta) per impo-
stare il numero di porta.
2 - Andare al menu Cong Network (Rete) TCP/IPv4 per modicare
l'indirizzo IP.
3 - Accedere all'interfaccia di gestione del router tramite Internet Explorer per ese-
guire il forwarding dell'indirizzo IP e della porta della telecamera nel "Server
virtuale".
Congurazione del router / Router Setup
4 - Aprire Internet Explorer quindi inserire l'IP WAN corrispondente e la porta http
per accedere.
Descrizione Preset / Preset Description
Chiama Preset/
Call Preset
Call No. 90 Preset Run track 1
Call No. 91 Preset Run cruise 1
Call No. 92 Preset Run cruise 2
Call No. 93 Preset Run cruise 3
Call No. 94 Preset Run cruise 4
Call No. 95 Preset Menu OSD / OSD menu
Call No. 97 Preset Abilita scansione casuale / Enable random scan
Call No. 99 Preset Abilita P-SCAN / Enable P-PSCAN
Impostare Preset
Set Preset
Set No. 91 Preset "Impostare scansione casuale; Task richiama in automatico il punto di inizio" /
"Set random scan; Task auto call the beginning point"
Set No. 92 Preset imposta limite sinistro di P-PSCAN / Set left border of P-PSCAN
Set No. 93 Preset imposta limite destro di P-PSCAN / Set right border of P-PSCAN
Set No.94 Preset tre volte /
Set No.94 Preset three times
"Impostare il valore limite dell'IR vicino e medio" /
"Set the boundary value of the near and middle infrared light"
Set No.95 Preset tre volte /
Set No.95 Preset three times
"Impostare il valore limite dell'IR Medio e lontano" /
"Set the boundary value of the middle and far infrared light"
4 WAN
Access through the router or virtual server
1 - Make sure the camera is well connected via LAN and then log in the camera via
LAN and go to Cong Network Cong Port menu to set the port
number.
2 - Go to Cong Network Cong TCP/IPv4 menu to modify the IP ad-
dress.
3 - Go to the router’s management interface through IE browser to forward the IP
address and port of the camera in the “Virtual Server”.
4 - Open the IE browser and input its WAN IP and http port to access.
IT EN

Other manuals for ELVOX 46235.020C

1

Other Vimar Security Camera manuals

Vimar ELVOX 4622.2812ESA User manual

Vimar

Vimar ELVOX 4622.2812ESA User manual

Vimar ELVOX TVCC 46516.213E User manual

Vimar

Vimar ELVOX TVCC 46516.213E User manual

Vimar ELVOX 4621.2812FMA User manual

Vimar

Vimar ELVOX 4621.2812FMA User manual

Vimar ELVOX TVCC 46237.KIT User manual

Vimar

Vimar ELVOX TVCC 46237.KIT User manual

Vimar ELVOX TVCC 4651.036E User manual

Vimar

Vimar ELVOX TVCC 4651.036E User manual

Vimar ELVOX 4621.2812DA User manual

Vimar

Vimar ELVOX 4621.2812DA User manual

Vimar 46812.036D User manual

Vimar

Vimar 46812.036D User manual

Vimar Elvox 4651.2812F User manual

Vimar

Vimar Elvox 4651.2812F User manual

Vimar ELVOX TVCC 4622.028EA User manual

Vimar

Vimar ELVOX TVCC 4622.028EA User manual

Vimar Elvox 4621.2812EMS User manual

Vimar

Vimar Elvox 4621.2812EMS User manual

Vimar Elvox 46.822.036 User manual

Vimar

Vimar Elvox 46.822.036 User manual

Vimar ELVOX 46522.036D User manual

Vimar

Vimar ELVOX 46522.036D User manual

Vimar ELVOX TVCC 46212.036B.01 User manual

Vimar

Vimar ELVOX TVCC 46212.036B.01 User manual

Vimar ELVOX TVCC User manual

Vimar

Vimar ELVOX TVCC User manual

Vimar ELVOX TVCC 4651.2713BLM User manual

Vimar

Vimar ELVOX TVCC 4651.2713BLM User manual

Vimar ELVOX 46226.312DMS User manual

Vimar

Vimar ELVOX 46226.312DMS User manual

Vimar ELVOX 4621.028FSA User manual

Vimar

Vimar ELVOX 4621.028FSA User manual

Vimar 46237.036 User manual

Vimar

Vimar 46237.036 User manual

Vimar ELVOX TVCC 4651.036F User manual

Vimar

Vimar ELVOX TVCC 4651.036F User manual

Vimar ELVOX 4624.036EA User manual

Vimar

Vimar ELVOX 4624.036EA User manual

Vimar ELVOX 46316.210A User manual

Vimar

Vimar ELVOX 46316.210A User manual

Vimar ELVOX 4621.028EA User manual

Vimar

Vimar ELVOX 4621.028EA User manual

Vimar Elvox 4622.3312EMA User manual

Vimar

Vimar Elvox 4622.3312EMA User manual

Vimar Elvox 4621.028FS User manual

Vimar

Vimar Elvox 4621.028FS User manual

Popular Security Camera manuals by other brands

Bkav AI VIEW C300-0200 installation guide

Bkav

Bkav AI VIEW C300-0200 installation guide

Eneo TPP-62A0012M0A user manual

Eneo

Eneo TPP-62A0012M0A user manual

Speco VLB9 user manual

Speco

Speco VLB9 user manual

Dahua HAC-HFW1200D user manual

Dahua

Dahua HAC-HFW1200D user manual

Cisco Nexus 5010 quick start guide

Cisco

Cisco Nexus 5010 quick start guide

Bosch AutoDome Junior HD VJR Series Operation manual

Bosch

Bosch AutoDome Junior HD VJR Series Operation manual

Dahua HFW2831S-S-S2 quick start guide

Dahua

Dahua HFW2831S-S-S2 quick start guide

Crest Audio CCA-2810WF-20 user guide

Crest Audio

Crest Audio CCA-2810WF-20 user guide

Vip2 VK2-1080VRD3V9 Installation and user manual

Vip2

Vip2 VK2-1080VRD3V9 Installation and user manual

Vicon V9360-1 user guide

Vicon

Vicon V9360-1 user guide

Riva RC4602SV-7416A-30 installation guide

Riva

Riva RC4602SV-7416A-30 installation guide

Interlogix TruVision TVB-4402 installation guide

Interlogix

Interlogix TruVision TVB-4402 installation guide

VADDIO RoboSHOT USB Series Complete manual

VADDIO

VADDIO RoboSHOT USB Series Complete manual

Monacor TVCCD-120 manual

Monacor

Monacor TVCCD-120 manual

Proximus P16-41438 user manual

Proximus

Proximus P16-41438 user manual

Sanyo VCC-HD2100 - Full HD 1080p Network Camera Specifications

Sanyo

Sanyo VCC-HD2100 - Full HD 1080p Network Camera Specifications

Eneo IPD-62M2713MAA user manual

Eneo

Eneo IPD-62M2713MAA user manual

Huviron SK-P464D/M556AI user guide

Huviron

Huviron SK-P464D/M556AI user guide

manuals.online logo
manuals.online logoBrands
  • About & Mission
  • Contact us
  • Privacy Policy
  • Terms and Conditions

Copyright 2025 Manuals.Online. All Rights Reserved.