manuals.online logo
Brands
  1. Home
  2. •
  3. Brands
  4. •
  5. Vimar
  6. •
  7. Security Camera
  8. •
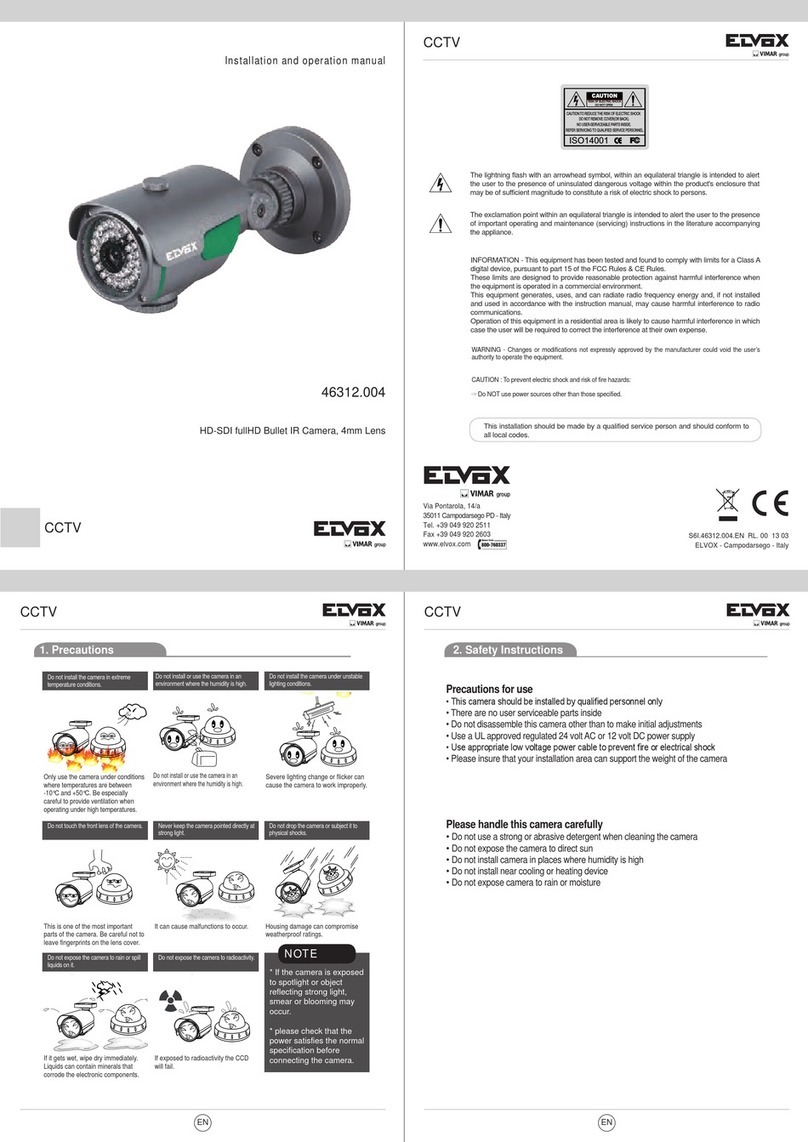
  9. Vimar ELVOX TVCC 46237.KIT User manual

Vimar ELVOX TVCC 46237.KIT User manual

Viale Vicenza, 14
36063 Marostica VI - Italy
www.vimar.com
49401352A0 00 1812
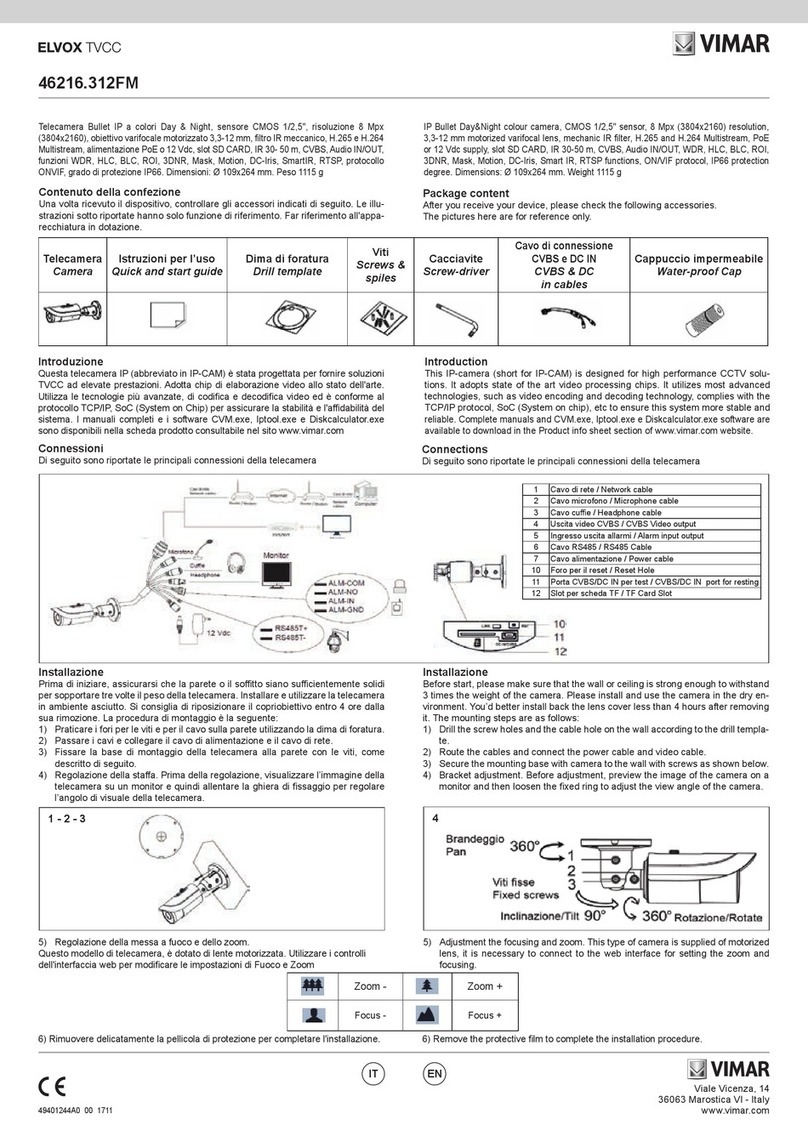
46237.KIT
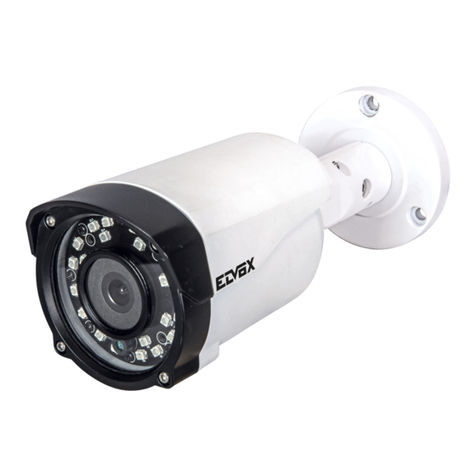
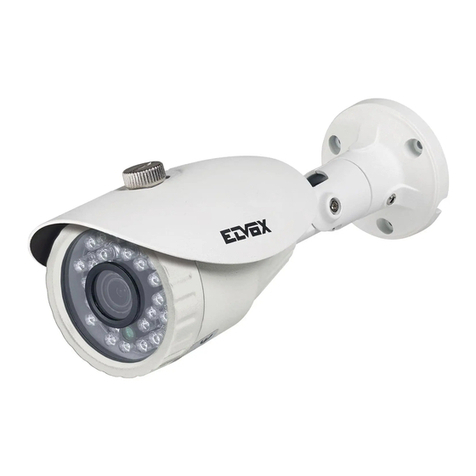
'Telecamera Bullet IP Wi-Fi, dedicata al kit Wi-Fi 46KIT.436WF a colori Day & Night,
sensore CMOS 1/2,7", risoluzione 2 Mpx (1920x1080), obiettivo fuoco fisso 3,6 mm,
filtro IR meccanico, Compressione H.265 e H.264, alimentazione 12 Vdc, IR 20 m,
grado di protezione IP66. Dimensioni: Ø 64x154 mm. Peso 365 g.
Nota: la telecamera funziona solo in abbinamento al kit Wi-Fi 46KIT.436WF
Contenuto della confezione
Una volta ricevuto il dispositivo, controllare gli accessori indicati di seguito. Le illu-
strazioni sotto riportate hanno solo funzione di riferimento. Far riferimento all'appa-
recchiatura in dotazione.
Introduzione
Questa telecamera IP Wi-Fi è stata progettata per fornire soluzioni TVCC ad elevate
prestazioni. Utilizza le tecnologie più avanzate, di codica e decodica video ed è
conforme al protocollo Wi-Fi IEEE802.11b/g/n.
Connessioni
Di seguito sono riportate le principali connessioni della telecamera.
Telecamera
Camera
Istruzioni per l’uso
Quick and start guide
Dima di foratura
Drill template
Viti
Screws & spiles
Introduction
This camera is designed to provide high-performance CCTV solutions.
It uses the most advanced video encoding and decoding technologies and complies
with the protocol Wi-Fi IEEE 802.11b/g/n
Connections
Here below the main connections of the camera.
IP Wi-Fi Day&Night colour Bullet camera, dedicated to the Wi-Fi kit 46KIT.436WF,
CMOS 1/2,7" sensor, 2 Mpx (1920x1080) resolution, 3,6 mm fixed lens, mechanical
IR filter H.265 and H.264 video compression, power supply 12 Vdc, IR 20 m, IP66
protection degree. Dimensions: Ø 64x154 mm. Weight 365 g.
Note: the camera works only in conjunctions with the kit Wi-Fi 46KIT.436WF
Package content
After you receive your device, please check the following accessories. The pictures
here are for reference only.
IT
EN
1Cavo di rete / Network Cable
(solo per aggiungere una nuova telecamera all’NVR/ only to add a new camera to NVR)
2 Cavo alimentazione / Power Cable
VGA
HDMI
AUDIO OUT
2
3
1
12 Vdc
Cavo di rete
Network cable
2
1
Regole di installazione
L’installazione deve essere e󰀨ettuata da personale qualicato con l’osservanza
delle disposizioni regolanti l’installazione del materiale elettrico in vigore nel paese
dove i prodotti sono installati.
Installazione
Prima di iniziare, assicurarsi che la parete o il so󰀩tto o l'appoggio siano su󰀩ciente-
mente solidi per sopportare tre volte il peso della telecamera. Installare e utilizzare
la telecamera in ambiente asciutto. La procedura di montaggio è la seguente:
1 - Praticare i fori per le viti e per il cavo sulla parete utilizzando la dima di foratura.
2 - Passare i cavi e collegare il cavo di alimentazione.
3 - Fissare la base di montaggio della telecamera alla parete con le viti.
4 - Allentare le viti di ssaggio per regolare l’angolo di visuale della telecamera.
5 - Le telecamere sono già congurate per connettersi via Wi-Fi all’NVR.
Installation rules
Installation should be carried out by qualified staff in compliance with the current
regulations regarding the installation of electrical equipment in the country where
the products are installed.
Installation
Before start, please make sure that the wall or ceiling or desktop is strong enough
to withstand 3 times the weight of the camera. Please install and use the camera in
the dry environment. The mounting steps are as follows:
1 - Drill the holes for the screws and the cable on the wall, using the drill template.
2 - Pass the cables and connect the power cord.
3 - Fix the mounting base of the camera to the wall with the screws.
4 - Loosen the xing screws to adjust the viewing angle of the camera.
5 - The cameras are already congured to connect to the NVR via Wi-Fi.
0°~360°
0°~90°
0°~360°
13 mm
25 mm
Ø 63 mm
Ø 3 mm
Ø 25 mm
44 mm
120°
120°
Viti regolabili
Adjustable
screws
So󰀩tto
Ceiling
Viti di ssaggio
Install screws
0°~360°
0°~90°
0°~360°
13 mm
25 mm
Ø 63 mm
Ø 3 mm
Ø 25 mm
44 mm
120°
120°
0°~360°
0°~90°
0°~360°
13 mm
25 mm
Ø 63 mm
Ø 3 mm
Ø 25 mm
44 mm
120°
120°
Viale Vicenza, 14
36063 Marostica VI - Italy
www.vimar.com
49401352A0 00 1812
46237.KIT
IT
EN
Aggiunta nuova telecamera all’NVR
Questa operazione va eseguita qualora si voglia aggiungere una nuova telecamera
(al massimo 2) alle due telecamere già comprese nel kit.
- Alimentare la telecamera e l’NVR, quindi collegarli tramite l’apposito cavo di rete.
Assicurarsi che il Led NET dell’ NVR sia acceso, in caso contrario controllare i
collegamenti.
Addition new camera to the NVR
This operation must be done if you want to add a new camera (max 2) to the 2
cameras already included in the kit.
- Power the camera and the NVR, then connect them using the network cable.
Make sure that the Net LED of the NVR is ON, if not check the connections
VGA
HDMI
AUDIO OUT
2
3
1
12 Vdc
Cavo di rete
Network cable
2
1
- Entrare nel menu Menu Principale>Congura Wi-Fi e cliccare su Abbinamento
per abbinare la telecamera all’NVR.
Al primo accesso verrà richiesto di inserire:
Nome utente: Admin
Password: 123456
- Enter in the Main Menu-->Wireless Setting and click Auto-Pair to add the camera
to the NVR.
At the rst access you will be asked to enter:
User name: Admin
Password: 123456
- Al termine dell’abbinamento verrà visualizzato il messaggio OK e l’immagine
della telecamera apparirà sullo schermo. Disconnettere quindi il cavo di rete.
- At the end of pairing, the message OK will be displayed and the image will appe-
ar on the screen. Then, disconnect the network cable.
Viale Vicenza, 14
36063 Marostica VI - Italy
www.vimar.com
49401352A0 00 1812
46237.KIT
IT
EN
Speciche / Specications
Telecamera
Camera
Sensore
Sensor 1/2,7" CMOS 2 Mpx
Pixel immagine
Pixel image 1920×1080
Otturatore elettronico
Electonic shutter 1/25 s ~ 1/100000 s / AUTO
Sensibilità
Sensitivity 0,01 lux@F1,2, AGC ON; 0 Lux (IR LED ON)
Obiettivo
Lens 3,6 mm
Immagine
Image
Compressione video
Video compression H.264/H.265
Risoluzione
Resolution 1080p (1920 x 1080), 1,3 Mpx (1280 x 960), 720p (1280 x 720), D1 (640 x 360)
Bit Rate 896 Kbps ~ 3 Mbps
Frame rate primario
Primary frame rate
20 Fps (1920 x 1080)
20 Fps (1280 x 960)
20 Fps (1280 x 720)
20 Fps (D1)
Frame rate secondario
Secondary frame rate 20 Fps (640 x 360)
Codica
Codication VBR/CBR
Wi-Fi
Wi-Fi standard IEEE802.11b/g/n
Range di Frequenza
Frequency range 2412 - 2472 MHz
Sicurezza
Security mode 64/128-bit WEP, WPA/WPA2, WPA-PSK/WPA2-PSK, WPS
Velocità trasmissione
Transmission speed
11b: 11Mbps,
11g: 54Mbps,
11n:150Mbps
Distanza trasmissione
Transmission range 300 m (in aria libera/ no objet interference)
Funzioni
Functions
Funzioni
Fucntions D-WDR, Smart-IR, 3DNR, movimento/motion, defog
Protocollo di rete
Network protocol Proprietario/ Proprietary
Giorno/Notte
Day&Night ICR
Altro
Others
Rete
Network RJ45 10/100M
Distanza IR
IR distance 20 m
Grado IP
IP grade IP66
Temperatura di lavoro
Operating temperature -20°C + 60°C con umidità/ with humidity 10% ~ 90%
Alimentazione
Power supply 12 Vdc - 300 mA
Consumi
Consumption 3,6 W
Dimensioni
Dimensions Ø 64x154 mm
Peso
Weight 365 g
Viale Vicenza, 14
36063 Marostica VI - Italy
www.vimar.com
49401352A0 00 1812
46237.KIT
IT
EN
Avvertenze
- Prima di utilizzare il prodotto si raccomanda vivamente di leggere il manuale e di
conservarlo in un luogo sicuro per consultazione futura.
- Utilizzare l'alimentazione specicata per il collegamento.
- Evitare di azionare il prodotto in modo improprio, sottoporlo a urti o vibrazioni, forti
pressioni che possono danneggiarlo.
- Non utilizzare detergenti corrosivi per pulire il corpo principale della telecamera. Se
necessario, utilizzare un panno morbido e asciutto per pulirla; in caso di sporco resi-
stente utilizzare un detergente neutro. È possibile utilizzare detergenti per mobili di
qualità.
- Non puntare la telecamera direttamente verso oggetti estremamente luminosi, ad
esempio il sole, in quanto si potrebbe danneggiare il sensore d'immagine.
- Seguire le istruzioni per installare la telecamera. Non rovesciare la telecamera, altri-
menti riceverà un'immagine rovesciata.
- Non azionarla se temperatura, umidità e alimentazione non corrispondono ai limiti o
valori specicati.
-
Tenere lontano da fonti di calore quali radiatori, bocchette dell'aria calda, stufe e simili.
- Il presente documento contiene le istruzioni per l'uso del prodotto. Non è la garanzia
di qualità. Ci riserviamo il diritto di correggere errori di stampa, incongruenze con la
versione più recente, aggiornamenti del software e miglioramenti, interpretazione e
modiche al prodotto. Tali cambiamenti saranno pubblicati nella versione più recente
senza previa notica.
- Quando il prodotto è in uso, sono applicabili i contenuti di Microsoft, Apple e Google.
Le immagini e le schermate di questo manuale hanno lo scopo di spiegare l'utilizzo
del prodotto. La proprietà dei marchi commerciali, dei logo e altre proprietà intellet-
tuali relative a Microsoft, Apple e Google appartengono alle suddette aziende.
Cautions
- Before operation, we strongly advise users to read this manual and keep it pro-
perly for using later.
- Please use the specied power supply to connect.
- Avoid from in correct operation, shock vibration, heavy pressing which can cause
damage to product.
- Do not use corrosive detergent to clean main body of the camera. If necessary,
please use soft dry cloth to wipe dirt; for hard contamination, use neutral deter-
gent. Any cleanser for high grade furniture is applicable.
- Avoid aiming the camera directly towards extremely bright objects, such as, sun,
as this may damage the image sensor.
- Please follow the instructions to install the camera. Do not reverse the camera,
or the reversing image will be received.
- Do not operate it incase temperature, humidity and power supply are beyond the
limited stipulations.
- Keep away from heat sources such as radiators, heat registers, stove., etc.
- This is product instructions not quality warranty. We may reserve the rights of
amending the typographical errors, inconsistencies with the latest version, sof-
tware upgrades and product improvements, interpretation and modication. The-
se changes will be published in the latest version without special notication.
- When this product is in use, the relevant contents of Microsoft, Apple and Google
will be involved in. The pictures and screenshots in this manual are only used
to explain the usage of our product. The ownerships of trademarks, logos and
other intellectual properties related to Microsoft, Apple and Google belong to the
above-mentioned companies.
Caratteristiche tecniche
Range di frequenza: 2412-2472 MHz
Potenza RF trasmessa: < 100 mW (20 dBm)
Regole di installazione
L’installazione deve essere e󰀨ettuata con l’osservanza delle disposizioni regolanti
l’installazione del materiale elettrico in vigore nel Paese dove i prodotti sono in-
stallati.
Conformità Normativa
Direttiva RED
Norme EN 301 489-17, EN 300 328, EN 62311, EN 60950-1
Vimar SpA dichiara che l’apparecchiatura radio è conforme alla direttiva 2014/53/UE.
Il testo completo della dichiarazione di conformità UE è disponibile nella scheda di
prodotto al seguente indirizzo Internet: faidate.vimar.com
RAEE - Informazioni agli utilizzatori
Il simbolo del cassonetto barrato riportato sull’apparecchiatura o sulla sua confezione
indica che il prodottto alla fine della propria vita utile deve essere raccolto separata-
mente dagli altri rifiuti. L'utente dovrà , pertanto, conferire l'apparecchiatura giunta a
fine vita gli idonei centri comunali di raccolta differenziata dei rifiuti elettrotecnici ed
elettronici. In alternativa alla gestione autonoma è possibile consegnare l'apparecchiatura che
si desidera smaltire al rivenditore, al momento dell'acquisto di una nuova apparecchiatura di
tipo equivalente. Pressso i rivenditori di prodotti elettronici con superficie di vendita di almeno
400 m
2
è inoltre possobile consegnare gratuitamente, senza obbligo di acquisto, i prodotti elet-
tronico da smaltire con dimensioni inferiori a 25 cm. L'adeguata raccolta differenziata per l'avvio
successivo dell'apparecchiatura dismesssa al riciclaggio, al trattamento e allo smaltimento
ambientalmente compartibile contribuisce ad evitare possibili effetti negativi sull'ambiente e
sulla salute e favorisce il reimpiego e/o riciclo dei materiali di cui è composta l'apparecchiatura.
Technical characteristics
Frequency range: 2412-2472 MHz
Transmission RF power: < 100 mW (20 dBm)
Installation rules
Installation should be carried out in compliance with the current regulations regar-
ding the installation of electrical equipment in the country where the products are
installed.
Conformity to Standards
RED Directive
EN 301 489-17, EN 300 328, EN 62311, EN 60950-1 Standards
Vimar SpA declares that this radio device complies the 2014/53/UE Directive.
The full text of the UE conformity declaration is available on the product sheet at the
following internet address: faidate.vimar.com
WEEE - User information
The crossed bin symbol on the appliance or on its packaging indicates that the
product at the end of its life must be collected separately from other waste. The
user must therefore hand the equipment at the end of its life cycle over to the
appropriate municipal centres for the differentiated collection of electrical and elec-
tronic waste. As an alternative to independent management, you can deliver the equipment
you want to dispose of to the dealer when purchasing a new appliance of an equivalent
type. You can also deliver electronic products to be disposed of that are smaller than 25 cm
for free, with no obligation to purchase, to electronics retailers with a sales area of at least
400 m
2
. Proper sorted waste collection for subsequent recycling, processing and environ-
mentally conscious disposal of the old equipment helps to prevent any possible negative
impact on the environment and human health while promoting the practice of reusing and/
or recycling materials used in manufacture.
Other Vimar Security Camera manuals

Vimar ELVOX 46243.030B User manual

Vimar

Vimar ELVOX 46243.030B User manual

Vimar ELVOX 46222.036F User manual

Vimar

Vimar ELVOX 46222.036F User manual

Vimar 46237.036 User manual

Vimar

Vimar 46237.036 User manual

Vimar 46812.036D User manual

Vimar

Vimar 46812.036D User manual

Vimar Elvox 4621.3312EMA User manual

Vimar

Vimar Elvox 4621.3312EMA User manual

Vimar ELVOX 46635.036 User manual

Vimar

Vimar ELVOX 46635.036 User manual

Vimar Elvocx 4621.2812ESA User manual

Vimar

Vimar Elvocx 4621.2812ESA User manual

Vimar Elvox 52R5 User manual

Vimar

Vimar Elvox 52R5 User manual

Vimar ELVOX 46316.210A User manual

Vimar

Vimar ELVOX 46316.210A User manual

Vimar Elvox 46512.36B User manual

Vimar

Vimar Elvox 46512.36B User manual

Vimar Elvox 4621.028FS User manual

Vimar

Vimar Elvox 4621.028FS User manual

Vimar ELVOX 46222.036C.01 User manual

Vimar

Vimar ELVOX 46222.036C.01 User manual

Vimar ELVOX 46522.036D User manual

Vimar

Vimar ELVOX 46522.036D User manual

Vimar ELVOX 4622.2812EDT User manual

Vimar

Vimar ELVOX 4622.2812EDT User manual

Vimar ELVOX 4622.028B User manual

Vimar

Vimar ELVOX 4622.028B User manual

Vimar ELVOX TVCC 4625.028B User manual

Vimar

Vimar ELVOX TVCC 4625.028B User manual

Vimar ELVOX TVCC User manual

Vimar

Vimar ELVOX TVCC User manual

Vimar Elvox 4621.2812B User manual

Vimar

Vimar Elvox 4621.2812B User manual

Vimar ELVOX TVCC 4652.036E User manual

Vimar

Vimar ELVOX TVCC 4652.036E User manual

Vimar ELVOX 4621.036E User manual

Vimar

Vimar ELVOX 4621.036E User manual

Vimar ELVOX 4622.028BA User manual

Vimar

Vimar ELVOX 4622.028BA User manual

Vimar ELVOX TVCC 46235.025D User manual

Vimar

Vimar ELVOX TVCC 46235.025D User manual

Vimar ELVOX 4621.2812EDT User manual

Vimar

Vimar ELVOX 4621.2812EDT User manual

Vimar ELVOX 46222.036B.01 User manual

Vimar

Vimar ELVOX 46222.036B.01 User manual

Popular Security Camera manuals by other brands

Genie WIPX4BVAF quick start guide

Genie

Genie WIPX4BVAF quick start guide

Speco O4FB8M user manual

Speco

Speco O4FB8M user manual

Lorex LNZ32P12 series instruction manual

Lorex

Lorex LNZ32P12 series instruction manual

Arenti Laxihub P2 quick guide

Arenti

Arenti Laxihub P2 quick guide

Imperx Tiger T8820 user manual

Imperx

Imperx Tiger T8820 user manual

AVer PTZ310 user manual

AVer

AVer PTZ310 user manual

Eneo EDMC-3221/E operating instructions

Eneo

Eneo EDMC-3221/E operating instructions

Lumens VC-TR40 Quick installation guide

Lumens

Lumens VC-TR40 Quick installation guide

Dahua DH-SD1A installation manual

Dahua

Dahua DH-SD1A installation manual

Security Solutions, Inc. VPTZ-100 operating manual

Security Solutions, Inc.

Security Solutions, Inc. VPTZ-100 operating manual

Dante DLC1981 Installation and operation manual

Dante

Dante DLC1981 Installation and operation manual

TRENDnet TV-IP100W user guide

TRENDnet

TRENDnet TV-IP100W user guide

Speco HT7040T instruction manual

Speco

Speco HT7040T instruction manual

Bosch Dinion XF LTC 0495/61 Specifications

Bosch

Bosch Dinion XF LTC 0495/61 Specifications

Lorex Vantage LZC7091 instruction manual

Lorex

Lorex Vantage LZC7091 instruction manual

Panasonic WV-CL920A Series operating instructions

Panasonic

Panasonic WV-CL920A Series operating instructions

Okina USA SEDX-768AI-W user manual

Okina USA

Okina USA SEDX-768AI-W user manual

TRASSIR TR-D2183ZIR6 quick start guide

TRASSIR

TRASSIR TR-D2183ZIR6 quick start guide

manuals.online logo
manuals.online logoBrands
  • About & Mission
  • Contact us
  • Privacy Policy
  • Terms and Conditions

Copyright 2025 Manuals.Online. All Rights Reserved.