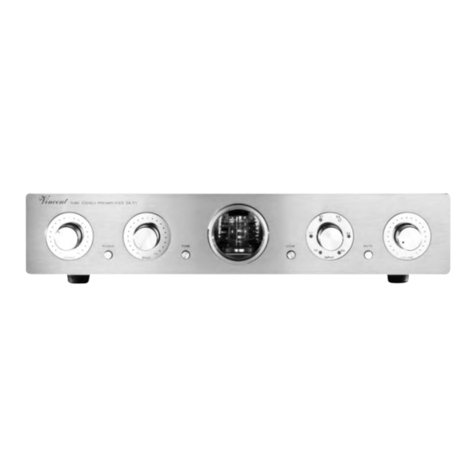
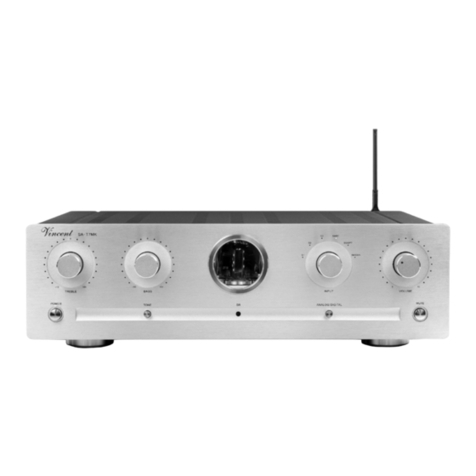
VINCENT SA-32 User manual

Vincent
SA-32
Hybrid Stereo Preamplifier
하
하이브리드 프리앰프
Instructions for use
사용설명서

2
Vincent
친
친애하는 고객님께:
본 제품을 구입하는데 보여 주신 고객님의 신뢰에 감사드립니다. 본 제품은 사운드나 제품
품질에 있어서 고객님의 높은 기대에 부응할 것입니다. 본 제품의 즉각적인 Plug and Play
를 원하실지 모르지만 사용설명서를 충분히 읽고 난 후에 설치하시기 바랍니다.
본 설명서는 본 기기를 취급하고 사용하는 방법 뿐만 아니라 최상의 성능을 얻도록 도와
줄것이기 때문입니다.
주의사항 중 몇가지는 상식적인 것일 수 있으나, 본 설명서의 안전상 주의사항을 준수하시
기 바랍니다. 만약 제품에 의문 사항이 있을 경우, 보증수리 및 일반 수리에 관한 일이 있을
경우, 오디오 전문가나 구입하신 판매대리점에 문의하여 주시기 바랍니다. 본 제품으로 커
다란 즐거움을 갖길 바랍니다. 감사합니다.
Vincent-Team 올림
Dear Customer,
we thank you for the confidence you prove in purchasing our product. It will match your high demands
towards sound and manufacturing quality. Though it is understandable that you want to plug and play
this product instantaneously, we encourage you to read this manual carefully before installation.
It will help you in handling and operating this machine in your system and obtaining the best possible
performance, even if it was installed by your dealer.
Please follow the security precautions, though some of those things may seem obvious.
In the appendix to this manual you will find a glossary explaining some established technical terms.
If there are open questions your audio specialist dealer will help you. He also represents your contact
person in case of needed warranty service or repairs after the warranty period and is interested to hear
from your experiences with Vincent products.
We wish you plenty of joy with your / our product,
your Vincent-Team

Vincent
3
Safety guidelines 22
Other instructions 23
Included in delivery 24
Description of the appliance 24
Installation 27
Operating the appliance 35
Tips 36
Search for errors 37
Technical specifications 38
Glossary 39
CONTENTS/SOMMAIRE목
목
차
안
안전 수칙
참고 사항
제품의 구성
본
앰프의 소개
설치
본격 사용법
좋은 음질을 위한 팁
이상 증상 대처법
제품 사양
용어 해설

22
Vincent
수리 및 변경금지 Maintenance/Alterations
제품을 변경하거나 임의로 수리하지 마십시오. 품질
보증에서 제외됩니다.
All equipment that is connected to the domestic mainsvoltage
can be dangerous to the user if not handledproperly. Leave
maintenance work to qualified profes-sionals. The product is only
permitted for connectionto AC 230Volt/50Hz, for earthed
sockets and use inenclosed areas. Altering the product
or manipulatingits serial number voids the warranty. After a
fault,leave the appliance’s fuse to be replaced only by a
professional with one of the same kind.
전원코드관리
3RZHU&DEOH&RQQHFWLRQ
전원코드는 꺽이거나 손상되지 않도록 관리하고
젖은 손으로 만지지 마십시오.
Always pull the plug and never the power cable ifyou want to
disconnect the appliance from themains power. Make sure
when setting up the appli-ance that the power cable is not squashed,
severelybent or damaged by sharp edges. Do not touch thepower
lead with wet or damp hands. Use the powercable supplied or
another one from
Vincent.
IRUVXFKHTXLSPHQWDQGWKHXVHUDQGPXVWEHDYRLGHGZLWKRXWIDLO
7DNH FDUH WKDW QR OLTXLGV RU REMHFWV JHW LQVLGH WKH DSSOLDQFH
YHQWLODWLRQVORWVHWF1HYHUH[SRVHWKHDSSOLDQFHWRKLJK
WHPSHUDWXUHVGLUHFWVXQVKLQHRUVWURQJYLEUDWLRQ
.
통풍 및 환기
Heat Build-up
본
기기는 통품이 잘되는 곳에 설치하고 주변의 다
른 물체와 최소 5cm 거리를 두십시오.
Make sure that a gap of 5 cm remains around theappliance and
that the surrounding air can circulate (do not install in enclosed
cupboards). Vents mustnot be covered up.
청취 음량
Volume
청각에 손상을 입지 않도록 볼륨을 적당이 조절
하십시오. 전원스위치를 켜기가 입력을 변경할
때는 먼저 볼륨을 최저로 줄인 다음 하십시오.
7KHPD[LPXPWROHUDEOHYROXPHLVDOZD\VUHDFKHGZHOOEHORZ WKH
PD[LPXP SRVVLEOH VHWWLQJ RQ WKHDPSOLILHU %H FDUHIXO ZLWK WKH
YROXPH VHWWLQJ LQ RUGHUWR SUHYHQWGDPDJH WR KHDULQJ GR QRW
H[SRVH\RXUVHOIWRKLJKYROXPHVXQLQWHQWLRQDOO\DOZD\VVHWWRDORZ
OHYHOEHIRUHFKDQJLQJWKHLQSXWFKDQQHO
청소
Cleaning
청소할 때는 먼저 전원코드를 제거한 다음에 부드
러운 천으로 가볍게 털어 주십시오.
Pull out the power plug before cleaning the outsideof
the product. Whenever possible, use a soft, lint-free cloth that
has been dampened. Do not use abrasives, solvents, thinners,
flammable chemicals, polishes and other cleaning products that
leave marks.
작업 전 전원끄기
Switching Off
기
기기나 케이블을 연결하거나 제거할 때는 반드
시 전원스위치를 끈 다음 하십시오
.
Switch theappliance off every time before you con-nect or remove
other components or loudspeakers,disconnect or connect it to the
mains power, leave itunused for a longer period or want to clean its
outsi-de. On all amplifiers and receivers, wait approx. 1minute
after this before disconnecting or reconnectingthe cable.
습
습기/열/진동
Moisture/Heat/Vibration
본 기기는 습기, 열, 진동에 노출되지 않는 곳에 설치
하십시오.
&RQWDFW RI HOHFWULFDOO\ RSHUDWHG HTXLSPHQW ZLWK OLTXLGV
PRLVWXUHUDLQRUZDWHUYDSRXULVGDQJHURXV
안
안전 수칙
SAFETY GUIDELINES
본
기기는 엄격한 품질관리 하에 각국의 안전기준에 적합하게 생산되었습니다. 그러나 사용자
의 안전을 위해 본 지침을 준수바랍니다.
7KLVDSSOLDQFHZDVSURGXFHGXQGHUVWULFWTXDOLW\FRQWUROV
,WFRPSOLHVZLWKDOOHVWDEOLVKHGLQWHUQDWLRQDOVDIHW\VWDQGDUGV1RQHWKHOHVVWKHIROORZLQJLQVWUXFWLRQVVKRXOGEH
IXOO\UHDGDQGREVHUYHGLQRUGHUWRSUHYHQWDQ\KD]DUG
본 제품을 열지 마십시오.
감전의 위험이 있으며 내부에 사용자가 임의로 수리할 수 있는 부품이 없습니다.
'RQRWRSHQWKHDSSOLDQFH5LVNRIHOHFWULFVKRFN
There are no parts in the appliance that require maintenance by the user.

Vincent
23
설치
Setting up the appliance
설치를 어떻게 하는가에 따라 음질에 영향을 많
이 받습니다. 기기는 안전하고 평탄한 장소에 설
치하십시오. 최상의 음질을 위하여 오디오랙을
사용하시고, 다른 기기 위에 포개 놓는것은 삼가
하시기 바랍니다.
How the system is set up has an
effect on thesound quality. Therefore only place it on a suitable,
stable surface. To make the most of yoursystem’s sound
quality, we recommend placing theequipment on Vincent racks
and not putting themon top of each other.
Old electronic equipment
This appliance is subject to the conditions set outin the
European Directive 2002/96/EC. This isidentified by the
symbol of a crossed out waste binon the appliance.
What this
means for you as a consumer:
All old electrical and electronic
equipment that isno longer used must be disposed of
separatelyfrom domestic waste using places provided by the
authorities. By doing so you can prevent damageto the
environment and help to encourage manu-facturers to produce
more durable or reusable pro-ducts. For further information
about disposingyour old appliance, please consult your local
aut-hority, waste disposal agency or the shop whereyou bought
the product.
(8안전인증 마크
CE sign
본
기기에 부착된 CE 마크는 본 제품이 유럽
EU 안전기준에 따른 안전인증을 획득한 제품임
을 표시합니다. (아울러 본 제품은 한국 안전인
증규격을 준수합니다).
This appliance complies with the current EU direc-tives about
attaining the CE mark and thus meetsthe requirements for
electrical and electronicequipment (EMC regulations, safety
regulationsand regulations for low voltage equipment).
저
저작권
Declarations
본
사용설명서는 독일
6LQWURQ 9HUWULHEV *PE+
회
사의 제품으로 어느 일부라도 본사의 허락없이 사용
할 수 없습니다.
9LQFHQW
는 동사의 등록상표입니다.
This document is a product of Sintron VertriebsGmbH,
76473 Iffezheim and may not be copied ordistributed partly or in
full without express, writtenconsent.Vincent is a registered
trademark of Sintron VertriebsGmbH, 76473 Iffezheim. Vincent
works continually to improve and develop itsproducts. Therefore,
the appearance and technicaldesign of the appliance are subject
to changes, aslong as they are in the interest of progress.
The content of these instructions is for information purposes only. It can
be changed at any time without priornotice and does not constitute
any obligation on thepart of the trademark’s owner. The latter
assumes noresponsibility or liability for errors or inaccuracies,
which may be included in these operating instructions.
포장의 보관
Storage of the packaging
포장재는 잘 보관하여 이사 또는 아프터서비스 등 제
품의 이동이 필요할 때 사용하여 제품의 손상을 방지
하십시오.
We strongly recommend that you keep the originalpackaging in
case you need to transport the equip-ment again at a later date.
Transport damages aremainly caused by improper packaging of
the HiFi-devices. Because the original packaging fits the
equipment accurately it will reduce the risk ofdamage if
transport is necessary.
심볼 설명
Explanation of the symbols
번개 마크는 위험한 전압이 존재함을 경고합니다.
The lightening bolt tells you that dangerous voltages are
present in the appliance, which can cause an electric shock.
주의를 요하는 중요사항
This symbol brings your attention to particularly important
information regardingoperation and maintenance.
알아두면 좋은 정보
This symbol identifies useful information and
advice about how to handle the appliance.
참고 사항
OTHER INSTRUCTIONS
24
Vincent
Please check the contents of the packaging, which in addition to theappliance
should contain the following accessories:
• 1 power cable 전
전원 코드
• 1 stereo set of RCA cables
RCA 케이블 1개
• this manual
영문 사용설명서
• 1 remote control “VRC-1”
리모트 컨트롤
Despite the fact that development is constantly
moving in the direction of digital audio format and
towards audio video systems with an increasing
number of channels, high quality stereo systems still
enjoy a large degree of popularity. Recent trends
also have not brought any changes concerning the
advantages of separate pre/main amplifier systems
over integrated amplifiers.
The SA-32 is a multi-purpose and sturdy stereo pre
amplifier within the Vincent range. In order to also
offer the high-end stereo technology at a lower
price level, new ground has been broken during the
design of the appliance: instead of replacing sound
regulatory and high quality components by more
competitive parts, the functions of the appliance have
been adjusted. The outcome is an amplifier that, in
terms of sound quality,
is able to compete with its “big brothers” and in
return it comes without functions that do not positively
affect the sound quality: remote control, large number
of input channels, BALANCE control and MUTE
function.
The amplifier circuitry of this preamplifier combines the
advantages of both transistor amplifiers and valve
amplifiers. The highest manufacturing quality and
excellent value for money go without saying. This
preamplifier is also the ideal partner for the main
amplifiers SP-331/SP-331MK as well as DVD
players, CD players, tuners, headphone amplifiers
and loudspeakers from the Vincent range. In
combination with the HiFi furniture and speaker
cables from the range, one can build a perfectly
harmonious system.
악세사리
INCLUDED IN DELIVERY
포장 박스 안에 본
기기와
함께
다음과
같은
악세사리가
제공됩니다
제품 설명
DESCRIPTION OF THE APPLIANCE

Vincent
25
1. TREBLE
Knob for setting the treble proportions (high fre-
quencies) of the sound.
2. TONE
If deactivated, audio signals bypass the tone con-
trol that has been set with the BASS and TREBLE
dials.
3. BASS
Knob for setting the bass proportions (low fre-
quencies) of the sound.
4. POWER
This is the main power switch for turning on and
off the device. The preamplifier is separated from
the mains voltage when switched off and cannot
be set into a standby state.
5. SR: sensor diode for the remote control
6. VOLUME: Volume dial
This is the knob for the adjustment of the main
volume level of the system.
7. GAIN:
-8dB attenuation of the output signal
With the activation of this function, the output
signal (9) is reduced by 8 dB and thus the volume
of the attached speakers. It should only be activat-
ed if even at low volume settings the volume is
already very high.
8. INPUT: Input Selector
This dial allows you to choose one of the six
inputs (S1,..., S6).
S1
S2
S3 S4
S5
S6
123 6 8
7
4
5
전면의
기능
FRONT VIEW
고음 조절
톤 콘트를 스위치
저음 (베이스) 조절
전원 스위치
증폭 게인 감소
볼륨
입력 셀렉터
리모컨 센서 창

26
Vincent
9
9. 소스 입력단자
INPUT: Terminal for
stereo audio signalsof the source
equipment
Here you find five stereo RCA input sockets
forsource equipment with analogue stereo (line
level)audio output.
10. 녹음 출력단자
REC OUT: Output
connectors assigned toa recording device
If desired, you can connect a recording
devicelike a CD recorder or a tape recorder to
this out-put. The stereo signal of this output is
identical tothe output signal of the selected
audio source atone of the preamplifier inputs.
11. 밸런스 입력단자
XLR-IN
Here you find one stereo input sockets for
sourceequipment (1x XLR) with analogue stereo
(line level) audio output.
12. 프리앰프 출력단자
OUTPUT:
preamplifier outputs
With these two pairs of connectors you can
con-nect the preamplified stereo audio signal
of thecurrently selected source to the power
amplifierchannels.
13. 밸런스 출력단자
XLR-OUT
With these pair of connectors you can
connect the preamplified stereo audio signal of
the currently selected source to the power
amplifierchannels. The volume and mute
settings have effect on the signal at this output.
14. 전압 변경 셀렉터
Voltage
Selector:
The voltage selector behind the pane allows
swit-ching the voltage from 230 V to 110 V.
Refer tosafety instructions for further information
(p. 32).
15. 트리거 (원격 스위치)
POWER
CONTROL: ON/OFF controlThese jack
connectors (3.5 mm) provide theon/off
signal for the standby control (12VTrigger).
16. 전원코드 인렛
AC 220-240V:
Power Connector
To establish the power supply, connect the
plugsof the power cable to the device and to a
suitablewall outlet.
S1 S2 S3 S4 S5
9 10 14 16
15
11
12 13
XLR-IN XLR-OUT
후면의 단자들
REAR VIEW

Vincent
27
디
디지털
케이블은
아나로그
케이블과
겉모양이
같
습니다
.
혼동에
주의바랍니다
. Mechanically
identical RCA plugs are available foranalogue and
digital outputs. Make sure that you do not get
these connections confused during installation!
전원이 켜진
상태에서
연결하면
앰프에
손상이
갈
수
있으니
전원코드를
제거한
상태에서
연결하십
시오
. 5
과
/
을
맞추어
연결하십시오
.
Make sure that you do not mix up the analogue con-
nectors for right and left. The RCA plugs for these
aremostly colour coded as follows: red for the
right channel, black or white for the left channel.
주의: 오디오에
전원이
켜진
상태에서
5&$
케이
블
단자의
중간
핀이
앰프의
샤시
또는
그라운드
선과
접촉하면
충격음으로
앰프
,
스피커
,
청각에
손상을
줄
수
있습니다
.
이런
사고를
방지하기
위
해
반드시
전원코드를
제거한
상태에서
연결하십
시오
.
Contacting the middle pin of the RCA plugs with the
outer ring of the RCA chassis jack may lead to dama-
ges to the main amplifier if it is switched on! To
avoidthis hazard, connect or disconnect only in
switched-offstate and more than one minute after
deactivating!
XLR connections
XLR단자 연결
Please note that European and US XLRsignal assignments for
the connector pins are different. This Vincent preamplifier
uses the Europeansystem following the standard AES14-1992.
Thecable structure is the same in any case. As long asboth
the preamplifier and the power amplifier satisfy the same
standard, the signal connection is correct. This is always the
case if both units weremade by Vincent. If two units from
different stan-dards are connected, this inverts the signal. In this
case the signal assignment on one side of the con-nection
has to be changed. Your audio specialistdealer will support
you with this.
XLR단자는 똑 같지만 연결방식에는 유럽식과
미국식이 있습니다. Vincent 기기는 유럽식 연
결방식을 채용합니다.
만약 같은 방식의 기기를 연결하면 문제가 없지
만 서로 다른 연결방식의 XRL 기기를 연결하면
위상이 뒤집힙니다. 이 경우 한쪽 기기의 단자 연
결을 바꾸어 주어야 합니다. (아래 그림 참조)
Cable connections
케이블 연결
플러그는 깊숙히 삽입하십시오. 느슨한 연
결은 잡음, 오작동 및 고장의 원인이 될 수
있습니다.
오디오 기기가 지닌 잠재 성능을 최대한 발휘
하려면 최고 품질의 케이블을 사용하여야 합
니다.
- wrong - - correct -
1.
미국방식
866\VWHP3LQ &2/'3LQ +27
2 1
3
HOT
GND
COLD
2 1
3
HOT
GND
COLD
설치
INSTALLATION
주의: 오디오 기기 간의 케이블 연결이 완료된 후 전원코드를 연결하십시오.
Set up the cable links in a sequence as follows. Connect the power cable between device
and power supply only after all other connections have been made.
설치 중 주의 사항
DURING INSTALLATION PLEASE OBSERVE THE FOLLOWING:
Protective caps
단자 보호캡
케이블 연결시 단자의 보호캡을 제거
하십시오.
RCA connections
RCA 단자연결
1 2
U
OUTPUT
O
. 유럽방식
(8V\VWHP3LQ +273LQ &2/'

28
Vincent
Changing/Inserting batteries:
배터리 교환
a)
배터리 덥개를 여십시오.
덥개는 자석식
으로
되어 있어 나사를 풀지 마십시오.
b)
사용한 배터리를 제거하고 새 배터리를
장착하십시오.
c)
배터리 덥개를 닫아 주십시오.
c
b
a
리모컨은
앰프
전면의
수신창
방향으로
겨누어
사용하십시오
.
허용
각도는
약
30
도이고
,
수신
거리는
약
7
미터
입니다.
Point the front of the remote control directly at the front
of the appliance, making sure there are no objects
between the remote control and the appliance. .
The distance between the remote control and theappliance
should not be more than 7 m, as thereliability of the
remote control is affected beyondthis range.
리모컨
REMOTE CONTROL
리모컨
수신
감도가
저하되면
배터리를
교환하십
시오
.
Make sure that you do not point the remote controlat an
angle to the appliance, as beyond an angleof ±30° to
the centre axis the appliance may notrespond as well
to the remote control.
Change both batteries if the distance at which the
remote control can be used effectively decreases.
배터리
BATTERIES
Using batteries
올바른 배터리 취급방법
부주의한 배터리 사용은 액체의 누액, 최악의 경우
폭발도 발생할 수 있으니 주의하여 사용하십시오.
배터리의 극성 표시를 맞추어 삽입하십시오.
Handling batteries incorrectly can cause batteryacid
to escape or an explosion in extreme cases.The
batteries must be correctly inserted taking noteof the
polarity.
장기간
제품을
사용하지
않을
때는
배터리를
제거해
놓으십시오
. Remove the batteries if the remote
control is notgoing to be used for a long time.
배터리
극성을
합선시키거나
,
분해하거나
가열하지
마
십시오
. Under no circumstances must batteries be short-
cir-cuited, taken apart or heated up.
배터리
폐기시
환경
규정에
따라
폐기하십시오
.
일반 쓰
레기와
함께
버리면
안됩니다
. For environmental
reasons, used batteries shouldbe disposed of in
accordance with local environmental regulations and
not put with domesticwaste.
Only use AAA (LR3) size batteries.
AAA 타입의 건전지를 사용합니다.

Vincent
29
17 MUTE 뮤
뮤트 (소리 죽임)
Pressing this button once cuts the signals at the out-
puts “OUTPUT” (12) and “REC OUTPUT” (10)
sothat the system’s loudspeakers are
muted.Pressing it again returns to the original
volume.
18 Input selector buttons
입력 셀렉
터
Select the input source you want to listen
towith these buttons.
19 VOLUME and VOLUME
볼륨
These buttons change the amplifier’s volumelevel
for the preamplifier outputs “OUTPUT” (12).
18
17
19
리모컨 사용법
BUTTONS OF THE REMOTE CONTROL
뮤트 버튼을 누르면 출력이 차단됩
니다. 다시 누르면 원상회복합니다.

30
Vincent
소
소스기기의
연결
CONNECTION OF THE SOURCE EQUIPMENT
후면의 입력단자 S1 ~ S5 에 아날로스 소스기기의 출력단자를 RCA 케이블로 연결하십시
오. XLR 단자도 2개 구비되어 있습니다.
Connect the outputs of the source appliances to the inputs “S1”...”S5” (9) of this preamplifier. You can connect up to four
devices with analogue RCA stereo high level output such as a CD player in order to provide the audio signals of your input
sources to the system. Two more inputs are equipped with XLR con-nectors. The output sockets on the source equipment are
usually indicated by “LINE OUT”, “AUDIO OUT”or “FRONT OUT”. You will find information about ways to connect source
equipment in their operating manuals. The four RCA inputs represent electrically equivalent standard high level inputs. They
have an identical function and differ only in name.
General hints:
참고 사항
턴테이블을 사용하려면 포노 프리앰프가 따로 필요합니다. 간혹 포노 프리앰프가 내장된 턴테이
블도 있습니다.
To use a record player you need a so-called phono preamplifier (also called an equaliser preampli-fier), which
is installed in the signal path between the record player and one of the high-level inputs.Some models of
record player already include this preamplifier and can be connected directly. Youwill find further
information in this appliance’s operating manual. The stereo sound of appliances that use output connectors
other than RCA (DIN plugs, jack plugs) can often also be used with the aid of adaptors.
S1
S2
S3 S4
S5
S6
SA-32
CD-Player, Tuner,
DVD-Player, etc.
LINE OUT
RCA connection
S1
S2
S3 S4
S5
S6
SA-32
CD-Player, Tuner,
DVD-Player, etc.
XLR connection
XLR OUT
XLR IN

Vincent
31
녹음단자
연결
&211(&7,212)$5(&25',1*'(9,&(
후면의
R
REC
O
OUT
단
단자에는
아
아나로그
녹
녹음기기를
연
연결하거나
,
다른 앰프의
/LQH/HYHO
입력단자에
연결할
수
수
있
있습니다
. R
REC
O
OUT
출
출력은
입
입력단자에
들
들어오는
소
소스의
신
신호
그
그대로이며
볼
볼륨과
톤
톤 콘
트롤을 거치지
않
않습니다
.
If you want, you can use the RCA sockets “REC OUT” (10) on the back of the appliance to connect an analogue
stereo recording device (e.g. CD recorder, cassette recorder etc.) or another appliance that is intended for
receiving the unchanged, fixed stereo output level (line level) from the signal source selected on the amplifier at
any given time. The output level is independent from the volume and tone settings(BASS, TREBLE, TONE,
LOUD).
S1
S2
S3 S4
S5
S6
SA-32
e.g. Tape recorder
녹음단자에 외부
기기를
연결하면
음질의
열화를
가져올
수
있으므로
꼭
필요한
경우에만
사용
하길
권장합니다
.
Connect this signal output to the signal input (“LINE IN”, “TAPE IN” or “REC IN”) on the recording appli-ance using
RCA cables. Please note that some recording equipment can have a slightly detrimental effecton
the audio signal quality. Some recording devices have rather low input impedance, which can
slightlyalter the input signal voltage. For maximal music enjoyment we recommend that you connect to the
“REC”terminal only for as long as the recording is actually being made.
RCA connection
파워앰프 연결
CONNECTION OF ONE OR MORE POWER AMPLIFIERS
2
조 RCA 출력단자와 1조의 XLR 단자가 있습니다. 각 단자에 1개의 스테레오 메인 앰프를
연결할 수 있습니다. (스테레오 앰프 대신에 모노 모노 앰프를 사용할 수도 있습니다.) 최
대 3대의 파워앰프를 연결할 수 있습니다
.
This preamplifier has two stereo preamplifier outputs with RCA connectors and one stereo
preamplifier output with XLR connectors for the main amplifier channels. In this way it is possible to drive
six loudspeakers or bi-wire/bi-amp one pair of loudspeakers. Instead of each stereo main
amplifier shown here you can alternatively use two mono main amplifiers.
In the case of RCA, connect both sockets named “1” in the field “OUTPUT” (12) with the RCA
input sockets of the main amplifier channels (often marked as “INPUT” or “POWER AMP IN”). For
this you need RCA cables. In the case of XLR connection choose the output labeled “3”. Please pay
attention not to interchan-ge right with left channels. The letters “R” and “L” indicate the correct
correlation. You may further use theSA-32 preamplifier output marked with “2” for a headphone
amplifier.
S1
S2
S3 S4
S5
S6
SA-32
Stereo main amplifier
INPUT
RCA connection

32
Vincent
전
전원코드 연결
CONNECTION OF THE POWER CABLE
본 기기는 220볼트용으로 출고 되었습니다. 제공된 파워코드를 사용하여 전원을 연결하십시오.
Check whether the wall socket provides the appropriate mains power, which is the case if it is supplied
with230 V AC 50 Hz. Push the plug on the power cable supplied firmly into the power socket on the back of the
appliance. Plug the other end of the power cable into a mains socket.
파워앰프 연결
CONNECTION OF ONE OR MORE POWER AMPLIFIERS
필요시 3개의 출력단자에 3대의 스테레오 앰프를 연결하여 사용할 수도 있습니다.
You can as well use all three stereo outputs at the same time, giving way for up to 6 main amplifier
channels to supply their loudspeaker. For that all you need to do is connect all remaining stereo outputs
(12)with additional main amplifier channel inputs.
2조의 RCA 출력단자가 있으므로 2대의 앰프에 연결하여 Bi-amping 할 수도 있습니다.
The fact that this amplifier is equipped with two RCA stereo preamplifier outputs enables you to
biampyour loudspeakers using adequate speakers and one or more additional main amplifiers. Your
HiFi spe-cialist will advise you on this.
S1
S2
S3 S4
S5
S6
SA-32
Stereo main amplifier
XLR IN
XLR connection
전압 변경
SWITCHING THE VOLTAGE
본 기기는
220
볼트용으로
출고되었습니다
.
필요시
사용전압을
110V
로
변경할
수
있으나
,
임의로
변경하지
마십시
오
.
임의변경으로 인한 고장은 보증 수리하지 않습니다.
7KLV GHYLFH LV HTXLSSHG ZLWK D VZLWFK WKDW FDQ EH XVHG WR FKDQJH WKH FRXQWU\VSHFLILFYROWDJH IURP 9
WR 9
주의: 전압셀렉터에 절대 손대지 마십시오. 중대한 고장이 발생할 수 있습니다. 전압의 변경
은 반드시 유능한 기술자에게 의뢰하십시오. 퓨즈도 교환해야 합니다. 임의로 사용전압의
변경으로 인한 고장은 제품 보증에 해당되지 않습니다.
Please never actuate the switch during operation! The voltage must only be switched by a techni-cian,
since the device fuse must also be replaced after actuation of the switch! Information aboutthe device
fuse can be found on the back of the device. Unauthorised actuation of the switch will void any
warranty claim!
XLR OUT

Vincent
33
스
스탠바이
콘트롤
기능을
위한
트리거
연결
CONNECTIONS FOR THE STANDBY CONTROL (POWER CONTROL)
대개
오
오디오나
비
비디오
시
시스템은
많
많은
기
기기들로
구
구성됩니다
. 모
모든
기
기기의
전
전원을
하
하나씩
일
일
일이
켜
켜고
끄
끄는
것
것이
번
번거로울
수
수
있
있습니다
. 그
그래서
요
요즘
p
power
c
control
또
또는
t
trigger
라
라
하는
기
기능을
갖
갖는
기
기기들이
늘
늘어나는
추
추세입니다
. 이
이
기
기능은
일
일종의
원
원격 전원 스위치으로
서
, 시
시스템의
한
한
기
기기
(주
주로
프
프리앰프
)에
에서
전
전원을
끄
끄거나
켜
켜면
서
서로
연
연결된
기
기기의
전
전원을
동시
켜
켜고
끌
끌
수
수
있
있습니다
. 특
특히
파
파워앰프가
프
프리앰프에서
멀
멀리
떨
떨어져
위
위치하는
경
경우
이
이
기능이
유
유용하게
쓰
쓰입니다
.
참고로
이
이
기
기능은
전
전원을
완
완전히
끄
끄는
것
것이
아
아니고
상
상대방
기
기기
의
전
전원을
스
스탠바이
상
상태로
둡
둡니다
.
Many AV-Systems consist of a multitude of individual components. To avoid the necessity of switching them on
and off before and after every use, many manufacturers have equipped their devices with what is known as
“POWER CONTROL” circuit or “TRIGGER”. This kind of remote-controlled standby circuit is used primarily for
preamplifier and power amplifiers. Particularly for pre-amplifiers and main amplifiers, this kind of remote standby
control is utilized, as power amplifiers are often placed far from other devices near the speakers. To employ these
functions, direct or indirect cable connections must be made between the preamplifier (or integrated amplifier)
and all the devices which support this function. The “POWERCONTROL” function operates in such a way that
each switching on or off of one device in the system (usu-ally the preamplifier) automatically brings about the
switching on or off of all the connected devices which support this function. Please keep in mind that all devices
which respond to the power control are not dis-connected from the mains network when switched off. They are
set to a standby state instead. For con-necting cables, two-core cables with 3.5 mm jack plugs (mono) are used. For
each connection between two devices one of those cables is needed.
If you don't wish to use this function or if the other components do not support it, all you have to do is leave out
these cable connections.

34
Vincent
스
스탠바이
콘트롤
기능을
위한
트리거
연결
CONNECTIONS FOR THE STANDBY CONTROL (POWER CONTROL)
사용방법은
두
두
기
기기의
단
단자를
3.5m
mm
미
미니잭
케
케이블로
연
연결합니다
. 이
이
기
기능을
원
원치
않
않거나
이
이
기
기능을
지
지원하지
않는
기
기기를
사
사용할
경
경우
, 그
그냥
연
연결하지
않
않으면
됩
됩니다
. 본
본기에는
2개
개의
P
Power
C
Control
단
단자를
구
구비하고
있
있습니
다
. 본
본기에서
다
다른
기
기기로
연
연결하면
되
되며
, 만
만약
2개
개
이
이상의
기
기기를
콘
콘트롤하고자
할
할
때
때는
같
같은
방
방법으로
무
무한한
연
연
결이
가
가능합니다
. 순
순환
체
체인을
구
구성하면
어
어느
한
한
기
기기에서
전
전원을
끄
끄면
, 연
연결된
모
모든
기
기기의
전
전원을
동
동시에
켜
켜고
끌
수
수
있
있습니다
. (아
아래
그
그림
참
참조
)
The SA-32 is equipped with two output connectors for the power control. Here, the switching signal generated by the SA-32 is
available for other components of the system. Two HiFi components can be connected directly to the amplifier's power control
outputs. If more than two devices, which can be controlled, are to be connected, then it is necessary to make the power
control connection between the amplifier and these further devices through the outputs of the two devices which are connected
directly. For that reason, every HiFi component that accepts power control signals is also equipped with a power control output.
Thus, in theory it is possible to provide an infinite number of HiFi components with the power control signal.
S1
S2
S3 S4
S5
S6
SA-32
main amplifier
e.g. SP-T700
second main amplifier
e.g. second SP-T700
power control cable
Attention:
주의 사항
이 기능을
갖
갖춘
기
기기는
두
두개의
입
입출력
단
단자가
있
있는데
I
In
O
Out
표
표기가
안
안된
경
경우
어
어느
것
것
에
연
연결해도 됩니다
. 단,
기기 간에 In과 Out socket을 상호 연결하면 안됩니다.(즉, 발
신기기와 수신기기가 구분되어야 합니다). 또
, 수
수신하는
기
기기에
1개
개
이
이상의 기기로
부
부
터 2중으로 콘트롤 신호를 받으면 안됩니다.
Many devices which can be controlled by aswitching signal (not preamplifiers or integrated ampli-fiers), have two
terminals which do not differentiatebetween input and output. In this case either of the two can be selected. “POWER
CONTROL” sockets of preamplifiers or integrated amplifiers must not be interconnected! Allreceiving devices must
not be connected to more than one preamplifier or integrated amplifier (directly orindirectly)!
POWER (4)
Select an input
INPUT (8)
“INPUT”
이라 표기된 노브를 좌우로 회전하여 후면에 연결
된 입력을 선택할 수 있습니다.
본격
사용법
OPERATING THE APPLIANCE
기능
Operation
버튼
Button
사용방법
Description
전면의 파워 버튼으로 켜고 끕니다. 안전을 위하여 스위치를
켜기 전에 볼륨을 최저로 낮추십시오. 끄면 전원이 차단되며
스탠바이 기능이 없습니다.
The preamplifier is switched on and off
using this button at the front panel.It has no standby option. When switched off the
device is internally separated from the AC power. As a precaution, after switching
on, the volume setting should be reduced.
스위치 켜기 끄기
Switch on and off
전원스위치
입력 선택

Vincent
35
기능
Operation
버튼
Button
사용 방법
Description
Change the volume
VOLUME (6)
“VOLUME”
노브를 회전하여 음량을 조절합니다. 볼륨은
“REC OUT” (10)
출력에 영향을 주지 않습니다. 뮤트 기능은
없습니다.
Change the treble pro-
portions of the sound
TREBLE (1)
“TREBLE” 노브를 우측으로 돌리면 고음이 증가하며 왼쪽으
로 돌리면 고음이 줄어듭니다. 중앙 포지션 (노브가 걸리는
부분)은 중립 위치입니다. 이 노브은 “REC OUT”출력
에 영향을 주지 않습니다. 이 기능은 톤 콘트롤 스위치로
끄고 켤 수 있습니다.
Change the bass pro-
portions of the sound
BASS (3)
“BASS” 노브를 우측으로 돌리면 저음이 증가하며 왼쪽으로
돌리면 저음이 줄어듭니다. 중앙 포지션 (노브가 걸리는 부
분)은중립 위치입니다. 이노브은 “REC OUT” (10)
출력에
영
향을
주지
않습니다
이
기능은
톤
콘트롤
스위치로
끄고
켤
수
있습니다
Switch off tone control
(BASS/TREBLE)
TONE (2)
사운드 (BASS, TREBLE)
에
변화를 주지 않고 원음 그대로 듣
고자 할 때는 이 스위치를 끄면 됩니다. 즉, 이 버튼을 누르
면 고음 및 저음 조절이 가능하며, 이 스위치를 누르지 않
으면 고음조절 및 저음 조절 회로를 우회하여 원음의 음색
에 변화를 주지 않고 그대로 출력합니다.
Reduce the amplifier’s
gain (attenuation 8dB)
GAIN (7)
이 버튼을 누르면 게인의 감쇠회로(attenuation)가 작동하
여 앰프 출력이 8dB
만큼 감소합니다. 이 기능은 스피커의
능율(감도)이 너무 높아서 최저 볼륨에서도 스피커 소리가
너무 클 때 출력을 낮춰주는 (특히 심야 청취 시) 유용한
기능입니다.
The GAIN operation is useful, ifthe combination of amplifier and speaker is so
sensitive that the usable region of the volume control of the SA- lies at the lowest
values. In this situation the volume steps are too coarse. In this case, after first
reducing the volume for the sake of caution, press the“GAIN” button.
본격
사용법
OPERATING THE APPLIANCE
볼륨(음량)조절
고음 조절
저음 조절
톤 콘트롤 스위치
게인 감쇠 (8B)

36
Vincent
Burn in/ Warm up번
번인
워밍업
오디오 기기가 최고의 성능을 발휘하려면 워
밍업 시간이 필요합니다. 최상의 음질을 얻
으려면 앰프에 항상 전원이 들어오게 하는
것이 좋습니다. 보다 상세한 정보는 전문가
의 자문을 받으십시오.
Youraudiocomponentsneedacertaintimeperioduntil
theyreachmaximumperformance.The duration of this
"warm up" time is very differentfor the various elements of
your audio system.Higher andhomogeneous sound
quality is achieved while keepingthe device switched
on. Youraudiospecialistdealerhasenoughexperi-ence to
give you more information.
Net frequency noise
전원
노이즈
어떤 오디오 기기는 앰프에 연결하면 스피커
에서 험 - 전원 주파수 노이즈가 들리는 경
우가 있습니다. 이 잡음의 특징은 볼륨을 키
우면 같이 커집니다. 기계의 이상이 있는 것
은 아니지만 바로 잡지 않으면 안됩니다. 일
반적으로 전원의 접지에 연결된 모든 기기는
앰프에 험을 발생시킬 가능성이 있습니다.
경험적으로 보면, 입력에 연결된 기기들 중
안테나가 달린 기기(
TV,
, 튜너 등),
PC,정
정전
형 스피커, 턴테이블, 헤드폰 앰프 등이 주로
잡음을 발생시킵니다.
Someaudiosourcedevicesmayincombinationwith the
amplifiercauseahummingnoiseatpower line frequency
audible from your speakers.Usually, its volume varies with
the volume settingof the amplifier. This is no sign of a
defect or faultof your audio products but has to be
eliminated.Generally, every wall-powered device
connectedto the ground wire of the power
plug can causethis problemwhen connected to the
amplifier. Experience shows that this problem is mainly cau-
sed by antenna-connected components (as TV-setsor
Tuners), personal computers, electrostatic loud-
험 노이즈의 또 다른 원인은 다른 기기의 전
원 장치로 부터 발생하는 전자파 영향일 수
있습니다.
이 경우 해결 방법으로 오디오 기기의 접지
에 전원의 중앙 접지 (혹은 대지 접지)를 연
결하므로서 오디오 케이스는 외부의 노이즈
로 부터 내부회로 차단하고 시그널을 보호
할 수 있습니다. 어떤 파워앰프는 "접지 차
단" (ground lift)스위치를 갖고있는 경우
가 있습니다. 이 스위치는 샤시 그라운드
와 회로상의 그라운드를 분리 차단합니다.
때로는 험을 제거하는데 효과적일 때가 있
습니다. 온갖 시도에도 불구하고 험이 지속
될 때는 전문가의 자문을 받으시길 바랍니
다.
speakers, sub-woofers, record players or headphone
amplifiers that are connected to the audioinputs of
the amplifier. Another possible reasonfor humming
noise is electro-magnetic interferenceof
other components’ power supplies with pick-up-
systems of record players (change the place of the
record player for a test).
In most electric devices the ground potentials of all
signals are connected to each other at one centralpoint,
where they have one common connection.If the device
uses the protective conductor of thewall outlet, the
corresponding wire of the line cordis connected
intractably to the metal housing ofthe device. This is
the mostly the point where thecentral grounding point is
attached to. By doingthis the housing is able to shield
all signals fromexternal radiated noise. Some main
amplifiers areequipped with a "Ground Lift"-switch. If it
is acti-vated, ground potential of the chassis and the pro-
tective ground wire are being separated from thecentral
signal ground point. The protective groundwire keeps its
function. Sometimes this helps prevent noise caused by
errors in grounding.
If the problem occurs and cannot be
solved byyourself your audio specialist dealer will
help you.
좋은
음질을
위한
팁
TIPS

Vincent
37
Symptom Possible Cause Countermeasure
No sound on both
channels although
the unit is ready for
use
소
소소기기에서 음성신호가 없음
.
The currently selected audio source (8) is
giving no signal.
DVD
플레이어의
출력
세팅
오류
One of the audio settings of a connected
DVD player (analogue/digital) has not been
correctly selected.
소스기기
연결
오류
The source device is not connected or is
wrongly connected to the selected input
channel terminal of the preamplifier.
입력선택
오류
Wrong input channel has been selected at the
preamplifier.
너무
낮은
볼륨
VOLUME is set too low at the pre-amplifier.
프리앰프-메인앰프 연결 불량
Main amplifier(s) has/have not been
connected correctly to the preamplifier, is/are
switched off or is/are faulty.
스피커
연결
불량
The speaker cables are
not properly connected to the main amplifier's
terminals or aredefective.
소스기기 전원 및 작동확인
Switch on the source unit and begin play-back.
세팅
수정
(
아나로그
/
디지털
)
Correct the settings in the player’s setup.
연결 확인 및 수정
Correct the connection.
입력선택 확인
Set the amplifier to the input
that your desired source is connected to (8).
볼륨 올림
Carefully increase the volume (6).
메인앰프 연결 및 동작 확인
Check the connection and status of the main
amplifier(s) and whether it is/they are working.
스피커 연결 확인
Check and tighten the speaker cables at the
main amplifier and the speakers.
Unit does not work
after pressing the
power button
전원이
들어오지
않음
전원코드 연결 불량
Mains cable is not connected to a suitable
mains wall outlet.Mains cable has not been
firmly inserted intowall power socket and the
device’s socket.Otherwise it may be defective.
퓨즈 불량 혹은 제품고장
Unit fuse or unit is defective.
전원코드 연결 확인
Connect to a functioning socket using a
suitable mains voltage.
아프터서비스 의뢰
Contact your dealer.
소리가 안남.
이상
증상
대처요령
SEARCH FOR ERRORS

38
Vincent
Frequency response: 20 Hz - 20 kHz ±0.5 dB
Nominal Output Voltage: 2 V
Total Harmonic Distortion: < 0.1% (1 kHz, 1 W)
Input sensitivity: 500 mV
Signal to Noise Ratio:
Input Impedance:
AC power connection type:
Inputs:
Outputs:
Dimensions:
Weight:
Colour:
Tubes:
> 90 dB
47 kΩ
9a+]ZDWWVPD[
5 x RCA stereo (LINE IN), 1 x XLR-IN
2 x RCA stereo (PRE OUT), 1x XLR-OUT
1 x RCA stereo (REC OUT),
1 x Power Control
430 x 77 x 360 mm
6,2 kg
silver / black
4x 6H16
Symptom Possible Cause Countermeasure
No audio playback
on one channel
소
소스 기기 이상
The source equipment is
giving signal on only one channel.
소스기기와 프리앰프 연결 불량
One of
the signal cables between audio sour-ce and
preamplifier inputs has not yet been plugged in
or is defective.
프리앰프와 메인앰프 연결 불량
One or
more audio signal cables between pre- and
main amplifier are defect or one of the plug
connections is loose.
메인앰프와 스피커 연결 불량 또는 스
피커 불량
One of the speaker cables is not
correctly connected to the main amplifier or is
defective.
소스기기 확인
Check the audio source. You
can try to use itat a different amplifier for a test.
소스기기와 프리앰프 연결 확인
Check the
cable connections, tighten them if necessary.
메인앰프
연결 확인
Check and tighten all
cable connections.
스피커 연결 확인
Check and refasten the
speaker cables at the speaker terminal of the main
amplifier and at the speaker’s connectors.
Poor sound quality
케이블
연결이
느슨해짐
.
연결단자
불량
The cable connections are not tight, the con-
nectors are dirty or a cable is defective.
톤 콘트롤 설정 불량
The tone settings
“TREBLE” or“BASS” have not been selected
correctly.
턴테이블을 직접 연결함
A record player
has been connected to a line level input without
using a phono preamplifier.
연결단지 및 케이블 확인
Check the
cables and cable connections.
톤 콘트롤 확인
Check the settings
selected there.
포노 프리앰프 추가 사용
Interconnect
a phono preamplifier.
한
한쪽 스피커에서
소리 안남
이상
증상
대처요령
SEARCH FOR ERRORS
음질이 나빠짐
.
전원 험 노이즈
Humming low
frequency noise is
audible, even as no audio
source is playing back
위"전원 노이즈" 참조 바랍니다.
See section "Net frequency noise" in
the chapter "Tips".
위"전원 노이즈" 참조 바랍니다.
See section "Net frequency noise" in the
chapter "Tips".
제품 사양
TECHNICAL SPECIFICATIONS
Other manuals for SA-32
1
Table of contents
Other VINCENT Amplifier manuals

VINCENT
VINCENT SV-232 User manual

VINCENT
VINCENT KHV-200 User manual

VINCENT
VINCENT SA-96 User manual

VINCENT
VINCENT SV-800 User manual

VINCENT
VINCENT SA-31MK User manual

VINCENT
VINCENT SV-227 User manual

VINCENT
VINCENT SA-93 PLUS User manual

VINCENT
VINCENT SP-331MK User manual

VINCENT
VINCENT SAV-C1 User manual

VINCENT
VINCENT PHO-8 User manual

VINCENT
VINCENT SV-237MKII User manual

VINCENT
VINCENT SA-T7 Manual

VINCENT
VINCENT SV-234 User manual

VINCENT
VINCENT SV-737 User manual

VINCENT
VINCENT sp-t700 User manual

VINCENT
VINCENT SV-237 User manual

VINCENT
VINCENT SP-997 User manual

VINCENT
VINCENT PHO-112 User manual

VINCENT
VINCENT SP-T800 User manual

VINCENT
VINCENT SV-500 User manual