Introduction Dimmable Compatibility (Dimmable model only)
Usage areas
Installing the product (Existing installation)
Box Contents
Thank you for choosing Visionary Technologies as your lighting
provider. This operating manual provides information on how Apollo
Mini 2 functions and how to safely operate Apollo Mini 2 and the
attached Phoenix™ 3 LED Driver
experience. Apollo Mini 2 has been tested on a number of popular dimming modules in the New Zealand market.
Apollo Mini 2 has been tested on leading edge, trailing edge, universal and digital dimming systems with a wide
range dimming experience on a majority of dimming modules. Contact us for recommendations.
2 is suitable for use in general lighting areas such as bedrooms, hallways, kitchens and living areas, as well as safe use in
*Apollo Mini 2 is not suitable for use in a parallel connection with unsuppressed inductive
loads or where there are known power quality issues. Doing so will void the product warranty.
NOTE: This list is not exhaustive and indicates common dimming modules that are used in the industry. While
Apollo Mini 2 has industry leading dimming compatibility, not all dimmer modules work effectively with
Apollo Mini 2, particularly older models. If you would like to check your dimmer module is compatible, please
contact Visionary Technologies and we can assist in this matter. An up to date dimmer module list can be
found at www.visionarytechnologies.co.nz
Any electrical work must conform with the Electricity Act
1992 including section 79, NZECP 50: 2004, Electricity Act
1992 Section 80 and NZECP 51: 2004.
recommend switching electricity off at the main switchboard of the
premises for added safety.
to damage the ceiling material. Ensure that there is no remaining driver/
by using your hands, applying a see-saw motion to both sides of the driver
while pulling towards the open position to disengage the driver’s teeth.
Once you have opened one driver you will nd it very straightforward to
open additional units.
plastic holder above to prepare cable insertion.
NOTE: Some previous installations have had the ground cable cut off so
the cable is not exposed. The NZECP requires you ensure proper ground
looping even though the LED driver is class 2 SELV and is not essential for
its safe operation.
until it engages the teeth over the cable securely.
would like to install above or below ceiling insulation.
into the ceiling cutout. Once the springs on both sides have been inserted
through the ceiling cut-out then you can carefully let them go. This will pull
of the spring clips into the ceiling cavity while the lamp is on an angle, then
load the second spring and insert the second spring into the ceiling cavity.
1x Apollo™ Mini 2
1x Phoenix Series™ 3 LED Driver
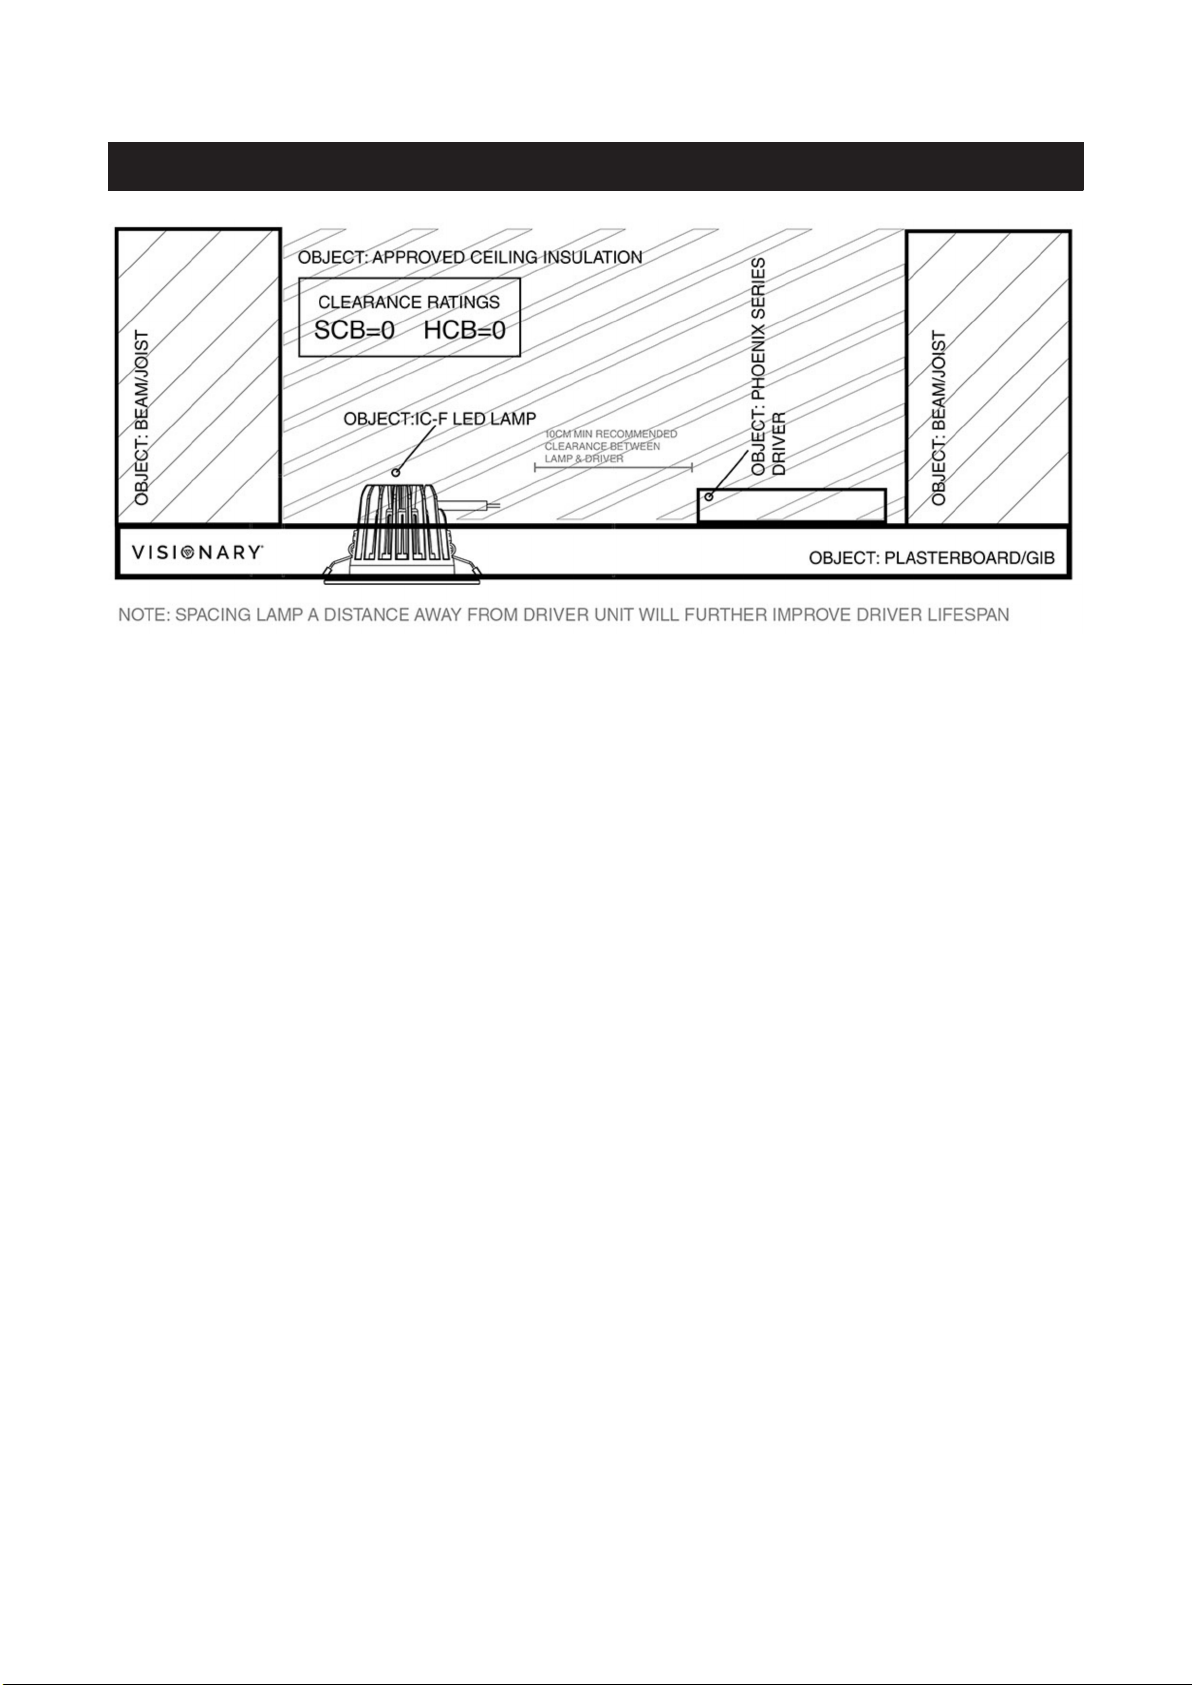
0
CUTOUT
QUICK INFO:
DIAMETER
68-90mm
Cutout
SCB
HCB
97
mm
CLEARANCE
IP PROTECTION
IP65
BRAND MODEL NUMBER TESTED DIM %
(4 Unit Load)
1-2
LAMPS
3+
LAMPS
Kiwi Electronics
0-100%
0-100%
YES
NO
YES
NO
Eclipse LED Dimmer 0-100% YES YES
HPM 0-100% YES NO
PDL
10.8-100%
10.9-100%
14.8-100%
0.2-100%
YES
YES
YES
YES
YES
YES
YES
YES
allsales agencies 8.2-100% YES YES
Vynco 3.6-100% YES NO
AcTe C 15-100% YES YES
Clipsal
6.4-100%
4.7-100%
9.4-100%
YES
YES
YES
YES
YES
YES
New Installations (requiring new wiring and/or new ceiling cutout)
Apollo Mini 2 must be installed by a fully licensed electrical contractor. Under New Zealand law, a home owner
experienced in installing Visionary products. Contact us for more information.
Visionary Technologies Ltd
www.visionarytechnologies.co.nz
Visionary Technologies Ltdwww.visionarytechnologies.co.nz