Visonos Music V User manual

USER’S MANUAL
musicV/mediaV
Copyright –VISONOS 2013

Table of contents
1Overview ......................................................................................................... 4
2Installation ....................................................................................................... 5
3Starting with MediaV........................................................................................... 7
4Playlists......................................................................................................... 16
5Settings......................................................................................................... 21
6Control MediaV using i-Pad/i-Phone..................................................................... 23
7Control MediaV from Android ............................................................................. 26
8Playing Contents from your Tablet or Smartphone (Airplay by Apple) ......................... 27
9Technical specifications.................................................................................... 28
10 Important safety information .............................................................................. 29
Thank you for the trust you have placed in our company and for buying our products. We hope that the
quality and technology incorporated in our products, and the care we have devoted in their
manufacturing, will provide you with the best service for many years. From this moment on, we are at
your disposal to vouch for the guarantee of our products, and we kindly request that you read carefully
the user instructions, which will allow you to get the maximum benefit from these products.
THIS DOCUMENT CONTAINS INFORMATION THAT IS SUBJECT TO CHANGE WITHOUT NOTICE.
No part of this publication may be reproduced or transmitted in any form or by any means, electronic or
mechanical, including but not limited to photocopying, recording, information retrieval systems, or
computer network without the written permission of Smart Living Iberia, S.L. VISONOS and all other
VISONOS product names and slogans are trademarks or registered trademarks of Smart Living Iberia,
S.L. VISONOS products may be protected by one or more patents. Our patent information can be found
here: www.visonos.com.
iPod®, iPad® and iTunes® are trademarks of Apple Inc., registered in the U.S. and other countries.
Windows® is a registered trademark of Microsoft Corporation in the United States and other countries.
Android® is a trademark of Google, Inc.
All other products and services mentioned may be trademarks or service marks of their respective
owners.
2013 by Smart Living Iberia, S.L. All rights reserved.

User manual –Visonos MediaV
P. 3
© –Visonos 2013
.
User manual –Visonos MediaV
P. 4
© –Visonos 2013
.
1 Overview
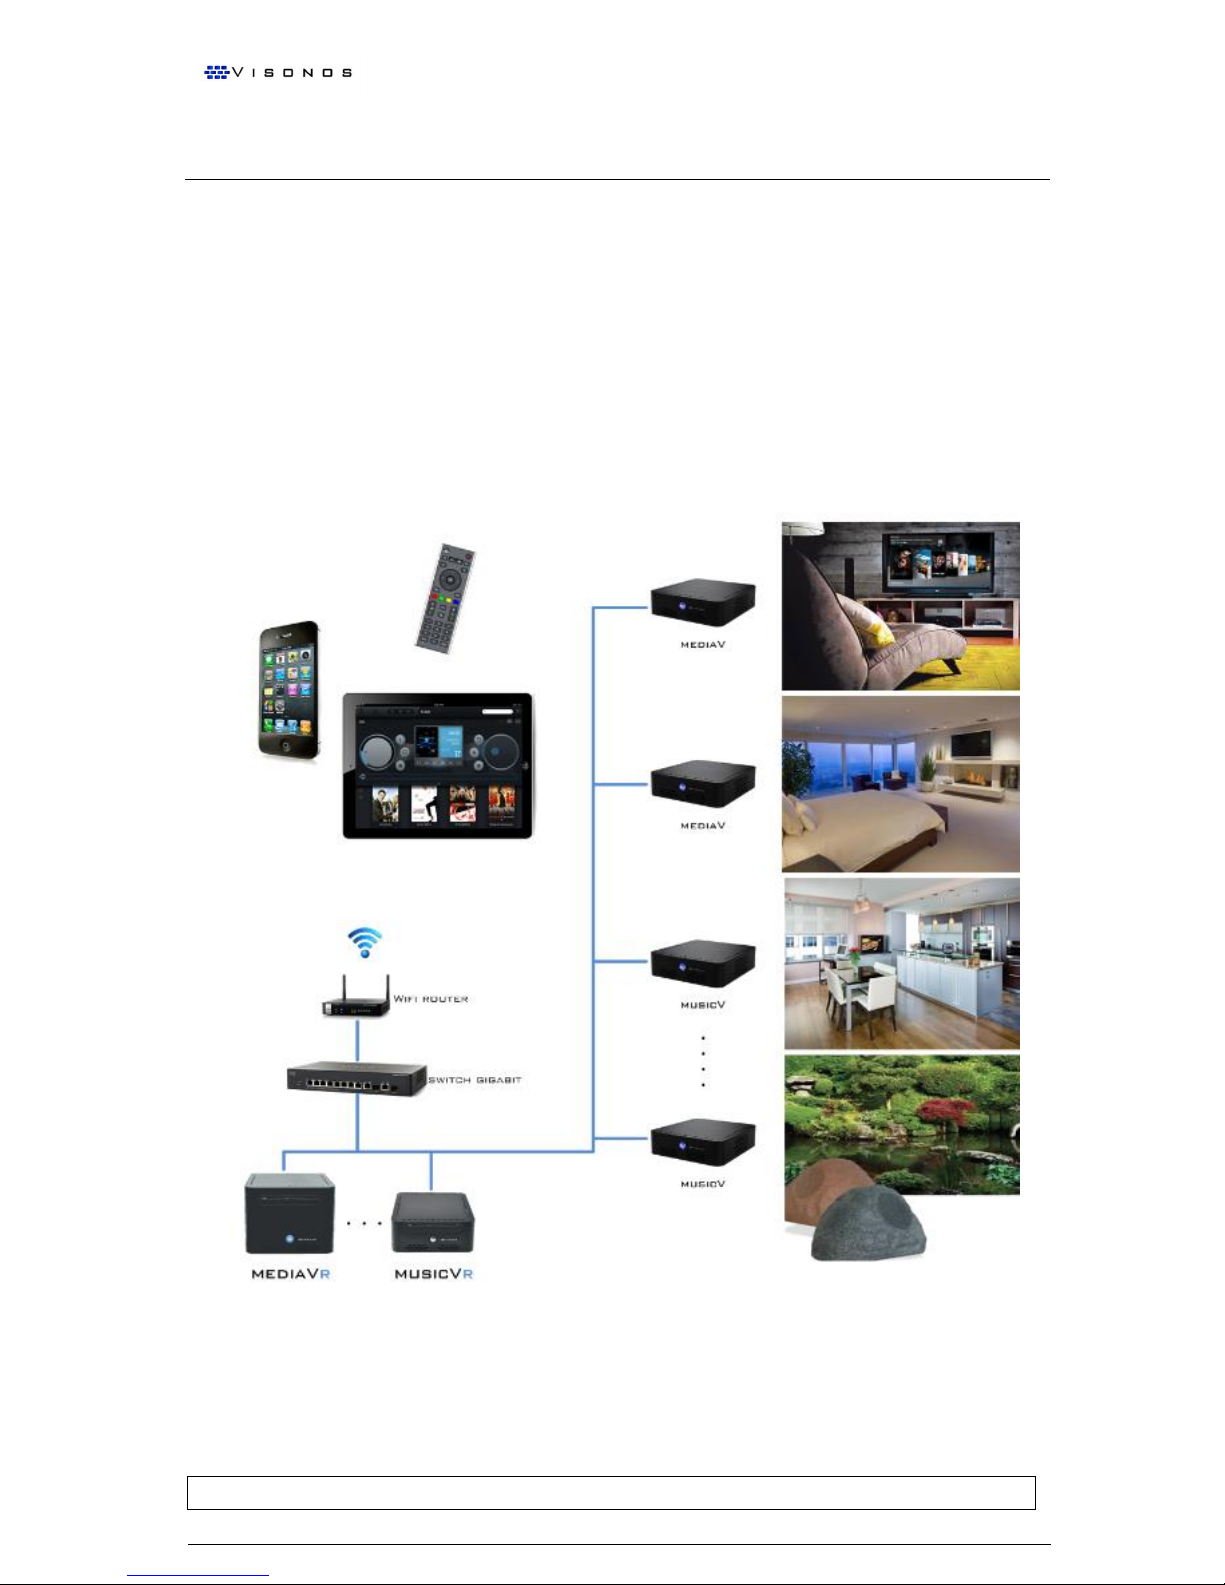
The Visonos System
Visonos is the new media center that can play digital contents in HD while allowing access to
Internet content (radio, music, videos, news, etc…).
In addition, Visonos can be used as a control centre for the house, allowing full control of
lights, blinds, air conditioning, alarms and surveillance cameras. It needs only some intelligent
system installed in the house.
Visonos is a fully IP-based system and allows easy control from a simple remote control or
from any computer connected to the network, tablet or mobile devices as well Apple’s i-Pad, i-
Pod or i-Phone. You only need a wired or wireless network to start using Visonos.
User manual –Visonos MediaV
P. 5
© –Visonos 2013
.
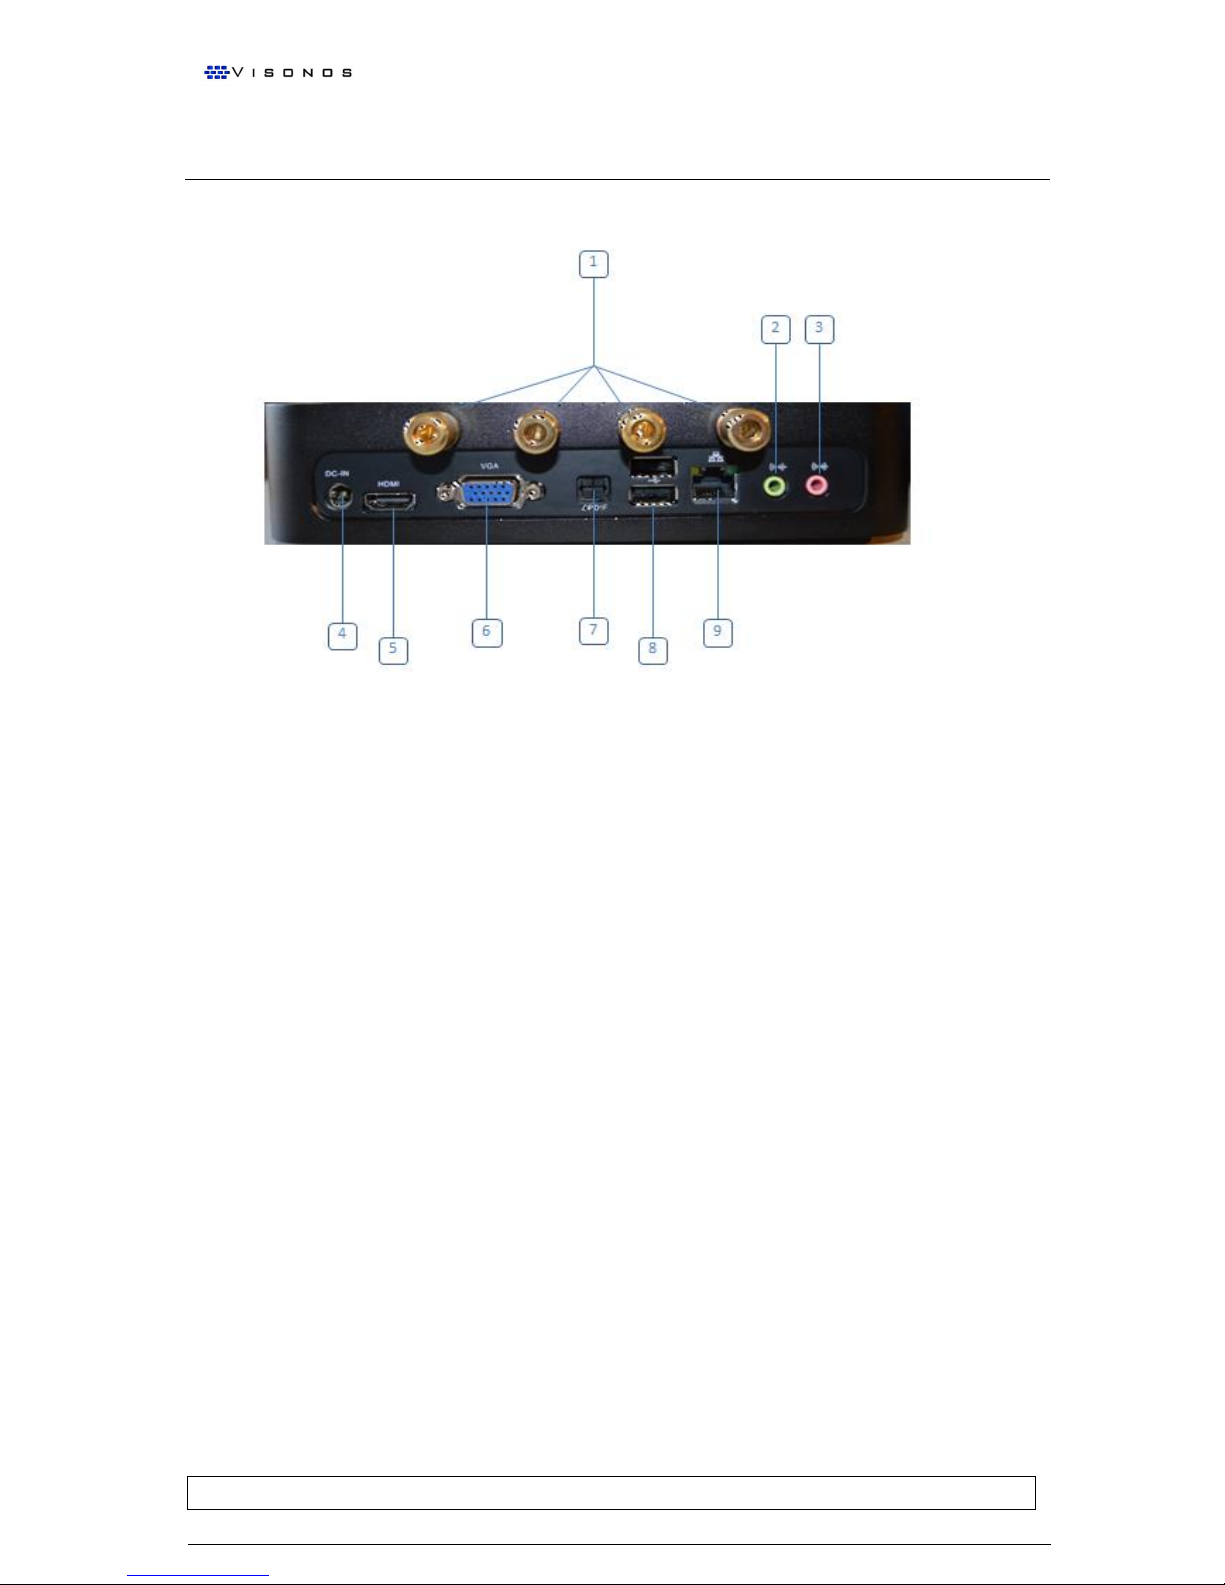
2 Installation
1. Speakers
2. Line Out
3. Microphone
4. Power
5. HDMI
6. VGA
7. SPDIF
8. USB
9. Ethernet 10/100/1000
First steps:
1. Connect MediaV to your TV or AV receiver using HDMI/VGA cable.
2. If you want, you can connect the audio output to your HiFi system using ANALOG/OPTICAL
cable.
3. If you want to connect speakers directly to MediaV, you can use audio cable to spring binding
posts L+R stereo.
4. Connect to the router or switch using a CaT5e/Cat6 cable.
5. Connect to the power.
6. Push ON/OFF button placed in the front of your MediaV.
Table of contents


