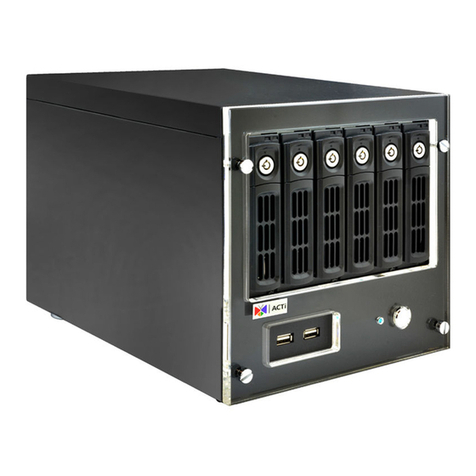
Visual Tools VX ATM User manual

1.
Video recording and ATM function unit
ENGLISH
VX ATM
Installation and user guide


User manual 1
INDEX
1FUNCTIONALITY....................................................................................................................................2
2CAMERAS INSTALLATION ...................................................................................................................3
3ATM CONNECTION TO THE VX-ATM...................................................................................................4
4ATM FUNCTIONALITY CONFIGURATION............................................................................................7
4.1 ATM EVENTS.....................................................................................................................................8
4.2 CHECKING THE POS INSTALLATION ....................................................................................................9
4.3 LIVE VIDEO........................................................................................................................................9
4.4 INFORMATION SEARCH IN RECORDING VIDEO .....................................................................................10
5APPENDIX 1 –TECHNICAL SPECIFICATIONS .................................................................................12

User manual 2
1 Functionality
A unit with ATM function can link images to the transactions generated by the ATM, both live
video and recording video.
The functionality is available for local and remote interface. The units are compatible with the
Supervisor VS for video functionality.
Images associated with ATM
One of the main features is the searching simultaneously of data and images. The searching
can cover different days, you have to enter the transaction data or request an intelligent word
search.
The storage of the data that is generated by the ATM besides the recording video allows you
to export video synchronized with the data.
Connections
The connection to the ATM is made through the VX-ATM’s network connection is also
possible to connect to the ATM from the USB unit’s port to the ATM’s serial port.
Events and alarms
One feature is the possibility of using key text strings or any incoming text string to generate
events or alarms on the cameras associated to the ATM. With the events and alarms you can
mark the video, generate relay activations, and send alarms.
The alarms can be sent via e-mail (alarm frames: VAV) or can be notified to up to two
Supervisor VS. The alarm sent by email includes in the subject the key text that has generated
the ATM alarm.
As video recording unit has real time video recording with data transmission to one or several
users.
For further information about the unit’s features as video recording please consult the
user manual at www.visual-tools.com .
Unit package contents
Please check that the following items are included in it:
Required model
USB mouse
External power supply 12V 5A
RJ45 cable for TCP/IP communications
RS-232 USB converter.
User manual.

User manual 3
2 Cameras installation
You can use any camera, PAL or NTSC depending on the VX-ATM model. Bear in mind that
the unit will records the camera signal being recommend colour cameras with good signal
level and clarity.
The cameras can be used for surveillance and transaction recording. The VX-ATM associates
the operating person to the transaction, allowing identifying any issue.
Figure.- 1 Camera showing ATM vision

User manual 4
3 ATM connection to the VX-ATM
The connection between the ATM and the VX-ATM it is done thought the local network cable
or from the ATM serial port to the unit USB port.
1.- Connection through local network, HTTP connection.
1. The connection is being made through a network cable between the ATM and the
VX-ATM unit.
2. The ATM must have integrated the POS-HTTP data transmission protocol
supplied by the manufacturer of the VX-ATM units. For this process it is
necessary that the ATM software manufacturer integrates the POS-HHTTP
protocol in the ATM this way the machine can transfer transactions to the VX-ATM
through the local network.
3. The VX-ATM has a specific key for this protocol, the ATM must have this key
configured to communicate.
4. The ATM has an ID that has to be defined in the VX-ATM unit, in the
Configuration/POS screen.
For further information please contact to the support department:
Phone: +34 917 294 844
Email: soporte@visual-tools.com
2.- Connection through ATM serial port.
The ATM has to send the texts through a RS232 serial line. To connect the RS232 to the VX-
ATM unit it is necessary to use a RS232-USB adapter provided by the manufacturer.

User manual 5
Configuration:
1. The ATM serial port has to be configured as follows:
.- Bits per second: 9600
.- Data bits: 8
.- Parity: None
.- Stop bits: 1
.- Flow control: None
2. Features of the text sent:
.- The characters must be coded in ANSI format.
.- Each line must finish with a CR.
.- Not all the ANSI characters are supported. These are the characters admitted by
the protocol:
[Space]
[Return line]
1234567890
ABCDEFGHIJKLMNÑOPQRSTUVWXYZ
abcdefghijklmnñopqrstuvwxyz
ÁÉÍÓÚ áéíóú
, . ; : ? ! = ( ) + - / $ " # @ _ < > & %
3. VX-ATM: Select the POS protocol to use in the Configuration/POS windows, for
further information please consult the chapter five.
.- Connection type: Select USB ports
.- POS protocol: Select SIDG.
With this configuration the VX-ATM shows in the video the text strings as are received, the unit
adds at the beginning of each line the hour’s text reception.
It saves the text labelled with the reception date and time internally, so it is possible to search
by date and text, and combine it to the correspondent video.
The unit dispose of 2 USB ports at the rear to connect to the ATM; this is the order of the ports
for the USB-RS232 connections:
Figure.- 2 Unit rear

User manual 6
The unit includes a RS232-USB converter. In case that you need to connect a second ATM
you need to order an additional cable.
Figure.- 3 RS232 –USB converter
The units have two digital inputs that are wired up to a DB9 connector with the following
diagram:
1
Input 1
2
GND
3
Input 2
4
GND
5
-
6
-
7
NC
8
Common
9
NA

User manual 7
4 ATM functionality configuration
Each ATM based unit has 1 HTTP connection and 2 USB ports. To configure the connections
on the VX-ATM unit it is necessary to access as Administrator user.
Note: In the configuration interface the ATM connections are shown as POS (Point of sale),
bear in mind that for all purposes the terms are equivalent.
In the Configuration tab select the POS section, the following window will appear.
Figure.- 4 ATM configuration window
In this window you can configure the ATM connection to the unit. For the ATM function is
running and active it’s necessary to configure the camera recording frequency (either time-
lapse or event) and select the camera associated to the ATM in the Configuration/POS
screen.
Point of Sales: –POS: ATM ID.
Last connection state: It shows the connection status by the icon status.
Connected , the cable is connected properly, it has a camera assigned and a
recording frequency.
Offline the cable is connected properly but it doesn’t have a camera
assigned or a recording frequency.
Off is neither connected nor active.
POS protocol: This is the communication protocol between the ATM and the VX-ATM by
default SIDG.
HTTP Id: ATM ID when the HTTP protocol is used.
Camera: camera assigned to the ATM.
Time-lapse recording: Camera recording frequency in working hours and non working hours.

User manual 8
Configured: It shows whether the connection to the ATM is running or is stopped.
In the lower part you can choose the different types of connection for the ATM.
USB ports. Direct connection to the USB ports.
USB hubs. This option is not available for the ATM.
HTTP. The ATM data entry can be done through a network connection between the
ATM and the VX-ATM, for that purpose you need to integrate a specific protocol.
The next item shows the type of transactions that the unit can store along with the recording
video.
Customer: Client ticket print.
Journal: Detailed information of the ATM use (types of transactions, number of
transactions , etc..)
The last option is the text overlay in remote live video and recording video and is checked by
default.
In the VX-ATM units you can record ATM’s transactions without time-lapse recording. The
Recording section shows what type of recording frequency has each camera. If it’s only event
recording you need to have at least 2 pre-event seconds to guarantee that the video
associated to the transaction is properly recorded.
When programming the POS you must press always the SAVE button after any connection
change and always after connecting a data line.
4.1 ATM events
In the ATM functionality configuration is possible to create events and alarms depending on
the information received. Press the POS EVENTS button in the POS configuration window
and you will access to this window where you can define the text strings able to generate an
event or an alarm.
Figure.- 5 ATM events configuration window
Apart from the use of key text strings is possible to use any incoming text string to generate
events or alarms.
When a ATM receive any of the defined words it generates an event / alarm than can be
consulted in the recorded video, there is also just for an alarm, the possibility of sending a
VAV with associated images.

User manual 9
4.2 Checking the POS installation
Visualization checking:
1. Connect remotely to the unit through an Internet Explorer or connect locally.
2. Log in with a user able to watch live video.
3. Select the camera associated to the POS.
4. Press the POS button to access the window where you can see the transactions
received by the POS that it associated to the selected camera.
4.3 Live video
In the live video screen, both local and remote you can watch the transactions that the VX-
ATM unit is receiving, select the camera associated to the ATM and press the icon, a new
window will appear with the viewer transaction at the top and the video viewer on the bottom.
Figure.- 6 ATM live video screen
To come back to the live video screen press the BACK button.

User manual 10
4.4 Information search in recording video
The information that the ATM gets is associated to the recording video, you can access the
recording video screen to search for transactions.
Figure.- 7 recording video screen
Pres in the icon to open the search screen.
Figure.- 8 Transaction search screen
Select the POS device (ATM device) where you want to make the search, set a starting and
final date, write the text screen to search and press the SEARCH button.
At the bottom window appears the transactions that match the searching text string. It appears
in blue the transactions that can be selected, the ones in grey doesn’t have video associated.

User manual 11
Figure.- 9 Search result screen
When you select a transaction it appears the following areas.
From this window you can select other transaction from the searching panel and make a new
search, press in the NEW SEARCH button to come back to the transaction searching screen.
For further information please contact the support department:
By phone: +34 91 729 48 44 By e-mail: soporte@visual-tools.com
Data from the
last search and
new search
button
Transactions that takes place in the
selected moment
Test results: the
results shown in
the video
viewer appears
in black
Video viewer it shows the video
corresponding to the selected
transaction

User manual 12
5 Appendix 1 –Technical specifications
MODELS:
VXATM: DVR of 2 cameras and 2 ATM.
OPERATOR
WORKSTATION:
Local interface for a VGA monitor
Remote access via WEB browser from any PC with MS Internet Explorer or with the Supervisor VS
reception and management software.
Different user levels password-protected. Multiple user login.
COMMUNICATION:
Web server over TCP/IP with Ethernet internal adapter and RJ45 connector.
Automatic management for Internet connections with dynamic IP address.
Automatic time synchronisation with a configurable NTP Server.
VIDEO INPUTS:
2 PAL or NTSC video inputs (according to the model)
ALARM INPUTS:
2 inputs for dry contacts.
Customisable alarm input titles and polarity inversion from the configuration interface.
RELAY OUTPUTS:
1 relay output with NO/NC contact. 24V 1A switch power.
Manual activation by the operator or configurable to indicate ATM event/ATM alarm.
Customizable relay output titles from the configuration interface.
VIDEO OUTPUT
1 VGA output for local interface.
ATM TERMINAL
CONNECTION:
ATM transaction reception through local network.
The data can be received from the ATM serial port; in this case the connection must be made by
using a kit that includes a USB adapter to RS232 port.
One kit per ATM.
RECORDING OF
TRANSACTIONS:
Recording of transactions from up to ATM terminals synchronized with the associated video
cameras.
Recorded video searching with key-word search motor.
Simultaneous playback of video and the associated transactions.
CAPTURE AND
COMPRESSION:
PAL resolution: 640 x 480.
4 configurable and independent quality levels for live and recorded video.
MPEG standard compression.
Compression size: 12 KB for very high quality, 9KB for high quality, 5 KB for medium quality and
3KB for low quality per image.
TRANSMISSION:
Transmission of up to PAL 25 ips/ NTSC 30 ips depending on the available bandwidth and the
recording configuration.
Simultaneous transmission and recording.
ALARM
TRANSMISSION:
Sending of alarm images via e-mail and/or alarm notification to up to 2 Supervisor VS posts.
RECORDING:
Hard disk recording. Different capacities.
PAL 50 ips / NTSC 60 ips for recording at any quality.
Simultaneous recording from different cameras and simultaneous recording and playback.
Automatic deletion of the images because of antiquity or hard disk occupation.
TIME LAPSE Recording:
Configurable calendar and possibility of synchronization with external devices through an alarm
input.
EVENT Recording:
Recording activated by means of the alarm inputs or motion sensors.
Configurable recording of up to 30 minutes of pre-alarm and 10 minutes of post-alarm.
VIDEO AND DATA
EXPORT:
Video export (MPEG format) including texts of POS to external USB device (hard disk or flash
memory).
MOTION DETECTION:
Motion sensors per camera with selectable activation (always/in working hours).
Definition of different motion/no motion areas and 3 levels of sensitivity.
Smart search of video sequences in local viewer with VMD filters on time-lapse recordings.
PAN TILT ZOOM
(PTZ):
Virtual panel for domes control and matrixes form multiple manufacturers through serial port (refer
to our dome list in www.visual-tools.com).
On-Screen control for local video viewer. Go to a preset by an alarm input function.
CONFIGURATION:
Menu for the configuration with user level password-protected.
Local or remote software updating.
POWER SUPPLY:
External power supply UL, CSA, FCC and CE marked.
Voltage: 110/220 Vac. 12v 5A, 50/60Hz. Connector diameter 2.5 mm.
Nominal consumption: 60W.
PHYSICAL DATA:
Weight: 1800 g. Width x Height x Depth: 192 mm x 65 mm x 220 mm.
CERTIFICATES:
CE.


DOCVXATMUM00EN_120612v400
VX-ATM
Installation and User Guide
ENGLISH
Table of contents
Other Visual Tools DVR manuals
