VITACLAY VM7800-5 Installation guide

OPERATING AND CARE INSTRUCTIONS
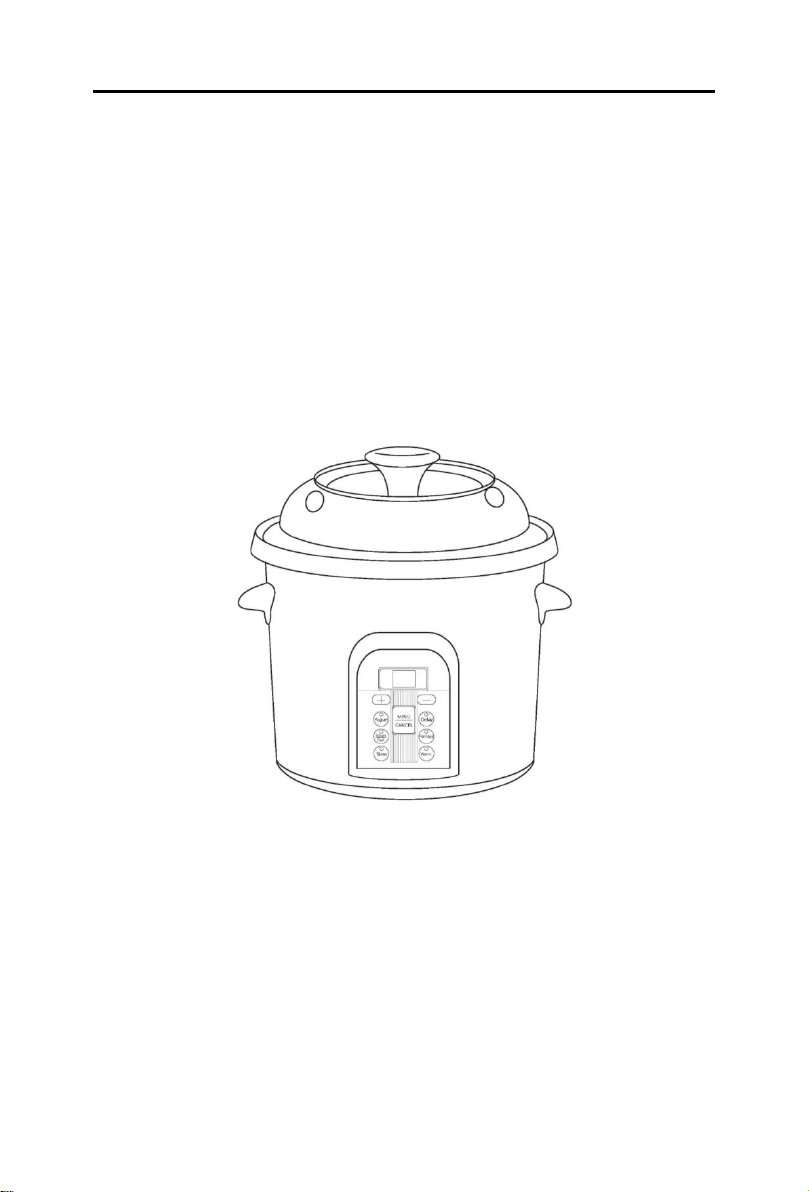
VitaClay® Smart Multi-crock
&
Stock pot
VM7800-5
READ ALL INSTRUCTIONS BEFORE INITIAL USE
HOUSEHOLD USE ONLY
© 2016 Essenergy, Inc. All rights reserved

IMPORTANT SAFETY INFORMATION
When using electrical appliances, basic electrical precautions should always
be followed to reduce the risk of fire, electric shock and injury, including the
following:
1. Read all instructions before using the appliance.
2. Intended for countertop use only.
3. WARNING: Spilled food can cause serious burns. Keep appliance and
cord away from children.
4. Do not operate any appliances that have damaged plugs or cords,
malfunctioned or been damaged in any way. Return the appliance to the
manufacturer or qualified service technician for repair or adjustment.
5. Do not immerse the heating unit of the appliance in water or any other
liquid. To prevent electrical shock, do not place the cord, plug or
cooking unit near water or other liquids.
6. Always unplug the cooker when not in use or before cleaning. Allow
cooker to cool before cleaning or removing parts.
7. Do not touch hot surfaces; Use the handles or knobs provided.
8. Avoid sudden temperature changes. Clay is sensitive to changes in
temperature, so allow it to cool and heat gradually. Placing a cold pot
onto a hot surface or a hot pot in cold environment (such as a very cold
countertop, the refrigerator or freezer) can cause the pot to crack. Also be
sure that the outside of the pot is dry before placing inside the housing to
cook.
9. Do not put cold liquids or food into heated pot. Thaw frozen foods before
placing in heated pot. Do not immerse heated pot into cold water.
10. Do not place cooker on or near a hot gas or electric stove burner. Do not
place cooker inside a hot oven or broiler.
11. Do not use outdoors.
12. Do not let cord hang over the edge of a table or countertop and do not let
it touch heated surfaces.
13. Use extreme care when moving the cooker if it is filled with hot liquid.
14. Ensure cooker is always placed on a flat, level surface before use.
15. Closely supervise whenever cooker is being used by or near children.
16. Do not use this cooker for anything other than its intended use.
17. The use of accessory attachments not supplied or recommended by
Essenergy may cause injury, fire or electrical shock and may also damage
the cooker.
18. Always attach plug to appliance first, then plug cord into the wall outlet.
19. To disconnect, turn unit off and remove the plug from wall outlet by
holding the plug. Do not pull the cord.

20. Never drape cord over edge of counter. Never use outlet below counter,
and never use with an extension cord.
21. The clay pot is fragile. Be careful when carrying or storing.
22. Do not cook food directly in metal housing.
23. Do not start cooking function while the clay pot is empty.
24. Dry heat can cause the clay pot to crack or break. Always have some
liquid present in the clay pot when the cooking cycle begins.
25. When using this appliance, provide adequate air space above and on all
sides for air circulation. On surfaces where heat may cause a problem, an
insulated heat pad is recommended.
26. When opening heated cooker, carefully lift and tilt cover away from you
to avoid scalding and to allow condensed water to drip into pot. Steam
and condensation will be very hot; be very careful not to burn.
27. CAUTION: To reduce the risk of electric shock, cook only in removable
container.
28. To ensure continued protection against risk of electric shock, connect to
properly grounded outlet only.
29. SAVE THESE INSTRUCTIONS.
This appliance is intended for HOUSEHOLD USE ONLY. There are no User
Serviceable Parts inside. The heating unit needs no lubrication or other service.
Do not attempt to service this appliance.
GROUNDING INSTRUCTIONS:
This appliance must be grounded. It is equipped with a 3-wire detachable cord
with grounded plug. The plug must be plugged into an outlet that is properly
installed and grounded.
WARNING: Improper use of the grounded wire can result in a risk of electric
shock. Consult a qualified electrician if necessary. Do not attempt to defeat this
safety feature by modifying the plug.
The short power cord is provided to reduce the hazards resulting from
entanglement or tripping over a long cord.
If it is necessary to use an extension cord, it should be positioned so that it does
not drape over the counter or tabletop where it can be pulled on by children or
tripped over and:
a) Use only 3-wire extension cord with 3-blade grounding plug.
b) The marked rating of extension cord must be equal to or greater than the
rating of this appliance. Electrical rating of this appliance. Electrical rating is
listed on the bottom of this unit.

CLEAN UNIT THOROUGHLY BEFORE FIRST USE
●Ensure the packing paper on the heating surface is removed.
●Wash the clay pot and lid with warm water and a small amount of
detergent.
●Rinse and dry clay pot thoroughly before placing in the housing.
●Plug the power cord into the unit first and then plug into the wall outlet.
When the cooker is ready for operation you will hear a long “beep”.
●Ensure the clock is set to the current time before using the Delay Timer
key features (see Function Keys).
Caution:
1. A slight odor and/or smoke smell may be noticed during the initial use of this
appliance. This is normal with many heating appliances and will disappear
after the first few uses.
2. The cooker should be used for its intended purpose only and not for other
cooking purposes such as stir frying, braising, browning or deep oil frying.
3. If liquids have been soaking in the clay pot for a very long time, a leak could
occur. Use a dry towel to dry the outside surface of the inner clay pot.
4. During the cooking process, the steam cap needs to be in place for safety and
performance.
5. Do not touch the steam cap during cooking process as it becomes very hot.
6. The clay pot and lid become very hot during the cooking process and/or when
cooking is finished. Use a dry cloth to pick up the clay pot and lid. Do not use
bare hands.

Stock Pot Basics (Do’s and Do-Nots)
CLAY POT CARE
Unglazed natural clay promotes health by preserving all essential
nutrients and vitamins in your foods. It creates excellent texture and
intensifies flavors of food. In order to preserve the quality and lifespan
of your clay pot, here are a few helpful tips and instructions to follow:
1. ALWAYS avoid temperature shock: never add frozen items to a
very hot pot or place a hot pot on a cold, marble counter or
directly into the refrigerator. Use a cloth trivet for the counter
and allow to cool down before placing in the refrigerator. Do not
place the clay pot in the freezer. Similarly, do not add boiling
water to a very cold pot (out of the refrigerator). Allow the pot
to normalize to room temperature before adding very hot or very
cold items.
2. Be sure that water-based liquids are always present in the
clay pot during cooking to prevent the pot from becoming too
dry and overheated. To achieve the optimum cooking results, we
recommend to a full pot cooking on “Fast” up to 2 hours, on
“Slow” up to 3 hours, bone broth for up to 9.5 hours. Clay
creates more gel than any other metal pot or glazed pot. For
more gel and collagens in bone broth, continue to let it sit in
WARM for additional 8-9 hours. “
3. ALWAYS cook with liquid present at least 2-3 cups (US cup)
in the pot. At the first-time cooking, for longer than an hour of
cooking time, please CHECK your liquid levels half way of
cooking time to see if liquid is running low, add same
temperature or room-temperature liquid as needed. If the liquid
is almost gone, turn the machine off and allow it to cool down
before adding more liquid and resume the cooking cycle. Use
the cooking chart for the first-time cooking and reduce or add
liquid amount as needed thereafter.

4. Make Oatmeal: 2 cups* oats with 8 cups* water. use “FAST”
setting to cook for 30 minutes ONLY. Leave the cooked oat for
additional 30 minutes for softer texture.
5. DO NOT cook food volume for under 1 liter, too small volume
cooking may risk in cooker damage.
6. DO NOT preheat, dry heat, bake or fry ANY foods dry---
without any water/broth-based liquids in pot.
7. Silicon stoppers must be plugged into the 4 steam openings on
the lid when cooking to prevent moisture and liquids from
evaporating.
8. Once you are ready to clean up, thoroughly wash or sanitize the
clay pot and let it dry completely before you store your VitaClay
in a dry or clean environment.
9. The STOCK POT models, as the name implies, are intended
for cooking large batches of mostly-liquid dishes such as bone
broth, stocks, soups, and stews. Do not cook casserole in this
pot, or easy over flow foods or liquid.
The clay pot itself is very delicate and requires gentle handling.
High quality item requires high quality care. It’s worth it!
Note: Cup* means in US CUP.

PARTS ASSEMBLY ILLUSTRATION:
(1) Clay (ceramic) pot Cover
(2) Silicon Steam Valve / Plug ( 4 pcs + 4 spares)
(3) Clay (ceramic) Pot
(4) Heat insulator
(5) Handle
(6) Cooker Housing
(7) Control Panel
(8) Power Cord

CONTROL PANEL DISPLAY AND FUNCTION KEYS
(1) YOGURT key
(2) STEAM / FAST (cooking) key:
(3) SLOW (cooking) key
(4) Delay Timer key
(5) PORRIDGE key
(6) WARM
(7) Timer keys “+” & “-"
(8) MENU / CANCEL
(9) LED display

HOW TO CHOOSE FUNCTIONS
STEAM / FAST COOKING
The STEAM / FAST function is good for cooking “Fast foods” or
veggie broth, or steaming foods, quick stew or soup, one pot meal, from
30 minutes to up to 1 ½ hours, depending on amount of food and liquid
added.
It is recommended to cook for 2 hours or less. If you want to cook
longer than 2 hours, choose “SLOW setting instead.
A full pot load takes about 40 to 60 minutes to reach to a boil. At
the first 1-2 hours cooking, you will lose some liquid due to
evaporation by a boil (about ½ to 1 cup per hour). The boil will be
slowed down over the course as the clay release the heat slowly and
keeps your food heat evenly.
ALWAYS cook with liquid present at least 3 cups (US cup) in the pot
to avoid burning or dry heating your pot.
Use the cooking chart for the first-time cooking and reduce or add
liquid amount and time as needed thereafter.
HOW TO OPERATE “STEAM / FAST”COOKING?
1. Place your 4 silicon steam plugs in the holes on the clay top to
help regulating the steam pressure built inside and prevent from
evaporation.
2. Press MENU key until the “STEAM / FAST” light indicator
flashes.
3. Continue to press the timer key “+” or “-” until you reach to the
desired cooking time. The timer is set by “0.5" or 30-minute
increments or decrement each time. If display shows “2.5” it
means cooking time is set for 2 ½ hours.

4. Within 6 seconds, the “STEAM / FAST” indicator light will
stop flashing and turn on and the LED display timer will start to
countdown at 6 minutes decrement. The cooker enters “STEAM
/ FAST” cooking mode.
5. After cooking completes, your food will be ready to serve and
the cooker will automatically enter to WARM mode up to 9.5
hours.
NOTE: You cannot change the cooking time once the cooker enters a
cooking mode unless CANCEL the cooking mode to start over.
Caution:
1. To prevent overflow: do not fill the cooker more than ¾ full of
water and food.
2. Ensure all ingredients are fully cooked before serving. If food is
not cooked through, restart the cooking cycle to cook longer.
3. If the Stew or food becomes too dry, it may cause the cooker to
overheat and you will hear a warning “beep” as the cooker
switches to the Warm cycle. You can cancel the cooking cycle.
SLOW / BROTH COOKING
The SLOW setting heats gentler than FAST setting and is good for
making soup, stew, bone or chicken broth, beans or chili. The
recommended cooking time is from 1 hour up to 3 hours. Bone broth up
to 9 hours, depending on amount of food and liquid added.
A full pot load takes about 60 minutes to reach to a boil. There will
be some liquid evaporation (about ½ - 1 cup per hour) during the
first 2-3 hours of cooking. As the results of clay’s low thermal
conductivity that releases heat slowly and cooks your food evenly, it
takes time to drop down to the desired simmer temperature.
VitaClay cooks 4 to 6 times faster to quickly bring to a boil than
conventional slow cooker. Your food is ready in 30 minutes or in an
hour or two without any pressure!

Use the cooking chart for the first-time cooking and reduce or add
liquid amount and time as needed thereafter.
HOW TO OPERATE “SLOW”COOKING?
1. Place your 4 silicon steam plugs in the holes on the clay top to
help regulating the steam pressure built inside and prevent from
evaporation.
2. Press MENU key until the “SLOW” light indicator flashing.
3. Continue to press the timer key “+” or “-” until you reach to the
desired cooking time. The timer is set by “0.5" or 30-minute
increments or decrement each time. If display shows “2.5” it
means cooking time is set for 2 ½ hours.
4. Within 6 seconds, the “SLOW” indicator light will stop flashing
and turn on and the LED display timer will start to countdown at
6 minutes decrement. The cooker enters “SLOW” cooking
mode.
5. After cooking completes, your food will be ready to serve and
the cooker will automatically enter to WARM mode up to 9.5
hours.
NOTE: You cannot change the cooking time once the cooker enters a
cooking mode unless CANCEL the cooking mode to start over.
PORRIDGE COOKING
The PORRIDGE function is good for cooking congee, mixed or whole grains
porridge. PORRIDGE takes about 45 to 80 minutes to complete cooking
depending on the volume of contents.
To make porridge, we recommend using 8 cups of water or broth per
cup of rice or grains. Please use silicon plug to help regulating the
steam pressure built inside. You may choose more or less liquid based

upon personal taste, but please ensure adequate liquid is always present
in the pot. Stir well if the grain becomes starchy to avoid sticky or burnt
on bottom.
How to delay your porridge cooking for later time,
1. Press MENU key until both “DELAY” and “PORRIDGE” light
indicators are flashing.
2. Press timer key “+” or “-” until reached to the delayed time to
start cooking. (for example, if you want to set DELAY to cook
porridge for 8 hours from now, press timer key “+” or “-” until
the LED displays as “8.0”. Your porridge will start cooking 8
hours from now).
3. Within 6 seconds, the DELAY and PORRIDGE indicator lights
will stop flashing and turn on. Your cooker is set on DELAY
timer (waiting state) to cook PORRIDGE.
4. When DELAY timer ends, the cooker will automatically enter to
cooking PORRIDGE mode. In about 45 minutes to 1 hour and
20 minutes, your porridge will be ready to serve and enter to
WARM mode up to 9.5 hours.
How to cook your porridge immediately:
1. Press MENU key until both “DELAY” and “PORRIDGE” light
indicators are flashing.
2. Wait for 6-7 seconds, your cooker enters porridge cooking
mode.
3. In about 45 minutes to 1 hour and 20 minutes, your porridge
will be ready to serve and enter to WARM mode up to 9.5
hours.
NOTE: Please do not use this function mode to cook “instant” or “steel
cut” oats, use “SLOW” setting to cook for 30 minutes instead. Leave
the cooked oat for additional 30 minutes for softer texture.

YOGURT
1. Press MENU key until the “yogurt” light indicator flashing.
2. Continue to press timer key “+” or “-” until you reach the
desired fermenting time.
3. A few seconds after the timer is set, the “YOGURT” indicator
light will stop flashing and turn on and the LED display timer
will start to countdown at 6 minutes decrement. The cooker
enters “YOGURT” fermenting mode.
WARM
1. Press MENU key until the “WARM” light indicator flashing.
2. Continue to press the timer key “+” or “-” until you reach to
the desired WARM time*.
3. A few seconds after the timer is set, the “WARM” indicator
light will stop flashing and turn on and the LED Timer
display will start to countdown at 6 minutes decrement. The
cooker enters “WARM” cooking mode.
4. When the “WARM” time ends, the cooker will shut off.
NOTE *:
At the WARM setting, if you choose not to press timer key “+” or “-”
the cooker will stay in WARM indefinitely, or until you press the
CANCEL key.
CANCEL
To Stop cooking at any time, press the “CANCEL” key, which will turn off
the cooker.

HOW TO OPERATE YOUR COOKER
USING SLOW or FAST cooking mode:
1. Load your ingredients into the clay pot.
2. Place the clay pot in the cooker’s heating base and turn the clay pot
so that it has good contact with the bottom heating plate. Cover with
clay lid.
3. Press “MENU” to select “SLOW” or “FAST” function.
4. Press the Timer key + or -until reach to the desired cooking time.
5. In a few seconds, your cooker will enter to the desired cooking mode.
NOTE:
1. Always use a dry cloth to dry and clean outside your clay pot before
placing it inside your cooker base.
MAKING STEW, SOUP or BROTH on “SLOW” mode:
VitaClay® is a great tool for making your flavorful and nutritious
hearty soup or broth. You may use this “SLOW”function setting to
make:
•Veggie broth in 30-50 minutes.
•Meaty bone broth in 4-6 up to 9 ½ hours.
•Whole chicken broth in 1 ½ -3 hours.
•Flavored oatmeal in 30 minutes!
•Bean or chili or meat Stew in 1-2 hours.
•Meat or bean stew in 1-2 hours.
Simply select on “SLOW” key, set on Timer + or - from 30 minutes up
to 9 hours depending on type of ingredients and amount of foods.
Please keep in mind, the less food in pot, the less time is needed to
cook. Or vice versa. After cooking is done, it will automatically switch
to Warm to hold food perfectly cooked for up to 9 ½ hours.

At the first-time cooking, for longer than an hour of cooking time,
please CHECK your liquid levels half way of cooking time to see if
liquid is running low. Add same temperature liquid as needed. If the
liquid is almost gone, turn the machine off and allow it to cool down
before adding more liquid and resume the cooking cycle.
HOW TO MAKE OATMEAL?
1. Add 2 cup steel cut or roll cut oatmeal and 7-8 cups water in
your clay bowl.
2. Place the clay bowl into the cooker housing base.
3. Press “SLOW” button. Press “Timer” for 30 minutes*.
4. Serve immediately or leave cooked steel cut oats in WARM for
additional 30 minutes or more for softer texture.
NOTE:
Do not cook oatmeal longer than 30 minutes or it may stick to the
bottom to crack.
BEAN POT- HOW TO COOK DRY BEANS?
1. Place the drained beans into clay pot and cover with 6 - 8 cups fresh
water or to about one inch above the beans for 1 cup of dry beans.
2. Add 1 to 2 Tablespoons oil and seasonings as desired.
3. Set “SLOW” cooking mode.
4. Press Timer +/- keys to set for 1 –2 hours depending on the bean
variety.
5. After the cooking cycle completed, your bean meal is ready to
serve, or cooker will switch to “Warm” cycle.
The best rule for the first time of cooking is to check halfway of
cooking time to see if they are covered with the cooking liquid during
cooking, then come to your own idea when beans are tender and taste
"done".

HOW TO STEAM ROOT VEGETABLES OR VEGGIES?
1. In your clay bowl, add 3 cups water.
2. Place your veggies in a bowl or steam basket
3. Place the veggie bowl / or steamer basket in your clay pot.
4. Set on “STEAM” and timer + /- for 30 minutes (green veggies or
chopped potatoes or yams).
NOTE:
To steam a full pot of whole root veggies like potatoes, or yams, set on
“FAST” and timer for an hour .
HOW TO STEAM FISH?
1. Add 3 cups water in your clay bowl.
2. Place your fish in a bowl or steam basket
3. Place the bowl / or steamer basket with fish in your clay pot.
4. Set on “STEAM” to steam for 30 minutes or until fish is cooked
through.
HOW TO MAKE 30 MINUTES ONE POT PASTA MEAL?
1. 2 cup organic pasta (any type)
2. 2 cups water or broth (chicken broth)
3. 1 cup organic marinara sauce (or Pesto sauce)
4. 1/2 pounds meatballs, veggies or other add-ins
5. Set on “FAST” for 20-30 minutes, and your pasta meal is ready!
NOTE:
You can always substitute water with veggie broth or bone broth for
savory dishes to enhance flavor and increase nutrition.
HOW TO MAKE CREAMY GREEK YOGURT

1. Place at least 32 oz to 48 oz of fresh milk into a high-sided
saucepan (1 cup of milk makes about a cup of yogurt).
2. Heat the milk until it just starts frothing (but before it boils) or
measure it: use a cooking thermometer and watch until it is
heated to 180ºF (82ºC). Remove the saucepan from heat and
allow the milk to cool to lukewarm. To accelerate the cooling
down, place the saucepan in cold water.
3. When the temperature reaches 110ºF (43ºC), you may add your
yogurt culture. Culture may either be bought freeze-dried or you
can use plain yogurt from the store or a previous homemade
batch. If not using a thermometer, wait until the pot is just cool
enough to touch with your bare hands (still very warm). Pour the
milk into a small clean cup and add 3-8 Tablespoons of plain
yogurt then stir culture in to distribute it evenly. Mix the room
temperature milk well with the smooth mixture and pour into
VitaClay pot.
4. Place the clay pot into the VitaClay cooker and push the
“Yogurt” button. Set it for 8 hours. Wait for the beep and it will
begin the incubation. Place the clay lid on the pot and close up
the cooker.
5. Once the yogurt is done, dispense the yogurt into your own
containers or leave in the clay pot to refrigerate for 4 hours
before using. Store in the refrigerator and use within 4-5 days.
6. Greek yogurt: The yogurt will thicken further in refrigerator.
After more whey separates from the yogurt, it will become
creamy Greek yogurt or yogurt cheese. You might use a strainer
or cheesecloth to separate more of the whey from the yogurt.
This will help thicken more.
7. Feel free to flavor with fruit, honey or vanilla beans and enjoy!
8. Don't forget to save a small amount to make the next batch!
Note:
1. 8 hours is best. The longer the yogurt incubates beyond that
time, the sourer the taste becomes.

2. Water may condense on the lid of the cooker. When you remove
the lid, take care not to drip any accumulated water into the
finished yogurt.
3. Mark the date you made the yogurt or with the date the yogurt
will expire (10 days). Chill the yogurt in the refrigerator for a
minimum of three hours before eating.
4. THE YOGURT MAKER SHOULD REMAIN PERFECTLY
STILL DURING THE MATURING PROCESS. DO NOT
MOVE THE APPLIANCE AS THIS WILL AFFECT THE
FIRMNESS OF THE YOGURT.
CHOOSING THE MILK
The following types of milk may be used: Raw milk, Pasteurized milk
of any fat content (full, 2%, 1% or fat-free), Powdered milk, Long-life
UHT sterilized milk, or coconut milk.
UNFLAVORED YOGURT
The taste and texture of the yogurt varies according to the milk and
yogurt starter selected. You should experiment with milk of various fat
contents to determine which one you prefer.
YOGURT FLAVORED AFTER COOKING
You may choose to make flavored yogurt and add sugar, honey,
flavorings, fruit or other ingredients to taste just prior to eating.
YOGURT FLAVORED WITH JAM AND JELLY, (OR HONEY,
OR SYRUP)
Ingredients:
●4-5 tablespoons of jam and jelly, (or honey or syrup)
●5 tablespoons of unflavored yogurt or 1 tablespoon of culture
●32 oz of milk
Heat the milk until it boils (82°C-180°F), for 1-2 minutes and starts to
climb the sides of the saucepan. Remove the saucepan from heat and

allow the milk to cool lukewarm (43°C-110°F). To accelerate the
cooling down, place the saucepan in cold water. Warm the jam and jelly
(or honey or syrup) over low heat. Add half of the milk and stir until
smooth; let cool again to (43°C-110°F), stir together the culture, jam or
jelly and remaining milk until smooth. Add the jam or jelly (or or honey
or syrup) while stirring. Add the mixture in VitaClay cooker. Cover the
cooker. Set “Yogurt” for 6 hours.
YOGURT FLAVORED WITH FRESH FRUIT
Ingredients:
●½ cup chopped fresh fruit
●4 tablespoons of sugars or to taste
●1-3 cup water
●5 tablespoons of unflavored yogurt or 1 tablespoon of culture
●32 oz of milk
Heat the milk until it boils (82°C-180°F), for 1-2 minutes and starts to
climb the sides of the saucepan. Remove the saucepan from heat and
allow the milk to cool lukewarm (43°C-110°F). To accelerate the
cooling down, place the saucepan in cold water. Cook the fruit in the
sugar and water over low heat for 10-15 minutes or until thickened. Let
cool again to (43°C-110°F). Stir together the culture and milk until
smooth. Stir in the chopped fruit. Add the mixture in VitaClay cooker.
Cover the cooker. Set “Yogurt” for 6 hours.
Turn the page for cooking charts for a wide array of foods in
your new VitaClay Multi-Crock & Stock Pot!
Safety Cautions-
●During cooking, DO NOT put your face near the steam vent, as
scalding or burning can occur; DO NOT place any object that is
heat sensitive close to, nearby or above the cooker; DO NOT

use a cloth to cover the steam vents, as this may damage the
cooker.
●DO NOT touch the base or clay parts during cooking or after.
●The clay or ceramic parts are designed for cooking with the
provided cooker base ONLY. DO NOT heat them on stove top
or oven.
●Avoid sudden temperature changes. DO NOT add cold water to
heated pot.
●When you just finish cooking while the pot is still hot, DO NOT
place clay pot or ceramic part in water or on cold surface. This
can SHOCK the pot to cause crack.
●When the cooker is not in use, please unplug the power cord.
●DO NOT heat your cooker when there is no liquid and food
inside.
●If the liquid completely evaporates the clay pot will begin “dry
heating”, immediately unplug the power cord, allowing the
cooker to cool down naturally. During cooling, DO NOT add
water or remove your pot from the cooker base.
●The minimum cooking volume or water or stock level should
always be above 1 liter. Too little water or stock can result in
cooker damage.
●When you plug in the power cord, please ensure a solid
connection with the cord and both the cooker and the electrical
outlet.
●DO NOT move the cooker when it is in cooking.
●Keep power cord plug and socket dry and clean. DO NOT touch
power plug with wet hands.
●During cooking, the cooker does automatic temperature
adjustments, and you may hear a ‘clicking” sound. This is
completely normal.
Other manuals for VM7800-5
2
Table of contents
Popular Electric Steamer manuals by other brands

Blodgett
Blodgett SC-7G Installation operation & maintenance

Wolf
Wolf IS15 Planning information

Market Forge Industries
Market Forge Industries STEAM-TECH PLUS STP-6E owner's manual

Philips
Philips HD9104/00 Specifications

Breville
Breville FOOD STEAMER / CUISEUR VAPEUR BFS600XL Instruction booklet

Kalorik
Kalorik USK DG 1 manual