TRANSCENDENT VT-TSP8
MOUNT INSTALLATION GUIDE
WWW.VITEKCCTV.COM
28492 Constellation Road Valencia, CA 91355 1/3
4.33” (110mm)
7.32” (186mm)
R.2”(5mm)
4.17” (106mm)
.5”(12mm)
R.07”(1.75mm)
R.08”(2mm)
.36”(9.25mm)
.3”(7.6mm)
.17”(4.25mm)
5.67”(144mm)
.28”(7.05mm)
R.08”(2mm)
R.49”(12.5mm)
.17”(4.5mm)
.5”(12.8mm) .02”(.4mm)
3.00” (66mm)
R.09” (2.35mm)
.53” (13.3mm)
.19” (4.7mm)
.24” (6mm)
.45” (11.5mm)
2.36” (44.65mm)
2.13” (54.02mm)
.14” (3.5mm)
1.76” (60mm)
4x.12”
(4x3mm)
5.35” (136mm)
5.35” (136mm)
6.30” (160mm)
2.99” (76mm)
3.94” (100mm)
.30” (7.7mm)
.18” (4.5mm)
.39” (10mm)
3.38” (85.9mm)
.24” (6mm)
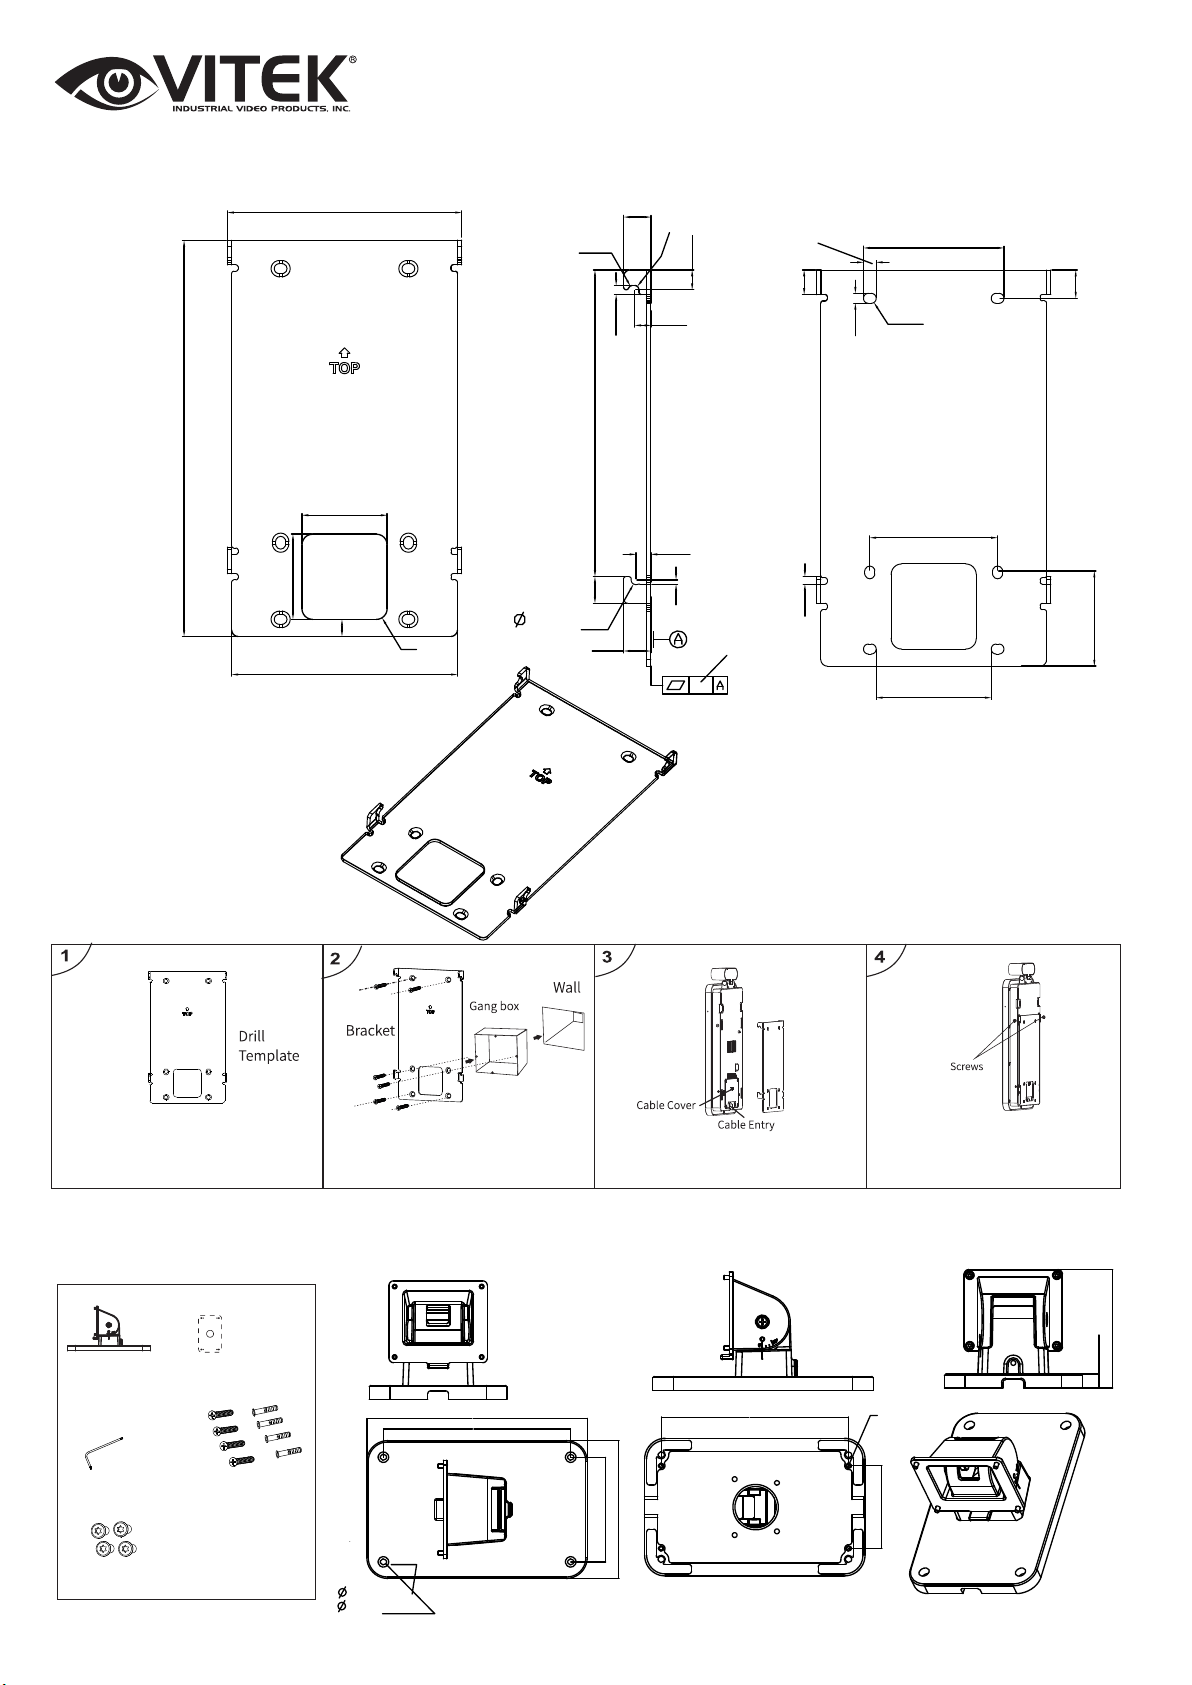
VT-TDBTH - Optional Desktop Bracket
Bracket
Screws (KM3*9)
Drill Template
Screwdriver
4 tapping screws
4 plastic plugs
Included Flat / Wall Bracket
1) Place drill template onto wall, then
drill holes accordingly.
2) Install gang box on the wall, use two
screws to secure the bracket to the gang
box, then use four screws to finish
securing bracket to the wall.
3) Route and connect cables, then
install cable cover.
4) Hang device on bracket hook,
then tighten screws to secure.
Weight: 6.61lbs (105.83oz.) / 3kg
Gross Weight: 1.10lbs (17.64oz.) / .5kg // Net Weight: .88lbs (14.11oz.) / .4kg


