Vitel Galaxy User manual

Galaxy
Getting Started
Guide
TM

ii
VTEL, Galaxy and Vtouch are trademarks of VTEL Corporation. Digital Visual Communications is a service mark of VTEL Corporation. All
other brand names and product names are trademarks or registered trademarks of their respective companies.
VTEL was issued the following patents by the U.S. Patent Office: Patent 5,657,246 titled, “Method and apparatus of a videoconference user
interface” and Patent 5,825,754 title, “Filter and process for reducing noise in audio signals.”
© 1999 by VTEL Corporation. All rights reserved. No part of this document may be reproduced in any form, including translation to another
language, without the prior written consent of VTEL Corporation.
Use, duplication, or disclosure by the Government is subject to restrictions as set forth in subparagraph (c) (1) (iii) of the Rights in Technical
Data and Computer Software clause at DFARS 252.227-7013.
The information contained in this document is subject to change without notice. VTEL assumes no responsibility for technical or editorial
errors or omissions that may appear in this document or for the use of this material; nor does VTEL make any commitment to update the
information contained in this document.
Document Edition Part Number Date
First 907-1080-EN1.00 August 1999
Video: 512.672.017/0172
Tel.: 512.437.2700
Fax: 512.437.2792
VTEL Corporation
108 Wild Basin Road
Austin, Texas 78746
www.vtel.com
Video: ++44 (0) 118 959 7112
Tel.: ++44 (0) 118 955 3200
Fax: ++44 (0) 118 956 0545
VTEL Europe Ltd.
Apex Plaza, Reading
Berks RG1 1AX, UK
www.vtel.com

iii
FCC Notice
This equipment has been tested and found to comply with the limits for a Class A digital device, pursuant to Part 15 of the FCC Rules. These
limits are designed to provide reasonable protection against harmful interference when the equipment is operated in a commercial
environment. This equipment generates, uses and can radiate radio frequency energy and, if not installed and used in accordance with the
instruction manual, may cause harmful interference to radio communications. Operation of this equipment in a residential area is likely to
cause harmful interference in which case the user will be required to correct the interference at his or her own expense.
Notice to Canadian Users
The digital apparatus does not exceed the Class A limits for radio noise emissions from digital apparatus set out in the Radio Interference
Regulations of the Canadian Department of Communications.
Le présent appareil numérique n’émet pas de bruits radioélectriques dépassant les limites applicable aux appareils numériques de la classe A
prescrites dans le Réglement sur le brouillage radioélectrique édicté par le ministére des Communications du Canada.
Austel Notice: For Use in Australia
This equipment can be connected to a telecommunications service only by an Austel-permitted terminal adapter.
Software License Agreement
This is a legal agreement between you, as the end user and Licensee, and VTEL Corporation. The VTEL Software includes computer
software, associated media, printed materials, and online or electronic documentation. By installing, copying, downloading, accessing or
otherwise using the Licensed Software, you agree to be bound by these terms.
LICENSE
VTEL grants Licensee a personal, non-exclusive license to use the VTEL Software, subject to the terms of this Agreement. Third party
software provided with VTEL Products is subject to the terms of the Third Party’s Software License Agreement. Licensee agrees to abide by
the terms and conditions of such Third Party Software License Agreements. Licensee shall not: (1) reverse-compile or disassemble any VTEL
Software, or attempt to do so; (2) modify the VTEL Software in any manner or to any extent; (3) copy the VTEL Software, except that one
copy of the VTEL Software may be made for archival purposes. The archival copy shall include VTEL’s copyright notice, along with a notice
that the copy is for archival purposes only and is subject to the provisions of this Agreement. Licensee agrees to take appropriate action by
instructions, agreement or otherwise to protect the VTEL Software and all parts thereof from unauthorized copying, modification, or
disclosure by its agents, employees, or customers. Licensee shall not assign or otherwise transfer this Agreement or any right hereunder. Any
attempt to transfer shall be null, void, and of no effect. The VTEL Software shall be used only as provided with the VTEL Products. This
license will terminate immediately without notice from VTEL if Licensee fails to comply with any of these provisions.
TITLE
Title and intellectual property rights to the VTEL Software, including all translations, compilations, derivative works, copies and partial
copies, remains solely with VTEL and/or its third party licensors. All rights not expressly granted under this Agreement are reserved by VTEL
and/or its third party licensors.
LIMITED WARRANTY
VTEL warrants to Licensee that VTEL Software will substantially conform to VTEL’s specifications at the time of delivery to Licensee. VTEL
provides the third party software “AS IS”, and makes no warranties whatsoever with respect to third party software which is governed solely
by the terms of the Third Party Software License Agreements. VTEL does not warrant that the VTEL Software will be error-free or operate
without interruption. VTEL will supply Licensee, free of charge, with those releases of the VTEL Software which VTEL, in its sole judgement,
deems necessary to correct errors or malfunctions in the VTEL Software for a period which is the earlier of (a) 180 days after the date the
VTEL Software is delivered to Licensee, or (b) 90 days after the date the VTEL Software is installed for use by Licensee. VTEL makes no
warranty as to any of the following: defects other than those which result from the VTEL Software materially failing to meet VTEL’s
specifications; defects related to Licensee’s misuse, neglect, accident or abuse of the VTEL Software or associated hardware; defects in any
VTEL Software which has been modified by Licensee; defects appearing when VTEL Software is used in violation of this Agreement.
THE FOREGOING WARRANTY IS EXCLUSIVE AND IS IN LIEU OF ALL OTHER EXPRESS OR IMPLIED WARRANTIES
INCLUDING, BUT NOT LIMITED TO, WARRANTIES OF MERCHANTABILITY OR WARRANTIES OF FITNESS FOR ANY
PARTICULAR PURPOSE.
LIMITATION OF LIABILITY
IN NO EVENT SHALL VTEL OR ITS LICENSORS BE LIABLE FOR DAMAGES WHATSOEVER INCLUDING, WITHOUT
LIMITATION, SPECIAL, INCIDENTAL, CONSEQUENTIAL, OR INDIRECT DAMAGES FOR LOSS OF BUSINESS PROFITS,
BUSINESS INTERRUPTION, LOSS OF BUSINESS INFORMATION, OR ANY OTHER PECUNIARY LOSS ARISING OUT OF THE USE
OF THE SOFTWARE EVEN IF VTEL HAS BEEN ADVISED OF THE POSSIBILITY OF SUCH DAMAGES.
U.S. GOVERNMENT RESTRICTED RIGHTS
The Licensed Software is provided with RESTRICTED RIGHTS. Use, duplication, or disclosure by the U.S. Government is subject to
restrictions as set forth in subparagraph (c)(1)(ii) of The Rights in Technical Data and Computer Software clause at DFARS 252.227-7013 or
in subparagraphs (c)(1) and (2) of the Commercial Computer Software--Restricted Rights at 48 CFR 52.227-19, as applicable. This
Agreement is governed by and constructed in accordance with the internal laws of the state of Texas and the United States, including patent
and copyright laws and shall not be affected by any conflict of laws provisions which would make Texas laws inapplicable.

iv

v
GalaxyTM
Contents
Chapter 1. Introduction to Galaxy 1.1
Controlling the Vtouch Software . . . . . . . . . . . . . . . . . . . . . . . . . . . . . . . . . 1.1
Remote Control . . . . . . . . . . . . . . . . . . . . . . . . . . . . . . . . . . . . . 1.1
Using the Built-In Help System . . . . . . . . . . . . . . . . . . . . . . . . . . . . . . . . . . . 1.2
Online Help . . . . . . . . . . . . . . . . . . . . . . . . . . . . . . . . . . . . . . . . 1.2
Chapter 2. Your First Call 2.1
Making a Call with the Hand Dialer . . . . . . . . . . . . . . . . . . . . . . . . . . . . . . 2.1
Call Progress . . . . . . . . . . . . . . . . . . . . . . . . . . . . . . . . . . . . . . . . . . . . . . . . 2.2
Disconnecting a Call . . . . . . . . . . . . . . . . . . . . . . . . . . . . . . . . . . . . . . . . . . 2.2
Chapter 3. Call Screen Features 3.1
Overview of the Call Screen . . . . . . . . . . . . . . . . . . . . . . . . . . . . . . . . . . . . . 3.1
Speed Dial List Features . . . . . . . . . . . . . . . . . . . . . . . . . . . . . . . . . . . . . . . . 3.2
Adding a Site to the Speed Dial List . . . . . . . . . . . . . . . . . . . . . . 3.2
Editing a Speed Dial List Entry . . . . . . . . . . . . . . . . . . . . . . . . . . 3.3
Dialing from the Speed Dial List . . . . . . . . . . . . . . . . . . . . . . . . . 3.3
Deleting a Site from the Speed Dial List . . . . . . . . . . . . . . . . . . . 3.3
Speed Dial List Options . . . . . . . . . . . . . . . . . . . . . . . . . . . . . . . . . . . . . . . . 3.4
Sort By... . . . . . . . . . . . . . . . . . . . . . . . . . . . . . . . . . . . . . . . . . . 3.4
Hide Pictures . . . . . . . . . . . . . . . . . . . . . . . . . . . . . . . . . . . . . . . 3.4
Call Progress . . . . . . . . . . . . . . . . . . . . . . . . . . . . . . . . . . . . . . . . . . . . . . . . 3.5
Snapshots . . . . . . . . . . . . . . . . . . . . . . . . . . . . . . . . . . . . . . . . . . . . . . . . . . . 3.5
Disconnecting a Call . . . . . . . . . . . . . . . . . . . . . . . . . . . . . . . . . . . . . . . . . . 3.5
Chapter 4. Options During a Call 4.1
Adjusting the Volume . . . . . . . . . . . . . . . . . . . . . . . . . . . . . . . . . . . . . . . . . . 4.1
Sending Slides . . . . . . . . . . . . . . . . . . . . . . . . . . . . . . . . . . . . . . . . . . . . . . . 4.1
Changing the Camera View . . . . . . . . . . . . . . . . . . . . . . . . . . . . . . . . . . . . . 4.1
Restoring Camera View . . . . . . . . . . . . . . . . . . . . . . . . . . . . . . . . . . . . . . . . 4.2
Automatically Saving Views (Dual Monitor Systems Only) . . . . 4.2
Manually Saving Views . . . . . . . . . . . . . . . . . . . . . . . . . . . . . . . 4.2
Going to a Saved View . . . . . . . . . . . . . . . . . . . . . . . . . . . . . . . . 4.3
Viewing the Picture-in-Picture (PIP) Window . . . . . . . . . . . . . . . . . . . . . . . . 4.3
Launching Extra Programs . . . . . . . . . . . . . . . . . . . . . . . . . . . . . . . . . . . . . . 4.4
Opening the Extras Screen . . . . . . . . . . . . . . . . . . . . . . . . . . . . . 4.4
Adding an Extra . . . . . . . . . . . . . . . . . . . . . . . . . . . . . . . . . . . . . 4.4
Sharing an Application . . . . . . . . . . . . . . . . . . . . . . . . . . . . . . . . . . . . . . . . . 4.5
Quit Sharing an Application . . . . . . . . . . . . . . . . . . . . . . . . . . . . 4.5
Adding the Remote Site to the Speed Dial List . . . . . . . . . . . . . . . . . . . . . . . 4.6

Getting Started Guide
Contents
vi
Chapter 5. Working with Slides 5.1
Overview of Slides . . . . . . . . . . . . . . . . . . . . . . . . . . . . . . . . . . . . . . . . . . . . 5.1
Opening an Existing Slide Tray or Graphic . . . . . . . . . . . . . . . . . . . . . . . . . 5.1
Sending a Slide . . . . . . . . . . . . . . . . . . . . . . . . . . . . . . . . . . . . . . . . . . . . . . . 5.1
Creating a New Slide Tray . . . . . . . . . . . . . . . . . . . . . . . . . . . . . . . . . . . . . . 5.2
Rearranging Slides . . . . . . . . . . . . . . . . . . . . . . . . . . . . . . . . . . . . . . . . . . . . 5.2
Annotating on a Slide . . . . . . . . . . . . . . . . . . . . . . . . . . . . . . . . . . . . . . . . . 5.3
Printing a Slide . . . . . . . . . . . . . . . . . . . . . . . . . . . . . . . . . . . . . . . . . . . . . . . 5.3
Saving a Slide Tray . . . . . . . . . . . . . . . . . . . . . . . . . . . . . . . . . . . . . . . . . . . 5.3
Managing Slide Trays . . . . . . . . . . . . . . . . . . . . . . . . . . . . . . . . . . . . . . . . . 5.4
Present Mode . . . . . . . . . . . . . . . . . . . . . . . . . . . . . . . . . . . . . . . . . . . . . . . . 5.4
Entering Present Mode . . . . . . . . . . . . . . . . . . . . . . . . . . . . . . . . 5.4
Using Present Mode . . . . . . . . . . . . . . . . . . . . . . . . . . . . . . . . . . 5.5
Exiting Present Mode . . . . . . . . . . . . . . . . . . . . . . . . . . . . . . . . . 5.5
Receiving a Slide . . . . . . . . . . . . . . . . . . . . . . . . . . . . . . . . . . . . . . . . . . . . . 5.5
Closing a Slide Tray . . . . . . . . . . . . . . . . . . . . . . . . . . . . . . . . . . . . . . . . . . . 5.5
Chapter 6. Multiway Conferencing 6.1
Before Joining a Conference . . . . . . . . . . . . . . . . . . . . . . . . . . . . . . . . . . . . . 6.1
Joining a Conference . . . . . . . . . . . . . . . . . . . . . . . . . . . . . . . . . . . . . . . . . . 6.1
Viewing Participants . . . . . . . . . . . . . . . . . . . . . . . . . . . . . . . . . . . . . . . . . . 6.2
Participating in a Conference . . . . . . . . . . . . . . . . . . . . . . . . . . . . . . . . . . . . 6.2
Conference without a Chairperson . . . . . . . . . . . . . . . . . . . . . . . 6.3
Conference with a Chairperson . . . . . . . . . . . . . . . . . . . . . . . . . 6.3
Controlling a Conference . . . . . . . . . . . . . . . . . . . . . . . . . . . . . . . . . . . . . . . 6.3
Becoming the Chair . . . . . . . . . . . . . . . . . . . . . . . . . . . . . . . . . . 6.3
Chairperson Functions . . . . . . . . . . . . . . . . . . . . . . . . . . . . . . . . 6.3
Granting Requests . . . . . . . . . . . . . . . . . . . . . . . . . . . . . . . . . . . 6.4
Chapter 7. Alternate Methods of Controlling Vtouch Software 7.1
Mouse . . . . . . . . . . . . . . . . . . . . . . . . . . . . . . . . . . . . . . . . . . . . . . . . . . . . . 7.1
Keyboard . . . . . . . . . . . . . . . . . . . . . . . . . . . . . . . . . . . . . . . . . . . . . . . . . . . 7.1
Annotation Tablet . . . . . . . . . . . . . . . . . . . . . . . . . . . . . . . . . . . 7.1
Tablet . . . . . . . . . . . . . . . . . . . . . . . . . . . . . . . . . . . . . . . . . . . . . . . . . . . . . 7.2

1.1
GalaxyTM
Chapter 1
Introduction to Galaxy
Welcome to GalaxyTM, the premiere videoconferencing system from VTEL®. This Getting Started Guide will give
you a brief, high-level overview of the Galaxy system, then lead you through your first videoconference. After
you finish reading this manual, and while you are exploring the VTOUCH software on your own, you may have
further questions. If so, please use the built-in Help feature within the software. It is easily accessible at all times
and can provide quick answers to your specific questions. (See page 1.2 for instructions on opening Help.)
Controlling the VTOUCH Software
For information on using an alternate method of software control, please see Chapter 6.
Remote Control
The remote control is the simplest and most efficient method of operating your VTOUCH software. The buttons
provide one-touch access to all major system functions.
One of the most convenient aspects of the remote control is that it moves the cursor only to active areas; in other
words, from one selectable item to another. Unlike a mouse that can move to any location on the screen —
perhaps missing a button you wish to select — the remote control arrow buttons guide your cursor intelligently
around the screen.
front view
top view
camera
zoom in
camera
zoom out
video mute
camera joystick
and select button
increase volume
decrease volume
audio mute
place call or hang up
cursor control
(all four arrows)

Getting Started Guide
Chapter 1. Introduction to Galaxy
1.2
Selecting an item:
To practice the steps below, first press the Video button on the remote control to display the Video menu.
•Throughout this
Getting Started Guide,
when you are asked to “Select”
on-screen buttons and menu items, simply perform the two steps
below.
1. Use the four arrow buttons on the remote control to navigate the orange highlight to the item you want
to choose.
2. Press the light gray button in the center of the remote control once to activate the highlighted function.
Using the Built-In Help System
The Help system that is built into the VTOUCH software is extremely intuitive. For example, if you are trying to
place a video call and have a question while you are in the Call menu, simply press the Help button for an
explanation of that particular screen. To close Help, press the Escape button on the remote control or select the
Done button.
Online Help
If you cannot find the answers you need with the built-in Help system, visit the VTEL Galaxy web site at
http://www.galaxy.vtel.com/help where you can find more in-depth Help.
arrow buttons
gray (select) button

2.1
GalaxyTM
Chapter 2
Your First Call
This chapter will guide you through placing your first video call. Proceed to Chapter 3 for more in-depth
information about the Call screen.
•See page 1.2 for instructions on selecting on-screen buttons and
menus with the remote control.
Making a Call with the Hand Dialer
1. The Call screen is used to place all outgoing Galaxy calls; open it by pressing the red Call/Hang Up
button on the remote control.
2. Select the Hand Dialer button.
3. Select a network type tab at the top of the screen.
4. Move the orange highlight to the Number field and use the keyboard to type the number you wish to
dial. You can also use the on-screen keypad and the remote control to enter the numbers.
If you make an error while entering information, use the Backspace button or the backspace key on the
keyboard to delete the last character entered. If you wish to erase all of the information on the page,
select the Reset button.
5. Select a Line Speed from the drop-down list. This is the rate at which your call will be connected. For
example, “384” means that 384 kilobits of data will be transferred every second (Kbps). Higher line
rates provide better video quality, however, your line charges may increase as well.
6. Select the Dial button to begin dialing the call.
Backspace deletes the
last character entered.
Reset clears all entries
on the screen.
Add to List saves the information in
the Speed Dial list.
Hand Dialer button
Select a network
type tab.

Getting Started Guide
Chapter 2. Your First Call
2.2
Call Progress
After you click the Dial button to place a call, a small Making a Call screen will appear in the lower part of the
monitor. Five icons give you a visual representation of the call status.
Disconnecting a Call
During a call, press the Call/Hang Up button to display the Call Status screen:
Select the Hang Up button to disconnect the call.
Caller ID
information
and snapshot
Status messages
appear here.
Click the Hang Up
button to disconnect
the call.
Click here to
disconnect the call.

3.1
GalaxyTM
Chapter 3
Call Screen Features
The Call screen contains several features that make videoconferencing simpler and more efficient. Open it by
pressing the red Call/Hang Up button on the remote control.
•See page 1.2 for instructions on selecting on-screen buttons and
menus with the remote control.
Overview of the Call Screen
The first time you open the Call screen you will see the Hand Dialer and Add options. As you use other features
in the Call screen, more options will become available. For example, if you select Add and create a new entry for
the Speed Dial list, the Edit and Speed Dial options will appear.
Use the Edit screen to change
an existing Speed Dial list entry.
Redial displays a list of the
most recently called sites.
Use Hand Dialer to call a site
that is not in your Speed Dial list.
Speed Dial acts as an address
book. This is where you store
site names and numbers.
Exit the Call screen.
Click Add to save a site to
the Speed Dial list.

Getting Started Guide
Chapter 3. Call Screen Features
3.2
Speed Dial List Features
The Speed Dial list is an integral part of the Galaxy system; it acts as an address book where you can save site
names and numbers. You can even customize each entry with a snapshot to make it easier to recognize (see
“Snapshots” on page 3.5).
Adding a Site to the Speed Dial List
1. Press the red Call/Hang Up button on the remote control to open the Call screen, then select Add.
2. Click on the correct network type tab at the top of the screen.
3. Enter a name for the site in the Name field.
4. Enter any other information that will be helpful to you, such as Company, Description and/or Notes.
5. Select the Favorites checkbox if this is one of the sites you will frequently call. See page 3.4 for
information on sorting by Favorites in the Speed Dial list.
6. Move the highlight down to the Number field and use the keyboard to type the number you wish to dial.
If you make an error while entering information, use the backspace key on the keyboard to delete the last
character entered.
7. Select a Line Speed from the drop-down list. This is the rate at which your call will be connected. For
example, “384” means that 384 kilobits of data will be transferred every second (Kbps). Higher line
rates provide better video quality, however, your line charges may increase as well.
8. When you are finished, press the Save button to save the information into the Speed Dial list.
9. The Speed Dial list will be displayed and your new entry will appear in the list.
Dial connects a call to this
site and saves it to the
Speed Dial list.
Select Save to record the
site to the Speed Dial list.
Select a network
type tab.
Click here if this is one of your
frequently called sites.
Notice that the Speed Dial
button does not appear
until you add a site.

Speed Dial List Features 3.3
GalaxyTM
Editing a Speed Dial List Entry
1. Press the red Call/Hang Up button on the remote control to open the Call screen, then select the Edit
button.
2. Select the site that you want to edit.
3. The Edit screen functions exactly like the Add screen (see page 3.2). After you have finished changing
any information, press the Save button.
Dialing from the Speed Dial List
1. Press the red Call/Hang Up button on the remote control to open the Call screen, then select the Speed
Dial button.
2. Select the site you want to dial. Use the up or down arrow buttons on the remote control if you need to
view more of the list.
Deleting a Site from the Speed Dial List
1. Press the red Call/Hang Up button on the remote control to open the Call screen, then select the Speed
Dial button.
2. Highlight the site you want to delete, then select the Options tab.
3. After the Options tab expands, select Delete Item. The site is removed from the Speed Dial list.
Select the site you want to
change.
Edit button
Speed Dial button
Select the site you
want to delete.
Click the Options tab,
then click Delete Item.

Getting Started Guide
Chapter 3. Call Screen Features
3.4
Speed Dial List Options
Sort By...
Use the Sort by... feature to change the way that listings appear in the Speed Dial list. For example, you can
choose Favorites to display only your most frequently called sites. Or, sort by Company to alphabetize the
listings by company names.
1. Press the red Call/Hang Up button on the remote control to open the Call screen, then select the Speed
Dial button.
2. Select the Sort by... tab to expand it.
3. Select a sorting method from the list.
4. Close the Sort by... tab by pressing the Escape button on the remote control, or by selecting the Sort by...
tab again.
Hide Pictures
By default the Speed Dial list displays a caller ID snapshot of each site, if available. You can choose to disable this
feature, allowing more listings to appear on a page.
1. Press the red Call/Hang Up button on the remote control to open the Call screen, then select the Speed
Dial button.
2. Select the Options tab.
3. Select Hide Pictures.
Select the Sort by...
tab to expand it.
Select it again to
make it disappear.
Select a sorting
method from the list.
Speed Dial button
Select the Options
tab to expand it.
Select Hide Pictures.

Call Progress 3.5
GalaxyTM
Call Progress
After you click the Dial button to place a call, a small Making a Call screen will appear in the lower part of the
monitor. Five icons give you a visual representation of the call connection status.
Snapshots
Follow these steps to create a snapshot to accompany a Speed Dial list entry:
1. During a call press the red Call/Hang Up button to display the Call Status screen.
2. Select the Snapshot button.
The image of the far end site that you are currently viewing will become the Snapshot associated with
that site.
Disconnecting a Call
During a call, press the red Call/Hang Up button to display the Call Status screen. Select the Hang Up button to
disconnect the call.
Caller ID
information
and snapshot
(if available).
Status messages indicate the
stages of call connection.
Click the Hang Up
button to disconnect
the call.
Click Hang Up to
disconnect the call.

Getting Started Guide
3.6

4.1
GalaxyTM
Chapter 4
Options During a Call
There are several common functions that most users are likely to perform during a videoconference:
•adjust the volume
•send or receive slides
•change the camera view
•move the camera to a memorized view
•view the Picture-in-Picture (PIP) window
•launch Extra programs
•share an application
•add a Speed Dial list entry
The following sections give brief explanations of each of these functions. For more detailed information, simply
press the Help button on the remote control at any time.
•See page 1.2 for instructions on selecting on-screen buttons and
menus with the remote control.
Adjusting the Volume
To adjust the volume while in a call, use the Volume Up and
Volume Down buttons on the remote control.
Use the Audio Mute button to stop all of your audio from being
sent to the other site. This can be especially useful if you are
listening to a presentation, for example, and want to be sure that
you do not accidently interrupt.
Sending Slides
The VTOUCH software includes a powerful component called “Slides” which you can use to send a graphic, a few
slides, or an entire presentation to the remote site. You may also draw on slides with easy-to-use annotation
tools. For a complete explanation of Slides, please see Chapter 5.
Changing the Camera View
With the VTOUCH software you have the ability to maneuver your own camera, as well as the camera at the site
to which you are connected. For example, this can be helpful when the far end speaker is referring to a
whiteboard that is not within the camera view. Instead of asking the speaker to change the camera angle, you can
perform that function from your own site.
Please note that not all systems support far end camera control, or some may have that function disabled.
Specifically, calls over a LAN network (H.323 standard) do not support this functionality.
volume down
audio mute
volume up

Getting Started Guide
Chapter 4. Options During a Call
4.2
•Perform these functions when the monitor is filled with a video image.
Moving the Camera at Your Site (Here)
1. The center of the remote control is a joystick that moves the local
camera up, down, left and right.
2. To zoom in or out, use the Zoom In and Zoom Out buttons on
the remote control.
Moving the Camera at the Far Site (There)
1. To gain access to the remote camera controls, press the
Here/There button on the remote control.
2. Controlling the remote camera is the same as controlling the local
camera; simply move the joystick in the direction you want the camera to move.
Restoring Camera View
Moving the camera manually takes time and attention away from your focus on the meeting. Since there are a
limited number of positions where you will actually point the camera during a meeting (such as a group shot,
individual participants or a whiteboard) the system allows you to jump quickly among memorized camera
positions.
To access these memorized camera views press the Video button on the remote control, then select the Restore
View tab.
•The following features can apply to both ends of a conference — your
site (Here) and the site you are connected to (There) — if the remote
system supports far end camera control. Use the Here/There button
on the remote control to switch between control of the two sites.
Automatically Saving Views (Dual Monitor Systems Only)
The VTOUCH software will automatically save a View each time the camera moves to a new position then stops
and remains idle for several seconds. The default number of saved Views is five. After the fifth View has been
saved, the next View will replace the first (oldest) View.
•Your system administrator can increase or decrease the number of
saved Views. The maximum number is eight.
Manually Saving Views
You can set a View yourself by focusing the camera on the position you wish to save and then selecting New on
the Restore View menu. A small snapshot of the current View is saved on the menu, along with a number
denoting the position of the View.
zoom out
zoom in
camera control
joystick
Select Here to save
camera views of
your local site.
Select There to
save camera views
of the remote site.
Add a New
camera view.

Viewing the Picture-in-Picture (PIP) Window 4.3
GalaxyTM
•If you have manually created five Views and then move the camera via
the joystick, an automatic View will be saved which will overwrite your
first saved View.
Going to a Saved View
To move the camera to a saved View, select the appropriate View snapshot on the Restore View menu and the
camera view will move to that location.
Viewing the Picture-in-Picture (PIP) Window
There are two types of Galaxy systems — single monitor and dual monitor. When a single monitor system is
connected in a call, the monitor displays the remote site (There). A PIP window is useful so that the local site
(Here) can verify that they are in the camera view and move their camera as needed. Dual monitor systems
display the remote site (There) on the left monitor and either the local site (Here) or graphics on the right
monitor. When displaying graphics on the right monitor, a PIP window may be useful to the local site.
1. Click the Video button on the remote control. The Video menu will appear.
2. Select the PIP tab to display the PIP menu:
Each View is saved
with a number and a
small snapshot of
that camera view.
Select the PIP tab.
Turn the PIP
feature on
and off.
There are four locations for the
PIP window (four corners). Each
time you select this button the
PIP window will move to the
next possible location.
Choose a size for
the PIP — large or
small.
Swap the PIP window display. You
can choose to show your own local
video (Here) in the main window
and the remote video (There) in
the PIP window, or vice versa.

Getting Started Guide
Chapter 4. Options During a Call
4.4
Launching Extra Programs
The VTOUCH software operates on a fully-functional Windows-based computer. You can install applications on
this computer, just as you would on your own desktop computer. While you are in a videoconference you can
access these applications with the Extras menu so you do not have to exit the VTOUCH software.
Opening the Extras Screen
Click the Extras button on the remote control to display the Extras menu.
Adding an Extra
1. Select Manage on the Extras menu.
2. Select the Add Utility button.
Click Manage to
add or remove
Extras.
FileSend has
already been
added for you.
Click here to add a
new Extra utility.
Table of contents
Popular Conference System manuals by other brands
Asus
Asus Chromebox for meetings for the large room user guide

Polycom
Polycom VSX 8000 Series Quick setup guide
LifeSize
LifeSize Icon 800 installation guide
PennNet
PennNet Polycom SoundPoint 550 quick guide
Grandstream Networks
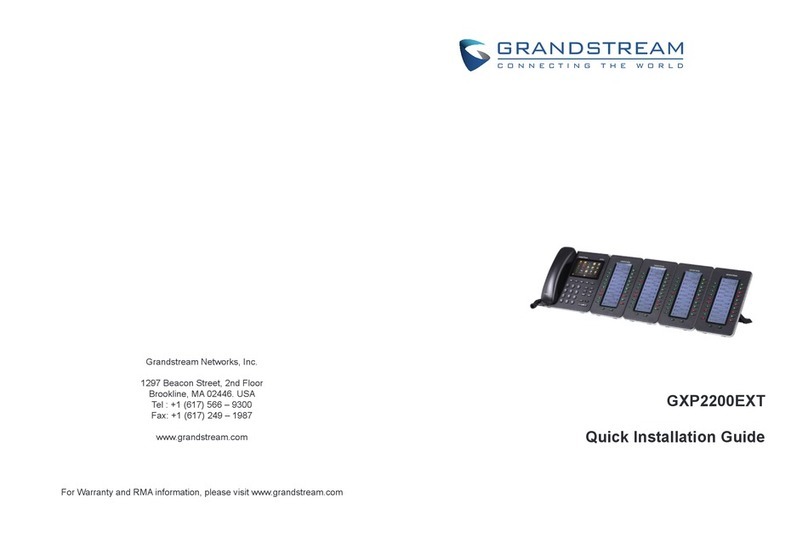
Grandstream Networks GXP2200EXT Quick installation guide

Listen
Listen ListenTALK user manual
