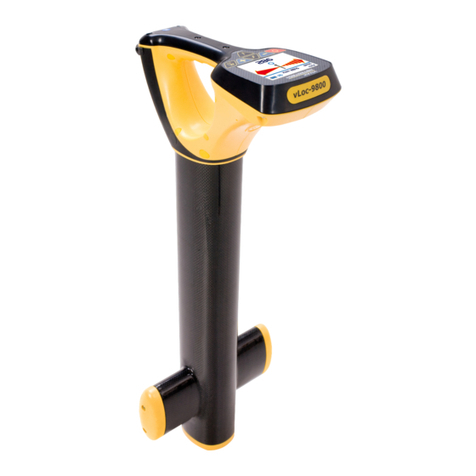
Vivax vScan Instruction Manual

vScan User Handbook
(English Edition)
Version 1.0
P/N: 4.04.000051

Table of Content
Introduction...............................................................................................................................................1
1.1 General Safety & Care Information......................................................................................... 1
1.1.1 Work-site Safety .................................................................................................................. 1
1.1.2 Equipment Safety ................................................................................................................ 1
1.1.3 Batteries and Environmental Safety..................................................................................... 1
1.1.3.1 Alkaline Batteries (Non Rechargeable).......................................................................1
1.1.3.2 Nickel Metal Hydride Batteries (Rechargeable)..........................................................2
1.1.3.3 Lithium-Ion Batteries (Rechargeable).........................................................................2
1.1.3.4 Lithium Metal Batteries (Non Rechargeable)..............................................................2
1.1.3.5 Transportation of Lithium-ion and Lithium Metal Batteries..........................................3
1.1.3.6 General Rules Regarding Disposal of Batteries.........................................................3
1.1.4 Care of Equipment............................................................................................................... 3
1.1.5 Care When Interpreting the Information Provided by the Locator........................................ 3
1.1.6 American & Canadian Safety Notices.................................................................................. 4
1.2 Service & Support................................................................................................................... 5
1.2.1 Serial Number and Software Revision Number ................................................................... 5
1.2.2 International and National Distributors and Service Centers ............................................... 6
Power Supplies.........................................................................................................................................7
2.1 vScan Receiver Batteries........................................................................................................ 7
2.1.1 Alkaline Batteries................................................................................................................. 7
2.1.2 Charging the Receiver Optional Li-ion Battery Pack............................................................ 7
2.2 vScan Transmitter Batteries.................................................................................................... 8
2.2.1 Alkaline Batteries................................................................................................................. 8
2.2.2 Charging the Transmitter Li-ion Batteries ............................................................................ 8
User Controls/Connections.......................................................................................................................9
3.1 Receiver.................................................................................................................................. 9
3.1.1 Display................................................................................................................................. 9
3.1.2 Receiver Controls ................................................................................................................ 9
3.1.3 Warning/Alerts................................................................................................................... 10
3.1.3.1 Shallow Line Alert.....................................................................................................10
3.1.3.2 Swing Alert...............................................................................................................10
3.1.3.3 Signal Overload Alert................................................................................................10
3.1.3.4 Overhead Signal Alert ..............................................................................................10
3.1.3.5 Action Required Alert................................................................................................11
3.2 Transmitter............................................................................................................................ 11
Locating ..................................................................................................................................................12

4.1 Passive Locating................................................................................................................... 12
4.1.1 Detecting Radio Signals .................................................................................................... 12
4.1.2 Detecting Power Signals.................................................................................................... 14
4.2 Active Locating...................................................................................................................... 14
4.2.1 Direct Connection .............................................................................................................. 14
4.2.2 Signal Clamp ..................................................................................................................... 16
4.2.3 Induction (33 kHz).............................................................................................................. 17
4.2.4 Detecting Active Signals.................................................................................................... 18
4.3 Taking Depth and Current Measurements............................................................................ 18
4.4 When to use 33 kHz or 131 kHz............................................................................................ 19
4.5 Metal Locate Mode (vScanM Cover Detector)...................................................................... 19
4.5.1 Locating a Buried Cover .................................................................................................... 19
4.6 Locating Non-metallic Pipes or Ducts ................................................................................... 20
4.7 Advanced Locating Techniques............................................................................................ 22
4.7.1 Two Person Sweep............................................................................................................ 22
4.7.2 “Swamping” an area with Signal (Broad Induction)............................................................ 22
4.7.3 Nulling Out a Signal (Induction Mode) ............................................................................... 24
4.7.4 Capacitive Coupling........................................................................................................... 24
4.8 Self-Test/Calibration Check .................................................................................................. 25
4.8.1 The vScan Receiver .......................................................................................................... 25
4.8.2 vScan Transmitter Check................................................................................................... 26
4.9 GPS ...................................................................................................................................... 27
4.10 Creating “Points of Interest” (POI)......................................................................................... 28
4.11 Bluetooth............................................................................................................................... 28
4.12 MyvScan ............................................................................................................................... 29
4.12.1 Using MyvScan.................................................................................................................. 29
4.12.2 Navigating around MyvScan.............................................................................................. 30
Glossary..................................................................................................................................................32

1 Introduction
Page 1 of 33
Introduction
This section provides general information for all Vivax-Metrotech instruments regarding safety and battery
related information.
1.1 General Safety & Care Information
This equipment must only be used by people suitably trained in the use of pipe and cable locators.
1.1.1 Work-site Safety
WARNING
Always comply with your Company’s work practices and safety codes.
Always comply with Local, State, Federal or National applicable work practices and safety codes.
Unless having the required authorization, license and appropriate training – do NOT make connections
to any pipe, cable or conductor.
Unless otherwise stated on the product labeling and in the products user handbook, this product is not
“intrinsically safe” and should not be used in areas requiring “intrinsically safe” approvals.
The equipment should not come in contact with corrosive or hazardous chemicals, or gases, dust.
Do NOT directly connect this equipment to cables or pipes that have a potential difference to ground of
greater than 25V AC.
ALWAYS REMEMBER TO DIG SAFELY.
1.1.2 Equipment Safety
WARNING
Do NOT open the enclosures (housings) of either the transmitter or receiver.
Place the ground stake firmly in the ground before connecting the cable from the transmitter.
1.1.3 Batteries and Environmental Safety
Vivax-Metrotech products use four types of batteries:
Alkaline batteries
Ni-MH (Nickel Metal Hydride) batteries – rechargeable
Lithium-ion batteries – rechargeable
Lithium-metal batteries –(small non rechargeable button cells for “clock” applications)
1.1.3.1 Alkaline Batteries (Non Rechargeable)
WARNING
When replacing the alkaline batteries – use only the size and type specified – do NOT mix battery types
(rechargeable and alkaline).

1 Introduction
Page 2 of 33
Do NOT mix partially discharged and fully charged cells in the same battery pack – do NOT mix old with
new.
Never attempt to charge alkaline batteries.
1.1.3.2 Nickel Metal Hydride Batteries (Rechargeable)
WARNING
When using rechargeable batteries, use only the correct charging device supplied or specified by the
manufacturer. The battery pack or the battery charger will contain circuitry to manage the charging
process – other chargers, even if they have the same connector, polarity, voltage & current rating, will
not have the same control circuitry and can cause damage to the product, overheating, and in extreme
cases fire of harm to the individual.
Do NOT assume that if the plug fits it is the correct charger – a charger with the correct part number
MUST be used – just because it is a Vivax-Metrotech charger does NOT mean it is the correct charger.
Before using for the first time, charge rechargeable batteries for six hours. If at any time the
rechargeable batteries do NOT last as long as anticipated – discharge fully and then charge for six
hours.
Care should be taken when charging batteries – NEVER repeatedly recharge batteries (or turn power off
& on) without using the instrument. If used with an inverter in a vehicle – charge the product then unplug
the charger and do NOT charge again until the rechargeable batteries have been used for at least 10
minutes. Failure to do this could result in the overcharging of the battery which will shorten the life of the
battery, and could in some circumstances causes overheating or fire.
If ever the product becomes hot during the charging process IMMEDIATELY unplug the charger and use
the rechargeable batteries for at least 10 minutes before recharging. If this reoccurs the next time the
unit is charged – return immediately to Vivax-Metrotech for repair.
Do NOT charge batteries for prolonged periods of time. Charging for prolonged period of time could
overcharge the battery, reduce the battery life and in extreme circumstances cause damage to the
locator and fire.
1.1.3.3 Lithium-Ion Batteries (Rechargeable)
WARNING
Lithium-ion batteries – some products use Lithium-ion batteries.
These are custom made battery pack and should not be dismantle or damage.
1.1.3.4 Lithium Metal Batteries (Non Rechargeable)
WARNING
Commonly known as “button cells” these are small, non-rechargeable batteries used to power internal
“clocks” within some units (similar to computers). Generally they have a life of 3-5 years.
Under no circumstances should any attempt be made to charge these batteries.

1 Introduction
Page 3 of 33
1.1.3.5 Transportation of Lithium-ion and Lithium Metal Batteries
WARNING
The Lithium-ion and Lithium metal batteries used in Vivax-Metrotech products meet the required safety
standards and include the designated protection circuitry.
When batteries with Lithium-ion and Lithium metal batteries are transported, or products containing
Lithium ion batteries, the packaging MUST include specified warning labels and shipping documentation
containing the appropriate information. Please contact Vivax-Metrotech Customer Service (USA 1-800-
446-3392, International +1-408-734-1400 (USA Pacific Time Zone)) for more details.
Regulations require specific labelling requirements for the shipping of products containing Lithium-ion
batteries and spare battery packs (battery packs that are not inside a product). There are also standards
for the packaging and limitations on the weight of the package, and the packaging must be marked with
the appropriate warning labels. Please contact Vivax-Metrotech Customer Service (USA 1-800-446-
3392, International +1-408-734-1400 (USA Pacific Time Zone)) for more details.
Vivax-Metrotech vScan products using Lithium-ion battery are classified as "not restricted" they can be
shipped normally by road/rail/sea & air (passenger & freight aircraft) without restrictions. If at any point
Vivax-Metrotech manufactures a product containing batteries that would fall under “hazardous cargo”
restrictions it will be clearly noted on the product labeling and in the user handbook.
1.1.3.6 General Rules Regarding Disposal of Batteries
WARNING
NEVER disassemble a battery, or battery pack.
Never dispose of in a fire or water.
Dispose of batteries in accordance with your Company’s work practice and any Local, State, Federal or
National standards or recognized best practice. Always dispose of batteries responsibly.
IMPORTANT
Remember - Batteries contain dangerous chemicals –They can be affected by
water ingress or excessive heat, they can explode or catch fire. They can also
cause electric shocks.
1.1.4 Care of Equipment
Use equipment only as directed in this user handbook.
Do NOT immerse any part of this equipment in water.
Store in a dry place.
Keep equipment in the case provided when not in use.
If left for prolonged period of time, remove alkaline batteries.
Keep unit clean and free of dust and dirt.
Protect against excessive heat.
1.1.5 Care When Interpreting the Information Provided by the Locator
WARNING
Like all locators – this instrument is locating, and providing depth and current readings based on
electromagnetic signals that radiate from the buried cable or pipe. In most cases these signals will

1 Introduction
Page 4 of 33
enable the locator to pinpoint both position depth and current correctly.
BEWARE – in some cases other factors will distort electromagnetic fields radiating from cable or pipe
being located, resulting in incorrect information.
Always locate responsibly, and use information learned during your training to interpret the information
provided by the locator.
Do NOT provide information regarding depth of cable or pipe to anyone unless authorized to do so by
your company.
REMEMBER that depth measurements are to the center of the electromagnetic field or pipe – in the
case of pipes this may be significantly deeper than the top of the pipe.
1.1.6 American & Canadian Safety Notices
USA
This transmitter and receiver comply with the general conditions of operation, pursuant to part 15 of the
FCC Rules.
oCFR 47 Part 15
Changes or modifications not expressly approved by the manufacturer could void the user’s authority to
operate the products.
CANADA
Equipment is for use by trained operators only, and not for general household or consumer use.
Operation is subject to the following two conditions: (1) this device may not cause interference, and (2)
this device must accept any interference that may cause undesired operation of the device.
EUROPE
Vivax-Metrotech confirms that the location system is compliant with relevant provision of European
directive 1999/5/EC and the low voltage directive 2006/95/EC.
oEN 55011
oEN 61000-4-2: A1 & A2
oEN 61000-4-3
oEN 61000-4-8: A1
oEN 61000-6-2
oEN 61000-6-3
oEN 61010-1
oEN 61010-2-031
oEN 61010-2-032
oETSI EN 300 330-2
oETSI EN 301 489-1
oETSI EN 301 489-3

1 Introduction
Page 5 of 33
1.2 Service & Support
1.2.1 Serial Number and Software Revision Number
Always quote your receiver and transmitter model number, serial number and software revision number when
requesting product support. They can be found as follows: (for reference only)
1
Model & Serial Number
NOTE
The transmitter Model & Serial Number can be found at the bottom of the
transmitter and also inside the transmitter between the battery tray and the main
module of transmitter.
Software Revision Number: For the receiver the software revision number is
displayed on the LCD during the startup sequence or can be found in the
“About” section of the user menu. This also applies to transmitters with
displays. The user cannot identify the software revision for transmitters without
displays.

1 Introduction
Page 6 of 33
1.2.2 International and National Distributors and Service Centers
In addition there are other local Distributors and Service Centers contact Vivax-Metrotech or the
International/National Distributor Network for a contact close to you.
World Headquaters, United State of America
China
Vivax-Metrotech Corporation
Leidi Utility Supply (Shanghai) Ltd.
3251 Olcott Street,
No. 780, Tianshan Rd,
Santa Clara, CA 95054, USA
Shanghai, China 200051
Website : www.vivax-metrotech.com
T/Free : 4008-206-719
Sales & Sales Support:
Tel : +86-21-5235-3001
T/Free : 800-446-3392
Fax : +86-21-5235-8365
Tel : +1-408-734-1400
Website : www.leidi.cn
Fax : +1-408-734-1415
Email : sales@vxmt.com
Europe
Service & Repairs:
SebaKMT
T/Free : 800-638-7682
Seba Dynatronic
Tel : +1-408-962-9990
Mess-und Ortungstechnik GmbH
Fax : +1-408-734-1799
Dr.-Herbert-Iann-Str. 6,
Email : service@vxmt.com
96148 Baunach, Germany
Australasia
Tel : +49-9544-680
Vivax-Metrotech AUS
Fax : +49-9544-2273
Unit 1, 176 South Creek Road,
Website : www.sebakmt.com
Cromer NSW 2099, Australia
Email : service@sebakmt.com
Tel : +61-2-9972-9244
France
Fax : +61-2-9972-9433
Vivax-Metrotech SAS
Website : www.vivax-metrotechaus.com
Technoparc ‐1 allée du Moulin Berger,
Email : sales@vxmtaus.com
69130 Ecully, France
service@vxmtaus.com
Tel : +33(0)4 72 53 03 03
Canada
Fax : +33(0)4 72 53 03 13
Vivax Canada Inc.
Website : www.vivax-metrotech.com
41 Courtland Ave Unit 6,
Email : salesfrance@vxmt.com
Vaughan, ON L4K 3T3, Canada
United Kingdom
Tel : +1-289-846-3010
Vivax-Metrotech Ltd.
Fax : +1-905-752-0214
Unit 18-19, Woodside Road,
Website : www.vivax-metrotech.com
South Marston Park Ind. Est.,
Swindon, SN3 4WA, UK
Central/South America and the Caribbean
Free Phone: 0800 0281811
Ventas para América Latina
Tel: : +44(0)1793 822679
3251 Olcott Street,
Website : www.vivax-metrotech.com
Santa Clara, CA 95054, USA
Email : salesUK@vxmt.com
Website : www.vivax-metrotech.com
T/Free : 800-624-6210
Tel : +1-408-734-1400
Fax : +1-408-743-5597
Email : VentasparaAmericaLatina@vxmt.com

2 Power Supplies
Page 7 of 33
Power Supplies
WARNING
Read the General Introduction of this document to learn more on the safe use, charging, handling/shipping
and disposal of batteries
The vScan is supplied as standard with alkaline battery packs. Both the transmitter and receiver can be
supplied with optional Lithium-ion rechargeable batteries.
2.1 vScan Receiver Batteries
2.1.1 Alkaline Batteries
The vScan requires six of AA type alkaline batteries. To replace the batteries unscrew the ¼ turn fastener of
the battery compartment, open the internal battery door. Remove the battery holder and replace ALL the
batteries. Mixing good and discharged batteries may result in excessive heat or even fire.
2.1.2 Charging the Receiver Optional Li-ion Battery Pack
The battery can be charged on site. Unscrew the ¼ turn fastener of the battery compartment (do not open the
internal battery door). Align the red dot on the charger plug with the dot on the charging socket and connect
together. Connect the supplied charger to the mains and switch on. The charging LED on the charger will
illuminate red until the batteries are charged. The LED will then turn green indicating a full charge.

2 Power Supplies
Page 8 of 33
NOTE
Do not insert rechargeable batteries in the dry cell (alkaline battery) holder. Only
use the rechargeable battery pack supplied by Vivax-Metrotech.
2.2 vScan Transmitter Batteries
2.2.1 Alkaline Batteries
The vScan transmitter requires four D type alkaline batteries. To replace the batteries unscrew the two
retaining fasteners of the battery compartment. Remove the old batteries and replace ALL of them. Mixing
good and discharged batteries may result in excessive heat or even fire.
2.2.2 Charging the Transmitter Li-ion Batteries
Remove the battery pack by unscrewing the two fasteners of the battery compartment. Align the red dot on
the charger with the dot on the charging socket, situated at the base of the battery, and connect together.
Connect the charger to the mains and switch on. The charging LED on the charger will illuminate red until the
batteries are charged. The LED will then turn green indicating a full charge.
WARNING
Only use the charger supplied. Using non recommended charger may result in
damage to the equipment or even fire and explosion.

3 User Controls/Connections
Page 9 of 33
User Controls/Connections
3.1 Receiver
3.1.1 Display
The display has a dot matrix format. The contents of the screen are dependent on the function being
performed. Details of these screens are revealed further in the user handbook.
1
Bluetooth icon
2
Peak level indicator
3
Compass (line direction indicator)
4
Battery level indicator (also alarm indicator)
5
Point of interest flag
6
GPS icon
7
Signal strength bar graph
8
Mode in use
3.1.2 Receiver Controls
1
Display
2
On/Off button. Also used to navigate in menu.
3
Depth/Current. Also long press enters menu option.
4
Fixed general purpose speaker
5
Mode switch. Also used to navigate menu functions
6
Battery compartment. Also charging and data transfer sockets
7
Removable headphone speaker
8
Sensitivity control
9
Removable wear boot

3 User Controls/Connections
Page 10 of 33
Locating Modes:
Power mode
Radio mode
33kHz Active
131kHz Active
Sonde mode
Metal cover detection mode
3.1.3 Warning/Alerts
Warnings or alerts can be indicated by four different methods:
1. Audio - an audible warning sound will be emitted.
2. Vibe - a vibration device situated in the handle will activate.
3. Visual - an alert icon will replace the battery icon.
4. Shutdown – the vScan can be configured to shut down if the management or user decides that is the
most appropriate course of action (examples – if self-test and calibration verification fails, or a “rental”
period ends).
NOTE
The vScan will continue to operate in a warning/alert condition unless
configured to “shut down”. If an overload condition is triggered the bar graph
will also flash.
How warnings/alarms communicate their message is user configurable using MyvScan desktop application.
3.1.3.1 Shallow Line Alert
The shallow line alert will be triggered when a shallow line is detected.
3.1.3.2 Swing Alert
The swing alert will trigger if the angle of swing exceeds 30 degrees from the
vertical. No alarm will be activated if the angle is more than 65 degrees from the
vertical as it will be assumed that the locator is not in use at this time.
3.1.3.3 Signal Overload Alert
The signal overload alert will trigger if the input signal exceeds the allowable limits.
This situation is very unusual and will only occur in extreme situations. The bar
graph will also flash.
3.1.3.4 Overhead Signal Alert
The overhead signal alert is triggered if vScan detects a significant signal radiating
from above, for instance an overhead cable.

3 User Controls/Connections
Page 11 of 33
3.1.3.5 Action Required Alert
The action required alert will trigger if the planned maintenance period or rental
period is exceeded or if a data upload is overdue, or if self-test/calibration test is
overdue or failed. Configuration of these warnings/alerts are done through the
MyvScan configuration software.
Warnings
If configured in MyvScan, the startup screen will indicate the number of days to next service. Other warnings
will be displayed during start up if configured in MyvScan.
Icon
Note
Upload data reminder
Rental period expiring
Self-test required
These warning icons will continue to be displayed until the relevant action is taken.
3.2 Transmitter
1
Direct connection socket
Automatically selects direct connection or signal clamp, when
connected. Always ensure weather proof bung is replaced when
not in use. If the connection socket is not being used, induction
mode is selected automatically.
2
On/Off pushbutton
Long press to switch on. Long press to switch off.
3
Output level pushbutton
Press to change from battery save to high signal output.
4
Speaker volume pushbutton
High/low settings.
5
Speaker
6
Battery housing cover
7
Battery cover retaining screw
8
Batteries
9
Pulse/Continuous pushbutton
Switch signal to pulse when in high noise environments.
10
Tx foot
Use to stand transmitter vertically when inducing over a wider area
or nulling the signal over an unwanted cable/pipe.
NOTE
When using alkaline batteries, a black molded hook at the end of the transmitter
is used to retain and connect alkaline batteries. If using the custom Lithium-ion
rechargeable battery pack, the hook is built into the battery pack. All
transmitters are supplied with the hook for the alkaline batteries even if
rechargeable batteries are specified. This ensures that alkaline batteries can be
used in the event the rechargeable batteries are fully discharged.

4 Locating
Page 12 of 33
Locating
4.1 Passive Locating
NOTE
The compass indicator is not active during passive location. Automatic gain
cannot be selected during passive location.
Passive locating refers to the process of detecting signals that “naturally” occur on pipes and cables. These
tend to fall into two categories, Radio signals and Power signals.
Radio Signals are created by low frequency radio transmitters. These are used for broadcasting and
communications. They are positioned throughout the world. As the frequencies are very low the signals tend
to penetrate and hug the curvature of the earth. When the signals cross a long conductor such as a pipe or
cable, the signals are re-radiated. It is these re-radiated signals that can be detected by the Radio Mode.
Power Signals are created by mains power running in the supply cables. These signals are 50 or 60Hz
depending on country. For instance the UK is 50Hz power but in the USA has 60Hz. When electrical power is
distributed throughout the network, some of the power finds its way back to the power station via the ground.
These stray currents can jump onto pipes and cables and also create power signals. Note that there has to
be electrical current flowing to create a detectable signal. So, for instance a live cable that is not in use may
not radiate a detectable signal. Also a very well balanced cable, ie exactly the same current flowing in Live
and Neutral, will cancel out and may not create a signal. In practice this is unusual as there is usually enough
imbalances in the cable to create a good detectable signal.
4.1.1 Detecting Radio Signals
1. Switch on the vScan Receiver and select Radio mode using the mode paddle.
2. Hold the vScan vertically and away from likely positions of cables or pipes.
3. Adjust the sensitivity control so that the bar graph reading is just starting to show some movement. The
sensitivity control should be at or close to maximum sensitivity. Note that the compass feature is not
available for the Power or Radio modes.

4 Locating
Page 13 of 33
NOTE
Note that there will be no sound from the speaker until the meter reading is
above approximately 10% of full scale.
4. Keeping the vScan vertical, walk across the area to be checked.
5. Continue in a grid across the area.
6. If at any time, the meter reading starts to increase, carefully move the locator forward and back to detect
the maximum signal. Use the peak level indicator to help confirm the correct position.
7. Rotate the vScan on its axis to obtain the maximum signal. The vScan is now directly over the line and with
the blade across the line.
8. The direction can also be found by rotating until the smallest signal is detected. The blade is then in line
with the cable/pipe.
9. Continue to locate the position of the line at regular intervals until its course is known through the target
area.
NOTE
In busy environments it is not always possible to look at the meter and take note
of traffic movements around you. In these situations it is best to locate the
position of the line using mainly sound rather than meter response. In very noisy
situations even the speaker sound may be drowned out. In this instance,
unscrew the speaker earphone and place it close to the ear to hear the sound
from the detected line.

4 Locating
Page 14 of 33
4.1.2 Detecting Power Signals
1. Locating Power signals is very similar to detecting Radio signals as they are both passive signals.
2. Hold the vScan vertically and away from likely positions of cables or pipes.
3. Adjust the sensitivity control so that the bar graph reading is just starting to show some movement. The
sensitivity control should be at or close to maximum sensitivity.
4. Now follow the procedure described above in the Radio mode section.
4.2 Active Locating
The term “Active Locating” describes the action of locating a cable or pipe by detecting a specific signal that
has been injected into that line. It has the benefit that, unlike passive detecting, the operator is in control of
the signals and therefore can be more specific about what line is detected. That is to say active signals can
be used for line tracing or identification. Also Passive signals are not always present on a line so using active
signals ensures more lines are detected.
To inject a signal requires the use of the vScan transmitter. The signal can be injected, or applied, to the
target line in a variety of ways.
4.2.1 Direct Connection
This method involves making an electrical connection to the cable or pipe.
WARNING
When connecting to a cable, only connect to the sheath of that cable. The
direct connection leads are NOT designed for connection to live cables.
WARNING
Do not touch metal parts of the connection clips when connecting to the line
or when the transmitter is on.

4 Locating
Page 15 of 33
WARNING
Only authorized personnel should make connections to cables.
To make a direct connection, insert the direct connection connector to the vScan transmitter. Insert the
ground stake into the ground a few meters perpendicular to the line. Connect the black lead to the ground
stake. Now take the red lead and connect to the target line.
Switch on the transmitter by pressing and holding the on/off button down for a couple of seconds. The
transmitter will emit a tone. The better the connection to the line and ground the lower the tone will be. Check
for a good connection by disconnecting and then reconnecting the red lead. If no tone change is heard
recheck connections.
Things that can affect the quality of connection are:
1. Rusty pipe connection point: clean the connection area with a wire brush.
2. Poor grounding: try inserting the stake into damp ground. Dampen the surrounding ground with water. If
still an issue, try connecting to a manhole cover surround. Avoid connecting to fence railings as these
may create return signal currents along the fencing that will interfere with the locating signal.
The output of the vScan transmitter can be set to battery save or high output levels. Always start with a low
output and increase the output if the received signal is not strong enough. Setting the output to high when it is
not required may result in some of the signal “bleeding off” onto other services and will drain more power
from the battery.
Also note that the transmitter transmits two frequencies simultaneously (33 kHz and 131 kHz). The purpose
of these two frequencies is explained in the section relating to “Using the vScan locator”.
When connecting to a ferrous material, it is sometimes not possible to find a suitable projection to apply the
connection clip. If this is the case, use the magnet supplied to make contact to the line and then clip the red
clip to the magnet. A good example of this is to make a connection to a street lighting circuit. Usually it is the
practice to connect the sheath of a lighting cable to the metallic inspection cover of a street lamp. Making a
connection to the inspection plate will energize the cable via the plate and sheath. Usually there is no
projection on the plate on which to clip so using the magnet on the plate provides a suitable clipping point.

4 Locating
Page 16 of 33
4.2.2 Signal Clamp
In many situations it is not possible to gain access to a cable for making an electrical contact. Or if there is, it
is not safe to do so. The Signal Clamp provides an efficient and safe method of applying a locate signal to a
cable.
Note that for best results the cable should be grounded at both ends.
When using the signal clamp, both ends of the target cable should be grounded to enable the current to flow.
When applying a clamp close to a grounding point where multiple grounds or a grounding bus exists ensure
that you place the clamp around the target line and not to the ground bus/other grounds to avoid the
transmitted signal also being applied to an unwanted lines.
Clamp Extension Rod
A useful accessory to the clamp is the extension rod:
The extension rod is fitted with a 10mm screw thread. This male thread will screw into the handle of the
signal clamp and will enable the clamp to be attached to too hard to reach cables such as in manholes or
overhead cables.
The extension rod is also fitted with a female thread in the handle which enables the rods to be fitted together
to further extend the range. To access this thread, the yellow handgrip needs to be slid off the end of the rod.
To operate the clamp jaws when attached to the rod, gently pull on the clamp cord which will open the jaws.
Release cable to close them.

4 Locating
Page 17 of 33
4.2.3 Induction (33 kHz)
With no direct connection lead or signal clamp connected, the transmitter will automatically start to radiate a
signal around the transmitter. These signals will penetrate the ground and couple onto buried lines. The
signal will then travel along the line which can be detected with the vScan locator.
Applying an induction signal to a line.
Remove any connections from the output connector. Switch on the transmitter and place it over the
suspected position of the line and position it so that it is across the line as above.
The Induction mode is particularly useful where there is no access to the line, but it should be noted that this
is the least efficient method of applying a signal and it is also prone to signals being applied to adjacent lines.
Also note that the signal will radiate out to the side of the transmitter as well as below. For this reason it is
recommended that when applying a signal using the Induction method, a distance of at least 20m is kept
from the transmitter when pinpointing or taking depth readings. Locating closer than 20m is possible but the
operator should be aware that the signal directly received from the transmitter may be strong enough to
influence the results.
When using the Induction mode, avoid placing the transmitter over metallic manhole covers as this will
severely reduce the effectiveness of the transmitter and in extreme cases cause damage to the transmitter’s
circuitry.
Table of contents
Other Vivax Transmitter manuals
Popular Transmitter manuals by other brands

Kramer
Kramer VP-200XLTHD user manual

E+E Elektronik
E+E Elektronik EE04 Series Instructions for setting up and operating

Dwyer Instruments
Dwyer Instruments HT Series operating instructions

RCA
RCA BTE-115 instructions

BWI Eagle
BWI Eagle AIR-EAGLE XLT Product information bulletin

Sennheiser
Sennheiser EM 300 G3 - 01-09 instruction manual

PR Elecronics
PR Elecronics 5333 manual

sielco
sielco EXC GX Series Quick setup guide

rollease acmeda
rollease acmeda Automate MTRF-DCIM-1C Programming instructions

Salcom
Salcom 12-86-9000 product manual

Avalon RF
Avalon RF TX518 User's guide & operating manual

Cardio Theater
Cardio Theater LCS-TX instruction manual