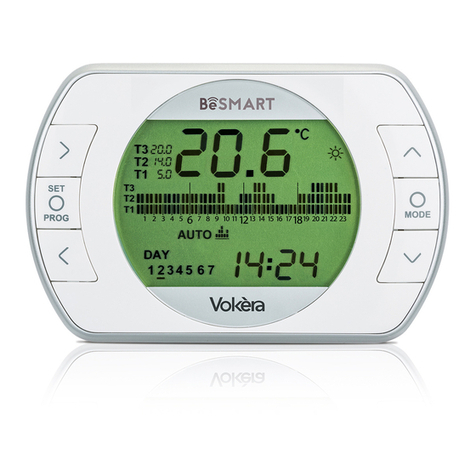
VOKERA OpenTherm 711 User manual

Vokèra OpenTherm 711 with external sensor connected
Setup guide to using the OpenTherm Control with an external weather compensation sensor fitted. If
you are unsure if an external sensor is fitted check the receiver unit. If the amber LED is lit there is an
external sensor fitted, so continue with this guide. If there is not solid amber LED use the other guide.
A flashing amber LED indicates loss of signal between room unit and receiver (check the battery in the
room unit).
When the OpenTherm control is installed it overrides the controls on the boiler fascia. For example the
OT Control will override the heating and hot water temperature settings on the boiler fascia. So your
OT controller is now the means by which you control your heating system and boiler. It also overrides
any other room thermostat or time control previously fitted to the system which may still be connected.
When the OpenTherm Control is connected to your boiler with an external weather compensation
sensor fitted, the room unit operates and displays differently than when no sensor is fitted.
With a weather compensation sensor fitted the room unit will have been programmed by the engineer
with a ‘heating curve’ set to give you an internal comfort level of 20°C when the weather outside is at
the lowest anticipated temperature for your part of the country.
In use if you find your heating too hot or cold, adjustment is possible to a maximum of °C above or
below the default temperature of 20°C.
With a weather compensation sensor fitted the heating gradient to the left of the display shows a pair
of bars.
Note for engineers: The heating curve must be set up on the room unit. Do not set a heating curve on
the boiler by following the instructions in the boiler manual as the OpenTherm control overrides the
boiler settings. The curve is set on the boiler only when an external sensor is fitted without an
OpenTherm.
VOKERA

Contents:
1. Manual operation of heating system.
2. Ready to go preset heating programme.
3. Setting the time of day on the room unit.
4. Setting the day on the room unit.
. Setting the heating temperature levels and the times.
6. Selecting heating modes on the OpenTherm Control.
7. Fast adjustment of the room temperature.
8. Adjusting the hot water temperature.
9. Resetting the boiler.
10. Fault indicators on the receiver.
11. Fault codes on the OpenTherm room unit.
12. Adjusting the parameters for the OpenTherm Control.
VOKERA

VOKERA
1: Manual operation of heating:
The room unit has four heating modes, OFF, TIMED, PARTY and HOLIDAY. Switch modes by pressing
the heating mode selector button .
OFF - No vertical temperature gradient and radiator icon is shown on the left side of the screen.
TIMED - Temperature gradient and radiator symbol on left side of screen (fast adjustment of
temperature ˚C up or down is possible, see section 7).
PARTY - Heating will operate at the comfort level for the remainder of that day then revert to timed
operation at midnight (fast adjustment of temperature ˚C up or down is possible, see section 7).
HOLIDAY - Heating will operate at the economy level for the duration of the holiday (no fast
adjustment of the room temperature is possible in HOLIDAY mode).
2: The preset heating programme is as follows:
Monday – Friday: 06:00 to 08:00 and 16:00 to 22:00 at comfort temperature. At all other times the
OpenTherm will maintain an economy temperature.
Saturday and Sunday: 08:00 to 11:00 and 16:00 to 23:00 at comfort temperature. At all other times the
OpenTherm will maintain an economy temperature.
The comfort temperature default setting is 21oC
The economy temperature default setting is 16oC
If you would like to alter the preset heating programme continue with this guide.
3: Setting the time of day on the room unit:
Press the button
Now, press the button
The timeline will go blank and the time appears above
Wait until the time starts to flash and then press the button
The hours digit alone will now appear
Use the or button to adjust and set the current hour
Press button to display the minutes digits
Use the or plus button to adjust and set the current minutes of the hour
Now simply press the button to return to the main screen Heating mode: The heating operates on
time and temperature levels programmed into the room unit. The heating indicator gradient on the left
of the display will be visible.

VOKERA
: Setting the day on the room unit:
Press the button
Now, press the button twice
Seven numbered house icons will now appear
Wait until these icons start to flash and then press the button
A single house icon will now appear containing a day number, for example use 1 if it is Monday
Use the or button to adjust the day number
Now simply press the button to return to main screen
5: Setting the temperature levels & the times:
There are three temperature levels, they are comfort, economy and off. We will now set the comfort and
economy temperatures. We suggest 20 or 21 degrees for the comfort level and 12 to 16 degrees for the
economy level.
Press the button twice
A filled timeline, sun icon and temperature appear indicating the current comfort level
Use the or plus buttons to select your desired comfort level temperature
Once the comfort temperature is set, move to the economy level by pressing the button
A half-filled timeline, moon icon and temperature appears indicating the current economy level
temperature
Use the or buttons to select your desired economy level temperature
Now, simply press the button to return to main screen
We can now select comfort, economy or off periods for different times of the day
First, press the button
Now, press the button three times
A filled timeline appears
Wait until it flashes
Then, press the button
A time, house icon with the day number and a timeline with bars appear
Each section in the timeline represents one hour

VOKERA
Each hour is divided into half hour segments
Each segment can be programmed as a comfort, economy or OFF segment
A blank segment represents an OFF half hour
A segment with a half bar represents an economy half hour
A segment with a full bar represents a comfort half hour
The number in the house icon represents the day of the week being programmed, for example 1 being
a Monday
Now, use only button, to choose the comfort, economy or off setting in the first half hour segment
When selected, press the button
The previous segment will have automatically copied into the next half hour segment
If you want to adjust this segment, use the button to alter the choice or press again to move on
and copy to the next segment
Repeat to program the whole day
Press the button to move to the next day and repeat
Repeat for the week
When the whole week is programmed press the button to return to the main display.
6: Selecting heating modes on the OpenTherm Control:
There are several override functions, which can be selected by pressing the
‘heating mode’
button
One press of the button will take you to ‘party mode’
The party mode is represented by the icon, which will appear on the left side of the display above
the time. This mode will override the program set for that day and operate at the comfort level
continuously until midnight. After midnight the heating will revert to the timed program.
The second press of the button will take you to ‘Holiday mode’
The holiday mode is represented by the icon, which will appear on the left side of the display above
the time. The holiday mode will commence from midnight and last for the number of days selected. The
days will be displayed to the right of the large house icon. Use the or buttons to indicate the length
of the holiday. The heating will operate at the economy setting for the duration of the holiday.
The third press of the button, will take you to the ‘Heating off’ mode
In the Heating OFF mode the timeline will be empty. It is worth mentioning that if the temperature in
the property falls below degrees (the default frost setting, which is adjustable) the heating will come
on to maintain an internal temperature of degrees.

VOKERA
The fourth press of the button, will return you to your timed heating programme
7: Fast adjustment of the room temperature on the OpenTherm Control:
The room temperature level can be adjusted temporarily at any time, and it will revert back to your
programmed temperature level at the next change i.e. the next off, economy or comfort segment.
First press the button
The temperature gradient on the left of the screen will change and the room temperature setting will
appear in the house icon. Now use the and the heating buttons (located by the radiator icon) to
adjust the temperature °C above or below the default temperature of 20°C.
Press button to set new temperature.
Press the button to return to the main display.
8: Adjusting the domestic hot water temperature on the OpenTherm Control:
You can adjust your desired hot water temperature setting at any time.
First press the button
Now use the and buttons to adjust the temperature to your desired new setting.
The temperature gradient on the right of the screen will change, a tap icon will flash and the hot water
temperature will appear in the large house icon.
Press the button once to lock the setting. If you do not press the button the new setting will not
be saved.
It is not necessary to visit the hot water control on the boiler fascia to adjust the hot water setting; the
room unit overrides the boiler setting.
9: Resetting the boiler:
The OpenTherm Control can display a series of fault codes to assist the engineer or users in assessing
its status. If a fault code does appear many will require the boiler to be reset.
Should fault codes appear on the room unit the boiler can be reset from the receiver (which is usually
located close to the boiler) by pressing the spanner button, or at the boiler itself by turning the boiler
main control selector past standby.
The boiler cannot be reset from the room unit. All but one fault can be reset from the receiver however
an A02 fault must be reset on the boiler fascia control by turning the main heating selector knob past
standby.
10: Fault indicators on the receiver:
If the green LED on the receiver is flashing the boiler is in lockout and requires resetting.

VOKERA
If the Amber LED on the receiver is flashing radio contact between the room unit and the receiver has
been lost (it is therefore worth checking the battery indicator on the room unit).
A solid red LED is not a fault indication, it simply indicates the unit is powered on.
A solid amber LED indicates there is an external sensor fitted.
11: Fault codes on the OpenTherm control (room unit):
Faults codes may be displayed on the room unit, but if the heating mode is OFF, no fault code is
displayed.
For further instructions relating to fault codes and system parameters, please refer to the OpenTherm
Quick help guide on our website
A01: Ignition fault on boiler
A02: Boiler overheat*
A03: Fan or flue problem
A04: System water pressure too low
A0 : Electrical or boiler control board problem
A06: Domestic hot water sensor problem (the boiler will still produce hot water for the user while
showing this fault condition but using the flow thermistor will lock to 6 °C which will provide warm water
for washing only. The temperature will not be adjustable on the room unit until repaired).
A07: Flow temperature fault
A08: Return temperature fault
A09: Flue temperature fault or service reminder (the boiler will still work as normal with a service
reminder alarm indicated.
*Any faults shown on the room unit with an A2XX code can be reset on the boiler control only, not at
the receiver.
12: Setting the parameters on the OpenTherm Control:
There are a set of default parameters ready programmed into the OpenTherm Control
The adjustment should generally be by the engineer not the end user however there are two that the
end user may need to adjust the heating curve and the value regarding the insulation of the property.
To enter parameter or engineer mode.
Press the button
Press the button times until PL appears in the screen

VOKERA
Press the button
PASS will appear and flash in the screen and the display shows 00
Press and hold the button until the 00 reads 3
3 is the password to enter parameter mode
Press the button
Press the button to scroll through the parameters. (When an adjustment is made pressing the
button again memorizes the new setting and moves on to the next parameter)
The parameters are not numbered consecutively. It is strongly recommended the user does not adjust
any of the parameters other than numbers 10 and 11.
01: Is to encode the receiver and room unit in case of failure and will rarely be necessary (if re-encoding
is required refer to the instruction booklet that was supplied with the OT control.
08: Use the or buttons to adjust the maximum flow temperature you require for the heating
system.
09: Use the or buttons to adjust the minimum flow temperature you require for the heating system
10: Use the or buttons to adjust the heating curve (we suggest a setting of 2. as a starting point.
The default setting is 1.2)
11: Use the or buttons to adjust the OpenTherm Control to suit the insulation level of the property.
The scale is 1 to 20 with 1 being a well-insulated house and 20 a poorly insulated house. The unit
default is 10.
13: The room unit is set to display the actual temperature but if it is located in an unusual position, close
to a window or over a radiator for example, it can be recalibrated while in this parameter with the or
buttons.
14: If you wish to reset the control system to the factory default parameters use the button to adjust
the figure to 1. Then press the button.
16: Indicates the software version of your OpenTherm Control
17: Use the or buttons allow the room unit to display in Centigrade or Fahrenheit.
18: Use the or buttons to adjust the temperature change upward from the programmed level nec-
essary to switch the unit OFF (the hysteresis). The range is between 0.0°C and 2.0°C. Default is 0.1°C
19: Use the or buttons to adjust the temperature change downward necessary to switch the unit
ON (the hysteresis). The range is between 0.0°C and 2.0°C. Default is 0. °C
20: Use the or buttons to adjust the frost protection temperature. The range is between 3°C and
10°C. Default is °C
21: Fault memory. Use the or buttons to scroll through the last 9 faults recorded on the boiler.

VOKERA
22: Unused
23: Unused
24: Unused
26: Use the or buttons to swap between the display of the actual boiler flue temperature and the
number of hours in condensing mode the boiler has operated x100. (2 00 hours signals the need for a
full service - A09 will be displayed on the room unit although the boiler will continue to operate as
normal).
Table of contents
Other VOKERA Thermostat manuals
Popular Thermostat manuals by other brands

nvent
nvent RAYCHEM SENZ WIFI quick start guide

Lafayette
Lafayette TM-1 user manual

Mohlenhoff
Mohlenhoff Alpha Thermostat AR 2010 C2 technical information

Hunter
Hunter Auto Temp 44402 002 Operation manual

LockStateConnect
LockStateConnect LS-60 Operation guide

Danfoss
Danfoss RT1 Installation & user's instructions