VonHaus 3000098 User manual

GREY CORDLESS
BRUSHED MOTOR
HANDHELD
VACUUM
3000098 - Instruction Manual
02 0119

CONTENTS
Safety Instructions 1
Safety Instructions 2
Safety Instructions 3
Specifications 4
Charging, Handheld Useage 5
Upright Useage, Attchment Useage 6

Opeation, Emptying the Dust Tank 7
Removing the Filters, Cleaning the Filters 8
Cleaning & Care, Wall Mounting 9
Troubleshooting 10
User Notes 11
Warranty 12

WARNING
PLEASE READ THESE INSTRUCTIONS CAREFULLY AND KEEP FOR FUTURE REFERENCE
1
INTENDED USE.
The appliance is intended for domestic
use only. It is not intended for use in
commercial or industrial environments and
is not suitable for use outdoors or on wet
surfaces.
This appliance is not intended for use by
persons (including children) with reduced
physical, sensory or mental capabilities,
or lack of experience and knowledge,
unless they have been given supervision
or instruction concerning use of the
appliance by a person responsible for
their safety.
GENERAL PRECAUTIONS.
Do not allow the appliance to be used as
a toy. Close attention is necessary when
used near children.
If the appliance is not functioning
properly, has been dropped, damaged,
left outdoors or immersed in liquid, do
not use, contact DOMU Brands Customer
Services.
Do not use the appliance if any parts
appear to be faulty, missing or damaged.
Ensure all parts are securely attached
before using the appliance.
CABLES AND PLUGS.
Do not handle the plug or the Charger
with wet hands.
Check to ensure your electricity supply
matches that shown on the rating plate.
The appliance must only be used as rated.
Keep the cable away from heated
surfaces.
Do not run the appliance over the
charging cable.
Do not unplug by pulling on the cable. To
unplug, grasp the plug, not the cable.
Do not use with a damaged cable or plug.
If the supply cable is damaged, it must
be replaced by a qualified engineer or an
authorised service agent in order to avoid
a hazard.
RISK OF PERSONAL INJURY.
Charge the appliance 4-6 hours before
initial use.
Never use the appliance without the Filter
Assembly and HEPA Filter in place.
Do not use the appliance in areas where
flammable or combustible liquids may be
present.
When using the appliance for the first
time, a smell or vapour may be given off.
This will dissipate after a few uses and is
normal.
Keep hair, loose clothing, fingers and all
parts of the body away from openings and
moving parts.
Do not insert any objects into openings or
cover the appliance.
Take extra care when operating on stairs.
Do not use the appliance with no Dust
Container attached.
Use only on dry, indoor surfaces.
In order to prevent damage to the
appliance and reduce risk of fire and/
or personal injury, the following objects
are strictly prohibited from being
sucked up:
• Any large or broken objects such as
glass
• Anything that is burning or smoking
such as cigarettes, matches or hot
ashes
• Liquid spills

WARNING
PLEASE READ THESE INSTRUCTIONS CAREFULLY AND KEEP FOR FUTURE REFERENCE
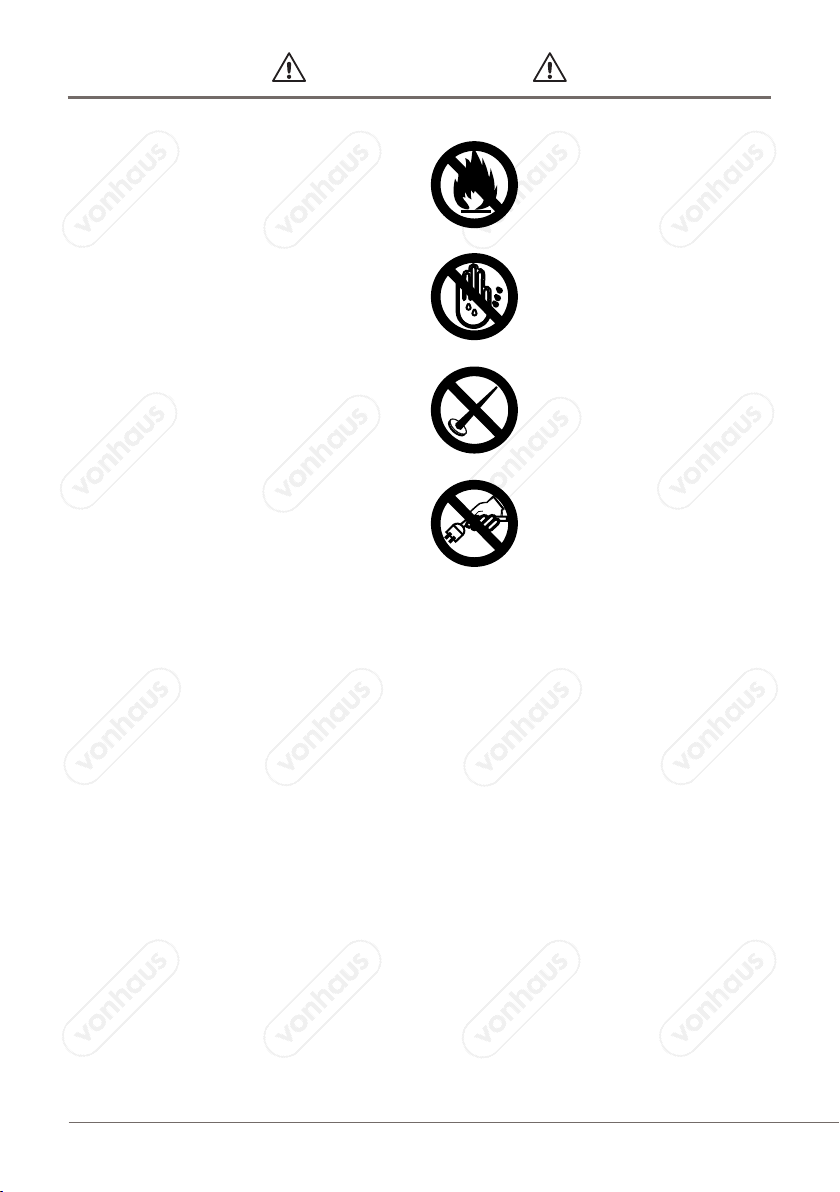
• Reactive liquids (solvents, corrosives,
detergents)
• Flammable or explosive substances
such as alcohol, thinners etc.
Store the appliance safely after use to
prevent any accidents.
Discontinue use if the battery runtime
changes abruptly or the battery has been
damaged.
Use only the charger supplied by DOMU
Brands. If other chargers are used, this
can cause the battery to fail causing dam-
age to the battery, appliance or personal
property.
Do not carry out any maintenance or
repair work other than that shown in
this manual, or as advised by the DOMU
Brands Customer Care Helpline.
Store the appliance indoors, in a cool, dry
place.
Use only as described in this manual
and with DOMU Brands recommended
attachments only.
BATTERY/CHARGER USE AND CARE.
The battery pack is not fully charged out
of the box.
Recharge only with the charger specified
by the manufacturer. A charger that is
suitable for one type of battery pack
may create a risk of fire when used with
another battery pack.
Use power tools only with specifically
designated battery packs. Use of any
other battery packs may create a risk of
injury and fire.
An extension cord should not be used
unless absolutely necessary. Use of an
improper extension cord could result in
the risk of fire or electric shock.
The charger is not intended to be used
for any purpose other than charging the
battery pack for this product. Any other
use may result in risk of fire or electric
shock.
First read the safety instructions and
then follow the charging notes and
procedures.
The charger is only designed to operate
on standard household electrical power.
Do not attempt to use it on any other
voltage.
Never attempt to connect 2 chargers
together.
Do not place any object on top of the
charger or place the charger on a soft
surface that may result in excessive
internal heat.
Do not attempt to disassemble the
charger. Take it to an electrician or power
tool repairer when service or repair is
required. Incorrect reassembly may result
in a risk of electric shock or fire.
Do not expose the battery to direct
sunlight for long periods of time.
Protect the battery and charger against
water and moisture.
Protect the battery from heat and fire.
Place the charger in a position away from
any heat source.
Remove the battery when the appliance is
not in use or stored for extended periods
of time.
When the battery pack is not in use, keep
it away from other metal objects such as
paper clips, coins, keys, nails, screws or
other small metal objects that can make a
connection from one terminal to another.
Shorting the battery terminals together
may result in burns or a fire.
To facilitate cooling of the battery pack
after use, avoid placing the charger or
battery pack in a warm environment such
as a metal shed or an uninsulated trailer.
To reduce the risk of electric shock,

WARNING
PLEASE READ THESE INSTRUCTIONS CAREFULLY AND KEEP FOR FUTURE REFERENCE
3
unplug the charger from the outlet before
attempting any cleaning. Removing the
battery pack will not reduce this risk.
To reduce risk of damage to the electric
plug and cord, pull by the plug rather
than the cord when disconnecting the
charger.
Never attempt to open the battery pack
for any reason or if the plastic housing
of the battery pack breaks or cracks,
immediately discontinue use and do not
recharge.
Failure to follow these instructions will
invalidate any guarantee.
1. Do not operate the Vacuum
too close to heaters, radiators,
cigarette butts and ect.
2. Never operate or plug in the
Vacuum with wet/damp hands.
3. Remove any sharp or large
objects before vacuuming.
4. Do not pull the plug away
from the socket using the cable,
always pull using the plug.

SPECIFICATION
2200 25 High Power
40 Low Power
4
HOURS
22.2
mAh MINS
V
BATTERY
POWER
WORKING
TIME
CHARGING
TIME
VOLTAGE
1. Wall Mount
2. Charger
3. Floor Brush
4. Dust Tank Release
5. Fabric Filter
6. Filter
7. Dust Tank Empty Clip
8. Dust Tank Cover
9. Indicator Light
10. On/Off Switch
11. Vacuum Tube
12. Long Crevice Tool
13. Brush/Crevice Tool
1
4
59 10
6
7
8
2
3
11
12
13

CHARGING
Charge the appliance fully before first use
Insert the Charger (2) into the Charger Input.
Ensure it is positioned correctly for charging.
The Indicator Light (9) located on top of the Vacuum
will flash red while charging.
Once the Vacuum is fully charged the light will
illuminate a solid green.
Charge the Vacuum for up to 4 hours.
NOTE: It is normal for the Charger (2) to become
warm to the touch during charging periods.
DO NOT: unplug the Charger (2) by pulling on the
power cord.
Always unplug the Charger (2) in the event of
prolonged absence (holidays,etc.). Recharge the
appliance again before use as batteries may self
discharge over increased periods of storage.
IMPORTANT! For best performance, the
Charging Pin Connector must be clean and free
from dust and dirt. The life expectancy of the
battery will vary dependent on use.
USAGE - HANDHELD
The Handheld assembly uses the Motor Unit and the
Floor Brush (3).
To assemble, align the clip on the Floor Brush (3) with
the clip on the Handle and Motor Unit and push in
until it clicks audibly clicks into place.
To remove the Floor Brush (3) press the clip on the
Handle and Motor Unit to release.
5
Use only the attachments that
comes supplied with this appliance.

USAGE - UPRIGHT
Use only the attachments that
comes supplied with this appliance.
USAGE - ATTACHMENTS
Use only the attachments that comes supplied with
this appliance.
To assemble, align the clip on either the Long Crevice
Tool (12) or Brush/Crevice Tool (13) on the Motor Unit
and push in until it audibly clicks into place.
To remove either attachment press the Clip on the
Handle and Motor Unit to release.
NOTE The Vacuum Tube (11) may be used to
extend reach as required.
Use only the attachments that
comes supplied with this appliance.
The upright assembly uses the Vacuum Tube (11) , the
Motor Unit and the Floor Brush (3).
Align the clip on the Vacuum Tube (11) with the
connection clip on the Motor Unit and push in until it
audibly clicks into place.
To attach the Floor Brush (3), align the clip on the
Floor Brush with the Vacuum Tube connection clip
and push in until it audibly clicks into place.
To remove the Vacuum Tube (11) press the release
clip on the Handle and Motor Unit.
To remove the Floor Brush (3) press the release clip
on the Vacuum Tube (11).

OPERATION
To power on push the ON/OFF Button (10) once.
The Indicator Light (9) will illuminate Green to indicate
the vacuum is On, and operating in Quiet Mode.
To increase the power to maximum setting, press the
On/Off Button for a second time.
To switch off, press the On/Off Button once again.
WARNING This unit is designed for dry
vacuuming use only.
Do not use to pick up liquids or on wet surfaces.
Do not pick up anything that is burning or
smoking.
7
EMPTYING THE DUST TANK
Release the Dust Tank Empty Clip (7) over a waste
disposal bin to release the debris.
Re-close the Dust Tank Cover (8) when finished. An
audible click will confirm the latch is securely closed.

REMOVING THE FILTERS
Press Down the Dust Tank Release (4), and remove
the Main Unit.
Twist the top of the Dust Tank to the left to access the
Filters.
Remove the Fabric Filter (5) and Filter (from the Dust
Tank.
NOTE: Take care when re-assembling the Filters en-
sure the Filter is the correct way around and the cavity
passes the Pins.
CLEANING THE FILTERS
IMPORTANT! Never replace the Filters unless
it is completely dry.
Allow the Filters to dry fully for at least 24 hours in
natural sunlight.
IMPORTANT! Never force dry the Filters,
as this may cause irreversible damage to
the filter.
IMPORTANT! Never operate the appliance
without the Filters in place.
NOTE For Best cleaning results, filters
require cleaning at least every 3 months,
depending on use.
24 Hours
Rinse both the Filters separately under cold
water as required.
Dry the Filters with a soft dry cloth.
Top
Fabric Filter
Filter
Dust Tank

CLEANING & MAINTENANCE
BRUSH REMOVAL & CLEANING
Slide the Locking Clip away from the Brush Head to
release the Brush.
IMPORTANT Always ensure the Vacuum is switched
off before performing maintenance and cleaning.
WARNING Always detach the Floor Brush
(3) from the Handle and Motor Unit before
removing/cleaning the Brush Head.
9
WALL MOUNTING
The Wall Mount (1) is wall mountable.
Accurately mark up the area you wish to place the
Wall Mount (1) on the wall.
Store the Vacuum Cleaner and Accessories onto the
Wall Mount.
IMPORTANT Ensure there are no cables or
pipes directly behind the area of the wall the
charging dock is to be placed.
* Wall Plugs & Screws are not supplied

TROUBLESHOOTING
PROBLEM SOLUTION
Check the appliance is fully charged before use
Empty Dust Tank and clean the Filters.
Check openings for any blockages. Unplug and
remove if necessary.
Ensure the Filters are correctly in place.
Empty Dust Tank and clean the Filters.
Contact DOMU Brands Customer Services if the
Filters has become damaged.
Recharge for 4-5 hours.
Remove the Brush from the Floor Brush and check
for any obstructions such as tangled hair or clogged
dirt.
Ensure the Brush has been correctly inserted into
the Floor Brush and locked into position using the
Locking Clip.
The appliance may need recharging. Connect to the
Charger and charge the appliance fully until the fully
charged.
NO POWER
LOSS OF SUCTION
FLOOR BRUSH NOT
ROTATING
BATTERY INDICATOR LIGHT
ILLUMINATING RED DURING
USE
Floor Brush is jammed. Switch off the Vacuum and
remove the blockage from the Floor Brush.

11
USER NOTES

DISPOSAL INFORMATION
CUSTOMER SERVICES
COPYRIGHT
WARRANTY
Please recycle where facilities exist. Check with your local authority for recycling advice.
If, for any reason you are experiencing difficulty using this appliance, please contact [email protected]
All material in this instruction manual are copyrighted
by DOMU Brands Ltd.
Any unauthorised use may violate worldwide
copyright, trademark, and other laws.
To register your appliance and find out if you qualify for
a free extended warranty, go to:
www.VonHaus.com/warranty
Please retain a proof of purchase receipt or statement
as proof of the purchase date.
The warranty only applies if the appliance is used
solely in the manner indicated in this manual and all
instructions have been followed accurately. Any abuse
of the appliance or the manner in which it is used will
invalidate the warranty.
Returned goods will not be accepted unless re-
packaged in its original packaging and accompanied
by a relevant and completed returns form. This does
not affect your statutory rights.
No rights are given under this warranty to a
person acquiring this appliance second-hand or for
commercial or communal use.

VonHaus is a registered trademark of DOMU Brands Ltd.
Made in China for DOMU Brands Ltd M24 2RW.
Thank you for purchasing the Grey Cordless Handheld Vacuum.
Table of contents
Other VonHaus Vacuum Cleaner manuals